Bright & Simple Swirls

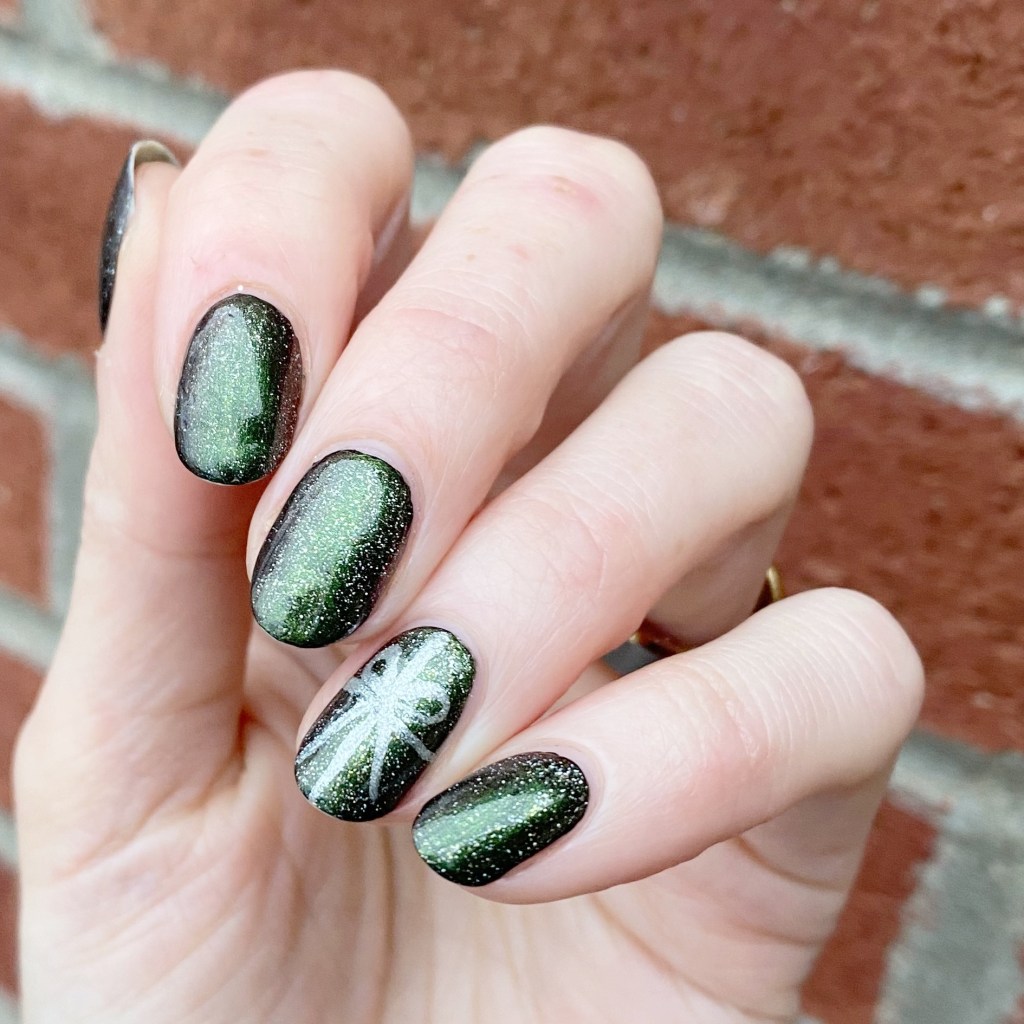
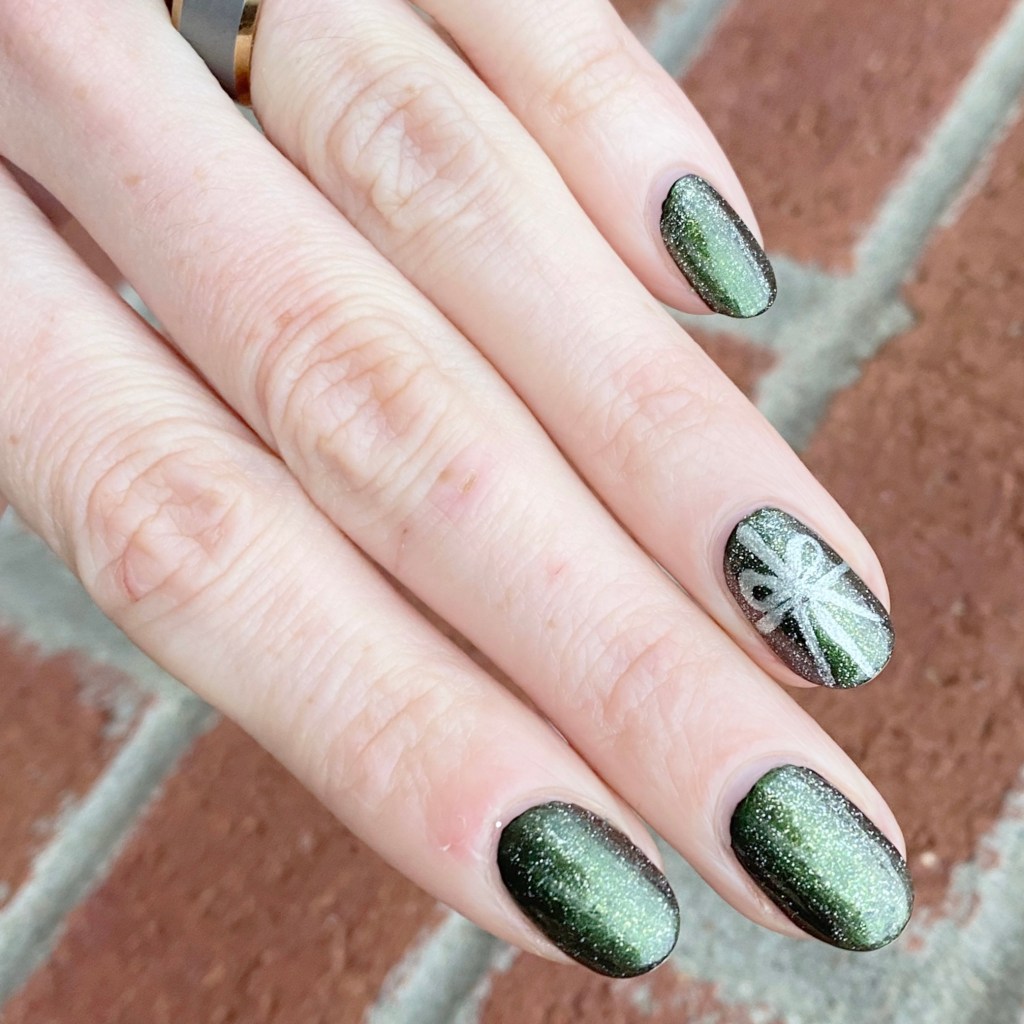
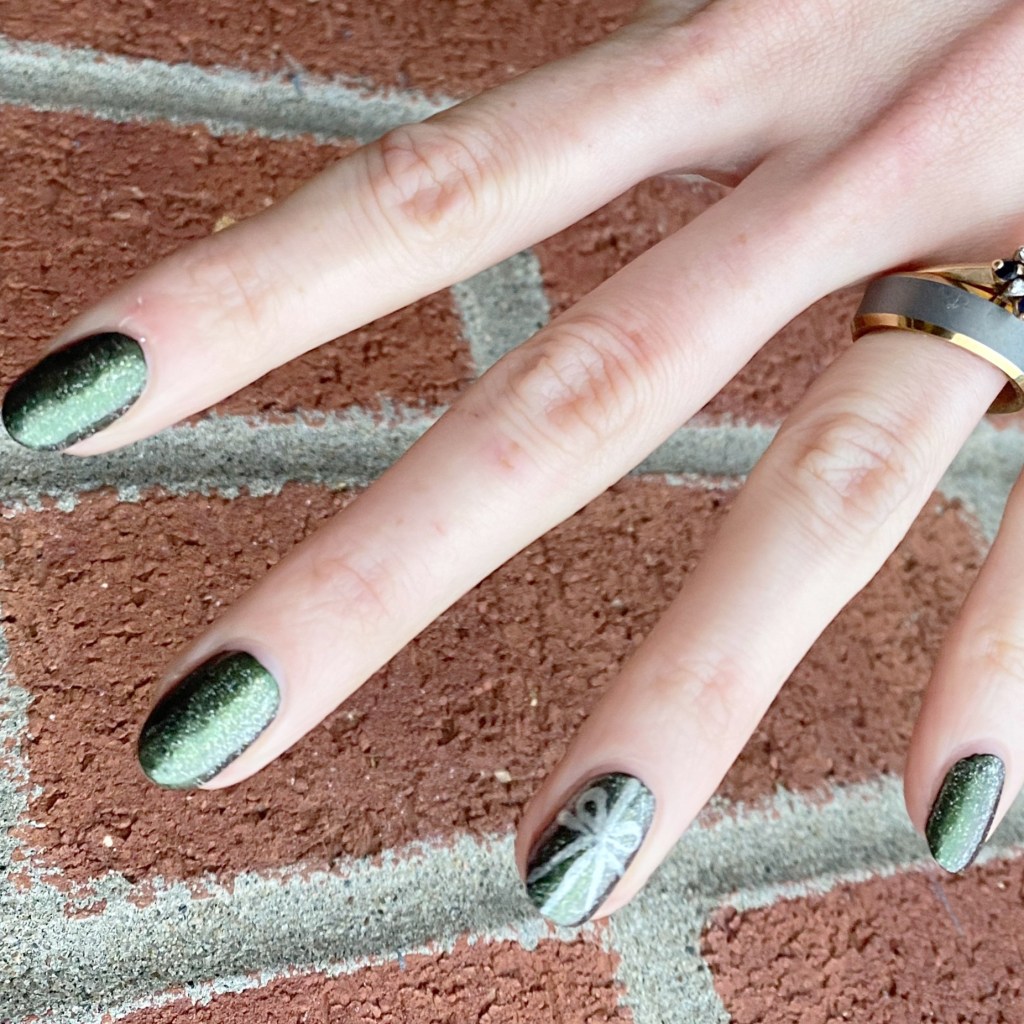
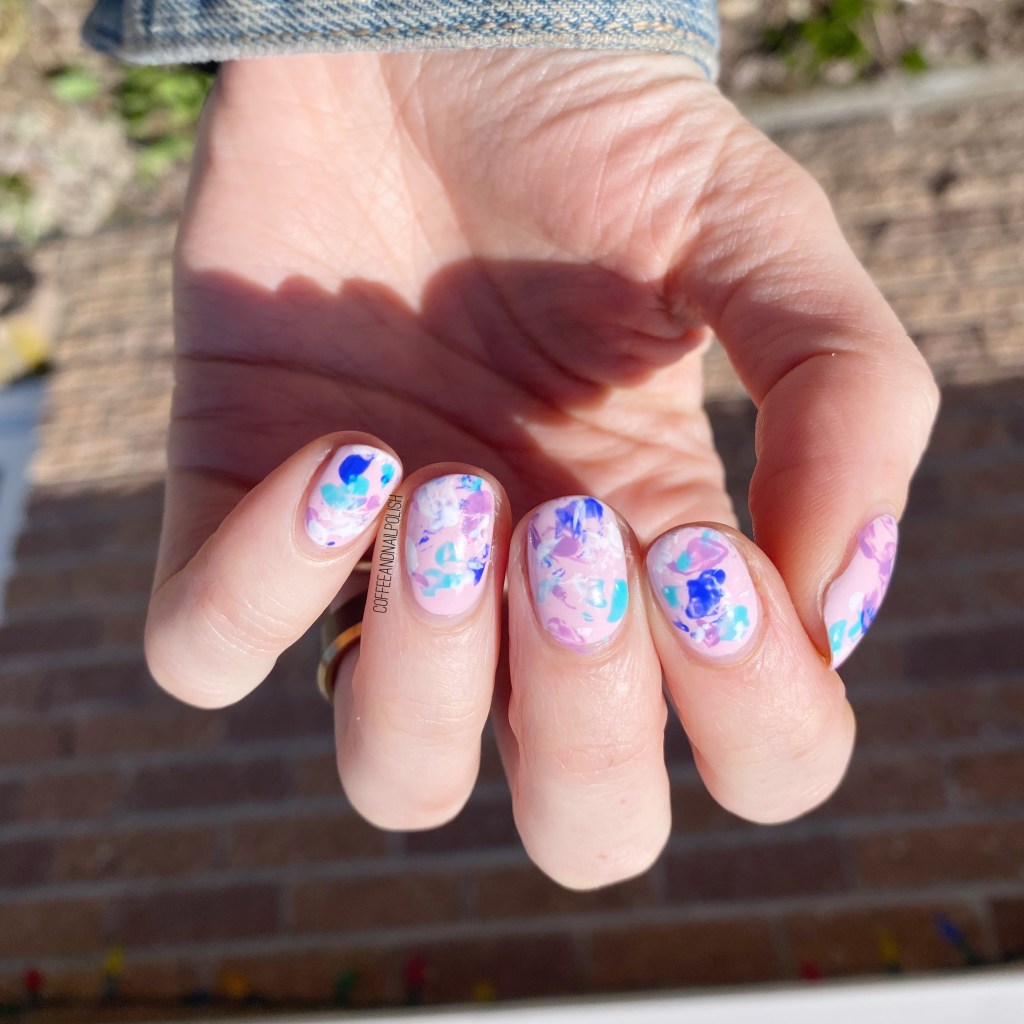
Hello lovelies & happy Tuesday! A freaking chilly Tuesday here. We went from it feeling like Winter this weekend, to it feeling like Spring yesterday, right back into a cold snap. My nails are definitely not happy about the back & forth, but I’m trying to keep them looking cute regardless.

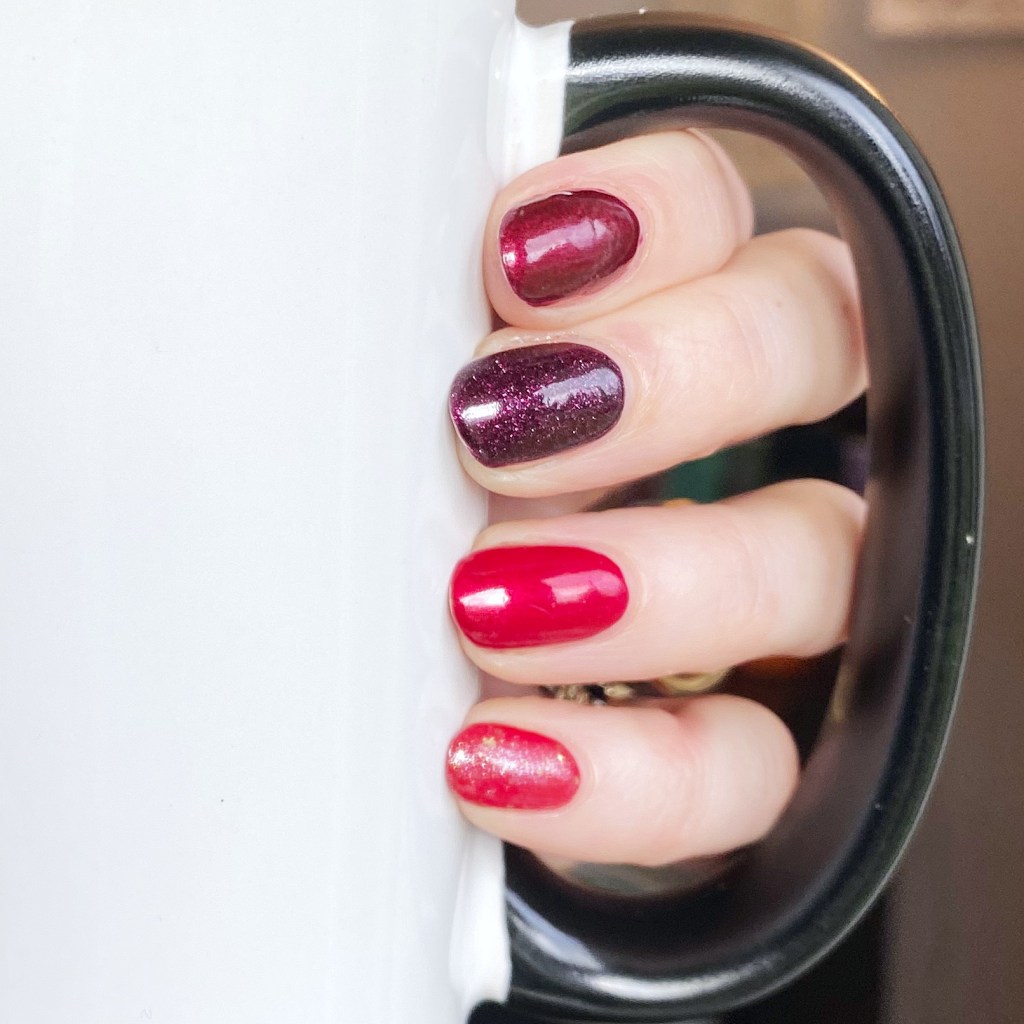
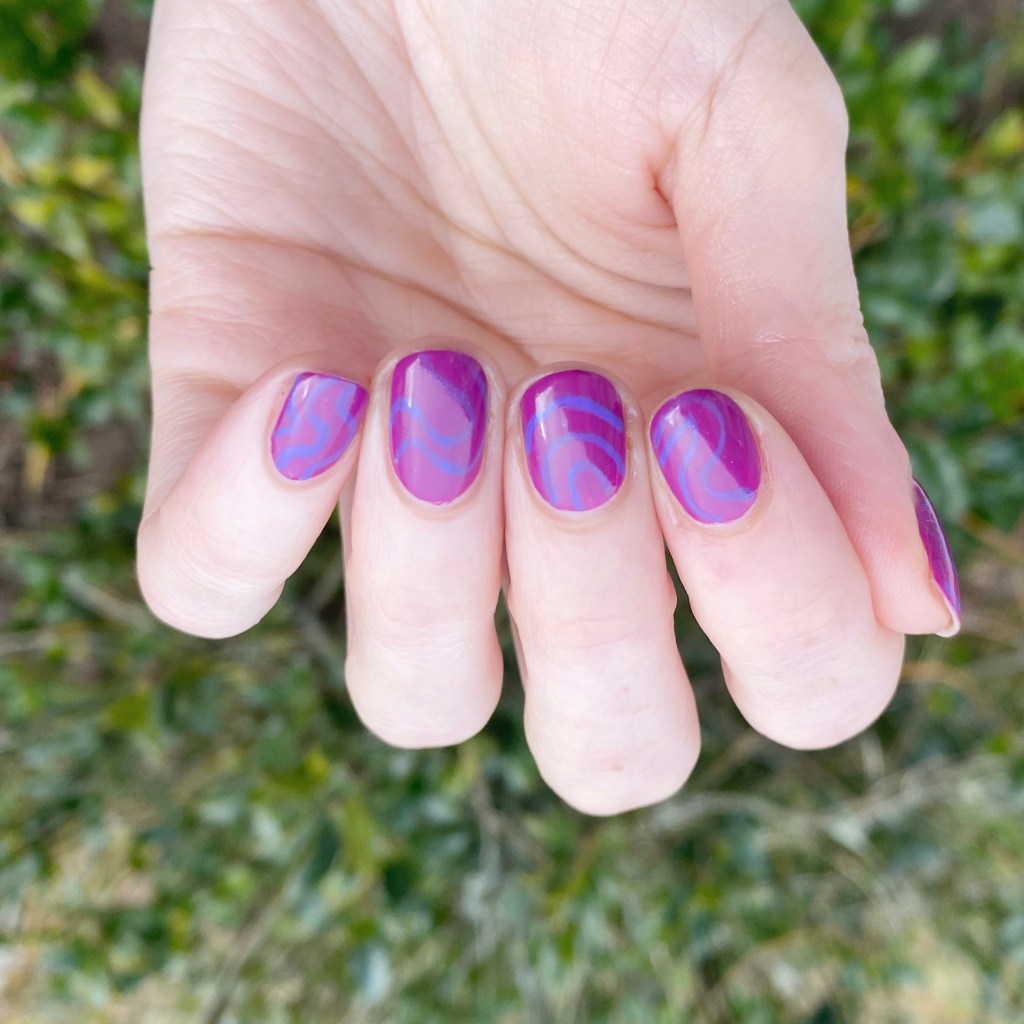
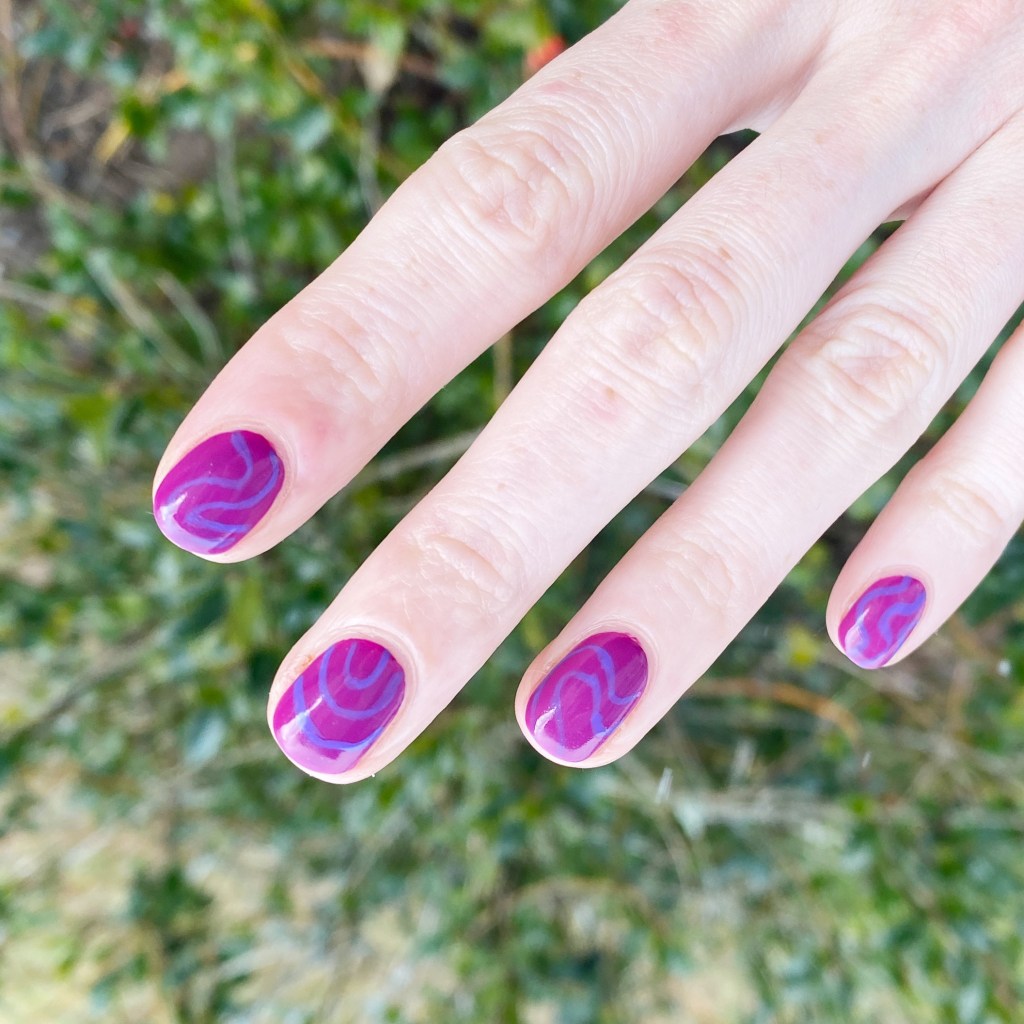
Todays look was a really simple one I did last week. I wanted something a little bit bright & colourful, & I was especially feeling Essie Flowerista as my base shade, so this is what I ended up with!

The polishes I used for this manicure are: 

  • Base Coat: Essie Hard To Resist Glow & Shine 
  • Top Coat: Seche Vite Fast Dry Top Coat
  • Essie Flowerista
  • Color Club Art Club Striper Passion Flower

I really wanted to do some nail art over my base, but I was running short on time. However — I thought these wavy lines using my Color Club Striper was perfect! I thought about doing them in more than one colour, but I think the purple over the fuchsia is more than perfect. I like the simplicity. It’s a great pop of colour which is exactly what you need when it’s still January.

What do you think about these bright & simple swirls? Are you feeling the simplicity of this design or do you prefer nail art that is more complex?

Let me know all your thoughts in the comments below. I love when people share their thoughts on my nail art!

Have a lovely Tuesday! 🌸

Dainty Present Accent Nail Art 🎁

Hello beauties & happy Friday! Can you believe we’re just a little over a week before Christmas? Where has the time gone?! We have less than 0 snow which means it doesn’t really feel like Christmas or, even, December here. But I’m hoping for a Christmas miracle, & a little bit of snow for the holiday.

Today though I have a cute Christmas design to share with you that I’ve been wearing for the last few days. I recently took a trip to the Chatters by my new work, looking for nail polish. While they don’t quite have the stash they used to have, I did find a couple cute shades including a mini bottle of OPI Green on the Runway from the 2014 Coca-Cola collection. I thought it would be a fun non-traditional Christmas colour choice.

The polishes I used for this manicure are: 

  • Base Coat: Essie Hard To Resist Glow & Shine 
  • Top Coat: Sally Hansen Insta-Dri Anti-chip Top Coat
  • Starrily Vantablack (c/o: NailStuff.ca)
  • OPI Green on the Runway
  • Sally Hansen Miracle Gel Make It N-Ice
  • China Glaze Sleigh Bells Ring
  • NailStuff.ca Mermaid Tail Nail Brush Trio (11mm Liner Brush)

I really wanted to see how Green on the Runway would look layered over black, & I like it! Obviously, I had to had some sparkle, & Sally Hansen Miracle Gel Make It N-Ice is a great topper! It adds just the right amount of sparkle to this design. It’s Christmas, so sparkle is almost mandatory!

Also I love how my teeny little bow turned out. Sometimes all you need is just a little accent nail, & I feel like this was the perfect combination of colour, with a little bit extra holiday added. It makes me so happy! My slightly dry cuticles thanks to freezing temperatures? Not so happy. But hopefully Santa has a big tin of Burt’s Bees cuticle balm for my stocking this year.

What do you think of this dainty accent nail, & colour combination? Are you a fan of simple of fancy holiday designs? Let me know all your thoughts down in the comments below! Just 8 more days until Christmas Eve, so now is the time to get the rest of my Christmas nails finalized.

Have a fantastic Friday!

Red Toned Skittle Nails 🔥

Good morning lovelies & happy Thursday. A beautiful sunny—albeit chilly—day here on the East Coast. You really can’t ask for a better late Autumn day. It’s got just the right amount of chill to make it feel like Christmas will be here soon… without needing 4 pairs of tights under your pants. Haha.

Today I have a fun red toned skittle manicure to share with you inspired by @heysolomiya on Instagram. I know, I know… I literally just posted a skittle manicure on Tuesday, but she posted a fun reel of some different skittle looks, & I was too obsessed with hers not to try another fun colour pairing. This time, though–& truthfully, after some false starts–I decided on a red toned skittle look.

The polishes I used for this manicure are: 

  • Base Coat: Essie Hard To Resist Glow & Shine 
  • Top Coat: Sally Hansen Insta-Dri Anti-chip Top Coat
  • Deborah Lippmann Through the Fire
  • Deborah Lippmann Good Girl Gone Bad
  • Deborah Lippmann New York State of Mind
  • Deborah Lippmann It’s Raining Men
  • Deborah Lippmann Boom Boom Pow

I decided to go with my Deborah Lippmann reds because they make some of my favourite red polishes, & I had enough for almost every finger. They combination turned out absolutely perfect, which I was so happy about, because this isn’t my first time trying to recreate this look, but it’s definitely the best combination I’ve ever done. & all these reds together scream✨ Holiday ✨ to me.

What do you think about this skittle look? Do you prefer skittle pairings with all the same colour, or pairing different complimentary shades together? Let me know all your thoughts down in the comments below!

Summer Bright Abstract Dots

Features Gifted Product in Exchange for Content

Hello lovelies & happy Tuesday! I hope everyone’s week is off to a lovely start.

I’m actually excited because I’ve been creating some fun nail art lately. I’ve been inspired by my nail polish, & sunny days, & bright colours. So I’ve been creating a bunch of fun, & easy, nail art looks lately. There is something about painting my nails that just makes me feel a little less stressed, & right now I will take all the stress relief I can get.

The polishes I used for this manicure are: 

  • Base Coat: Essie Hard To Resist Glow & Shine 
  • Top Coat: Sally Hansen Miracle Gel Top Coat
  • Sally Hansen Miracle Gel x Friends A Moo Point 
  • Sally Hansen Miracle Gel x Friends Yellow Taxi 
  • Sally Hansen Miracle Gel x Friends Laven-door
  • Sally Hansen Miracle Gel x Friends How You Bluein’?
  • Sally Hansen Miracle Gel x Friends The One With the Teal
  • Sally Hansen Miracle Gel Black-O
  • NailStuff.ca Dotting Tool Trio
  • NailStuff.ca 4mm Micro Detail Brush

This look was partially inspired by this manicure I did a few Summers back, but decided to brighten up the colour scheme a bit.

Also my little girl decided she really wanted her nails painted like Mummy, so I decided to recreate this nail art on her tiny little nails, & I’m quite impressed with how they turned out! It was surprisingly easy, even on her tiny little nails. I always get really excited when she asks me to paint her nails, especially when she wants her nails painted like me.

What do you think about this abstract dot looks? I’m still really loving these bright & fun Sally Hansen x Friends Miracle Gel collection. They’re just so much fun for Summer.

Products featured in this post were provided in exchanged for content.

Spring Inspired Saran Wrap Splatter

Hello loves & happy almost Easter weekend! It’s been a beautiful week here on the East Coast — very Spring-y! I even had a chance to break out my flip flops. So I’ve been feeling all the Spring colours.

Todays look is a nail art technique I haven’t done in a while — Saran Wrap splatter. This is a technique I’ve done a lot in the past, but it’s been a hot minute since the last time, so I was excited to pull it out of my repertoire.

The polishes I used for this manicure are: 

  • Base Coat: Sally Hansen Good. Kind. Pure Hardener
  • Top Coat: Essie Speed Setter
  • Sally Hansen InstaDri Racing Rose
  • Sally Hansen Miracle Gel Get Mod
  • Essie Butler Please
  • Essie Play Date
  • Icing Matte Nail Polish Neon Blue
  • Crinkled plastic

How fun are these colours together? I feel like these pinks & purples & blues just go so well together. I’ve been doing this technique a very long time, & it never gets old to me. It’s a way easier option than your traditional spatter, & way less clean up. I usually only have a few places I need to clean up with acetone, versus a traditional spatter that makes quite a mess,

What do you think of this Saran Wrap Splatter look? Have you ever tried this technique before? Let me know all your thoughts down in the comments below!