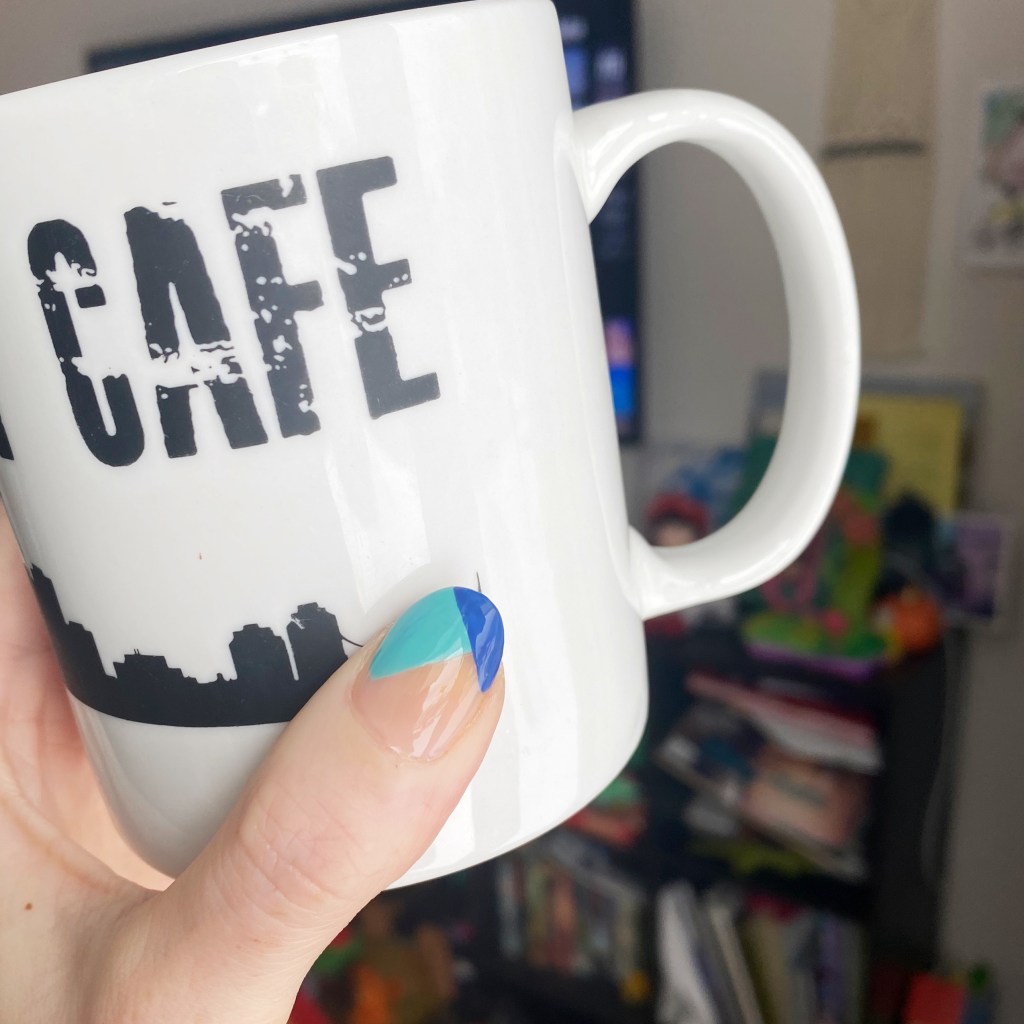
Happy Friday lovelies! 💙
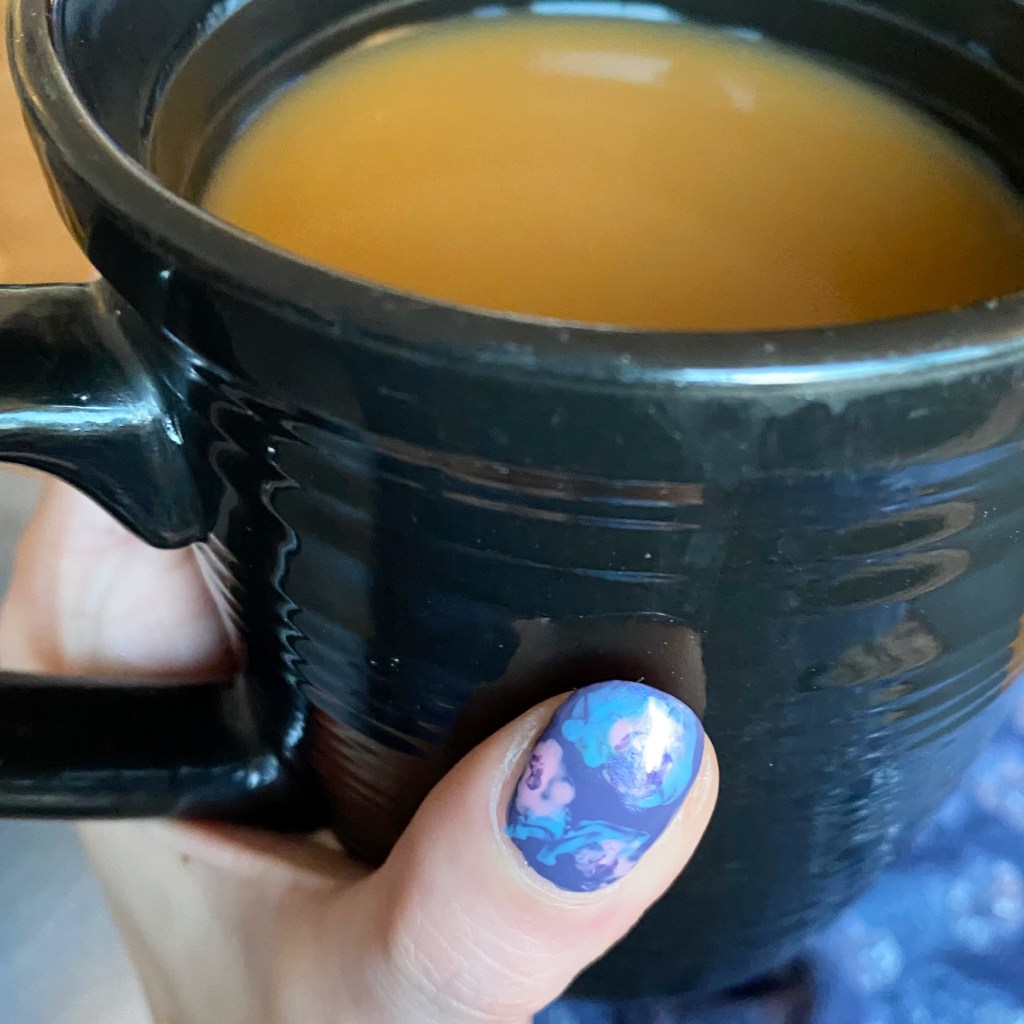
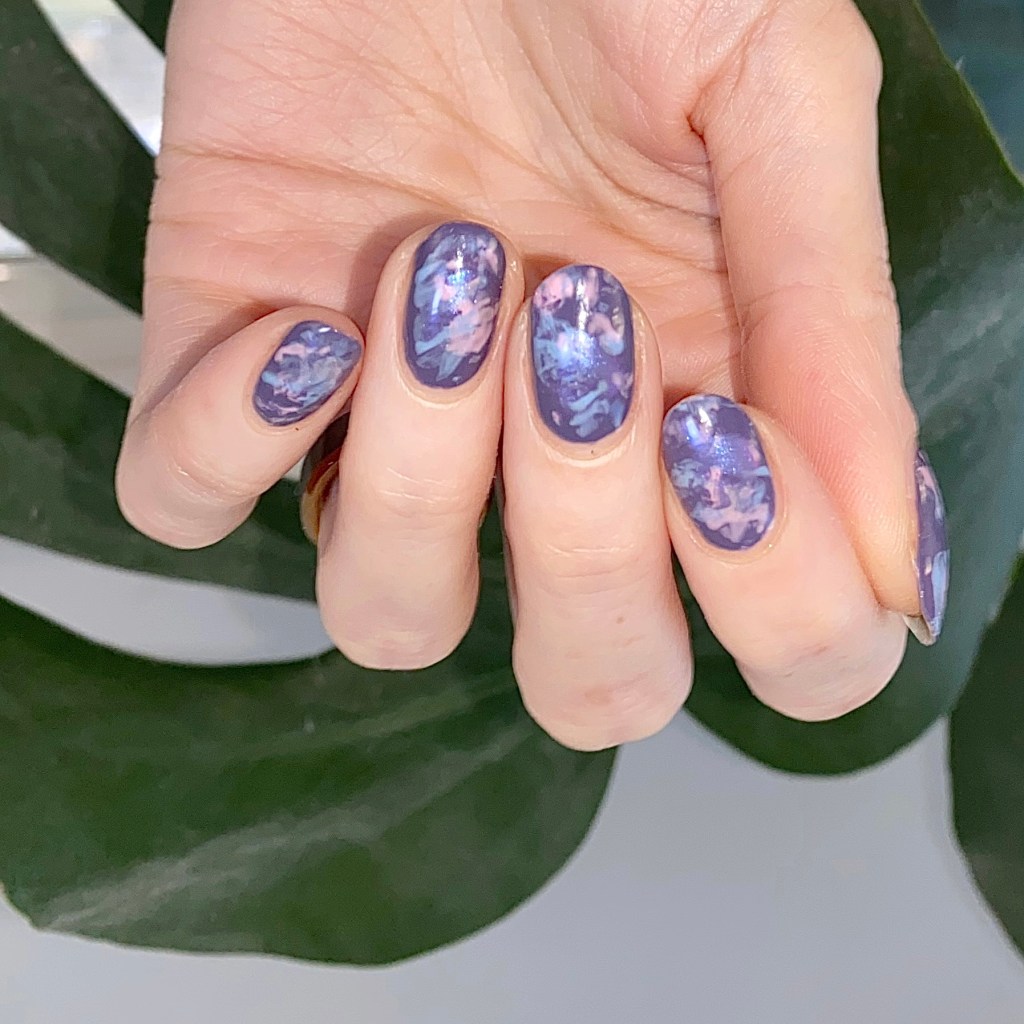
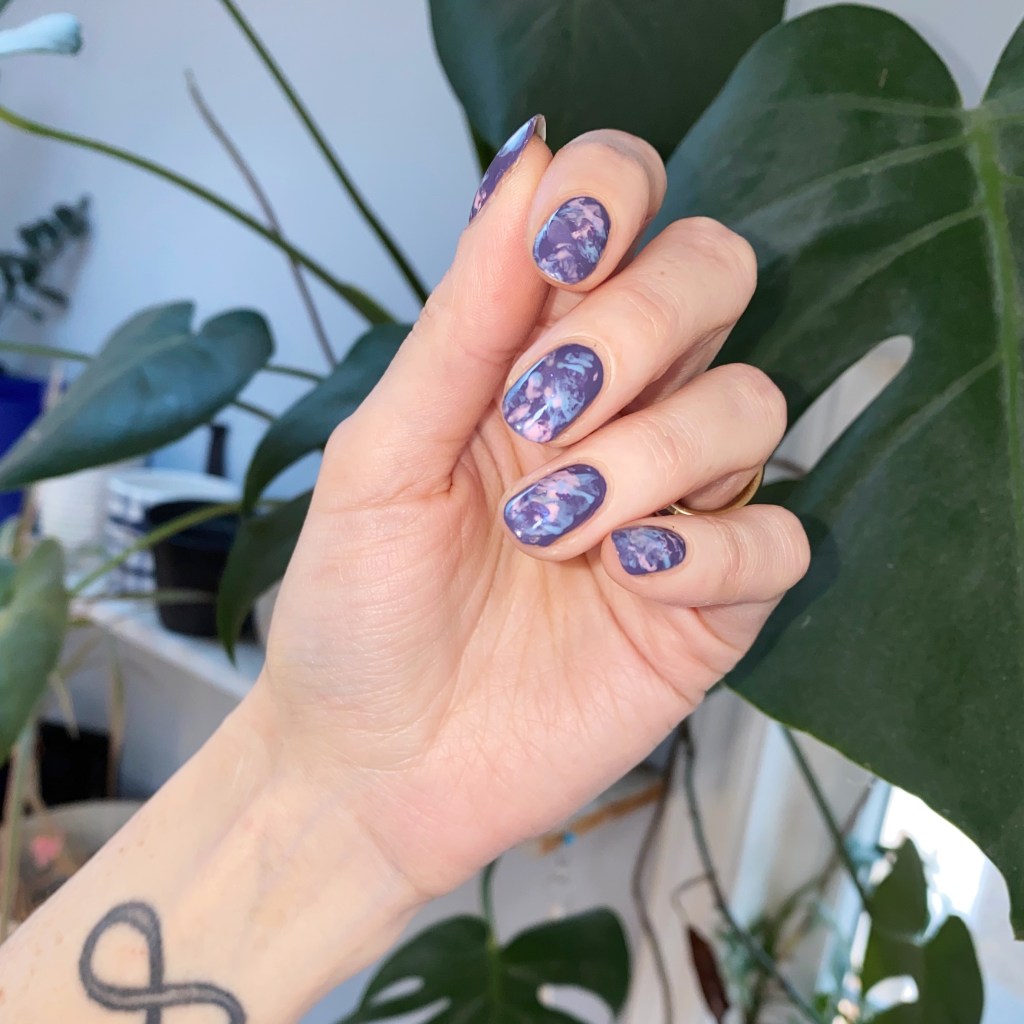
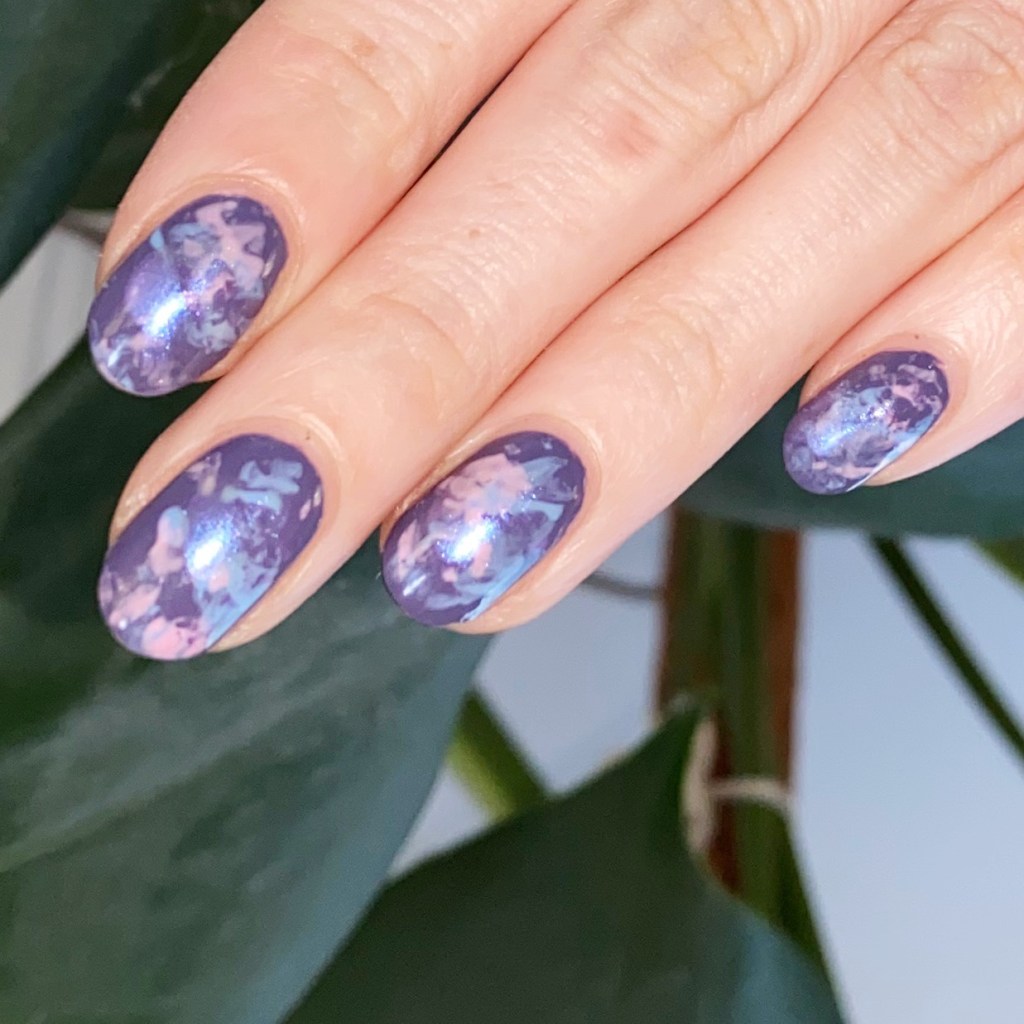
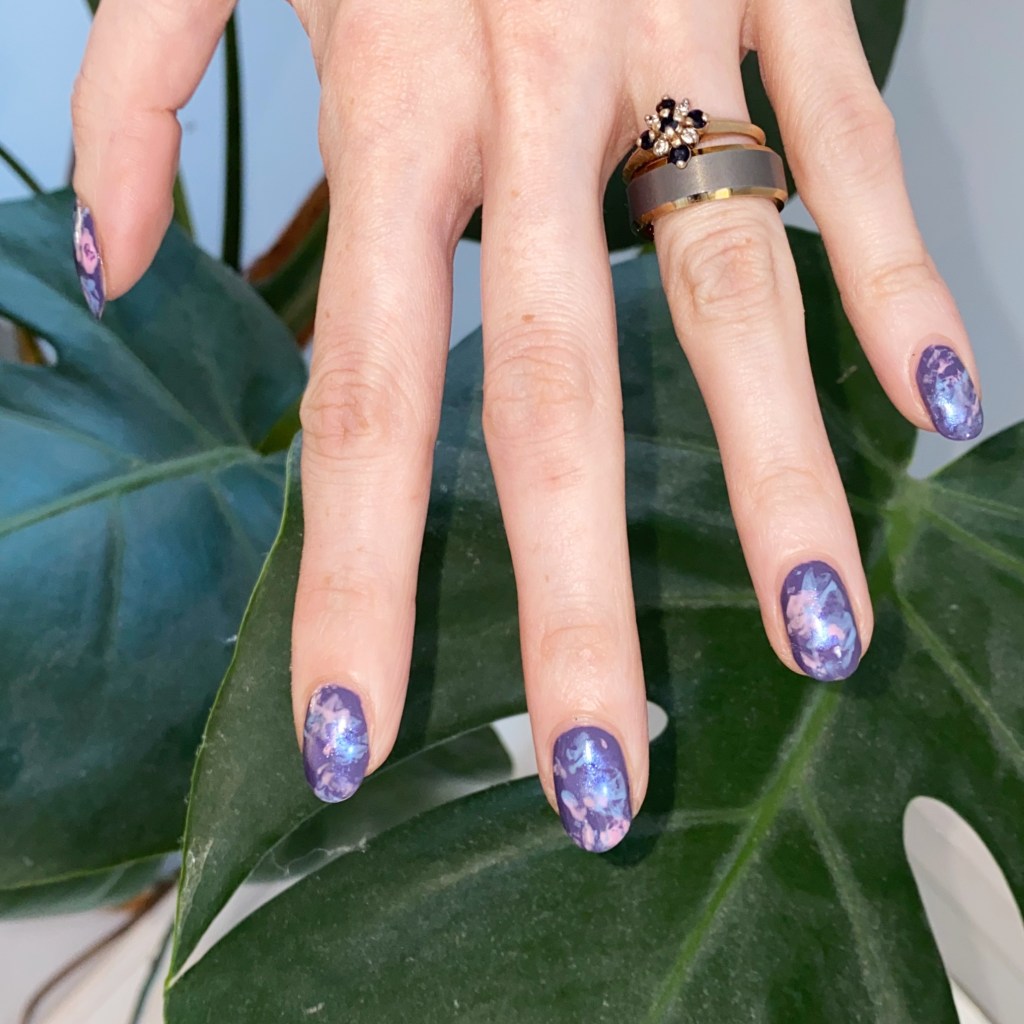
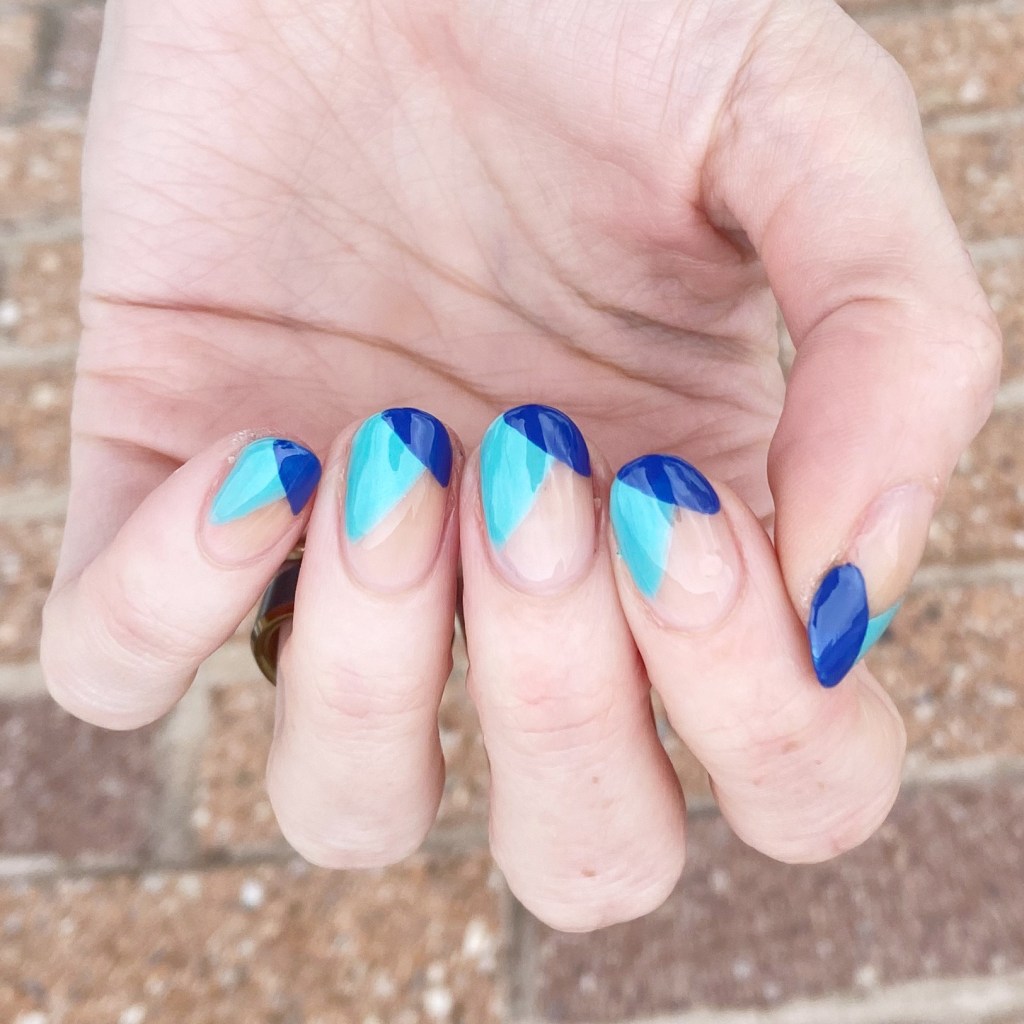
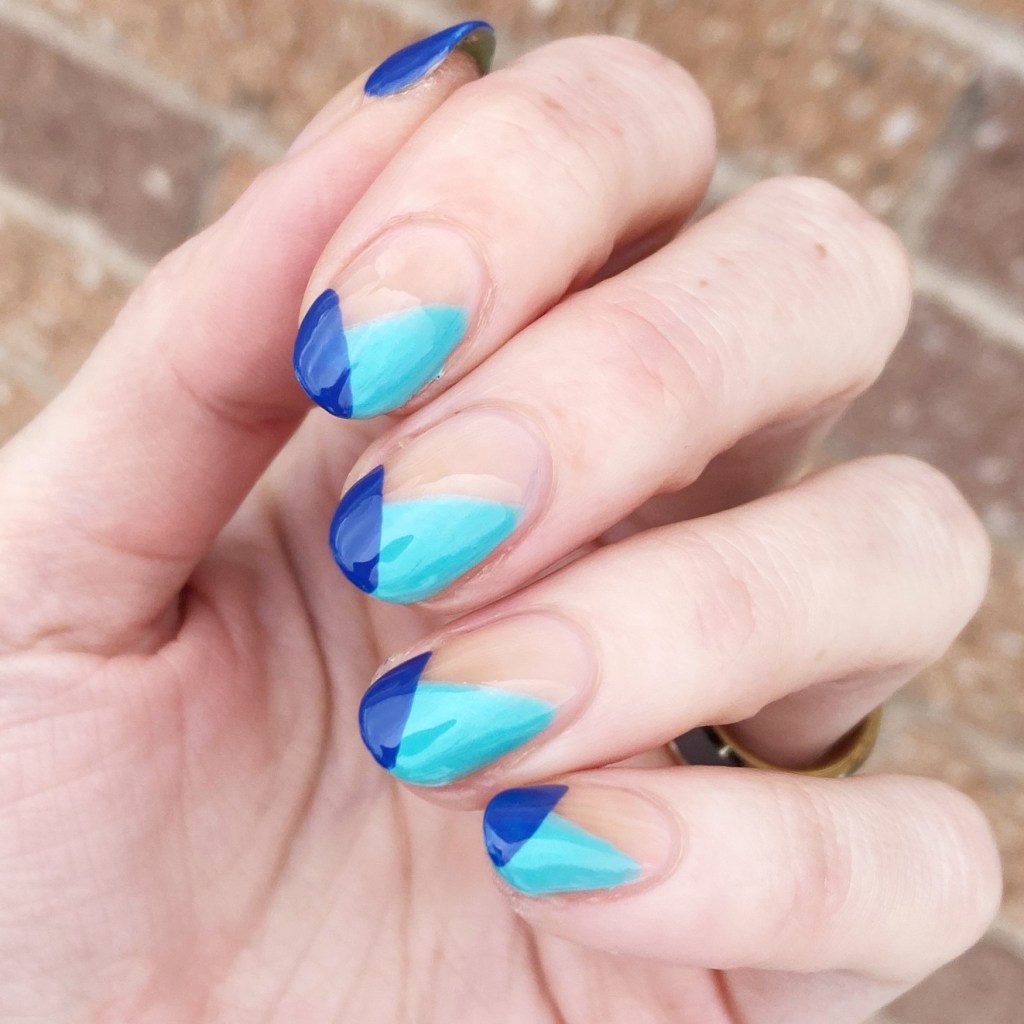
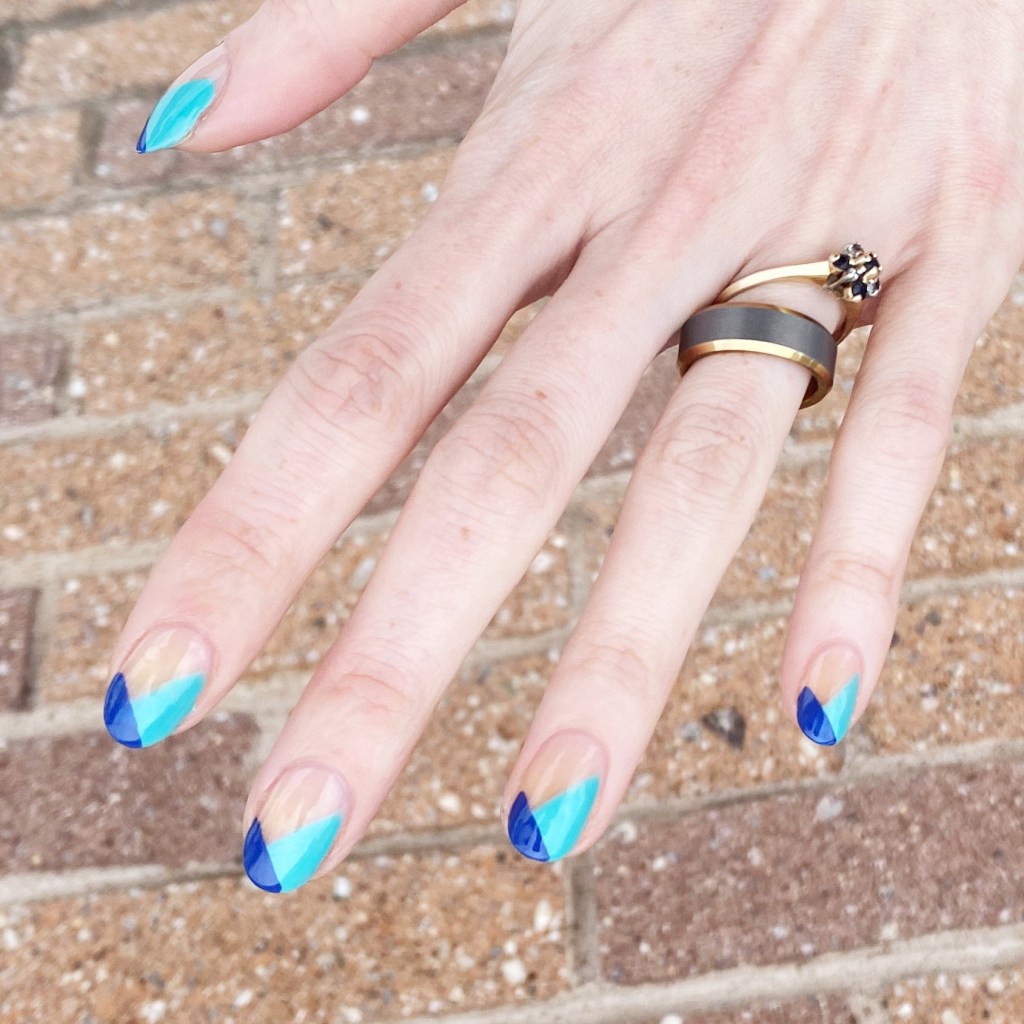
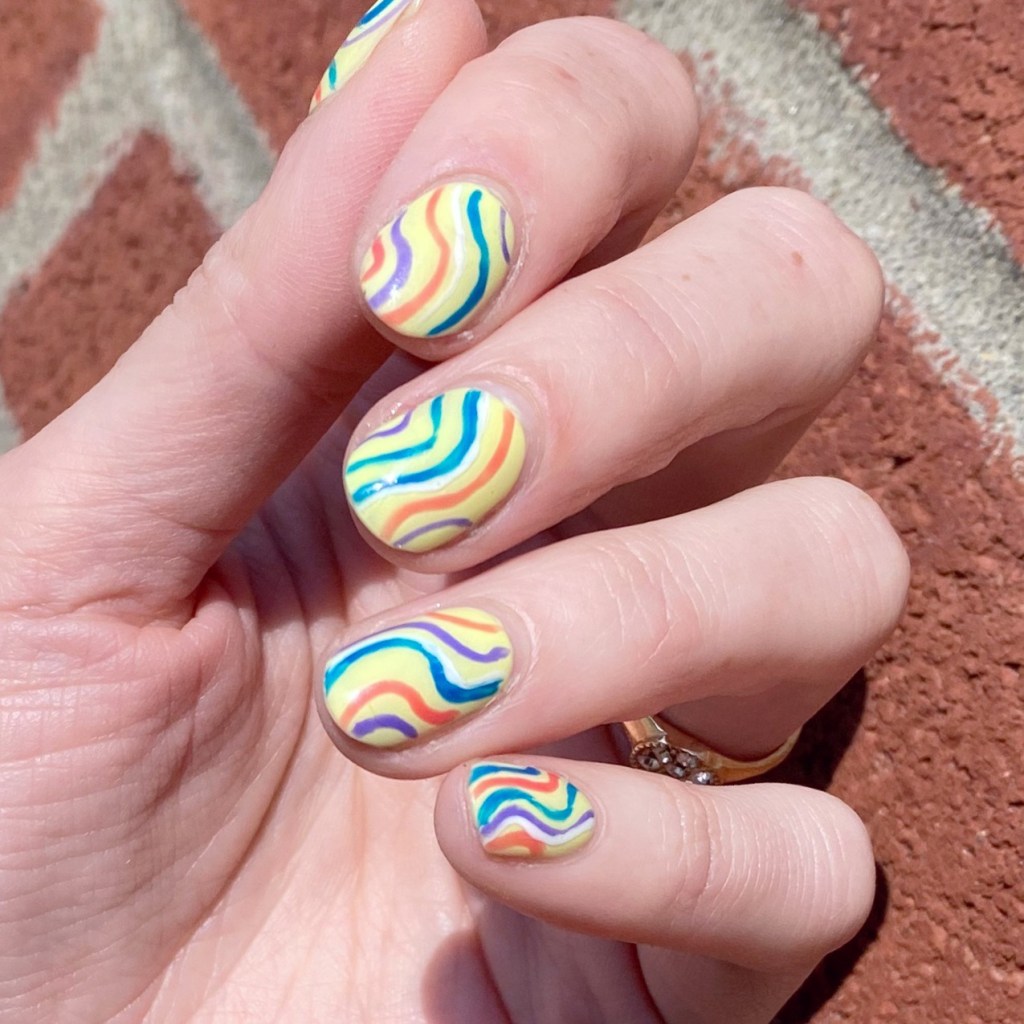
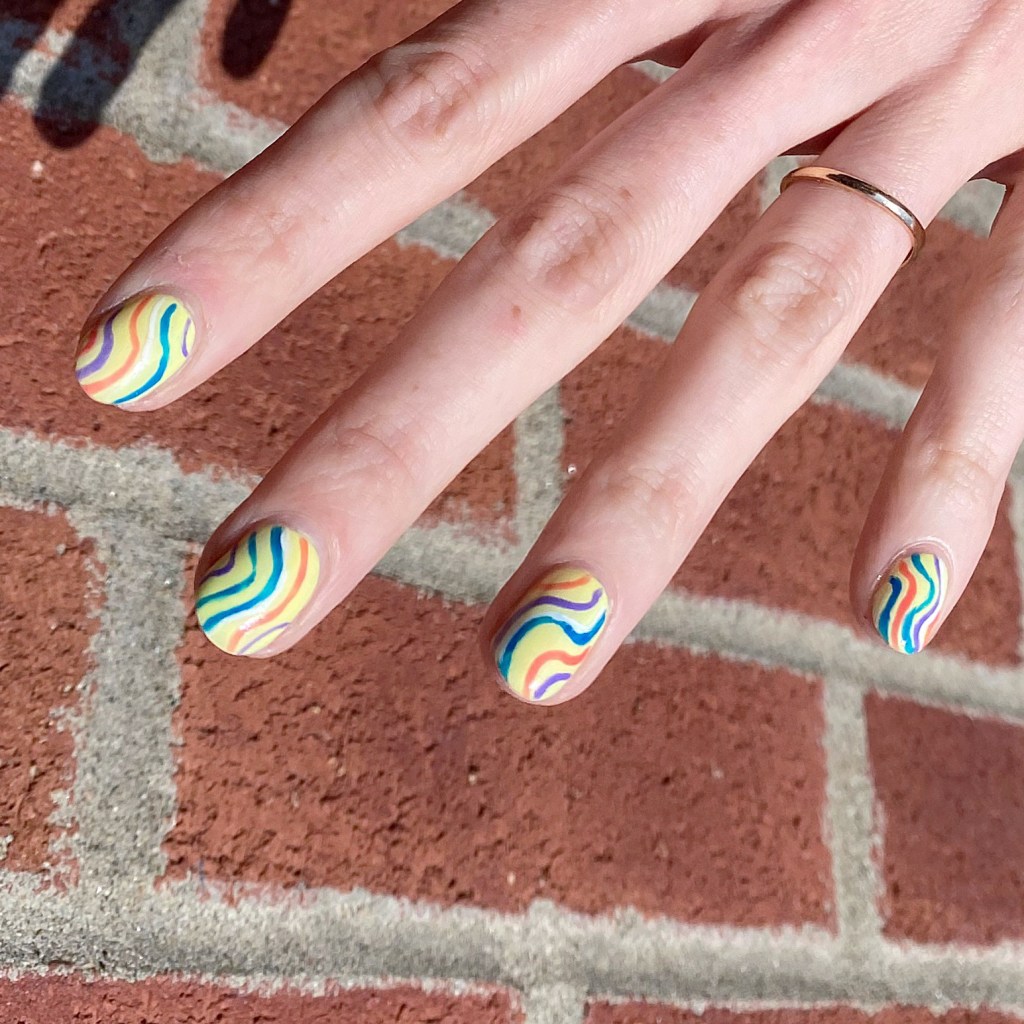
I hope everyone has had the best week! The weekend is (almost) here. & it’s a long weekend at that! What could be more exciting? Well… how about some fun nail art? Today I’m sharing a fun look that was super, super easy to do: these fun & zany freehand swirls.
I recently re-discovered some old Art Club Nail Art Duo pens from years ago, & decided to see if they were still any good. What resulted was this fun look! The colours are a little bit outside my usual wheel house, but I wore this look for over two days, so I ended up really liking it.
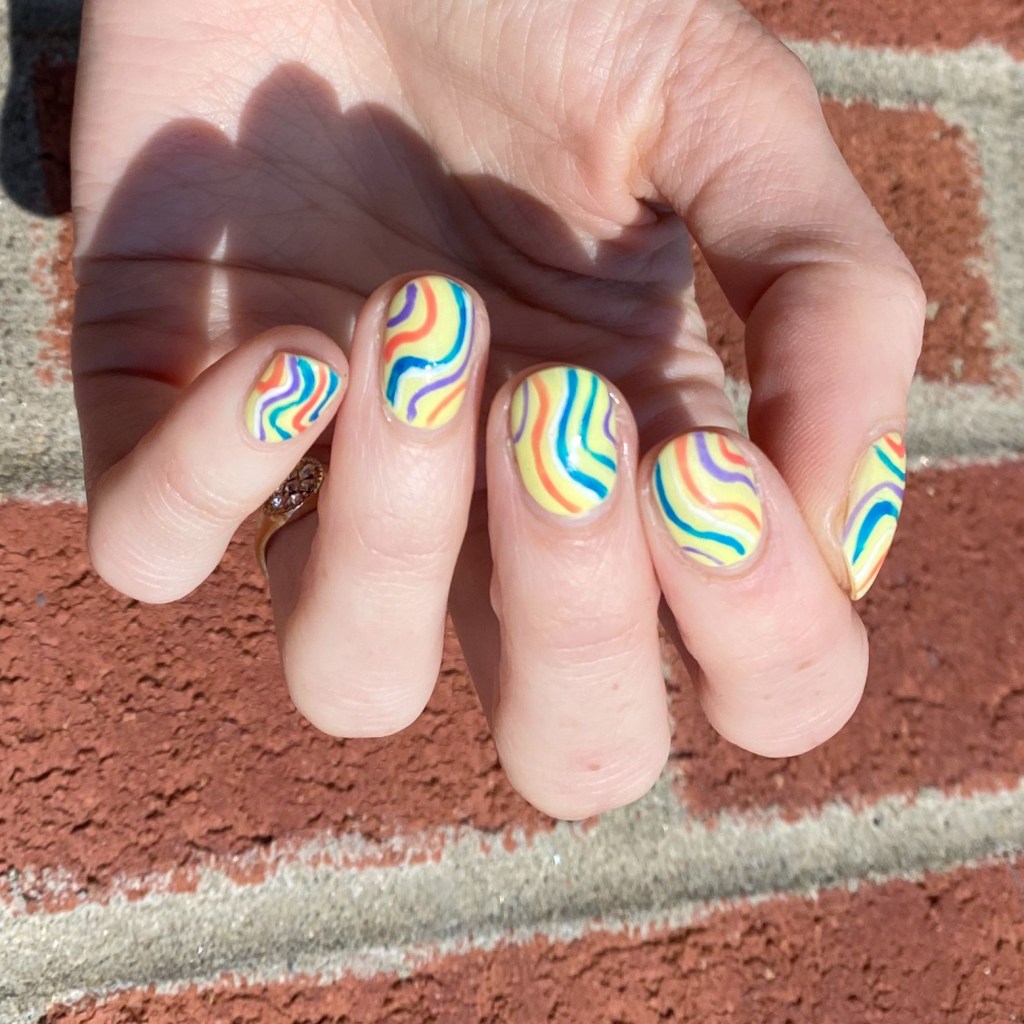

The polishes I used for this manicure are:
- Base Coat: Londontown KUR Nail Hardener & Base Coat
- Top Coat: Seche Vive Fast Dry Top
- Sally Hansen Miracle Gel Neon Lemon Chillo
- Sally Hansen MG Get Mod
- NailStuff.ca 16mm Striper Brush
- Color Club Art Club Striper Passion Flower
- Art Club Nail Art Duo Hot Purple
- Art Club Nail Art Duo Royal Blue

Sometimes I forget that nail art isn’t supposed to be stressful, it’s supposed to be fun! & this nail art look was definitely fun. It definitely has me already planning on buying a whole bunch for stripers, just for fun.
What do you think of this nail art look? Are you a fan of this colour scheme? Would you wear a look like this? Let me know all your thoughts down in the comments below!