Fall Inspired Abstract Nails

F5F811DF-87E7-434E-B1C1-9F1EA7A0F071

5DA51701-92E1-48E7-BB34-50836165986F

Good morning lovelies! Hope you’re enjoying the beginning to another beautiful week. Also how is it possible we’ve passed the middle of September & it’s creeping (quickly!) towards October?! It feels like just yesterday I was dreaming wistfully about pumpkin spice, & now it will be Halloween before we know it!

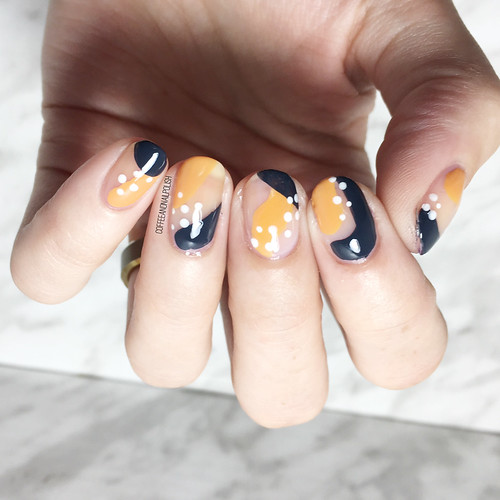
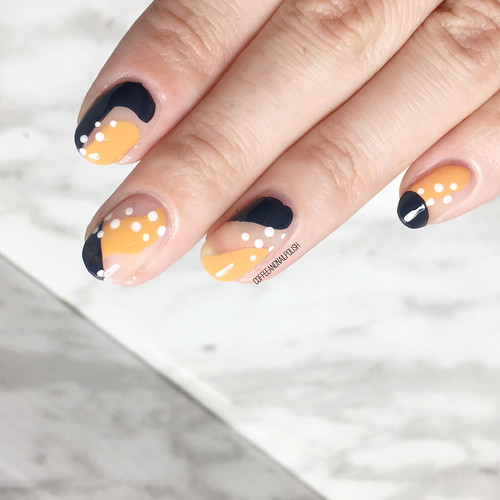
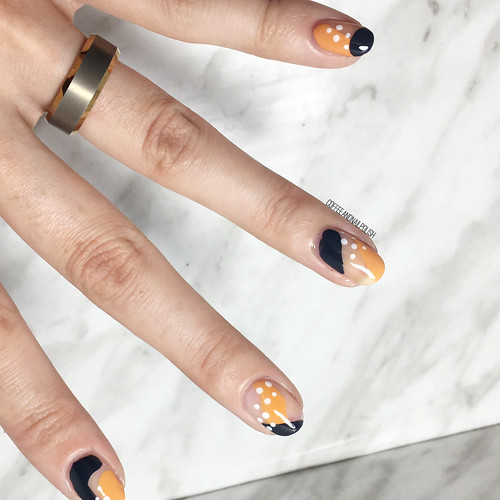
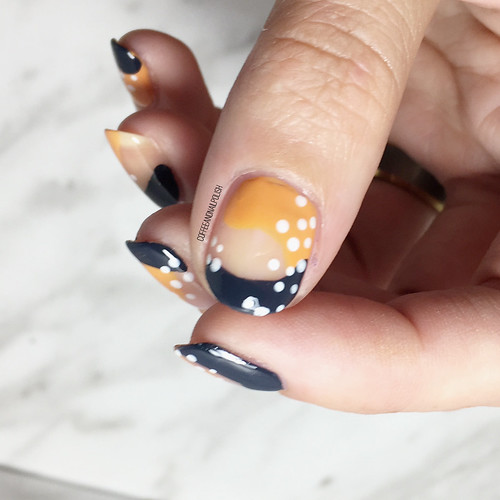
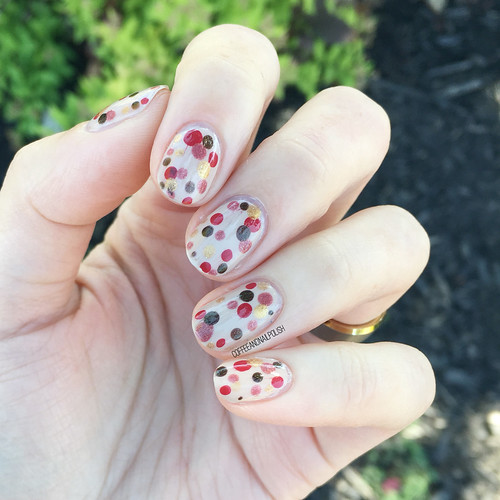
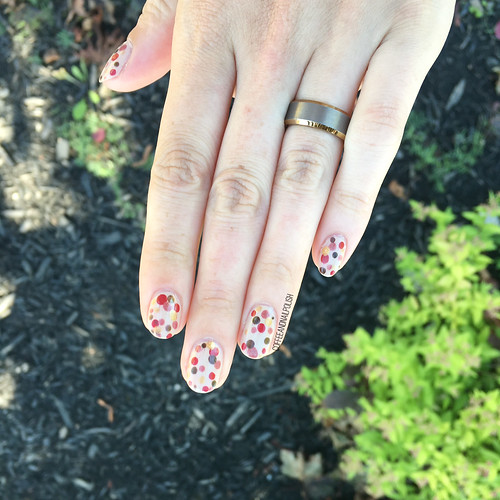
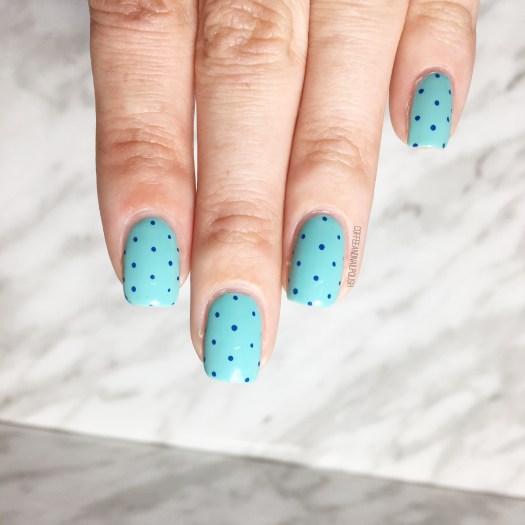
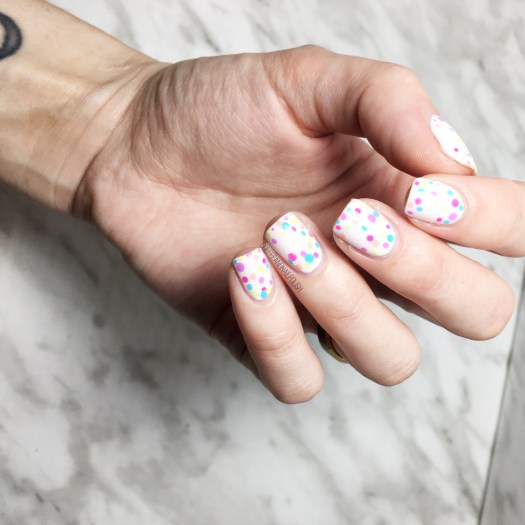
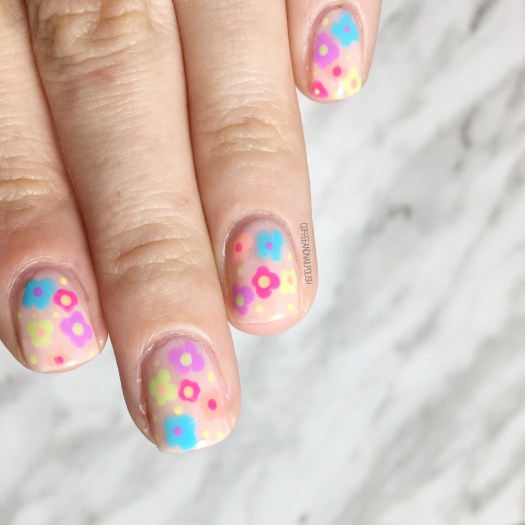
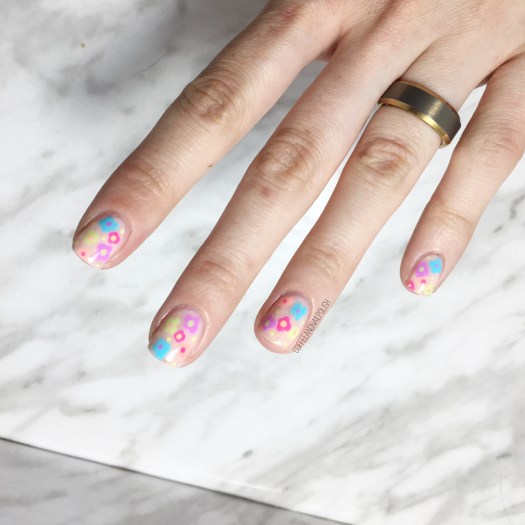
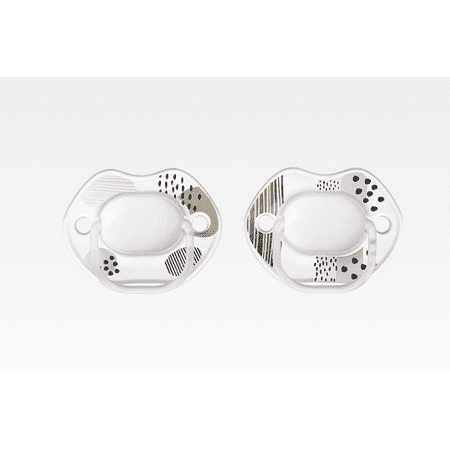
Today I have a really, really fun design to share with you that I had an extremely hard time figuring out what to call. It has a little bit of everything in it: negative space, polka dots, colour blocking, abstract lines. This look was partly inspired by a few of these looks I’ve seen popping up on Instagram & partly inspired by my daughters new soothers. But I am 100% in love with the end results!

26BDD1C6-1E10-45B3-9D38-29CB5BA62415

97DB8AC6-8E06-4661-AEA4-DB74F92D807E

For this manicure, the polishes I used were:

  • Base Coat: Gel overlay
  • Top Coat: Essie Gel Setter
  • Wet N Wild 2% Milk
  • Essie Fall For NYC
  • Essie Bobbing for Baubles
  • Sally Hansen Miracle Gel Get Mod!
  • NailStuff.ca Dotting Tool Trio

.

AD4035E0-806D-49BC-B973-47A0D9D6EF65

3426C284-975C-4370-844A-6A7927208C72

64678B2E-66C7-4667-B914-0E543C05F59A

This look is super easy to do, even though it comes across as more complicated & fancy. Basically the hardest part is figuring out how to layer your lines of colour, but because they’re “abstract” you don’t have to worry about making them perfectly straight. & then just go in with a small dotting tool for some extra dots, & you’re finished! I originally was going to add a few random lines as well, but was worried about kiddos waking up (I literally did these at 6am while everyone was asleep) so I went the safe route. Definitely want to try them again & see if I can get even closer to my inspiration! This was a fun first attempt though!

E3E487ED-8B2E-46AA-B7D1-5E36A09A5B6A

D78A3D3F-9AB7-419B-B036-5B754104D719

Love love loving this look! Seriously, it feels so good to paint my nails, & even if it means waking up earlier than I might want, it’s so worth it in the end. Painting my nails is what keeps me feeling like me, & it’s important to have that “thing” that makes you feel like you, especially when you’re a new Mom.

I know I get asked a lot how I have time, with two young kids, to keep doing my nails & the honest answer is: I just make the time when I can. It’s not always easy, & sometimes it takes into the next day to finish a manicure, but sometimes that’s what you have to do. We’ll see what happens when my maternity leave is up & I go back to work, but I will keep trying as much as possible to keep the routine going & finding my times to paint & create.

36F421BD-1D25-4295-B751-8C833289987A

What do you think of this nail art look? What kind of manicures would you like to see next? Share down below your favourite nail art look!

๐Ÿงก

Fall Themed Dotticure ๐Ÿ๐Ÿ‚

0B472774-631A-42F8-9762-8B0697B82C57

Good morning lovelies! Hope everyone is having a lovely start to their week! We are finally heading home after 2 weeks on vacation, as the Hurricane that hit Nova Scotia pushed back our travels.

I have one more look from my vacation to share with you. I had to bring my China Glaze Gone West Shades with me, so I created a cute & easy dotticure.

You know how much I love a good dotticure!

1EE9A151-846C-435E-92DB-DF80DE958BE8

699FEA9D-F1D1-4B04-A4C0-6F62D86F5C07

The polishes I used for this manicure were:

  • Base Coat: Duri Rejuvacote
  • Base Coat: Quo by ORLY Bonder
  • Top Coat: Revlon Quick Dry Top Coat
  • China Glaze Prairie Tale Ending
  • China Glaze Campfired Up!
  • China Glaze Buffalo Bills, Bills, Bills
  • China Glaze Gold Mine Your Business
  • China Glaze Take The High Rodeo
  • NailStuff.ca Nail Art Dotting Tool Trio

1187E175-3898-45EB-9B47-648E8298C803

4EF5E352-A989-4381-B69B-E27BAAE8E728

Still obsessing over this collection & how well all the polishes come together. I have some great ideas for manicures coming up! & now that the days are definitely feeling cooler, my obsession with Fall shades is totally justified.

15C42B3C-A50A-4576-9808-897B073D0485

3594B75A-2EC0-42D4-87D1-C7F480208641

Nothing like a fun polka dot design for quick & easy nail art look! I know I say it every time, but dotticure designs were one of the first real “nail art” looks that I started to play around with, & because of that they will always be a favourite! They are just so versatile, & you could do one every day & never have it look the same.

39402167-075A-4EAB-934A-1E2A4F54B1C8

7B5505DF-B28A-40A6-84C4-824401872D37

What do you think about this Fall dotticure look? What Fall colours are you obsessed with right now? Share your favourite dotticure colour combinations down in the comments below! & click HERE to check out my (many) other dotticure deisgns.

Blue on Blue Dotticure

Good morning lovelies & happiest of Mondays! I hope the weather where you are is nicer than here on the East Coast — it’s raining, again.

My favourite.

Today I’m showing off a quick & simple nail art look that I did last week. Now that the countdown for baby #2 is down to days, I’ve been trying to keep my manicures quick & simple. & there is nothing I love more when I want quick nails than a dotticure!

The polishes I used for this manicure were:

  • Base Coat: Sally Hansen  Green Tea & Bamboo Strengthener
  • Top Coat: Essie Speed Setter
  • China Glaze For Audrey
  • Sally Hansen I โ™ฅ๏ธ Nail Art Pen in Navy

I’ve mentioned before how much I love my Sally Hansen nail art pens for creating dotticures. I find they’re the easiest because you don’t have to constantly need to reapply polish to your dotting tool, you just need to touch the nail. Obviously, that’s for petite polka dots as opposed to bigger dots.

This was also my first time wearing China Glaze For Audrey in absolute ages & I forgot how pretty it is. Fun fact: For Audrey was the very first China Glaze shade I ever bought (shortly after our very first Sally Beauty opened) & I bought it completely based on the fact Breakfast At Tiffany’s is one of my favourite movies.

What do we think about this dotticure? Do you have a favourite polka dot combination? Share your favourites down in the comments below!

Summer-y Neon Dotticure

{PR sample}

Good morning lovelies! & happy Tuesday! I hope everyone is having a great start to their week — we’re having a beautiful Sunny day today & I plan on fully embracing all the sunshine. So what better day to share this fun neon dotticure I did last week.

Again, I had to reach for my fun Neons from Sally Hansen Canada! I’m seriously either grabbing these Neons & my Holos which is why you see me grabbing either so often!

For this manicure, the polishes I used were:

  • Base Coat: Sally Hansen Green Tea & Bamboo Strengthener
  • Top Coat: Seche Vive
  • Top Coat: Sally Hansen Miracle Gel Top Coat
  • Sally Hansen Miracle Gel Electri-Lime
  • Sally Hansen Miracle Gel Fuchsia Fever 
  • Sally Hansen Miracle Gel Lemon Chillo
  • Sally Hansen Miracle Gel Miami Ice
  • Sally Hansen Miracle Gel Peach Please
  • Sally Hansen Miracle Gel Violet Voltage 
  • Sally Hansen Miracle Gel Get Mod

Is there anything more fun than a dotticure? I just love how easy it is to do & how cute they look! With the white base, these remind me so much of candy! ๐Ÿญ I wore this design for a good 4 days before changing them up (this was day four) & they lasted an impressively long time without chipping! There was some growth near my cuticles, but other than that they were almost still perfect by day 4.

What design would you like to see next? What colours? Let me know down in the comments below!

Neon Dotticure Flowers

{PR Sample}

Hello lovelies! Hope everyone is having a lovely Wednesday — here in Halifax it’s raining (again) is I decided the best way to cheer myself up would be creating another look using my newly gifted Sally Hansen Neons!

If your looking for actual swatches of these polishes, you’re in luck–I finally got the energy to swatch & photograph last night so that post will be coming this weekend! In the meantime, I’ve been having a blast coming up with fun & colourful nail art looks using these polishes.

Today’s design is a super simple nail art look I am pretty confident in saying anyone can achieve! All you need in a dotting tool (or a bobby pin) & an assortment of colours.

For this manicure, the polishes I used were:

  • Base Coat: OPI Nail Envy
  • Top Coat: Seche Vive
  • Sally Hansen Miracle Gel In the Sheer
  • Sally Hansen Miracle Gel Electri-Lime
  • Sally Hansen Miracle Gel Fuchsia Fever 
  • Sally Hansen Miracle Gel Lemon Chillo
  • Sally Hansen Miracle Gel Miami Ice
  • Sally Hansen Miracle Gel Peach Please
  • Sally Hansen Miracle Gel Violet Voltage

I was really feeling some vibrant 70s vibes & this design turned out just how I imagined in my head. The pop of colour of the flowers over the sheer base just really works together–very Summer-y & fun, which is what I’m all about right now! & cheers up the blahs brought on by the torrential rain we’ve been having the last couple days. The simplicity of this design also makes me happy–I managed to create these nails in about 30 minutes last night, after I finished all my swatching, which meant I could still make it to bed before 11pm! Haha it’s the simple things in life that make me happy.

what do you think of this neon dotticure floral looking using the new Sally Hansen Neons? Have you seen these polishes in stores yet? I saw them in my local Shoppers Drug Mart just the other day, so you should definitely see them start popping up soon!

*PR SAMPLE* Some of these items were sent to me for review. However, all opinions are my own