Vibrant Stripes with the new Sesame Street x Sally Hansen Instadri Collection

•contains pr/gifted product•

Hello lovelies & happy Wednesday! We’re officially mid week & that much closer to the weekend. It’s been a busy week for me so far, so I feel like that’s reflected in my nail art. When it’s stressful/busy times, I definitely don’t have the time or energy for more complicated nail art.

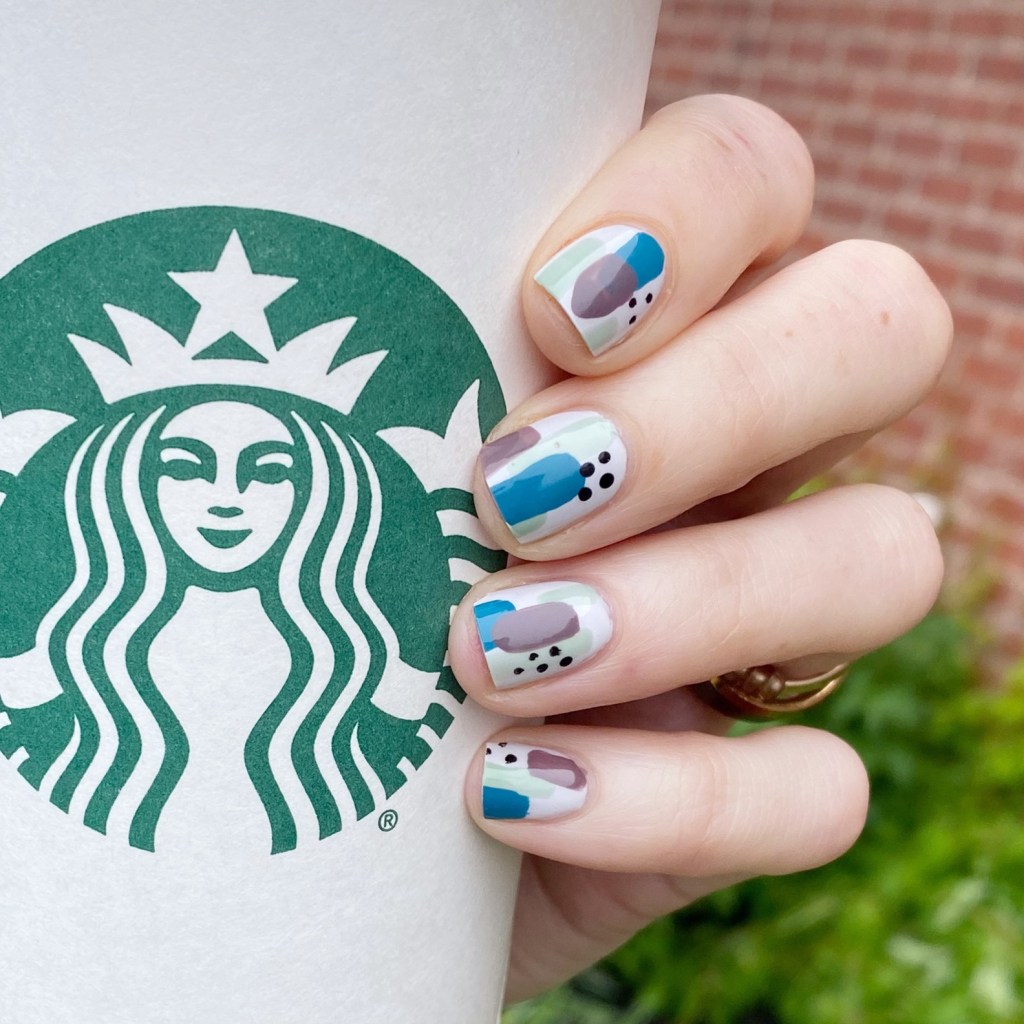
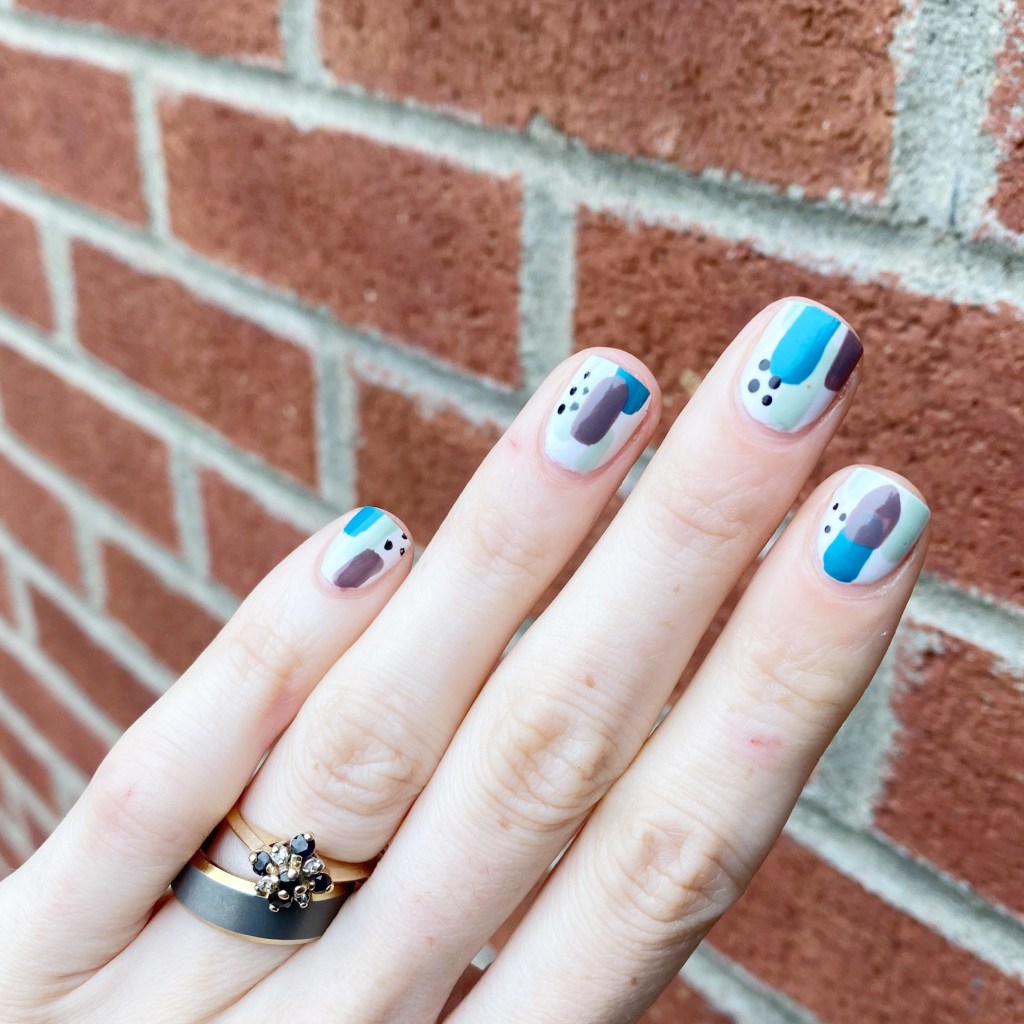
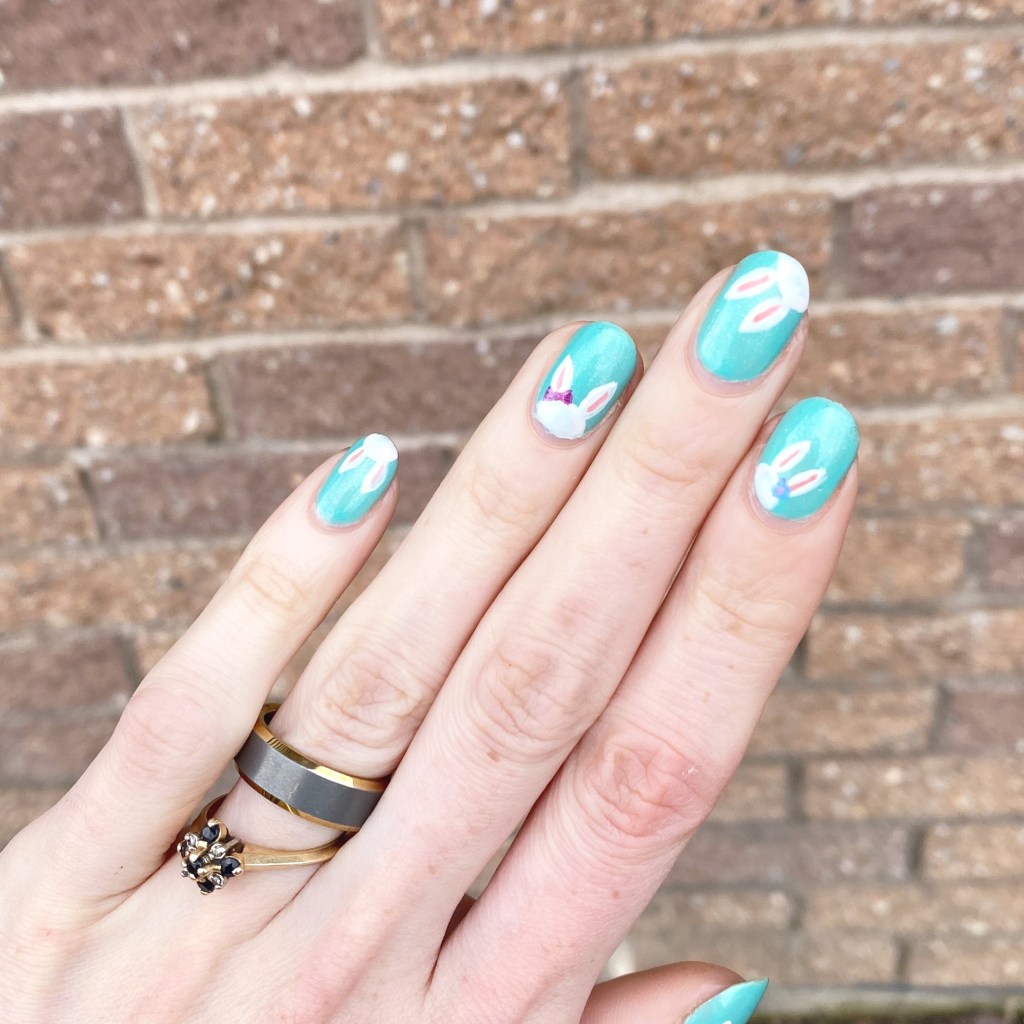
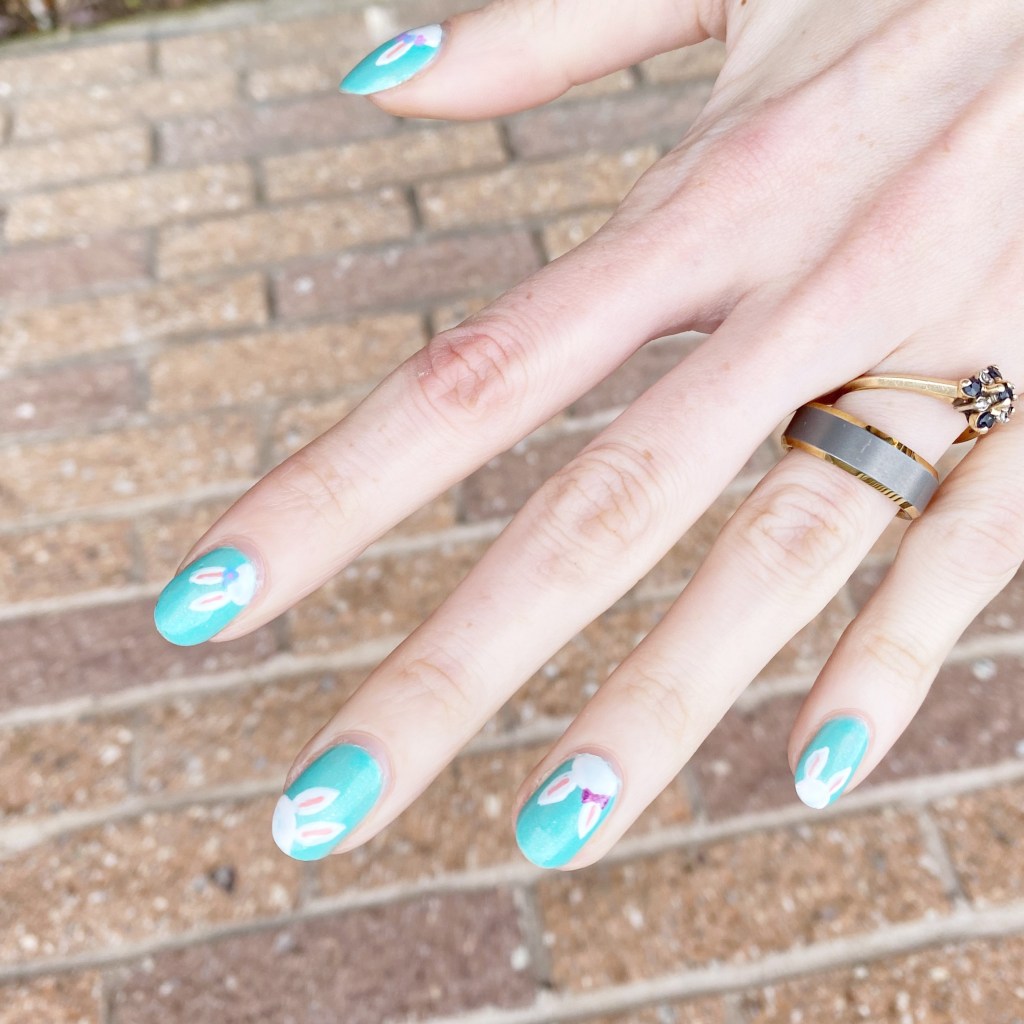
But! I have some exciting nail art to share with you today because it features some nail polish I was recently surprised with! Friday I came home to some surprise nail mail from Sally Hansen featuring the Sally Hansen x Sesame Street InstaDri collaboration. I really couldn’t wait for a chance to try these shades out, so I decided to pair a few in a quick freehand stripe look.

The polishes I used for this manicure are: 

  • Base Coat: Sally Hansen Miracle Gel Colour Grip Primer Base Coat 
  • Top Coat: Sally Hansen Miracle Gel Glossy Top Coat
  • Sally Hansen x Sesame Street InstaDri 1 Polish, Ah Ah Ah
  • Sally Hansen x Sesame Street InstaDri Am I Not Adora-blue?
  • Sally Hansen x Sesame Street InstaDri Turquesa Brillante
  • Sally Hansen x Sesame Street InstaDri SCRAM!
  • NailStuff.ca Mermaid Tail Brush Trio (11mm liner brush)

I guess we’re back to Summer, haha. Even though I had fully embraced the Fall flakie vibes with my previous manicure, I am very much in love with the colour scheme of this design. They’re very bright, & colourful, which is perfect for a collection based on something like Sesame Street. I’m looking forward to swatching all the shades to shade for this weekend’s Swatch Sunday post.

What do you think of this bright & colourful stripe-y look? Are you a fan of this colourful design? Have you seen the Sally Hansen clx Sesame Street shades in any of your nail polish haunts? Let me know all your thoughts in comments below!

Products featured in this post were provided in exchanged for content.

All thoughts are honest & my own.

Abstract Shorties

Hello lovelies & happy first day of Summer to those in the northern hemisphere! & it actually feels very Summer like today, which is very exciting. I’m definitely here for it, & all things Summer related.

Todays look is a quick abstract design I applied over my base of OPI I Cannoli Wear OPI from my Swatch Sunday post for this week. I wanted to extend my wear another day or so, & decided an abstract look was the perfect way to do that!

The polishes I used for this manicure are: 

  • Base Coat: Londontown KUR Nail Hardener & Base Coat 
  • Top Coat: Seche Vive Fast Dry
  • OPI I Cannoli Wear OPI
  • Essie Revenge’s A Beach
  • Essie Turquoise & Caicos
  • Essie Merino Cool
  • OPI Who You Callin’ Bossy?!
  • Small dotting tool — NailStuff.ca Dotting Tool

As you can see, I’m rocking extra shorties right now thanks to a break on my ring finger at work on Saturday.

Normally I would be upset about it, but I’m kind of enjoying shorter nails right now. I find when my nails are square, I prefer a shorter length to them. Plus I love showing off that you can rock fun nail art no matter the length of your nails!

What do you think of these abstract shorties? Are you a fan of looks like these? Let me know all your thoughts down in the comments below, & what colour scheme you would choose.

Have a lovely Wednesday ☀️

Shimmery Mermaid Vibes 🧜‍♀️

Hello loves! It’s Monday again.

It’s also 3 days away from June, which just blows my mind. I mean, I’m happy for Summer weather — although, we could use some rain here so send rain vibes! — but also this year is speeding by & it’s kind of unbelievable. How is it even possible that we’re almost half way through this year?

But I digress; you’re here for nails, so let’s talk nails! Today’s look was what I promised in yesterdays swatch post. I knew that OPI Blue My Mind would be a beautiful base from some nail art, & I knew I was feeling mermaid nails. So naturally, I knew what I had to do.

The polishes I used for this manicure are: 

  • Base Coat: Londontown KUR Nail Hardener & Base Coat 
  • Top Coat: Seche Vive Fast Dry Top
  • OPI Blue My Mind
  • Essie Viva Antigua!
  • Beyond the Nail Mermaid Scale Vinyls

My little girl is absolutely obsessed with all things mermaids right now, so this was the perfect manicure to impress her! This was also super easy to do. I only applied one coat of Viva Antigua! over my base, so it’s kind of spotty in some spots, but I like it because it gives a more watery scale look (if that makes sense). You can kind of see the base showing through, & I like that. Over all, it’s a very pretty look.

In fact, I’ve been wearing this manicure since Thursday, & it’s still holding up very well. I usually wear a manicure maybe 3 days max (& that’s if I’m really busy) but I’ve just loved this look so much, & it’s barely even showing tip wear, it felt like a shame to remove it. Of course, I will probably change my nails today, but it’s been fun to wear. I almost wish I had gone to see the Little Mermaid this weekend, as it would have been the perfect manicure for it. But I’ll have to redo one when I take my little girl in a few weeks.

What do you think of my mermaid nails? Are you feeling all the mermaid vibes? Let me know all your thoughts on this look down in the comments below!

GLAM NAILS CHALLENGE APRIL – Easter Bunny 🐰

Hello lovelies & happy Monday! I’m excited because it’s April, & I haven’t participated in a Glam Nails Challenge in a while so I thought it would be fun to participate this month since it’s a Spring-y themed challenge so I thought it would be fun to participate.

The first prompt for this month? Easter bunny. Which is awesome because I love any excuse for some holiday themed nails. I browsed through my Pinterest, & settled on a cute peek-a-boo bunny look.

The polishes I used for this manicure are: 

  • Base Coat: Essie Hard To Resist Glow & Shine 
  • Top Coat: Seche Vite Fast Dry Top Coat
  • LA Colors Mermaid Magic Sea Life
  • Sally Hansen Miracle Gel Ski Bunny
  • Sally Hansen MG Get Mod
  • Sally Hansen MG Pretty Piggy
  • Sally Hansen MG Sugar Fix
  • Sally Hansen MG Orchid-ing Aside
  • Sally Hansen MG Montley Hue
  • NailStuff.ca 4mm Micro Detail Brush
  • Small Dotting tool (NailStuff.ca — Dotting Tool Trio)

How cute did these bunnies turn out? I was a little bit nervous about free-handing these bunnies, but I was really happy with how they turned out. They look so cute! I added the little details like the bows & flowers, but I didn’t want to add little faces because I felt like they would end up way too cartoon-y.

But they turned out perfect! Super Easter-y, & a fun look to wear. Obviously if you wanted to go a little more subtle you could just do one bunny accent, but I was in the mood to go wild!

What do you think about this Easter Bunny nail art look? Can you believe that it’s less than a week to the big day? What is your favourite Easter treat? Let me know all your thoughts down in the comments below!

GLAM NAILS CHALLENGE DECEMBER — Christmas Plaid

Good morning lovelies & happy Wednesday! & happy Day two of Glam Nails Challenge December. Also… can you believe it’s December 7th? I mean… it’s raining here on the East Coast & above freezing so it certainly doesn’t feel anything close to December. At least I have Christmas nails to keep me in a somewhat festive mood.

But onto the nails — prompt #2 is Christmas Plaid. I do love a good plaid manicure, & for today’s look I decided to go with a sparkly plaid design.

The polishes I used for this manicure are: 

  • Base Coat: Essie Hard To Resist Glow & Shine 
  • Top Coat: Sally Hansen Insta-Dri Anti-chip Top Coat
  • Quo Beauty Green With Envy
  • ACO by Ardene Crystal Fog
  • Sally Hansen Miracle Gel Red It Twice
  • Sally Hansen Miracle Gel Get Mod
  • China Glaze New Year, New Boo
  • W7 Gold Dazzle
  • Mermaid Tail Nail Brush Trio (11mm Liner Brush)

Originally I thinking of a sparkly green plaid, but as soon as I put Crystal Fog over Green with Envy it gave it a teal/turquoise colour instead. But I decided to go with it, & I think all the sparkly lines still give it the Christmas Plaid look I was hoping for. & I do love all the sparkle & shimmer of the look. If there is any time to break out the glitter, it’s obviously Christmas.

What do you think about my Christmas plaid design? What colour combination would you wear for a Christmas plaid. I feel like usually I go for more a red look, but I’ve been wearing a lot of red nails lately (& I’m sure there will be more!) so it’s fun to change things up a bit.

Don’t forget to check out all the fun #glamnailschallengedec looks on Instagram, & stay tuned because we have a whole lot more Christmas-y looks coming in the next few weeks!