Fall Themed Dotticure 🍁🍂

0B472774-631A-42F8-9762-8B0697B82C57

Good morning lovelies! Hope everyone is having a lovely start to their week! We are finally heading home after 2 weeks on vacation, as the Hurricane that hit Nova Scotia pushed back our travels.

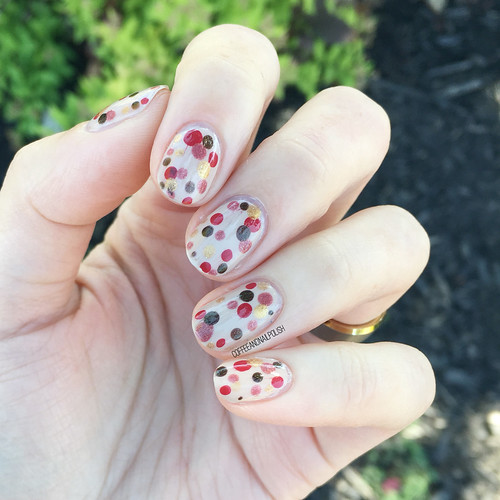
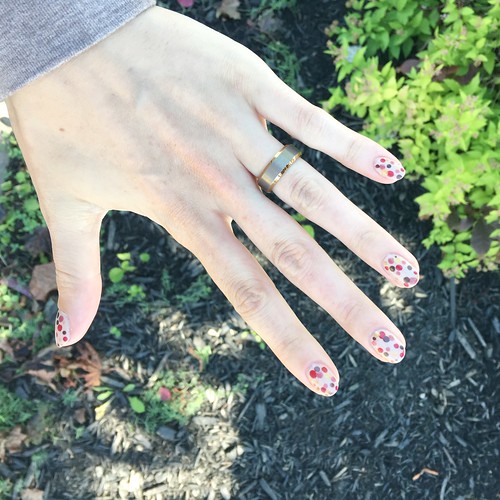
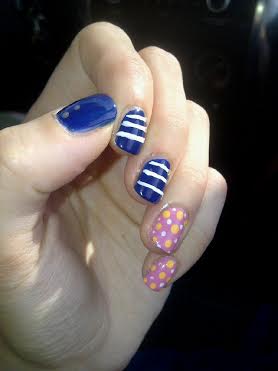
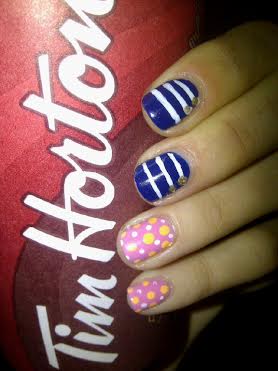
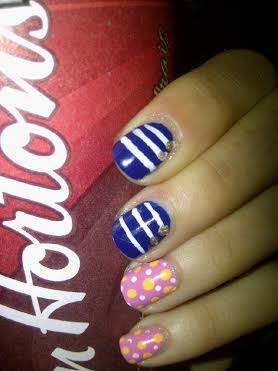
I have one more look from my vacation to share with you. I had to bring my China Glaze Gone West Shades with me, so I created a cute & easy dotticure.

You know how much I love a good dotticure!

1EE9A151-846C-435E-92DB-DF80DE958BE8

699FEA9D-F1D1-4B04-A4C0-6F62D86F5C07

The polishes I used for this manicure were:

  • Base Coat: Duri Rejuvacote
  • Base Coat: Quo by ORLY Bonder
  • Top Coat: Revlon Quick Dry Top Coat
  • China Glaze Prairie Tale Ending
  • China Glaze Campfired Up!
  • China Glaze Buffalo Bills, Bills, Bills
  • China Glaze Gold Mine Your Business
  • China Glaze Take The High Rodeo
  • NailStuff.ca Nail Art Dotting Tool Trio

1187E175-3898-45EB-9B47-648E8298C803

4EF5E352-A989-4381-B69B-E27BAAE8E728

Still obsessing over this collection & how well all the polishes come together. I have some great ideas for manicures coming up! & now that the days are definitely feeling cooler, my obsession with Fall shades is totally justified.

15C42B3C-A50A-4576-9808-897B073D0485

3594B75A-2EC0-42D4-87D1-C7F480208641

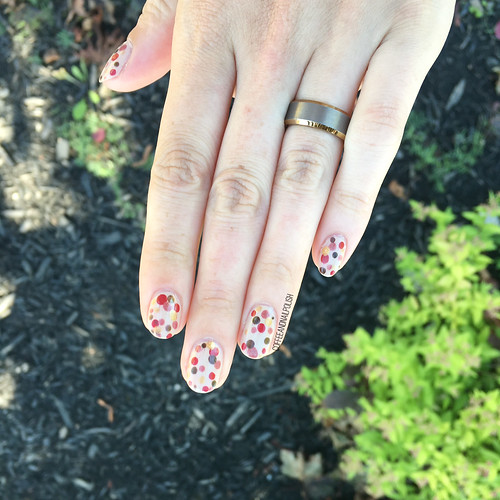
Nothing like a fun polka dot design for quick & easy nail art look! I know I say it every time, but dotticure designs were one of the first real “nail art” looks that I started to play around with, & because of that they will always be a favourite! They are just so versatile, & you could do one every day & never have it look the same.

39402167-075A-4EAB-934A-1E2A4F54B1C8

7B5505DF-B28A-40A6-84C4-824401872D37

What do you think about this Fall dotticure look? What Fall colours are you obsessed with right now? Share your favourite dotticure colour combinations down in the comments below! & click HERE to check out my (many) other dotticure deisgns.

Happy Birthday Canada Day Nails 🇨🇦

Happy Canada Day! 🇨🇦 Today is an important birthday for my country–it’s the 150th birthday of Canada’s Confederation. & in honour of the occasion I created these festive nails using maple leaf stencils I received in honour of the occasion free from Nail Polish Canada (& thanks so a discount code @jennieshaw posted a few weeks back). 

For this manicure I used:

  • Base Coat: L’Oréal All In One
  • Top Coat: Essie Speed Setter
  • Essie Too Too Hot
  • China Glaze Ruby Slippers
  • Sally Hansen Hard As Nails Hard To Get
  • Xroma Polish & Vinyls Skinny Waves Vinyls
  • What’s Up Nails Canadian Flag Nail Stencils c/o: Nail Polish Canada

I hope everyone is having a fabulous Canada Day (& it’s not too rainy where you are!) Myself & the baby are heading on vacation tomorrow so we’re keeping our plans low key today since he’s a little too young for fireworks this year. We are however having a fun Canada Day supper with my inlaws before we leave. Whatever your plans are today, I hope it includes a little red & white (& maybe something maple flavoured). 

How are you celebrating Canada’s 150th Birthday?! Let me know in the comments below! 

Nautical themed Bridal Shower Nails.

So I totally misjudged being on vacation. I am a lot busier than I thought I would be, but I guess that goes a long with being a bridesmaid. But I’m still managing to get some nail art time in! I decided to do something fun and nautical themed for my besties Bridal Shower (using her wedding colors, obviously), and this is what I ended up coming with.

bridalshower

bridalshower3

The polishes I used for this manicure were:

  • Maybelline Sapphire Siren.
  • ACO by Ardene Kiss by a Rose.
  • China Glaze Metro Pollen-tin.
  • ACO by Ardene Golden Luxery.
  • Mariposa Nail Design Striper in White.
  • Essie Good to Go Top Coat.

I’ve been browsing a lot of nautical themed nails on Pinterest, so I wanted to give it a quick try. I created my lines freehand, (and on the go) which is why some of them aren’t as straight as I hoped they would be. But they’re not so bad, and they went great with the dress I wore to the bridal shower!

bridalshower4

bridalshower5

bridalshower6

I can’t believe my best friend is getting married in 2 days! We used to make Spice Girl videos in my backyard way, way back in the day, and now she’s going to walk down the isle. If I don’t cry, I will be absolutely shocked.

Now, time to go play with some polish. I’m feeling some swatching today. I bought a bunch of new polishes in July I haven’t yet had time to share with you, so I figured now is a good time. With the exception of a little bridal lingerie shopping tonight with the bride to be, I’ve got the whole day to myself. And my stash is calling my name!

Have a great day lovelies!

Back to Bright.

Just a quick manicure for today. I wanted to do something fun on my nails, which was also quick before I headed to work, so I decided to do some sponging. I find using a cosmetic sponge and some differing colors is a quick way of creating a fun manicure, which isn’t too time consuming. Also–it was so nice to be back home with my whole stash at my disposal! I missed it so much!

sponging3

For this manicure, the polishes I used were:

  • OPI Pinking of You.
  • Sinful Colors Thimbleberry.
  • Sinful Colors Hip to be Square.
  • Sinful Colors Dream On.
  • Sally Hansen Xtreme Wear Pacific Blue.
  • Essie Good to Go Top Coat.

Quick and easy, bright and colorful. Two things I love in a manicure.

sponging sponging2

Freehand, and sort of abstract, chevrons/zigzags.

After my successful chevron moon manicure last week, I wanted to try another chevron manicure as I haven’t done very many in the past. I was inspired by this pin on Pinterest, and figured with my new small detail nail art brush, I could make a good attempt at freehand chevrons.

 1

Left hand.

6

Right hand.

The polishes I used for this manicure were:

  • OPI My Boyfriend Scales Walls.
  • ACO by Ardene Neon Pink.
  • Maybelline Sapphire Siren.
  • Sinful Colors Be Happy.
  • China Glaze What a Pansy.
  • Nutra Nail Speed Dry Top Coat.

I’m calling these abstract because… well… they’re not the cleanest lines. Surprisingly, my right hand turned out better than my left, which is funny because it was done using my none dominant hand! Never the less, I’m proud of how they look! When I first started doing nail art, I never would have been able to create something like this without it turning into a big blobby mess. It’s nice to remember that on days when I see others nail art and feel envious that I’m not that good… all it takes is lots practice.

2 3

5

Seeing these, I feel so proud of being able to create these freehand. For real first attempt, I think I did pretty good. And the colors just look so great together! This is also giving me an urge to do a “then and now” nail art post, just to show myself how far I’ve come from my first days of doing my nails, to now. It would be fun to recreate my first nail art attempts, just for a personal comparison. Maybe that’s what I’ll dedicate next week to. =)