Nails for Days.

Wow, I’ve been MIA again…. we’ve been house sitting for my parents which means I don’t have all my polishes (or nail art tools) at my disposal. However, I have still been painting my nails the last week so I thought I would share with you the simple manicures I’ve been playing around with. I’ve been testing out the combination of using Essence Gel Look top Coat with Essie’s Good to Go top coat, and I have to say it’s been working for me. Usually I have chips in my polish by the end of day 1 (or sometimes half way through), but most of these manicures I’ve worn for 2+ days with minimal chipping. Considering I’m not gentle on my hands, that is actually kind of amazing.


flying dragon3 flying dragon

The polishes I used for this manicure were:

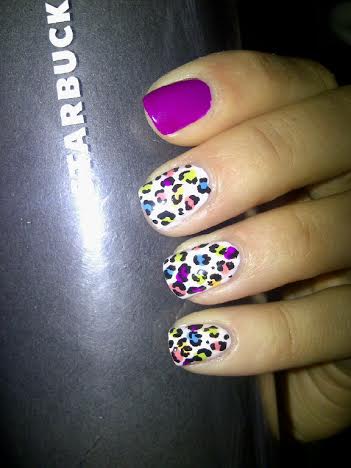
  • China Glaze Flying Dragon (purple)
  • Essence Petal to the Metal gold topper.
  • Essence Gel Look top coat.
  • Essie Good to Go top coat.

Oh China Glaze Flying Dragon… how I love you. You are now, and will forever be my favorite nail polish color…. I just wish you didn’t chip so damn fast! Thankfully though, adding my top look combo gave me these nails for THREE days with very minimal chipping until day three (when it all went to hell). I do love the combination of the Essence Gold Topper over dark colors though… looks so regal. (Also makes me crave fall a little bit… some one slap me!)


crackle crackle2

The polishes I used for this manicure were:

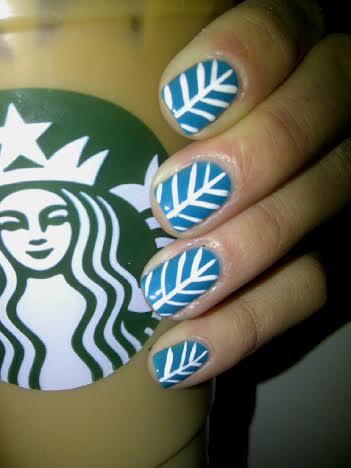
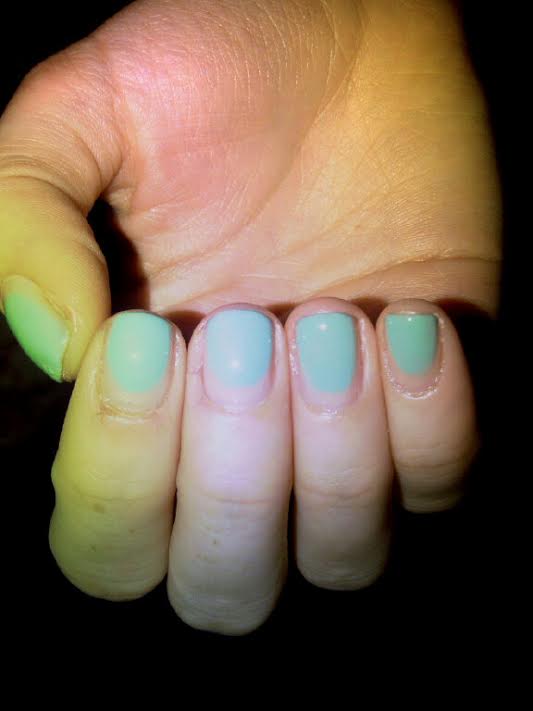
  • Sinful Colors Be Happy (blue base color)
  • Icing Electric Graffiti (pink shatter)
  • Essence Gel Look Top Coat.
  • Essie Good to Go top coat.

I was feeling some crackle, since I haven’t used it in years. I used to love playing with crackle, and Icing’s Electric Graffiti was definitely my favorite of the ones I owned. That hasn’t changed. So bright, and so awesome.


ruffian2 ruffian

Polishes used for the manicure were:

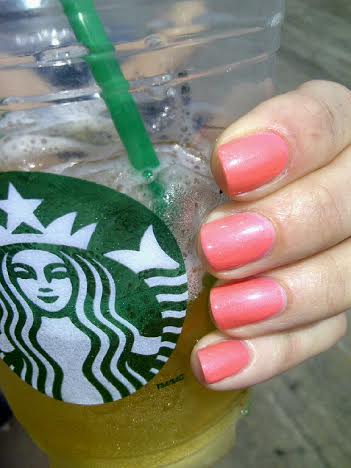
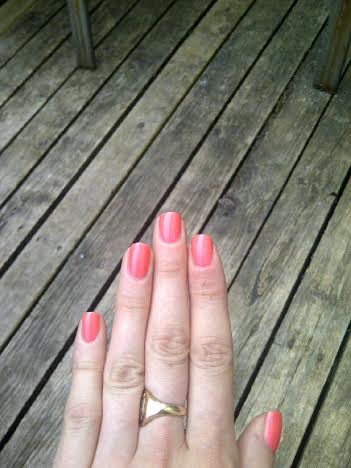
  • Joe Fresh Latte (nude base)
  • Nicole by OPI Oy Oy Oyster (nude shimmer)
  • Essence Dive with me to the Island (teal ruffian)
  • Essence Gel Look Top Coat.
  • Essie Good to Go Top Coat.

Oh man, I had such high hopes for the manicure… I had visions of a gorgeous nude and teal ruffian… except the nude color my mother owns (which is dark for her) blends PERFECTLY into my skin… so it just looked like I didn’t paint for enough down on my nail. And the shimmer I added didn’t show up enough. Next time I’ll definitely go with something not so perfectly matched to my skin tone.


So as you can see, I’ve still been playing around with polish I just haven’t been as nail art crazy as normal. I’m also still bumming hard about my shorties, but they’ll grown… unfortunately just not over night (I wish!) Next week I’m on vacation from work so it will be A LOT more nail art time. In fact, in honor of my best friend who is getting married next week, I think I’m going to do a whole week of wedding manicures, for both bride and bridesmaids. And then at the end of the week, I can share the manicure my friend is letting me do for her nails for the wedding. =)


coffee

Now it’s time to finish my coffee, and get started on a super cool manicure I hope to share with you tomorrow.

Purple Ombre.

When I first started getting into nail art, Ombre nails were all the trend. Even though they aren’t as popular as they once were, I still think they’re a great look. I hadn’t done ombre nails in a while so I decided to give them another try. I was feeling a purple manicure, so I grabbed five purple polishes as close to each other in tone and created a quick ombre.

OMBRE3

The polishes I used for this manicure were:

  • Essence Beauty Beats Baby Ooh Ooh — thumb.
  • Essence Color and Go Break Through — pointer.
  • China Glaze What a Pansy — middle.
  • ACO by Ardene Purple Rain — ring finger.
  • Sally Hansen Complete Salon Manicure I Lilac You — pinky.
  • OPI I Snow You Love Me — glitter placement.
  • Essie Go to Go Top Coat.

OMBRE2 OMBRE

Plus side of owning a TON of polish–makes it easy to match a few up to create  a quick ombre which still looks like the colors are supposed to go together. I also added some glitter to create a rhinestone look, just for an extra little something-something. It just pulls the whole look together for me.

OMBRE4

So what do you think of these ombre nails? Like I said, I still really love the ombre manicure so I could see myself doing this with all sorts of different colors. Also I’m really digging I Snow You Love Me for all the glitter placement possibilities. Plus from a distance it looks like rhinestones on the nails (but without the worry that I would knock them off in about 2 seconds at work.)

Also I’m seriously addicted to the Skinny Caramel Macchiatos at Starbucks. I go through waves of being addicted to certain drinks, and they’re my drug of choice right now. So delicious.

Then and Now: Multi-colored Leopard print.

Finally! Some nail art.

I’ve been feeling so uninspired with my nails lately. I will start something, get half way through, and then hate it and give up and have to start over. It’s so frustrating. =( I turned to my previous manicures for this one. One of the very first manicures I did when I got a dotting tool was a multi colored leopard print manicure. I remember being so proud of this, especially when I got a “Did you do those yourself?” Comment.

multicoloredleopardprint

So I decided I wanted to recreate that manicure. (Although, I used different colors for this one haha.)

two

The polishes I used for this manicure were:

  • Sinful Colors Dream On — purple.
  • Sinful Colors Easy Going — off white.
  • Kozmic Colours — blue.
  • China Glaze Metro Pollen-tin — yellow.
  • Pure Ice Wild Thing — green.
  • Sinful Colors Island Coral — coral.
  • Cherimoya Black
  • Nutra Nail Speed Dry Top Coat.

three one

four five


Can I use say proud I am of how these turned out! I haven’t done a leopard print in quite a while, but after a lot of practice I’ve realized smaller spots look much better than bigger blobs. And I think these nails turned out perfectly. Also I tried to take a picture doing that awkward claw hand pose (how did I think that looked good?) but It was the most awkward position ever! Also check out the state of my nails! They look so much better now! Not just because my technique has improved, but they are just such a better shape!


So what do you think of these multi-colored leopard print nails?

True Blue and Chevrons.

I’ve got some simple nail art to share with you today. I meant to post these yesterday, but by the time I got home from work I was pretty much a zombie.

For this NOTD, I was trying to recreate the pattern of my favorite mug. I don’t it’s perfect yet, but for something I did real quick before bed I do really like how they turned out. Plus all my lines were straight which yey!

trueblue2 trueblue

The polishes I used for this manicure were:

  • ACO by Ardene True Blue — the blue/teal base color.
  • Stripe Rite Striping Polish in White — white chevron pattern.
  • Nutra Nail Speed Dry Top Coat.

This polish was very frustrating to try and capture a picture of. On my nail, it’s a deep teal color but the second I started photographing it appeared much more blue than it actually is in person. Didn’t matter if it was inside or outside. These pictures are the closest I could get to the actual color, but still come across more blue than the polish truly is.

trueblue5 trueblue4 trueblue3


All about Neon.

So I have a swatch of a fun neon polish to share with you today from China Glaze’s 2012 Summer Neons collection.

What is it about Summer time and neon colors–I just can’t get enough! I was checking out the Chatters by my work recently, and they were had marked down all their clearance polishes to $4.99. Anyone knows me knows that I love a deal, so I ended up picking two polishes– China Glaze’s Pink Plumeria, and OPI’s I Snow You Love Me. The second I saw Pink Plumeria, I knew I had to put it on my nails as quickly as possible!

1

3

As I’ve stated before, I’m a sucker for anything Coral so the second I saw this color I fell instantly in love. It’s a neon-ish Coral with a subtle golden shimmer scattered through out. It’s less pink than the picture above shows (thanks to my camera flash not capturing it properly) but on the nail it comes out a very vibrant coral. I’ve read that some people had problems with application, but I found the formula flawless–honestly it went on so smoothly I was shocked. It was a little sheer, so I did apply two coats with left me with very minimal visible nail line. I could have done three coats for full coverage, but it really wasn’t needed. I had no streaks, or patchiness at all. The polish does dry to a matte satin finish, so I added a coat of Nutra Nail Speed Dry Top coat to give it a glossy finish.

2

I can’t not say enough how much I absolutely LOVE this polish. The subtle shimmer is beautiful, and the color is so perfect for Summer. The only issue I had was a tiny chip on my pinky finger this morning, but that could have been brought on by the house cleaning I did before starting my day. Regardless, I couldn’t stop staring at my nails all day. They even perfectly matched my dress that I wore on my coffee date with my best friend today. (Couldn’t have planned that better if I had tried!). Even he noticed how pretty and bright my nails were. =)

4

I know this was a limited edition polish from two years ago, so I’m not sure how easy it would be to find now. But if you have a Chatters near you, I would recommend checking out the clearance sale they have on right now because you never know what lost goodies you might find!