Birthday Nails with Essie Birthday Girl 🎉

F516455D-4537-4A98-AB92-7F0C2C493092

Hello lovelies & Happy Tuesday! Hope everyone is having a beautiful start to their week. Today I’m breaking up my usual posting schedule because TODAY IS MY BIRTHDAY! That’s right, today marks 33 years around the sun. So obviously I needed to do something fun on my nails to mark the occasion.

In years past I’ve done some obvious birthday nails, but this year I decided to let the polish do the talking. When I saw that Essie had released a polish called Birthday Girl, I knew that I was going to need to own it & incorporate it into my birthday mani this year! I also wanted to do something fun, as I snapped a nail just in time for my birthday, so I am back to some serious shorties.
B6F4411E-B3BE-4022-A8E6-B491C3881773

D5BA04A3-77C1-4A8D-97B2-F6EDDF238362

For this manicure, the polishes I used were:

  • Base Coat: Duri Rejuvocate
  • Top Coat: YSL Beauty Quick Dry Top Coat
  • Essie The A-bliss {PR sample}
  • Essie Birthday Girl
  • Color Club Pucci-licious
  • Color Club Eternal Beauty
  • Essie Play Date
  • Sally Hansen Pat on the Black
  • Nailstuff.ca 11mm Liner Brush {PR sample}

.

6B65E022-F47A-402E-A001-10F99CDAA9E7

01B4F731-8F0D-445D-AAF9-C1103719365E

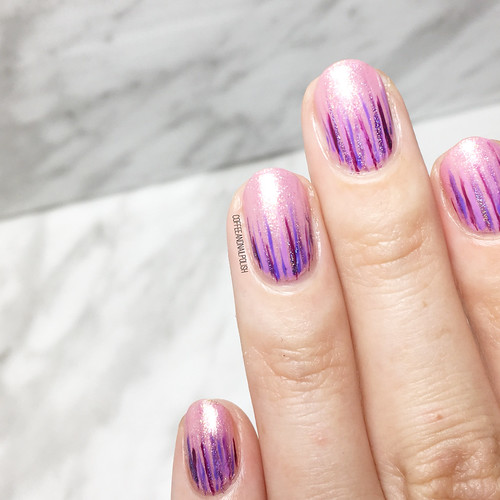
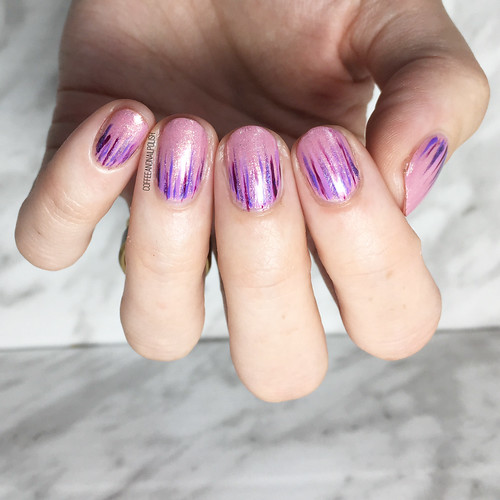
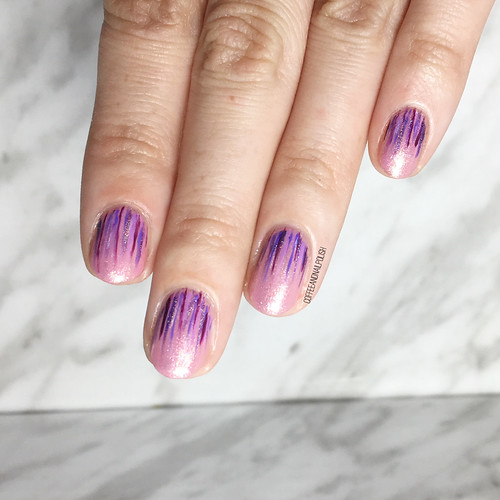
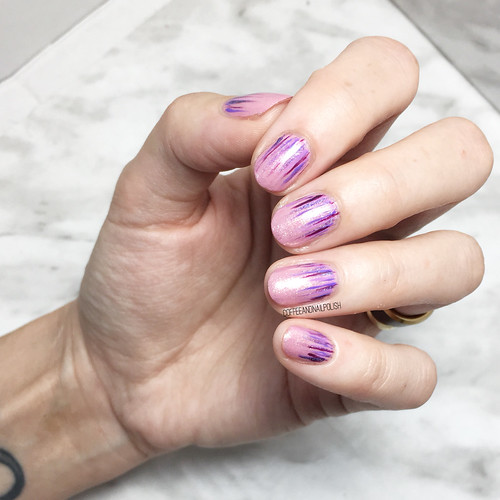
For my base, I applied two coats of Birthday Girl over one coat of The A-bliss. I then did a whole bunch of Pinterest stalking to see what kind of design I wanted to do overtop my base of Birthday Girl & in the end I decided a Waterfall look was the way to go! Do you remember when Waterfall designs were all the rage? I feel like this design needs to make a comeback!
3C197715-613B-4B6C-8739-90325123C31A

DF26AE0C-B843-43C7-B7C3-D9FD5043AFED

For this look I decided to pick a few purples that I thought would compliment my pink base. Then o used my liner brush from NailStuff to brush thin streaks of polish at my cuticle line, & bam! An low effort design that looks super fancy & fun. Kind of reminds me of sparkling fireworks at the base of my nails which is perfect for celebrating, even if my idea of celebrating is drinking my free birthday drink from Starbucks & playing with the new stamping plates my Mum bought me for my birthday! I can’t think of a more perfect day. ☕️💅🏻

06924BF0-00CA-4581-8459-66D69BCD6AE0

59F2C682-46CF-43FC-8C89-1023165DE1EC

Hope everyone has an amazing day! Let me know what you think about this look & what colour combination you’d love to see me do in a Waterfall look next! 💙
SWATCH SUNDAY — OPI Black Cherry Chutney

BA39FAB2-00B3-4D33-ABE3-CF99FE9708A5

28E28C29-1EB7-4CAB-AF9C-C6556F4D9EBC

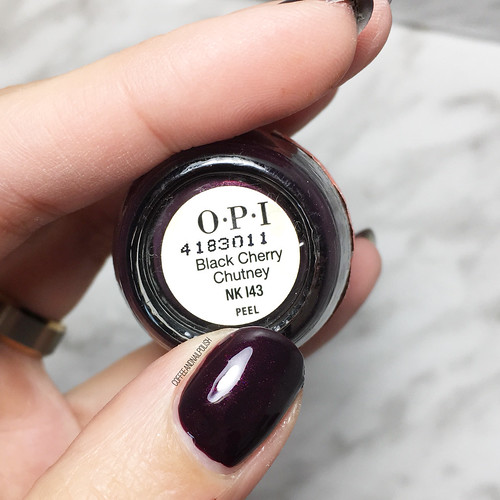
Hello lovelies! Today I’m keeping the Fall mood going with what could quite possibly be the most perfect dark maroon for Autumn: OPI Black Cherry Chutney.

I know everyone has their opinions on what colours & polishes call to them this time of year, but I don’t think anyone can deny that maroon is definitely an autumn shade. There are quite a few beautiful picks for this time of year (OPI Every Month is Oktoberfest is one that I see pop up a lot this time of year) & Black Cherry Chutney is one of my favourites.

64C97978-B1B5-4034-9EA7-EB4D5D627DBE

05672104-3DD2-4604-A925-3906433652AA

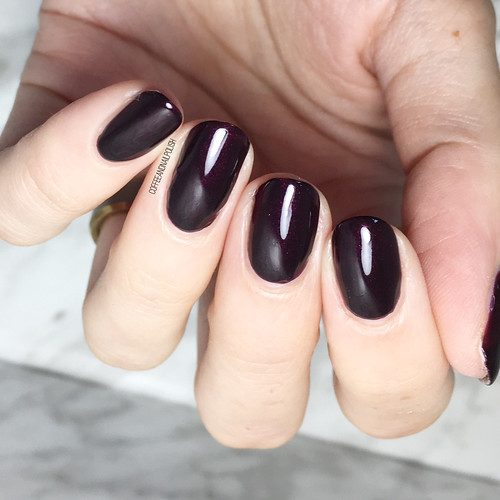
For my swatches I did a base coat, 2 coats of colour & finished with glossy top coat (Essie Gel Setter).

First coat was streaky & not full coverage at all, but with the second coat everything hit perfect opacity. The base is fairly dark, but it’s the shimmer that steals the show. Literally, this is just Fall in the bottle–you can’t deny that it is perfect for a cool October day, snuggled up in cosy socks, with a pumpkin spice latte or apple cider in hand.

2B977870-F0D5-4BDB-A4BB-E3EFF384E850

3E036C5C-E1C2-4E1A-8AD5-D7A8B738707A

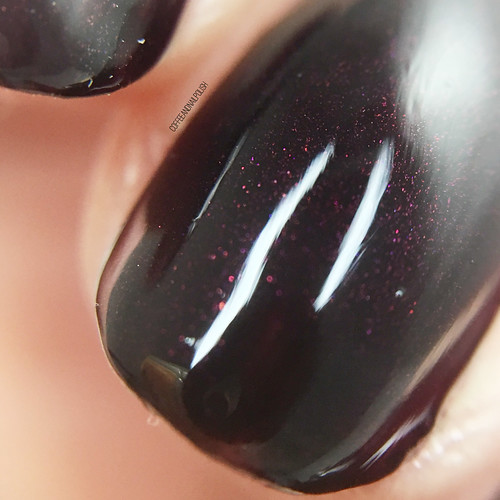
Down below, I have a macro shot of Black Cherry Chutney which shows off the raspberry shimmer.

8159D52F-1AC5-4295-ACDB-FB15999905FA

& for fun, a shot of this manicure in full sunshine, which is where I think it really transforms. You go from these deep vampy nails to BAM!

E078A103-C8FF-4E74-A679-F61F6CBF698E

What do you think about OPI Black Cherry Chutney? 🍂🍁 Do you have this polish in your stash? What shade is your “it’s Fall” polish pick? Let me know all your thoughts down in the comments below!

Shimmery Teal & Purple Half Moons

11D25747-F0D9-4E00-81D5-2627C3FA913E

07346D81-807B-4EA6-A8AF-4ACD5C74CE26

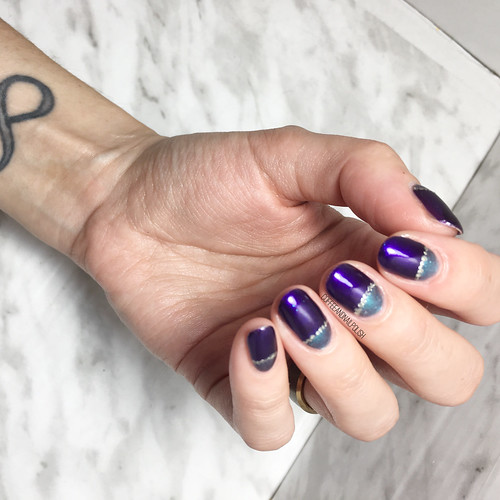
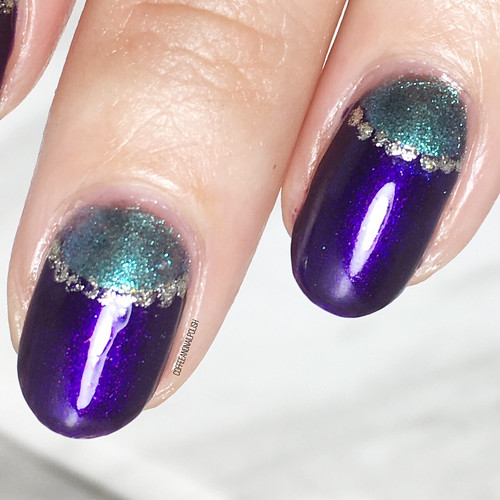
Good morning lovelies & happy Thursday! Hope everyone is having a lovely week so far. Today I’ve got some more Fall nail art to share with you, in a fun jewel toned colour scheme!

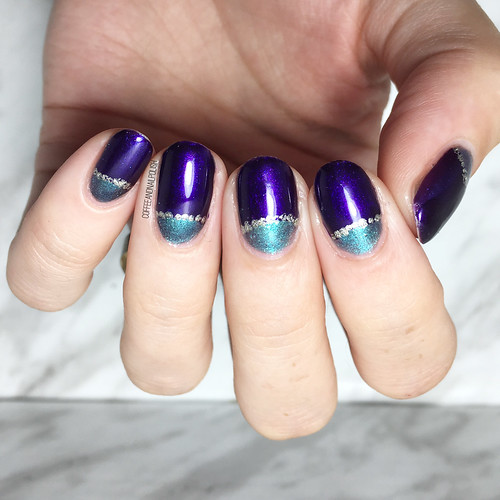
There is something I love SO MUCH about pairing purple & blue/teal together. I just find they compliment each other so well, which is probably why–regardless of the season–it is a go to combination for me. I was already wearing my Swatch Sunday pick for this week, & I wanted something to pair with it in a quick half moon, so naturally I had to reach for a purple to complete the look.

CFD458E9-CA10-4772-B3D1-08492950322A

66015A3D-F6FA-4F0A-B27A-FFE2CC510C4B

BD8E2F71-1B06-4B38-8D93-4D65D8DD1BCF

For this look, the polishes I used were:

  • Base Coat: Gel overlay
  • Top coat: Essie Gel Setter
  • Quo by ORLY Breathable Freudian Flip
  • Essence 25 Arabian Nights (new formula Shine Last & Go!)
  • Essie Jiggle Hi, Jiggle Lo
  • Paper hole reinforcements
  • small dotting tool (Mine are from NailStuff.ca)

.

5ADEE743-46BC-4DC7-96B2-9EF44AE3F1F4

5136D70C-383F-4BCF-8815-F70984BDB16F

EC2C5F96-F1AD-4F55-9C7F-B3CF682371B1

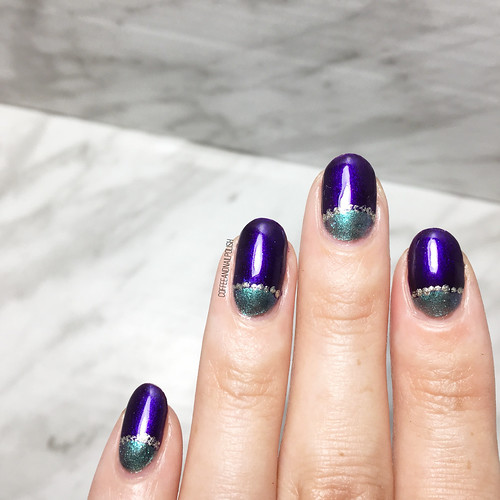
Trying out this new purple from the reformulated Essence line at Shoppers Drug Mart. I’m trying my best not to buy too many new polishes (since, you know, I have a million) but I can’t resist $2.99 nail polish so I picked up this pretty shimmery dark purple called Arabian Nights, & I really think it compliments my base of Freudian Flip really well! I decided to add in some gold as well, so keep it feel luxe, & I think the end result looks super fancy. (Also Arabian Nights applied over my base in only one coat, which made this manicure even quicker to do!)

Feeling like this has a bit of a Mardi Gras vibe as well, although a little bit early for that! But I really do love how fancy these feel, thanks to the jewel tones & gold accents. Of course, the fanciest place I’ll be wearing these is the grocery store, but that’s okay with me! I’ll have the best looking nails at Sobeys!

14BBD6F5-B306-4852-BB3B-B1BC8BB6E818

AA9CDACF-60D4-4208-BAFA-4976BD07F8A3

What do you think about this half moon look? What manicure are you planning on rocking this weekend? Let me know all your thoughts down in the comments below!

Constellations for #GlamnailschallengeAug

E6977ACF-5A94-4F59-8A9C-D551E98E0379

770EA117-F39E-4804-8605-8A97DA8C6271

Hello lovelies & happy Monday! Today I’m sharing another design for #glamnailschallengeaug!

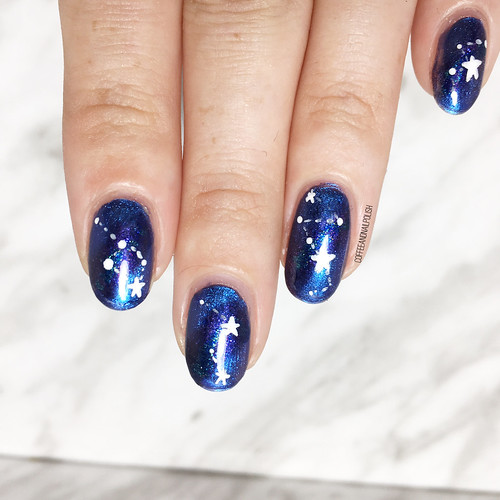
Today’s prompt is Constellations. 🌌 I did galaxy nails just a few weeks ago, so I wanted to do something different enough from that design & try my best to recreate the prompt on my nails. Usually I am such a perfectionist it can cause me to get frustrated when things aren’t “perfect”. This whole prompt has been about painting my nails, stepping out of my comfort zone, & creating nails that are “perfect enough”.

DE58EC5F-3B2D-496F-8C30-399A110F8D08

EC2A6733-F331-47EC-BFFE-C27B73468DF3

For this manicure, the polishes I used were:

  • Base Coat: Sally Hansen Complete Salon Manicure Strengthening Base Coat
  • Base Coat: Quo by ORLY Bonder
  • Top Coat: Essie Gel Couture
  • OPI Miss Piggy’s Big Number
  • OPI Ink
  • OPI The Sky’s My Limit
  • White Acrylic Paint
  • NailStuff.ca 7mm Liner Brush
  • NailStuff.ca Dotting Tool Trio
  • Latex Free Make Up Sponge

78593710-7BD2-4194-AEB0-65BE45AACAF5

FFC0E01D-CB49-41F0-A272-DADBFECAA2CB

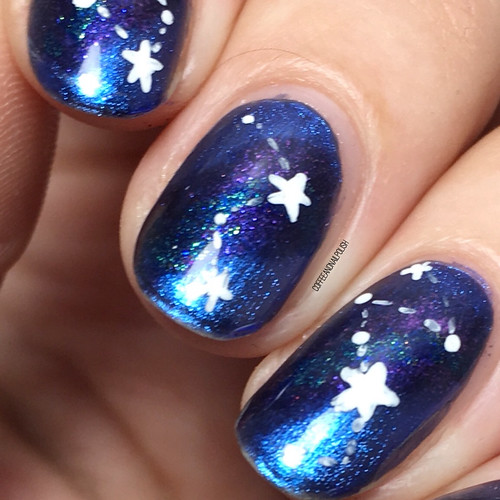
I’ve been experimenting a bit with acrylic paints for nail art lately, mostly when creating nail art in bit unsure about, like his design. I wasn’t sure how I wanted to “attach” my stars to show off the constellations, so I drew my dots & stars first, applied my top coat, & then drew my lines. By putting top coat in between the dots/stars & the lines, I could easily wash off the lines & redraw them without acetone ruining my look.

I probably wouldn’t switch to using acrylic paint for all designs, like my florals, but it certainly works really well for designs like this, & I have a feeling it would also be really useful for more different or advanced patterns. I’ve been going through some older designs & really obsessing over the swirly designs I used to do, so I feel like I’m definitely going to be trying out more of those looks coming up! I’m feeling very inspired.

A2D03432-7656-41DA-AFED-034AFCC7C7C5

E82CCCBD-A26A-4F49-89A7-F18229DBD5A4

I am really really loving how this look turned out, especially in keeping the background not too busy as I normally would in a galaxy/space design. I wanted to kind of create a background that looked like those magnetic polishes I see all over Instagram, but have yet to own. Subtle, definitely there. & I feel like I managed to achieve that, especially using the polishes I picked.

480C91D3-83F3-4480-BDA7-D7DCAC2E4759

What do you think about this look? Are you loving the manicures I’ve been creating this month? Like this post & leave a comment if you’d like to see me do more of these nail art challenges!

& don’t forget to check out the hashtag #glamnailschallengeaug on Instagram to see the other pretty nails posted for the challenge! I just love seeing all the beautiful & different interpretations that we’re coming up for the same idea!

Mermaid Nails for #glamnailschallengeaug

3DA7F91A-CA98-4C30-BB84-F02BCF14961B

ABB287C1-2545-45F2-8644-9BFEF5A2000D

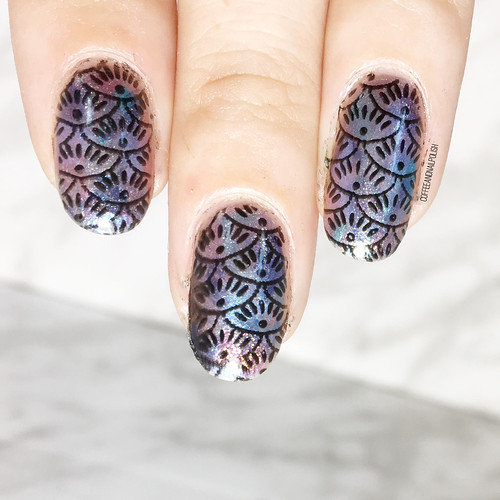
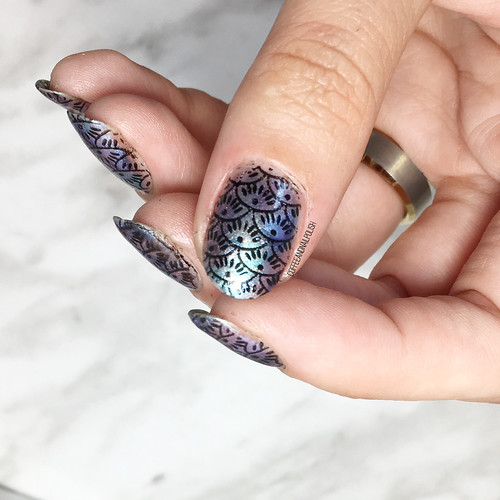
Hello lovelies & happy Wednesday! Today I have another manicure to share with you for the August Glam Nails Challenge! Today’s prompt is Mermaid, which is always a fun design to do. Sadly, I’ve run out of my mermaid pattern nail vinyls, so I decided to stamp my scale pattern onto my nail, since I was pretty sure I wouldn’t be able to freehand them.

I had a pretty specific idea in my mind of what I wanted this manicure to look like, & unfortunately I didn’t have an actual mermaid scale stamping plate, so I went through the plates I do have to find the one which would work best!

4A867BBB-341D-4CAA-A728-D2047D7A84F5

CB9591C1-09CC-4F85-AB61-CB3B9701ADCC

For this manicure, the polishes I used were:

  • Base Coat: Sally Hansen Complete Salon Manicure Strengthening Base Coat
  • Base Coat: Quo by ORLY Bonder
  • Top Coat: Essie Gel Couture Top Coat
  • Essence Across the Universe
  • Essence Mermaid of the Galaxy
  • Essence Guardians of the Unicorn
  • Essence Space Glam
  • Essence Intergalactic Adventure
  • Essence Black in Black
  • NailStuff.ca Clear Stamper & Scraper (gifted)
  • BornPrettyStore stamping plate BP-LO32 (item #23268)

6F1E9417-AF8A-4CA3-9B03-D18C8330FAE8

1C220597-DB87-4B94-B4B7-1845306587AD

Please excuse the remaining mess around my cuticles. I forgot to use my cuticle barrier because I was rushing, & trying to clean up the polish on my fingers was tricky. That’s what you get when you try for a nap time manicure & want to get your nails done before the babes wake up!

But even if my cuticles aren’t perfect, I’m still so in love with how this manicure turned out! The Essence Out Of Space Stories polishes work so well for this fantasy type design. Especially with the duo/multichrome finishes they have.

04A858B6-6C6C-4129-A4EA-6B8FC7A79509

837477B9-6F58-47B1-B2C6-70890ADFBCF2

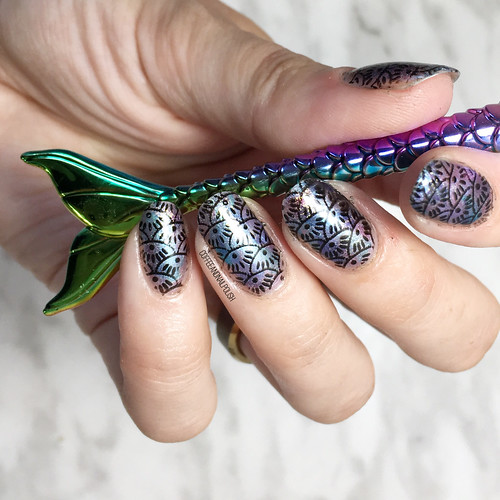
Posing with my mermaid nail art brush because it’s the only mermaid-y item I think I own. I feel like even though I didn’t use a traditional mermaid image, they still came out very mermaid-esque. I actually think I like this pattern even better!

BEBF5EA9-61BB-4B13-A16F-6FF7CE47168B

What do you think about these mermaid pattern nails? 🧜🏼‍♀️ share your thoughts down in the comments below!