Shimmery Subtle Ruffian Nails

PR — Features Gifted Product

Hello beauties & happy Thursday. Hope everyone is having a good week so far. I had a very exciting week because I received the most amazing PR package from Sally Hansen Canada featuring 4 shades from their Miracle Gel Holiday 2022 collection. I’m sure I’ve said it before, but Sally probably makes my favourite Holiday collections, & I always feel so lucky when I receive any PR from them this time of year.

I have a fun unboxing Reel on my Instagram if anyone wants a sneak peak. Swatches are coming this Sunday!

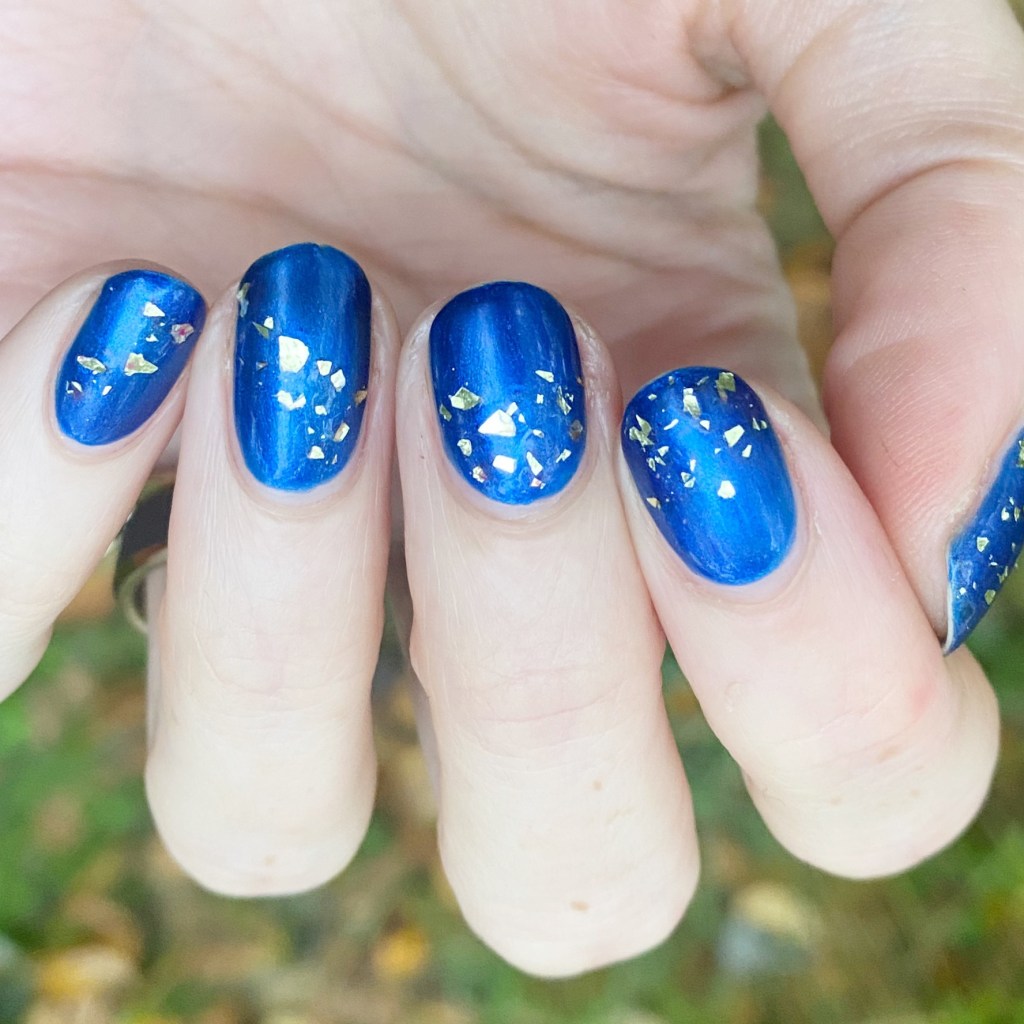
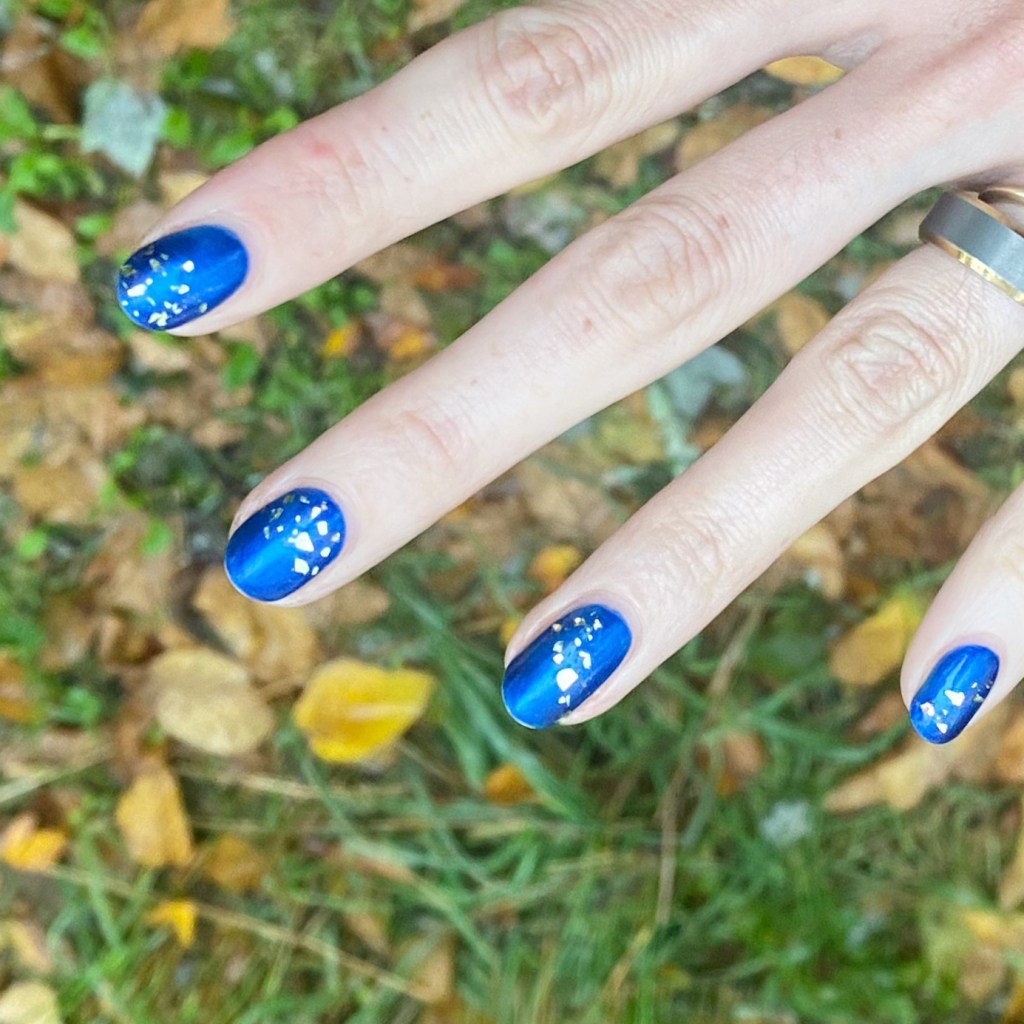
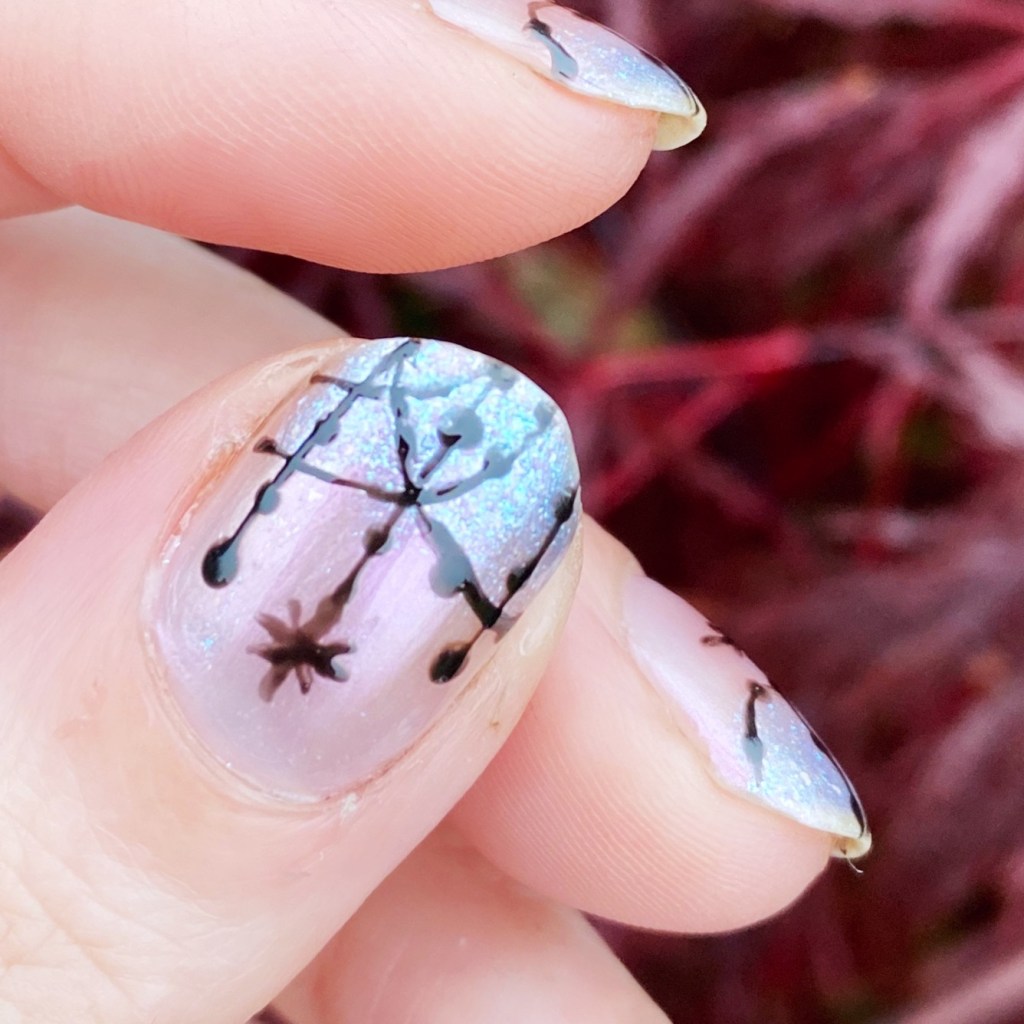
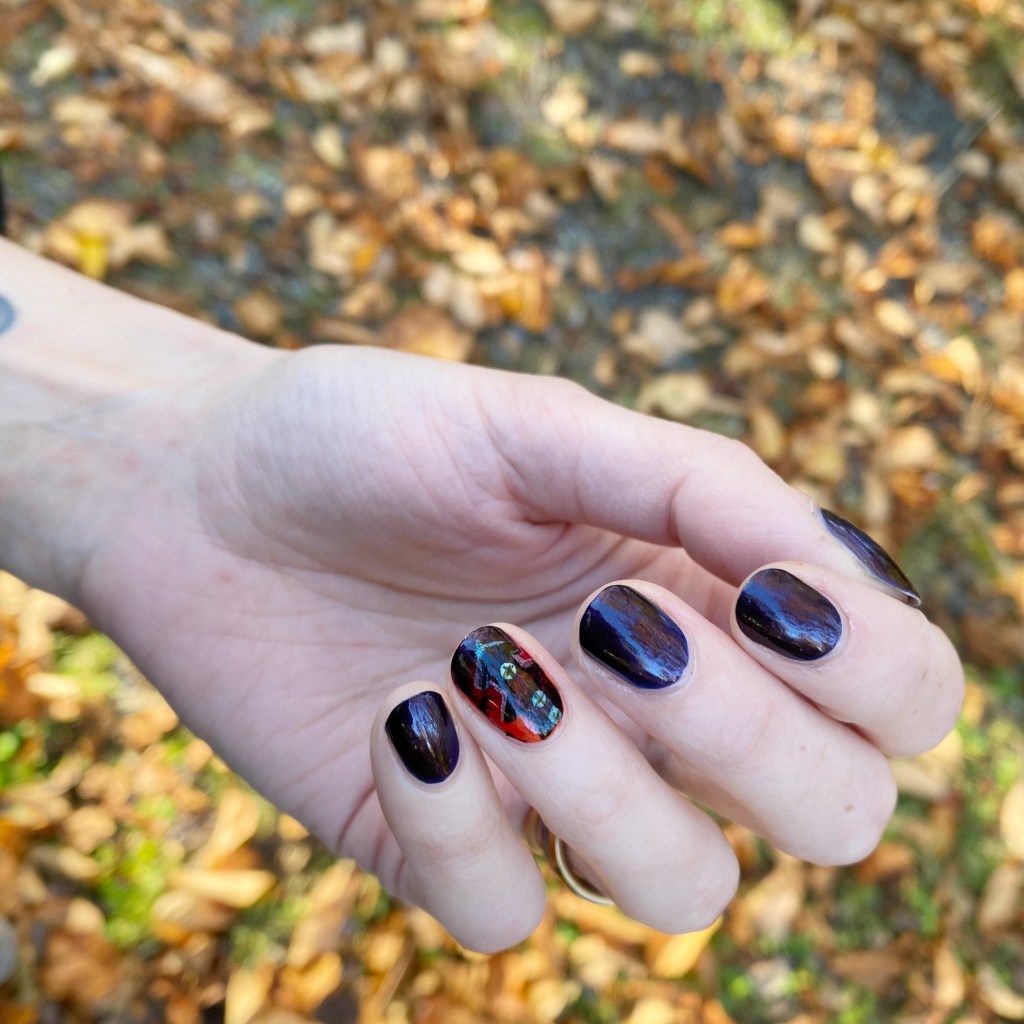
In the meantime, I had to try out one of the shades I received, & decided to use as the base for this shimmery, & subtle, ruffian nails.

The polishes I used for this manicure are: 

  • Base Coat: Essie Hard To Resist Glow & Shine 
  • Top Coat: Sally Hansen Insta-Dri Anti-chip Top Coat
  • Sally Hansen Miracle Gel Shine Bright Like a Menorah (Merry & Bright Holiday 2022 collection) •pr sample•
  • Sally Hansen Miracle Gel Garnish Attention
  • Sally Hansen Miracle Gel Unicorn Top Coat

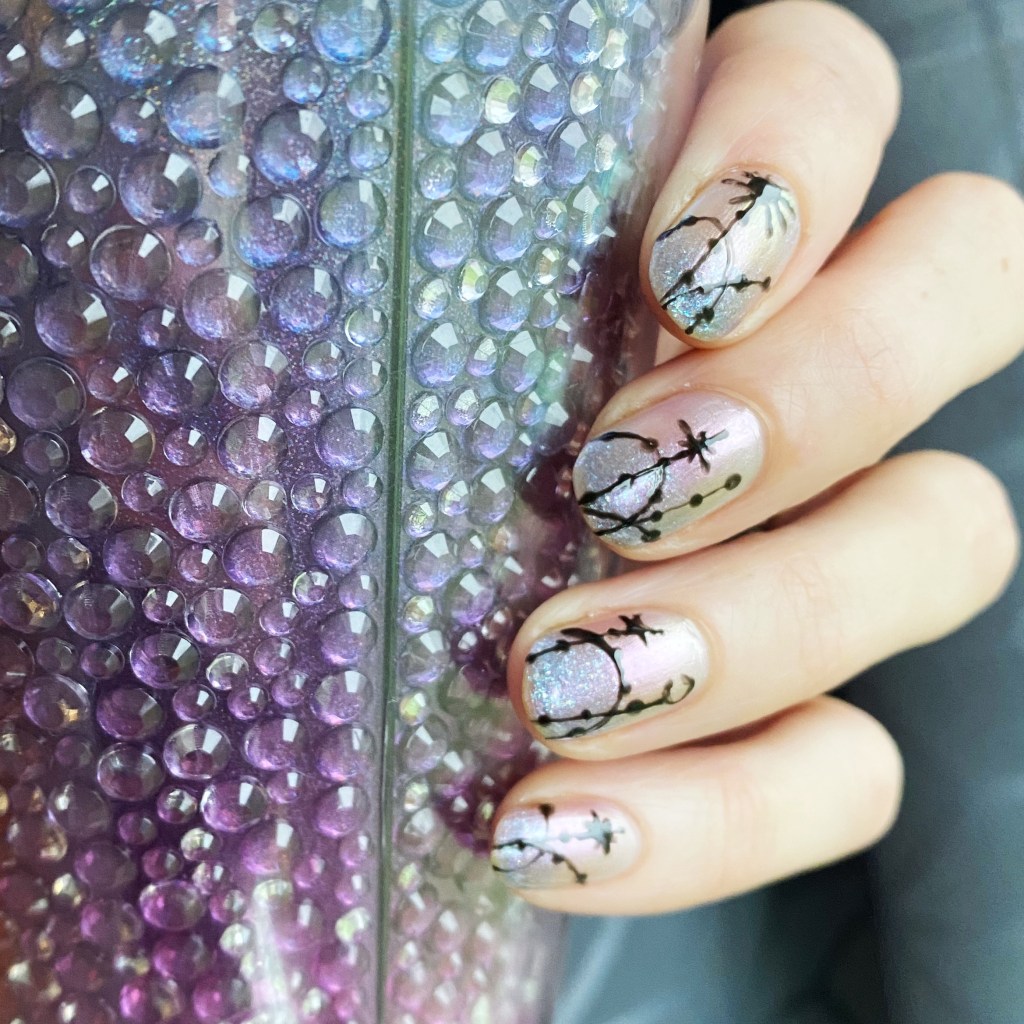
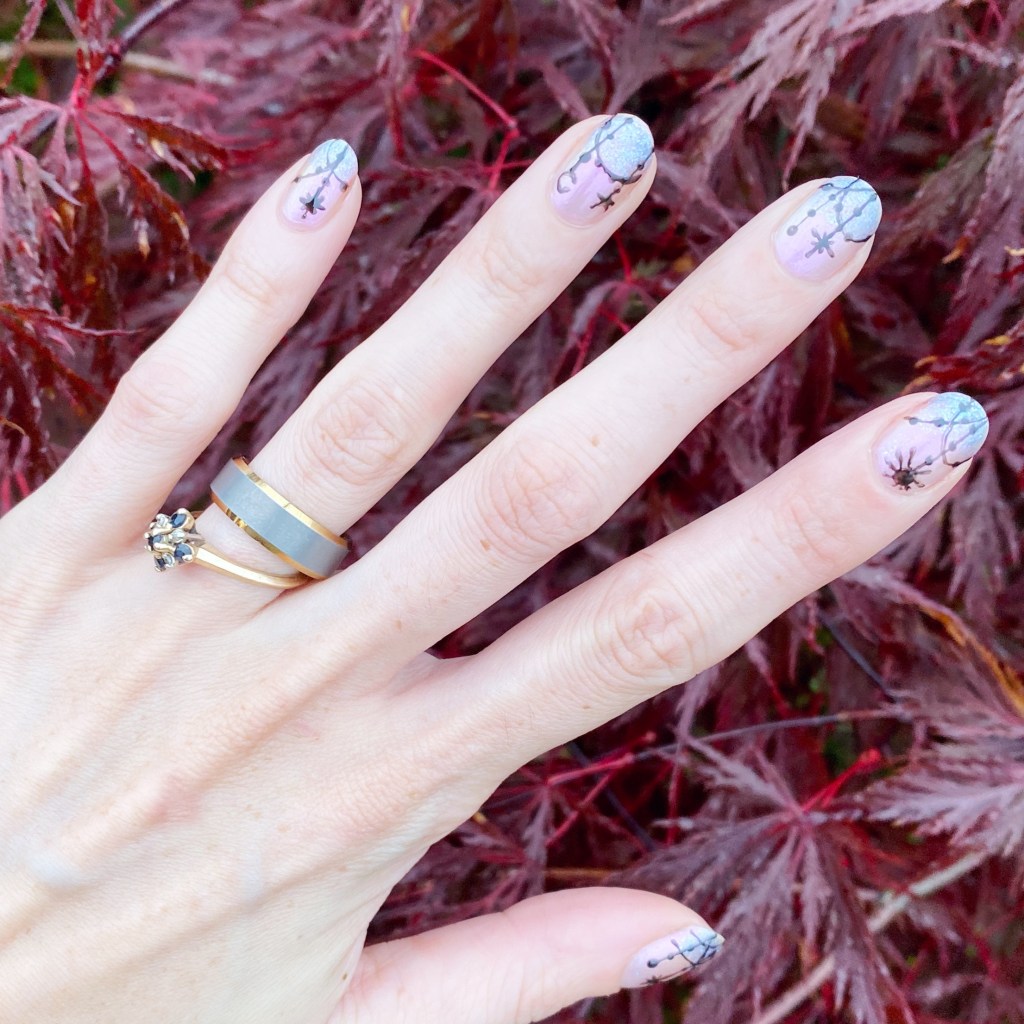
Another super simple look that has a very striking effect — that would be perfect holiday party nails. Listen, I don’t have a holiday party to go to, but that doesn’t mean my nails can’t look like I do! & I know lots of people do, & will be looking for nail polish/art ideas.

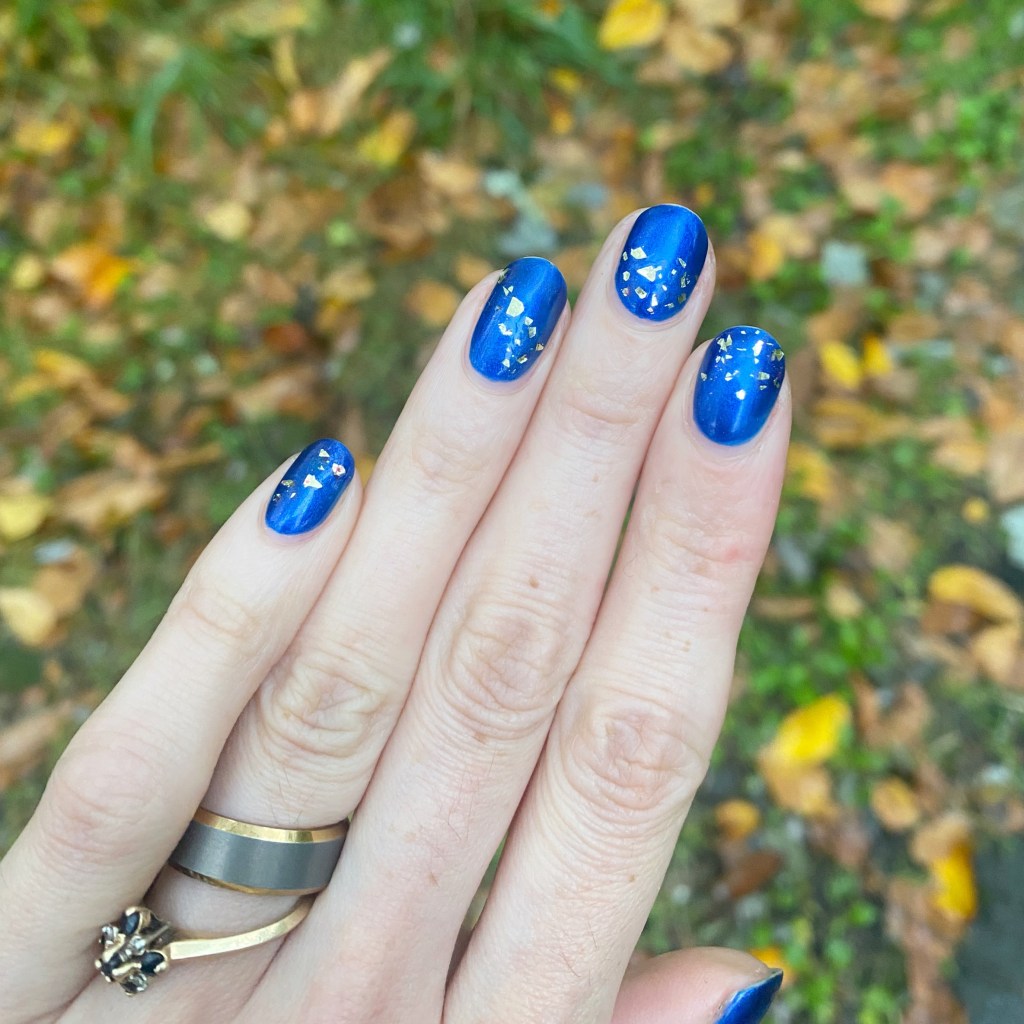
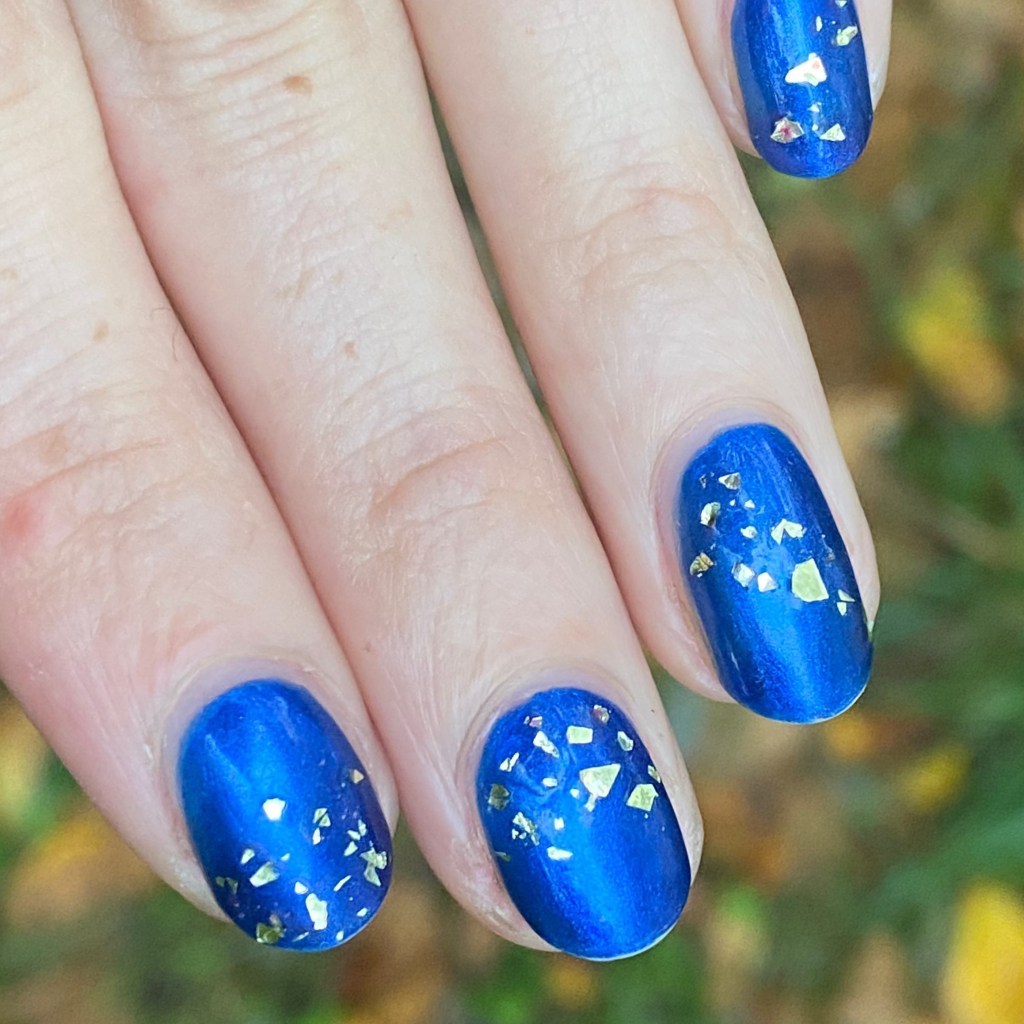
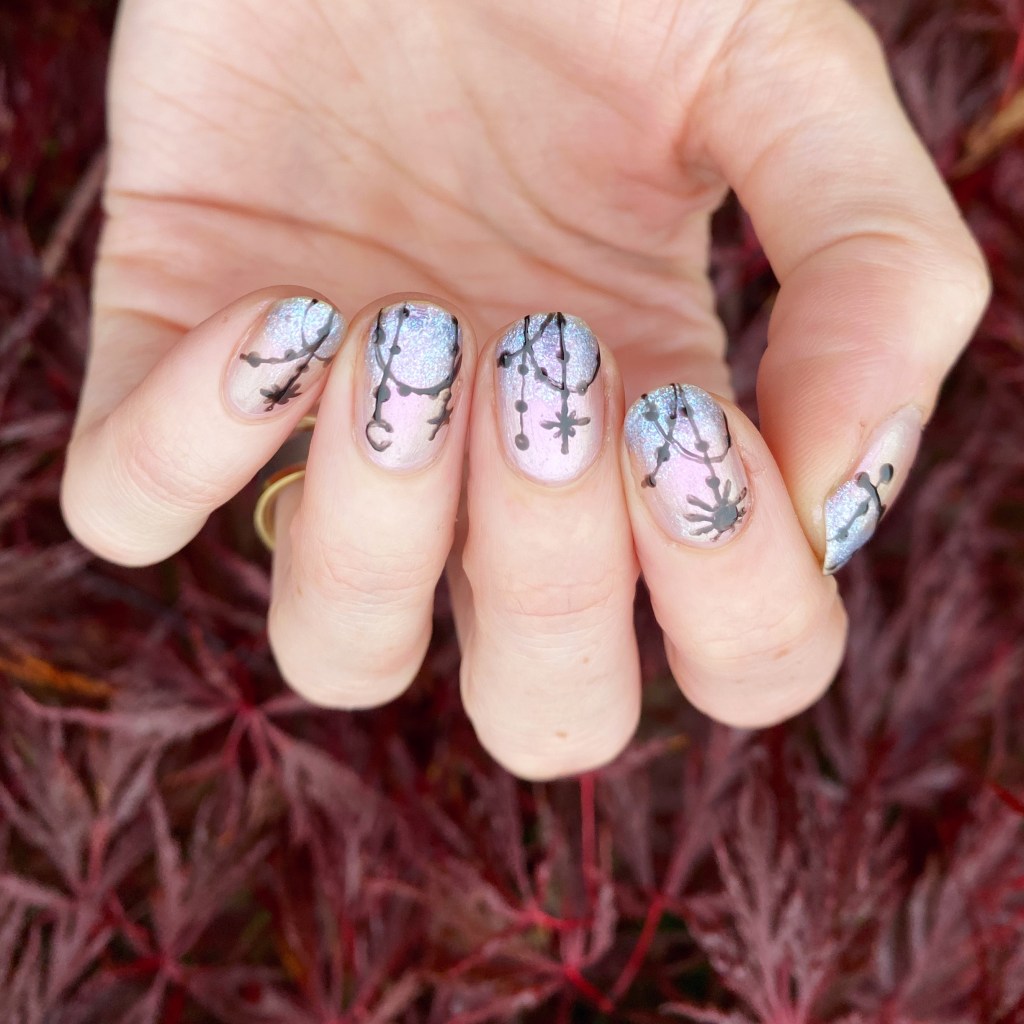
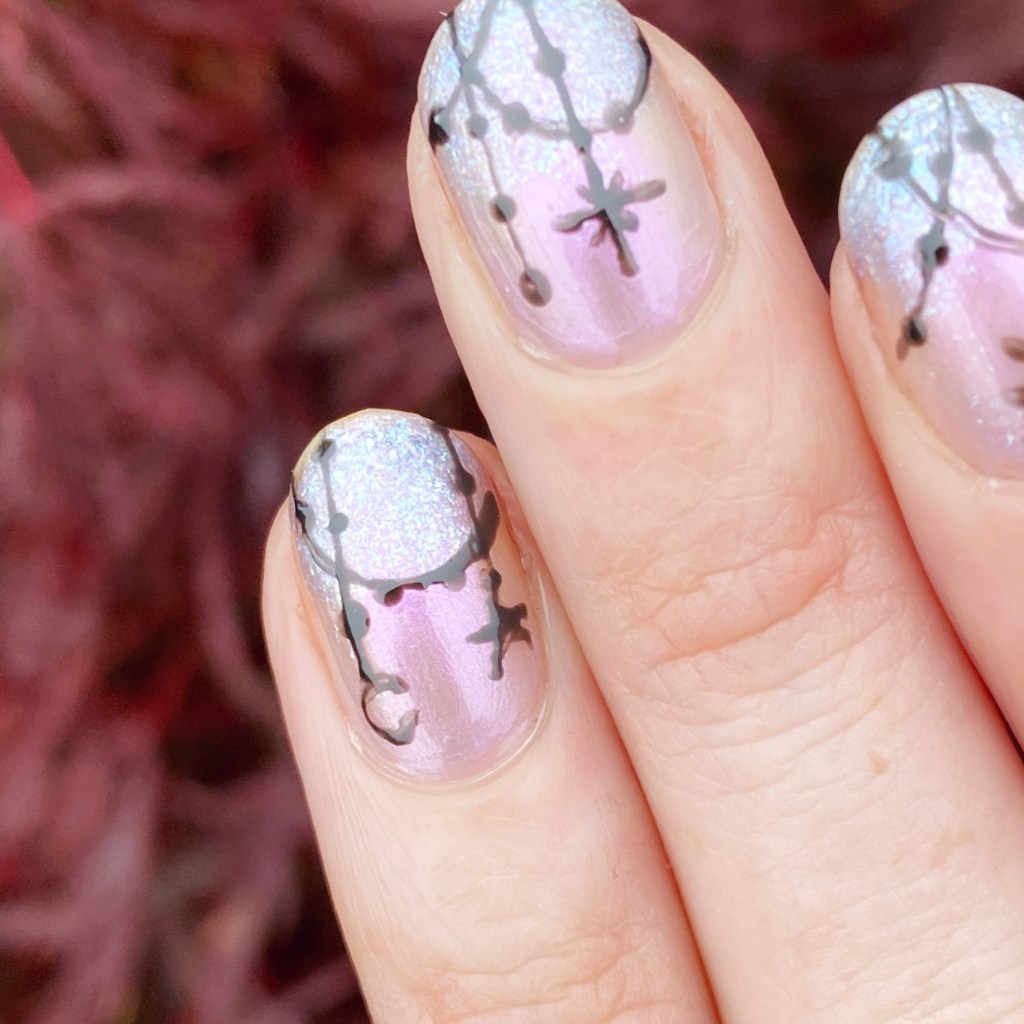
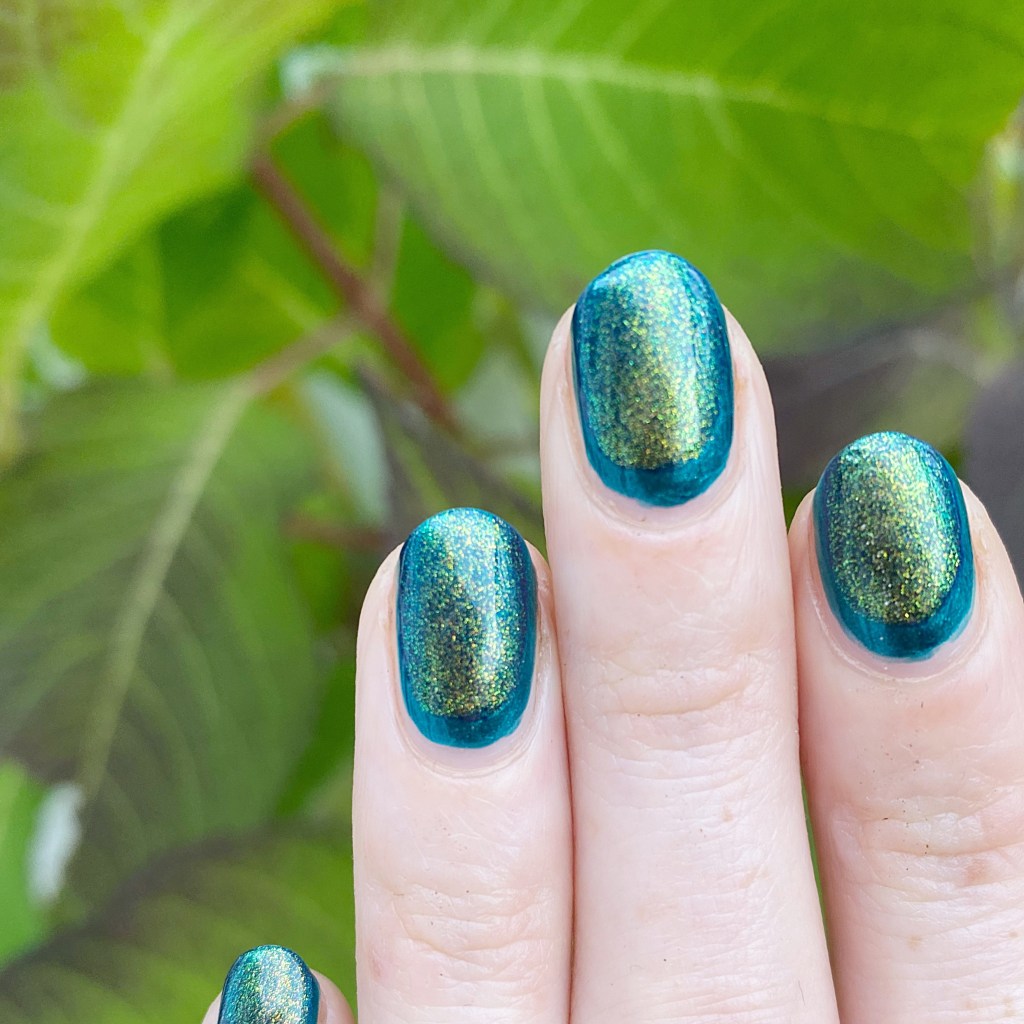
The most difficult part of these is getting that second rounded swipe. I find the Miracle Gel brushes can be a bit trickier for that, but only because my nails are pretty thin & small, & they are very wide so they almost cover too much of the nail! Just takes a bit of practice, but if you get it right… well, it looks pretty beautiful. & the subtle ruffian effect is a perfect touch of nail art. You could also do the opposite, & put the glitter as the base, which would also have a similar peek-a-boo subtle look.

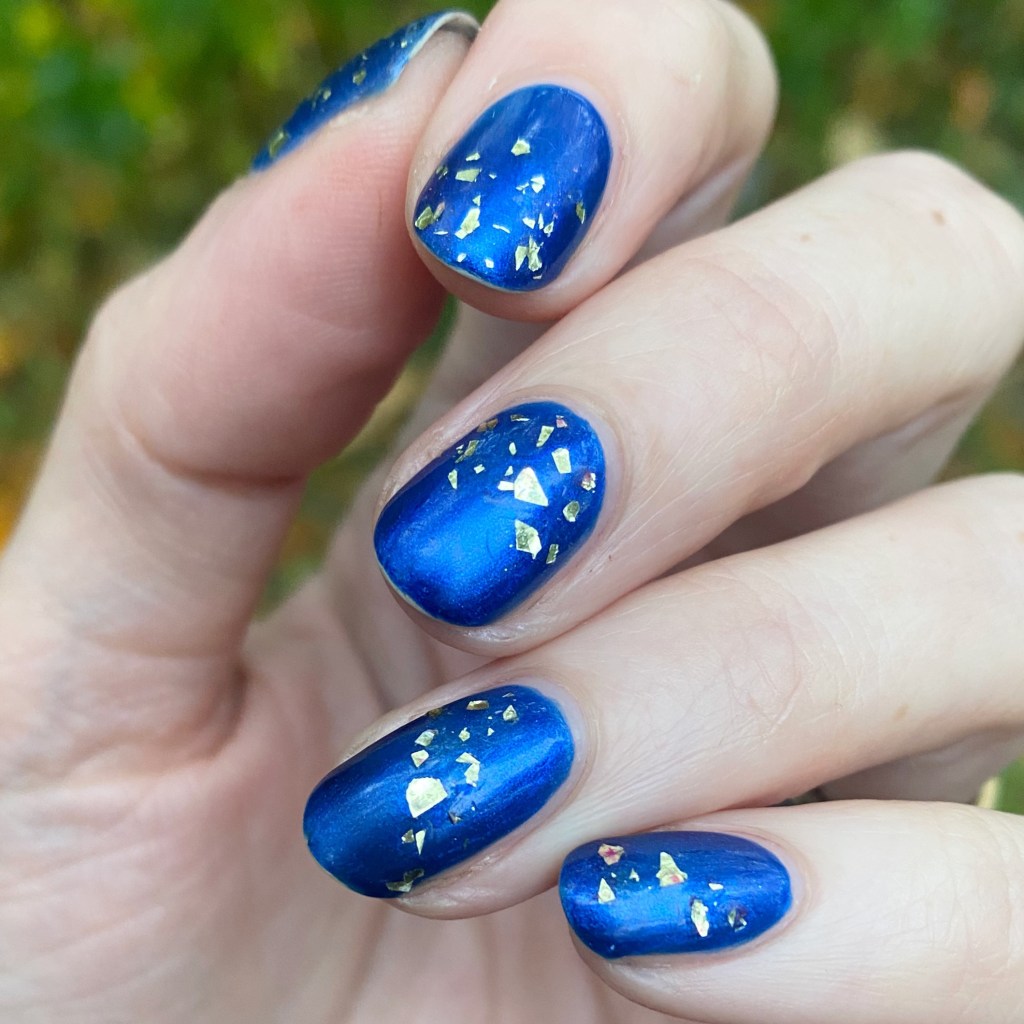
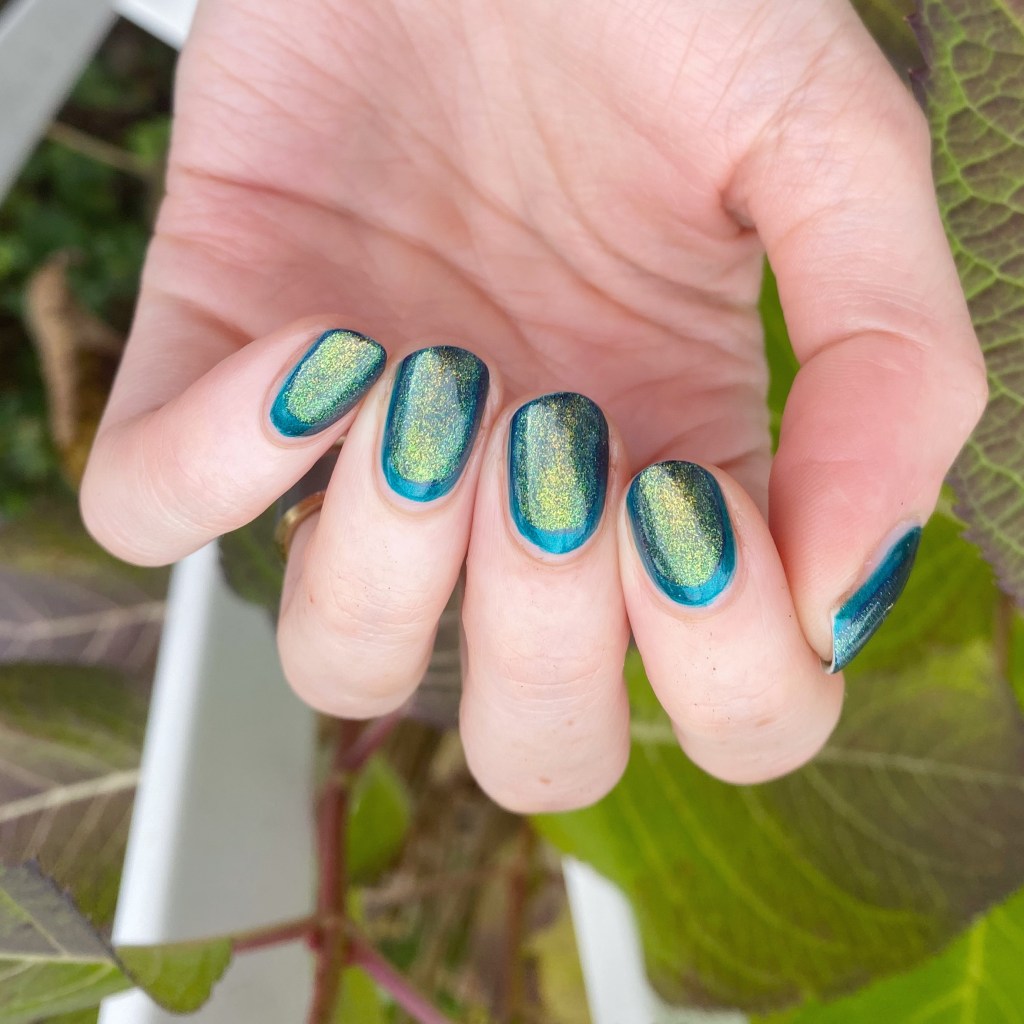
What do you think about this subtle shimmery ruffian look? I really like how the combination turned out, & it’s a fun look to wear! If there is one thing about the cold, dark months of late-Autumn/Winter I enjoy, it’s that there is no better time to pull out all the pretty dark sparkly shades that have been hiding in my stash untouched for months! So expect a lot more shimmer & sparkle on this blog!

It’s long overdue.

Have a fantastic Thursday!

Icy Blue & Gold Glitter

Good morning lovelies & Happy Tuesday!

I can’t believe we’re a full week into November—& I’m not going to lie… it’s been quite the week. Post Halloween I ended up with the stomach virus my kids had, all while preparing for the last couple days at my jobs. Hence why it’s been extremely quit. But I’m feeling better, & have a crazy amount of free time on my hands, so how about some nail art!

Todays it’s an old favourite nail art technique: glitter placement. I’m also wearing a nail polish I haven’t ever worn — the new formula of Sally Hansen Pacific Blue.

The polishes I used for this manicure are: 

  • Base Coat: Essie Hard To Resist Glow & Shine 
  • Top Coat: Sally Hansen Insta-Dri Anti-chip Top Coat
  • Sally Hansen Xtreme Wear Pacific Blue (the new formula)
  • Essence Cosmetics Steeling the Scene
  • Small dotting tool (I always use mine from NailStuff.ca — Dotting Tool Trio)

Okay, so first off: I know I’ve talked a lot about how mad at Sally Hansen I am that they replaced the original amazing & flawless Pacific Blue, & I still am because they messed with perfection. BUT I won’t lie — this new version, as a separate polish on it’s own, is beautiful & frosty, & a great late Fall/Winter polish. It kind of reminds me of China Glaze Frostbite, which means I might have to do a comparison post soon!

Also this bottle of Essence Steel-ing The Scene has been in my stash since almost the beginning, & it still remains my go to for a nail art look like this. I’ve bought other shard glitters over the years, but I always seem to go back to this beauty. It’s a classic, in my opinion. But you can’t argue with how pretty the look is. & if you’re already thinking about those holiday party looks, this is an easy one you can do with minimal effort, in any colour scheme you need!

November is such a weird time for nail art — I feel like I struggle with it every year. But with some open days ahead of me, & time to fill, I’m hoping to get creative & show off some fun nail art looks in this pre-Christmas season. Let me know if they’re are any nail art looks you’re dying to see, & I’ll try my best to make wishes come through!

Have a lovely Tuesday.

GLAM NAILS CHALLENGE OCTOBER — Skull 💀

Hello beauties, & happy Wednesday!

I hope everyone’s week is going by wonderfully. Mine has been… interesting but I’m excited to show off these fun nails for the second last prompt of Glam Nails Challenge October: skull.

I was especially excited because it gave me another chance to use the Color Club Skull stamping plate I purchased last year.

The polishes I used for this manicure are: 

How fun! I just picked up this bottle of OPI Vampsterdam at Marshall’s the other day, so I was pumped to wear it right away. A lovely Autumn shade. & a great base for these skulls.

What do you think about these skulls? Can you believe how quickly Halloween is approaching?! Only one more prompt to go before this month’s challenge is over!

Have a lovely Wednesday.

GLAM NAILS CHALLENGE OCTOBER — Witch

Hello lovelies & happy Wednesday. I hope everyone is having a lovely week so far. Can you believe it’s less than 2 weeks until Halloween? I’m super pumped. I almost have both kids Halloween costumes figured out, as well as my own, & we just have to get the house fully decorated. I’m very excited

I’m also excited to share my nails for the next Glam Nails Challenge October prompt: Witch. Originally, I was kind of stumped on what to paint on my nails for this prompt, because I didn’t want to go to literal with the prompt. So I ended up going with what I would wear on my nails if I were embracing my witchy vibes, inspired by this look I saw on Pinterest.

The polishes I used for this manicure are: 

  • Base Coat: Essie Hard To Resist Glow & Shine 
  • Top Coat: Sally Hansen Complete Salon Manicure Fast Dry Top Coat
  • Sally Hansen Xtreme Wear Iris Ilusion
  • Sally Hansen InstaDri Cosmic Blu
  • Sally Hansen Miracle Gel Black-O
  • NailStuff.ca 7mm detail brush

I really wanted to go with this iridescent gradient that would almost look like I had magic coming out of my finger tips. & then I hand painted the cool pattern using my 7mm detail brush. & it turned out pretty awesome — minus my pointer where I had a bit of an oops & had to think quick. It’s supposed to be a sun, but it kind of looks like a spider, but that’s also Halloween-y so I’ll take it.

I had a few different “witchy” ideas for my nails but I really like how this one turned out. It’s a bit lighter than most witch designs, I feel, like more of a Willow from Buffy kind of vibe. &. I really like that.

What do you think about my witch design for Glam Nails Challenge October? Do you like this kind of abstract interpretation of the prompt, versus being more literal? Let me know what you think down below, & let me know if you’re dressing up for Halloween this year… & as what! & check out the other Witch designs on #glamnailschallengeOct.

Have a lovely Wednesday!

GLAM NAILS CHALLENGE OCTOBER — Haunted House

Hello lovelies & happy Thursday! I hope everyone’s week is going well. Mine has been busy — as evidenced by the fact I’m late, again, on posting my next prompt for Glam Nails Challenge October! But here are my fun Haunted House nails for the next prompt of Glam Nails Challenge.

I decided to go with an accent nail vs a full manicure, mostly because I was short on time. But I’m so happy with how my accent nail turned out, & how awesome my spooky haunted house turned out!

The polishes I used for this manicure are: 

  • Base Coat: Essie Hard To Resist Glow & Shine 
  • Top Coat: Sally Hansen Complete Salon Manicure Fast Dry Top Coat
  • Sally Hansen Complete Salon Manicure Fiery Island
  • Sally Hansen CSM Warm Regards
  • Sally Hansen CSM Red Over Heels
  • Sally Hansen CSM Belle of the Ball
  • Sally Hansen Miracle Gel Blacky-O
  • Sally Hansen Miracle Gel Yellow Taxi
  • NailStuff.ca 7mm detail brush
  • Latex Free Make Up Sponge

I know I talk a lot about how much I love when a nail design turns out, but this is one of those nail art looks that came together so perfectly that I feel really good about how they turned out. While I like to think that my freehand skills have gotten better, when it comes to some nail art looks I still worry about the end result.

These definitely gave me the spooky Halloween vibes I was craving. Plus I love the dark shades I picked to go with this design. Also, a sneaky shot of my cinderella hand, which doesn’t get a lot of nail polish love. I matched with an accent nail on that hand, but went with a spooky tree & graveyard scene, which I think pairs perfectly with my haunted house.

What do you think about this fun spooky nail art look? Let me know all your thoughts on these October nail art looks I’ve done so far, & share down below which one has been your favourite so far!

& don’t forget to click #glamnailschallengeoct to see all the other fun nail art looks.