Earth Day nails with #thenailartsquad


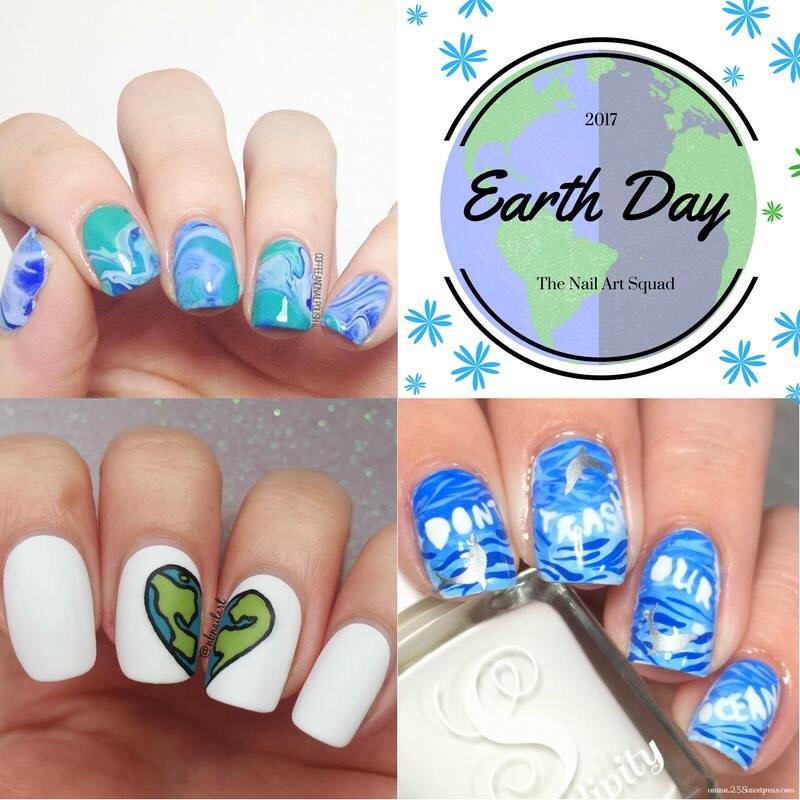
For Earth Day 2017 I joined up last minute with a couple members of #thenailartsquad–@25sweetpeas & @nbnailart–for some Earth inspired manicures! Each one of us had a cute, unique take on the idea & all the designs turned out so awesome! 

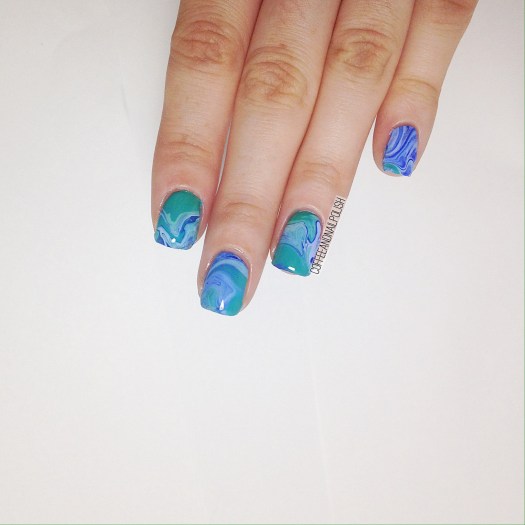
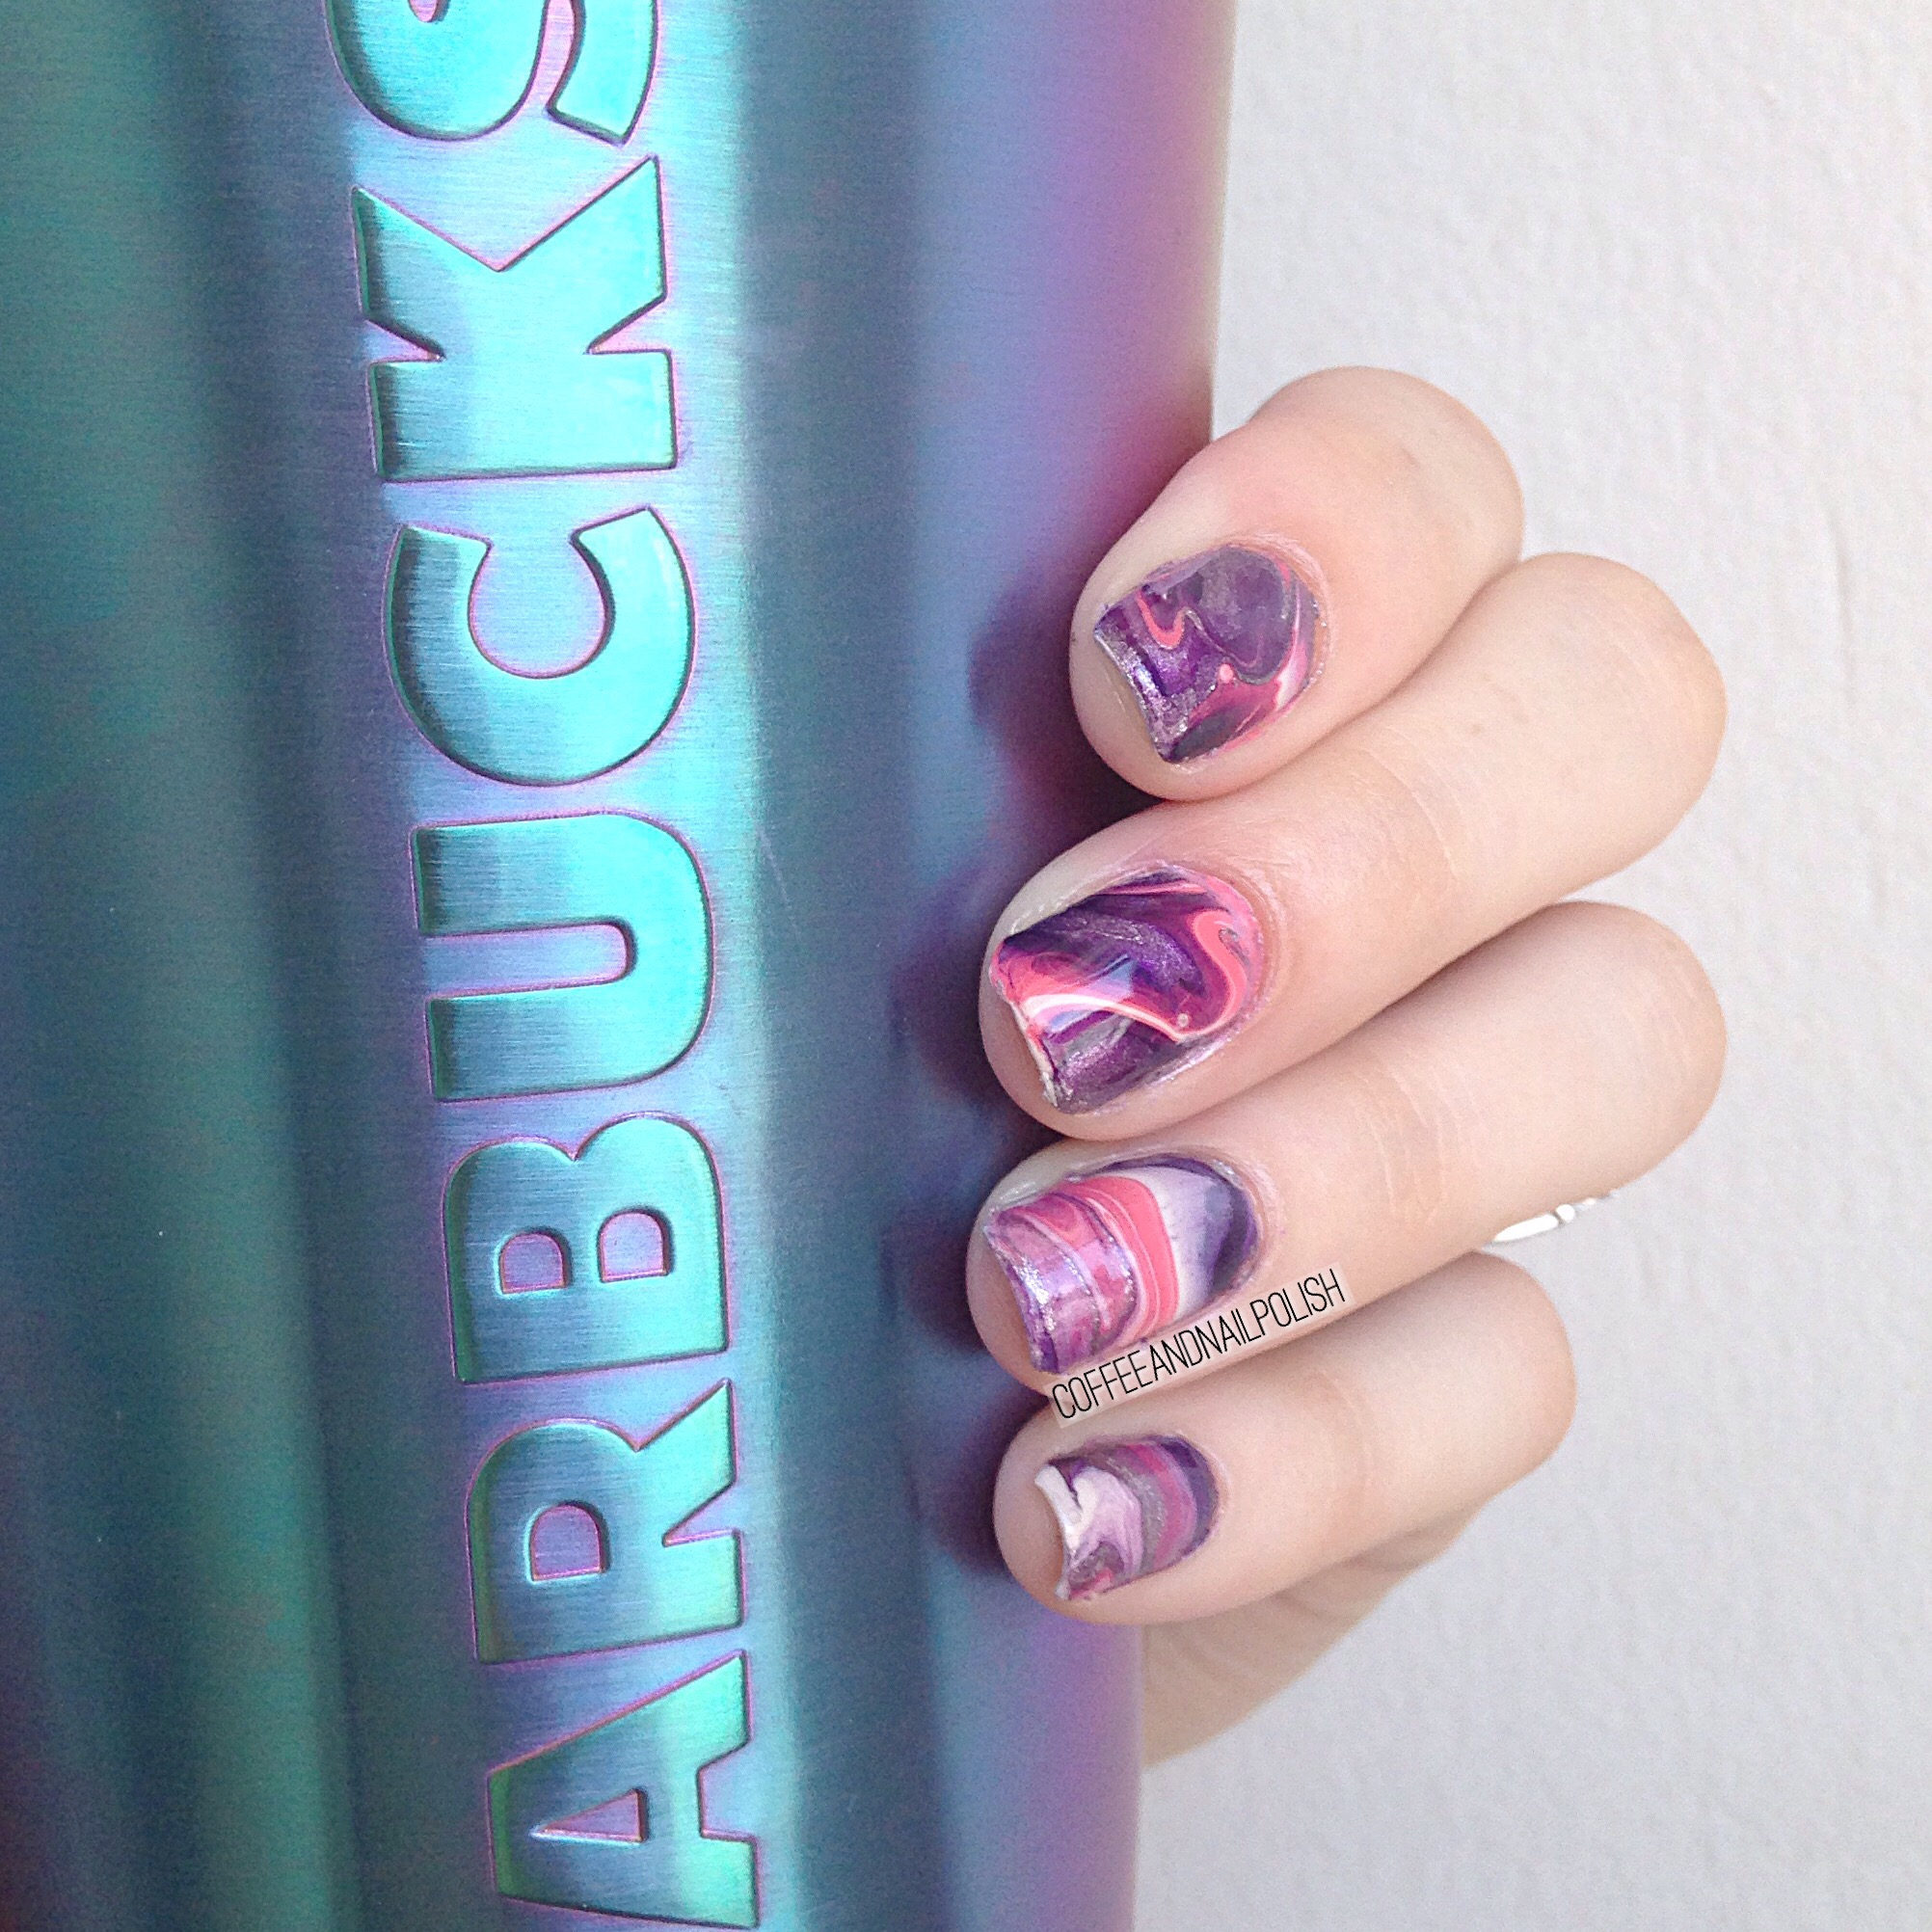
For my Earth Day inspired manicure, I had an idea to create a drip marble that would look like the Earth, & I’m so happy with how it turned out! 

For this manicure, I used:

  • Base Coat: Perfect Formula Pink Gel Coat 
  • Top Coat: Cutex Quick Dry Coat. 
  • Sally Hansen X-treme Wear Boho Blue
  • Sally Hansen X-treme Wear Babe Blue
  • Sally Hansen X-treme Wear Kiwi Bikini
  • Sally Hansen X-treme Wear Jazzy Jade
  • Silicone Craft Mat


To achieve this design, I used the same technique as my last drip manicure. The more I practice this technique, especially applying the decals, the easier it gets! Also I think it actually looks like the Earth, which makes me so happy! I wasn’t sure if this idea was going to turn out, but it actually worked so well! 

What do you think of this Earth inspired design? Let me know in the comments below. 🌎 and don’t forget to check out #thenailartsquad on Instagram to see these designs, as   well as all past collaborations! 

Unicorn Inspired Gradient 🦄

So by now you’ve probably been introduced to the Unicorn Frappuccino that Starbucks released yesterday. I know it completely blew up my Instagram & Facebook feeds… everyone & their grandma was showing off the drink on social media. Personally I have no interest in trying it–not a fan of frapuccinos (too much sugar), I can’t have any dairy so no whip cream, & there isn’t even any coffee in it! But that doesn’t mean I don’t want to join in the unicorn fun, so I took inspiration from the colours of the drink to create a Unicorn inspired gradient! 

For this manicure, I used:

  • Base Coat: Perfect Formula Pink Gel Coat 
  • Top Coat: Cutex Quick Dry Top Coat
  • Sally Hansen X-treme Wear Orchid Around
  • Sally Hansen X-treme Wear Royal Hue
  • China Glaze Fairy Dust
  • Latex Free cosmetic sponge (purchased at Dollarama)
  • Born Pretty Store Peel off Liquid Tape

It’s been so long–too long–since I played around with a gradient, so I’m a little rusty. But I’m pretty happy with how these turned out. The colours might not exactly match its inspiration, but I thought it was a good attempt. It would have been more fun if I had one of those cute unicorn stencils (I think they’re by Twinkled-T) to add a holo glitter unicorn on my ring finger, but with a little Fairy Dust added it still has that magical feel. 

Have you tried Starbucks Unicorn Frappuccino yet? Does it taste as magical as it looks? Part of me wants to order one just to take a picture of it with my nails (because I’m silly like that) but that would be a serious waste of money that could be better spent (on coffee, for example). Oh well, when you can’t drink it, why not wear it in your nails!

What do you think of this gradient? Do you see the inspiration? Let me know your thoughts in the comments below! 🦄

Mani Swap with @LoveforNails01


Today Im excited to share another mani swap with one of my fellow Instagram nail art girlies. This time I teamed up with Hannah (@lovefornails01)! For this swap, she recreated my recent cactus design, & I recreated her Negative Space deep V tape mani.

For this mani, I used:

  • Base coat: Perfect Formula Pink Gel Coat
  • Top Coat: Cutex Quick Dry Top Coat
  • China Glaze Turned Up Turquoise
  • Sally Hansen Terra Coppa
  • Snail Vinyls Single Deep Chevron nail vinyls
  • Born Pretty Store thick striping tape.

As soon as I saw this design, I knew I had to try & recreate it. I love the combination of the turquoise with the bronze-y colour. I’m a huge fan of Art Deco Tape manis, but I’m been nervous to try them on my own. I was really excited to team up with Hannah so I could give her version a try!

Hope you love this swap as much as I do! I have a few more swaps coming up which I’m really excited for, as well as some Easter designs. 🐥🐰🥕  So stay tuned!

Mani Swap with @teenynails

It’s been a long while since I teamed up for any Mani swaps, so I have a few swap collabs coming up with some of my favourite girls on Instagram.

Up first, I have a swap with the very talented @teenynails. For this Swap she recreated my leopard patterned half moons & I had to recreate her beautiful purple vintage floral!

The polishes I used for my recreation were:

  • Essie Play Date
  • CND Crimison Sparkle
  • Kiss Nail Art Striper in Black
  • Kiss Nail Art Striper in White
  • Sally Hansen I ♥️ Nail Art pen in White 
  • Essie Brides No Grooms
  • My Beauty Spot unnamed pink
  • Essie Off Tropic 
  • Essie First Timer 
  • Cutex Quick Dry Top Coat
  • Small Nail Art brush from Bundle Monster

You know how I feel about floral, & I thought these were so perfect for the Spring-y weather we’ve been having. Plus it gave me an excuse to pull out Essie Play Date again. & these are definitely some of the best roses I’ve done in a while. I just can’t stop staring at them.

What do you think of our recreations? Let me know in the comments below!

And shout out the the lovely @teenynails for joining me in this swap. 💜 Don’t forget to check out her account on Instagram & check out all her amazing nail art!

Drip Marble decals inspired by @SimplyNailogical 


I’ve tried water marbling, & it was… not my thing. I’ve tried drag marbling, & it’s usually hit or miss. But I really love marbled nails, so naturally when I picked up a silicone craft mat I knew I needed to try drip marbling recently done by @simplynailogical.


For this mani I used:

  • ORLY Decades of Dysfunction 
  • Sally Hansen Pretty Piggy
  • Nicole by OPI We Got Beiber Fever
  • Finger Paints Wanna Gogh Dance?
  • ACO by Ardene Base Coat
  • Cutex Quick Dry Top Coat

To create my decals, I started off by dropping my polished of choice onto the mat, starting with my lightest colour (ORLY Decades of Dysfunction) as my base, then continued with my darker colours, & finished with my metallic shade (Finger Paints Wanna Gogh Dance?). Once all my colours were down, I moved my mat around to create my marbled effect. Once I was happy with one decal, I’d let it sit & dry for a few minutes before starting on the next one. When I was happy with the amount of decals I’d made, I left them to Dry for a few hours (around 2 hours).

I’m not going to lie, trying to apply these wasn’t the easiest. I started off by painting my accent nails with a base colour (again I used ORLY Decades of Dysfunction) and let dry. I then peeled off my decal & figured out which part I wanted on my nail, trimming it down to a more manageable size. When I was ready, I applied a coat of my ACO by Ardene base coat & immediately stuck my decal onto the nail. Using a brush dipped in acetone, I cleaned up around the cuticle. This was probably the least fun part–I wish I had better nail art scissors to trim off the access instead! When the decal was fully cleaned up & my cuticles were clean I sealed everything in with top coat to finish. I also surrounded my cuticles in oil to help after all that remover. No one likes wrecked cuticles.

And how does the final result look?

Continue reading “Drip Marble decals inspired by @SimplyNailogical “