GlamnailschallengeOct—Eyeballs

45E86584-C2A4-43FF-9846-30586D4F3276

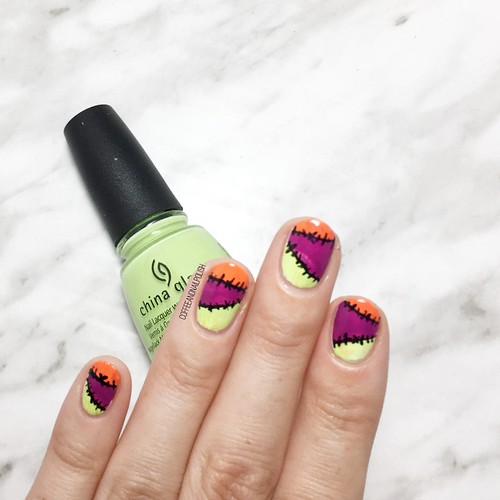
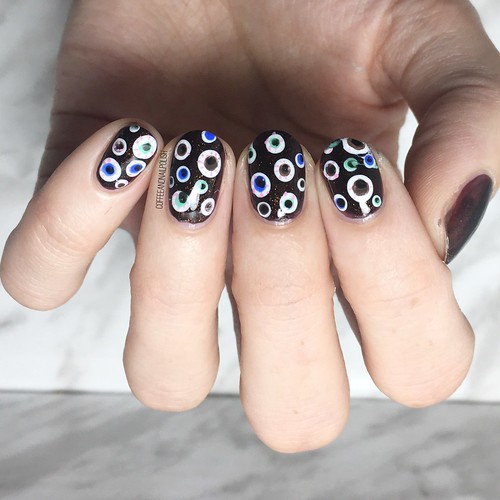
Hello lovelies! It’s time for another prompt for #glamnailschallengeOct: Eyeballs! This look was actually inspired by an old design by Chalkboard Nails, that I found via Pinterest. I thought her look was equal parts cool & creepy, so it would be the perfect look for today’s prompt. 👁

0302440D-DA17-4825-A591-602A797D3EA3

92801428-0BDA-40CE-95DC-31F220E5C65D

For this manicure, the polishes I used were:

  • Base Coat: Sally Hansen Green Tea Bamboo Strengthener
  • Base Coat: Duri Rejuvocate
  • Top Coat: YSL Beauty Quick Dry Top Coat
  • Sinful Colors Leather Loose
  • Sally Hansen MG Get Mod
  • Sally Hansen Xtreme Wear Pacific Blue
  • Essie First Timer
  • OPI How Great Is Your Dane?
  • Sally Hansen Insta-Dri. Jelly Belly Bubble Gum
  • NailStuff.ca dotting tool trio
  • NailStuff.ca 7mm detail brush

.

9F293366-C481-40AF-AAC1-7BC6FA2AD15F

29EA31EF-D27A-4A56-BC48-2887E0E034FA

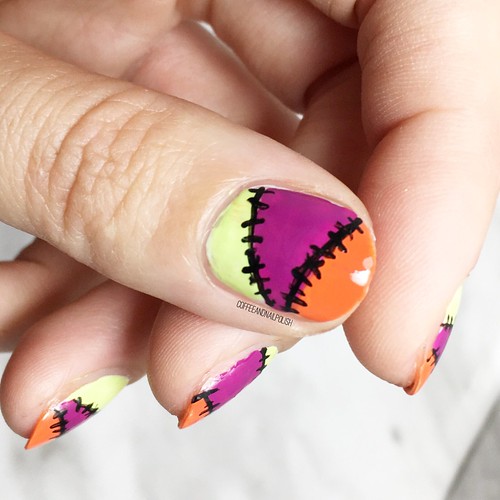
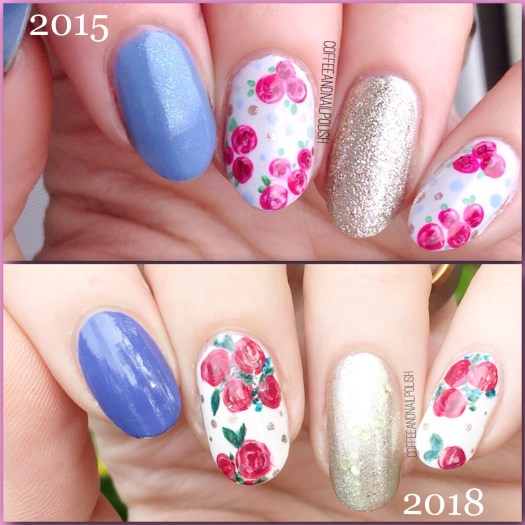
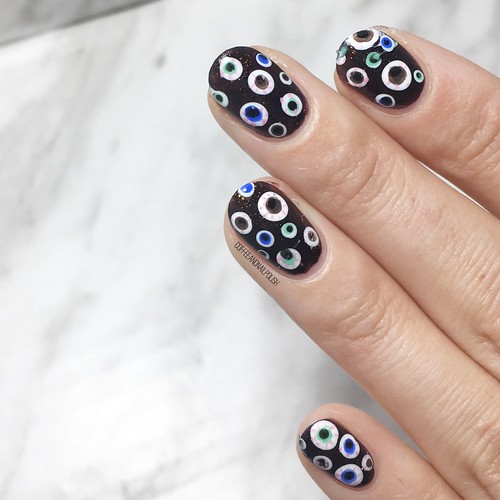
This look was a little time consuming but still a super easy look to achieve. I went through a few different ideas on what I wanted my eyeball design to look like, & this one seemed the most fun (& creepy!) I also was super pumped to pull out Sinful Colors Leather Loose again, because it is such a fantastic Fall shade that I had kind of forgotten about a little bit. That brown with the shimmer–oh boy is it beautiful! & my eyeballs really popped against it.

CDD62548-C564-41DB-9165-33C0F45D1762

4130E624-CECB-4A97-84DC-3171E8BCB04E

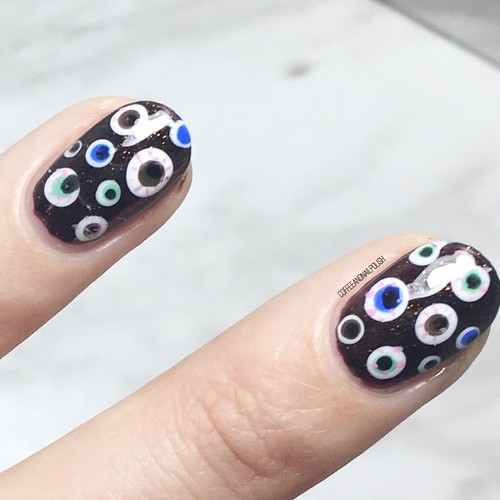
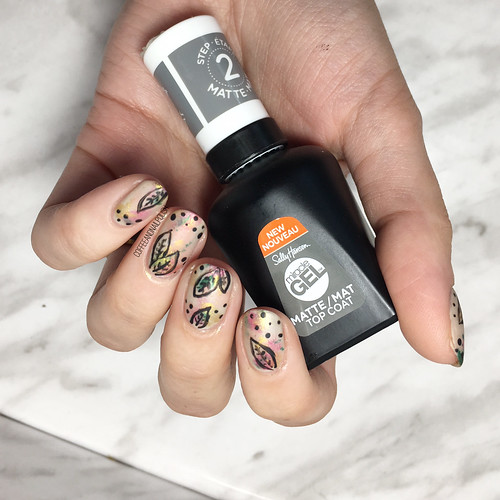
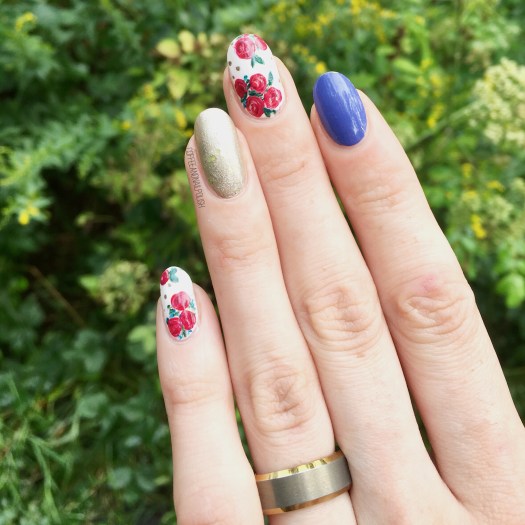
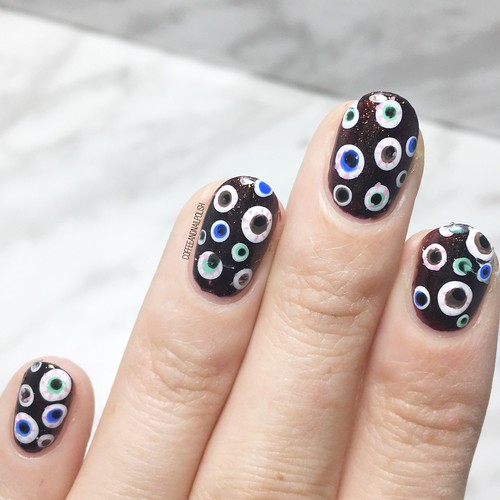
Totally creepy, am I right? I probably could have done a few more eyeballs on my design, but I was painting against the clock & wanted to make sure I got this look done!

521B4523-B15B-4551-8D8E-881E74801BD4

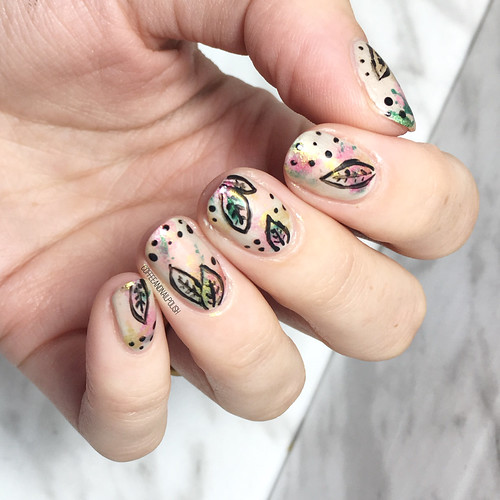
What do you think of this look for today’s prompt? Would you wear this creepy eyeball look? Can you believe we only have TWO more prompts left before the end of #glamnailschallengeOct?

 Keep following along with #glamnailschallengeOct on Instagram & don’t forget to check out all the other awesome (& creepy!) eyeball looks!

Halloween Patchwork Nails (recreated from @thelittlecanvas!)

8A565967-9C12-442C-8608-6102A0C3AF0E

Hello lovelies & happy Tuesday! Today I have some more Halloween nails to share with you, this time a recreation of a design by Alaina aka @thelittlecanvas! If you follow her, you might have seen she recently recreated my ghost design, as well as my candy corn dotticure , so I really wanted to recreate one of her past Halloween nail art designs! & I found the perfect look in this patchwork design from 2 years ago!

FEE657FF-3511-4CDE-80F9-FC22CE286DD3

468F4136-06BD-423B-99F6-E203CBFAC9DA

For this manicure, the polishes I used were:

  • Base Coat: Sally Hansen Green Tea & Bamboo Strengthener
  • Base Coat: Duri Rejuvocate
  • Top Coat: YSL Beauty Quick Dry Top Coat
  • Sally Hansen Miracle Gel Get Mod
  • China Glaze Be More Pacific
  • Essie Flowerista
  • Sally Hansen CSM Fiery Island
  • Black Acrylic Paint
  • NailStuff.ca 11mm Liner Brush

.

10AEB632-DFC5-4AA0-9EEA-048E1241E328

8C1C0877-2A94-430A-852C-C4C81D5E52DD

Oh my gosh you guys, this look is so fun & so easy! I started with a base of white, because it was easiest to make colours pop, & then created my blocks of colour. I did my green & orange first, & then filled in the middle with my purple. You don’t have to be too concerned with perfectly straight edges because you’ll be adding the black stitching, so I didn’t see the point in using tape. Then to finish my design, I took black acrylic paint & one of my NailStuff stripers, & added the black stitching along the edges. Finish off with top coat, & your nails are all ready for Halloween!

704962CA-71CA-465C-99C0-00A19C27B2FC

648C057D-0BA3-448F-9A0B-966E0F5FD209

This patchwork look is perfect for a variety of different Halloween costume ideas, & you can definitely change up your colours depending on needs–this would be perfect for a Bride of Frankenstein, Zombie, Scarecrow, etc. Lots of fun ideas, but super easy to do, even for a nail art beginner. & using acrylic paint for your lines vs nail polish also makes things a little easier, because if you mess up you can erase the lines without wrecking your whole nail.

840C102B-7CA0-490E-8302-3160049737D0

5DFB116B-E28A-4ED0-955F-ACC708F0A20F

What do you think about this nail art look, recreated from @thelittlecanvas? Did I live up to the original? & hop over to Alaina’s blog today to see her version of another one of my nail art looks!

Fall Leaves 🍂 Nail Art Recreation

E8C7A357-B8D6-4ABB-A930-82C28D6396CC

B971C433-7837-4656-B6CB-069566BC4426

Hello lovelies & Happy Friday!

Today I have a fun nail art look to share with you that is a recreation of an old favourite: this Fall leaf design. This design was one of the first designs I ever posted on Instagram that I was the most proud of. So while browsing through my old designs, I decided it was definitely long overdue for me to recreate this design!

28294277-6B43-482E-B5C5-7FC301D46CBC

A3D30523-B31F-4289-AE5B-1365F27AC403

For this manicure, the polishes I used were:

  • Base Coat: Gel overlay
  • Top Coat: Essie Gel Setter
  • Top Coat: Sally Hansen Miracle Gel Matte Top Coat {PR sample}
  • Quo by ORLY Breathable Heaven Sent {PR sample}
  • Sally Hansen Miracle Gel Good Cheer-y {PR sample}
  • Wet N Wild Blazed
  • Rimmel 60 Seconds 830 Camouflage
  • Mariposa Nail Polish gold shimmer (no name)
  • Black Acrylic Paint
  • Nailstuff.ca Dotting Tool Trio

.

1CB0DB52-50FD-4AB3-AF60-E1DE237F0F5B

C2FB8302-EC8D-4DEE-9888-B9A9D49BB01E

So obviously with it being five years since I first painted this design, I wanted to change things up a little bit & play around with the look. Instead of black polish, I used acrylic paint because I knew it would make it easier to start over if there was any mistakes. I also used my 11mm mermaid tail brush from NailStuff.ca, but looking back I should probably should have went with a small size for thinner lines.

Also this time I decided to add some matte top coat over my design, & it really made the design & colours pop! I’ve been absolutely loving the Sally Hansen Miracle Gel matte top coat.

F9EE6409-C6A5-4715-AF2C-278ADDB1018B

857606B3-7283-43DD-942F-5358C79B6065

Just for fun, a couple shots of this design before I added my matte top coat.

Obviously I think both versions of this design are fabulous, but I’m just slightly more in love with the matte version. Something about this time of year just has me craving matte-ified nails more often, & honestly I feel like metallic nails (which I also craved more often during Autumn) pop so much more when they are matte.

53C032A2-95B1-49F6-9A59-1052AB010FD3

6180732B-733C-40E3-AAA6-2818016FF6F5

So what do you think about my updated version of this design? Which do you prefer: matte or glossy? Share your thoughts down in the comments below & let me know which version is your favourite!

Mini Egg inspired Easter Nails (yep… again!)

Good morning lovelies, & happy Friday. Today I’m prepping for Easter festivities with a brand new Easter design… & showing off this Mini Egg inspired look. This is definitely not the first time I’ve created this design, & I seem to return to it every couple of years because it’s a fairly easy “design” to create but it gets the point across!

Also who doesn’t love chocolate?

This look is super simple to do–all you need are your egg colours, the spots (I used a brown polish & Saran Wrap–I’ve seen others create this look using a black & white glitter topper which was awesome) & some matte top coat.

Easy Peasy. & awesome nails to rock for your Easter festivities which won’t cut into any family (or chocolate) time.

For this design, the polishes I used were:

  • Base Coat: OPI Nail Envy
  • Top Coat: Seche Vive
  • Matte Top Coat: Sally Hansen Miracle Gel Matte Top Coat -{PR sample}
  • China Glaze Sun Upon My Skin
  • Claire’s Matte Sorbet Blue
  • Claire’s Matte Sorbet Pink
  • Claire’s Matte Sorbet Mint
  • Claire’s Matte Sorbet Purple
  • OPI How Great is Your Dane?

Is the trick for me to get the spots right in the eggs is a light touch & minimal polish on the Saran Wrap. I crinkle it up extra & then don’t apply too much polish to the plastic so when I dab it down, you don’t apply too much polish to the area. You want just a few dots as opposed to a big splat.

Every time I do & redo this look, I think I love it even more. It’s just such an easy way to do festive nails, & the only downside is you have to fight the urge to eat your nails!

So what are you planning on wearing on your nails this weeekend? Share down below!

Recreating my Wedding Nails (Happy 3rd Anniversary to us!)

Happy Wednesday lovelies! Not only is today the middle of the week & halfway to the weekend, but today marks 3 years since I married my best friend. If you’ve been around originally, you may remember my original post featuring the nails on our special day.

Naturally, I wore a floral design–which is a surprise to no one. & in honour of this day, I decided I really wanted to recreate my original design. & spoiler: I love it just as much today as I did on this date 3 years ago.

For my recreation of this manicure, the polishes I used were:

  • Base Coat: OPI Nail Envy
  • Top Coat: Essie Speed Setter
  • Essie Suite Retreat
  • Sally Hansen Miracle Gel After Altar
  • L’Oréal Getting Kilty
  • Julep Vivien
  • Sally Hansen CSM Killer Heels
  • Sally Hansen CSM Red It Online
  • Sally Hansen CSM Rose To the Occasion
  • Sally Hansen CSM Blush Against The World
  • Quo by ORLY the Antidote
  • Essie Off Tropic
  • Quo by ORLY Diva
  • Essie Sew Psyched
  • Nailstuff.ca Mermaid Tail Nail Art Brush
  • Dotting Tools

I’ve written before how much I love going back to recreating my manicures, & I’m so glad I got to do the same for this one. I know some people go for more classic wedding & bridal manicures, but it just felt more “me” to do a full floral look (with something blue & a gold accent nail.) & no matter how much time passes, I don’t see myself ever getting “over” floral nail art. It’s just too perfect.

How did you wear your nails for your wedding day? Did you go more classic or a little more fun? (& for those planning to get married soon, do you know how you’re wearing your nail yet?)

& for fun, a few pictures from our wedding day ♥️