Blurple Colour Block Featuring OPI

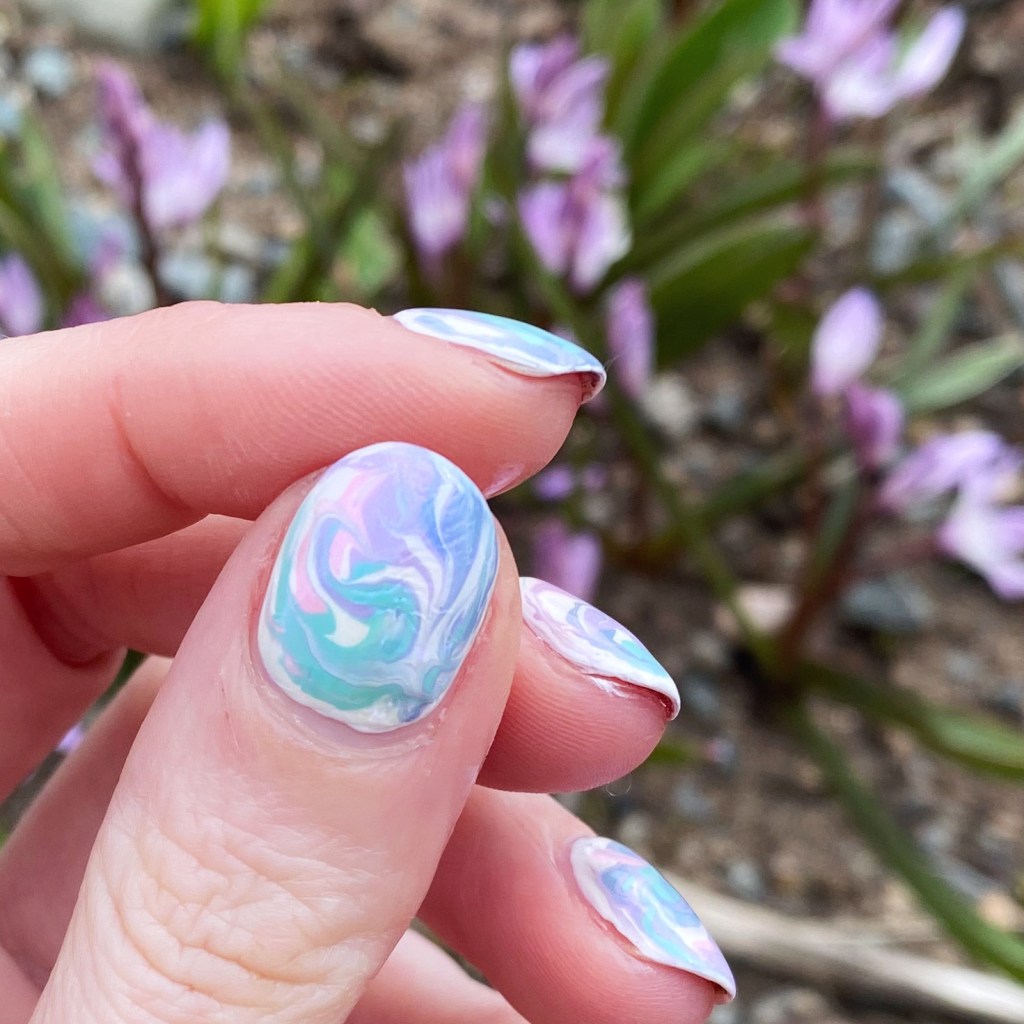
Good morning lovelies & happy Tuesday… it’s been a while. This month has been so insane, & my nail painting has really fallen off. Trying my best to get back into it though, & today I have some fun (& relatively simple!) nail art to share with you.

The polishes I used for this manicure are: 

  • Base Coat: Essie Here to Stay
  • Top Coat: Essie Gel Setter
  • OPI Dining al Frisco
  • OPI Infinite Shine Sound of Vibrance
  • OPI Infinite Shine Shaking My Sugar Plums
  • Quo by Orly Striper Black

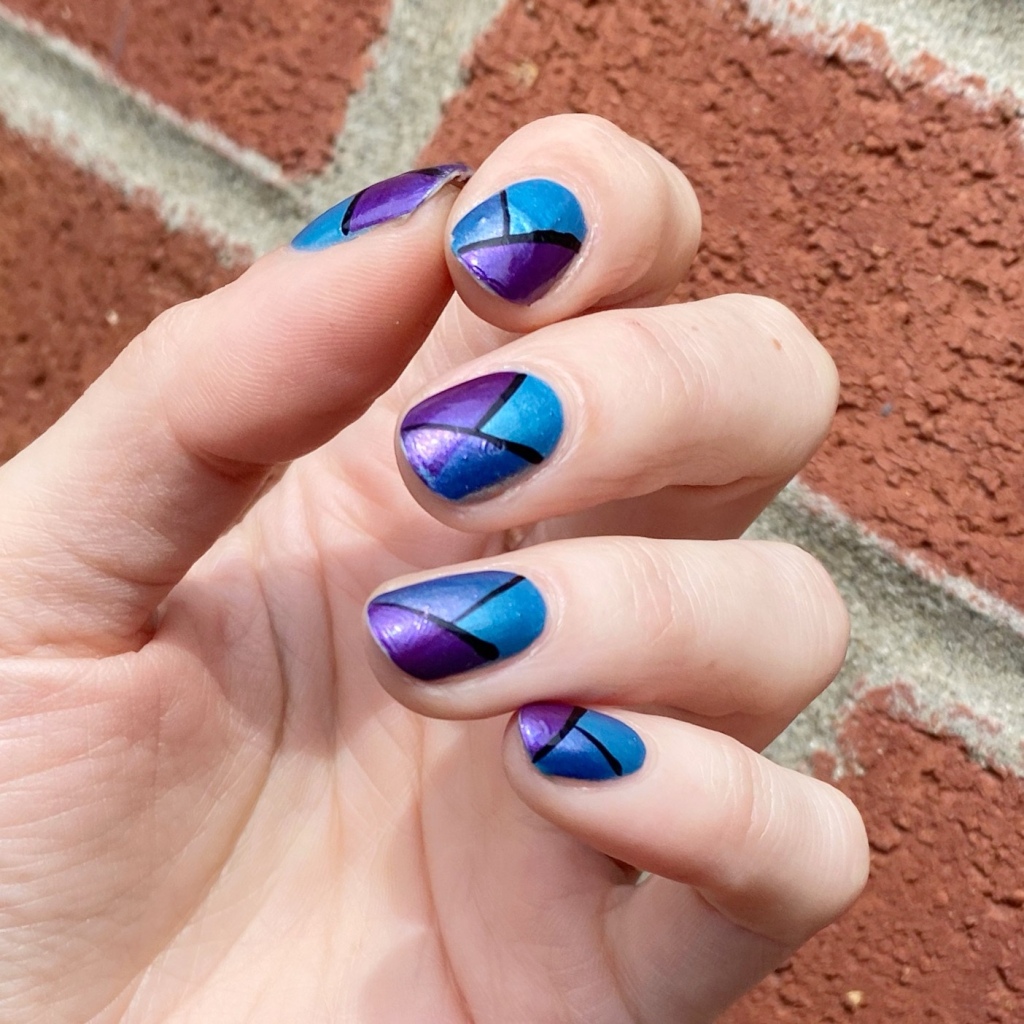
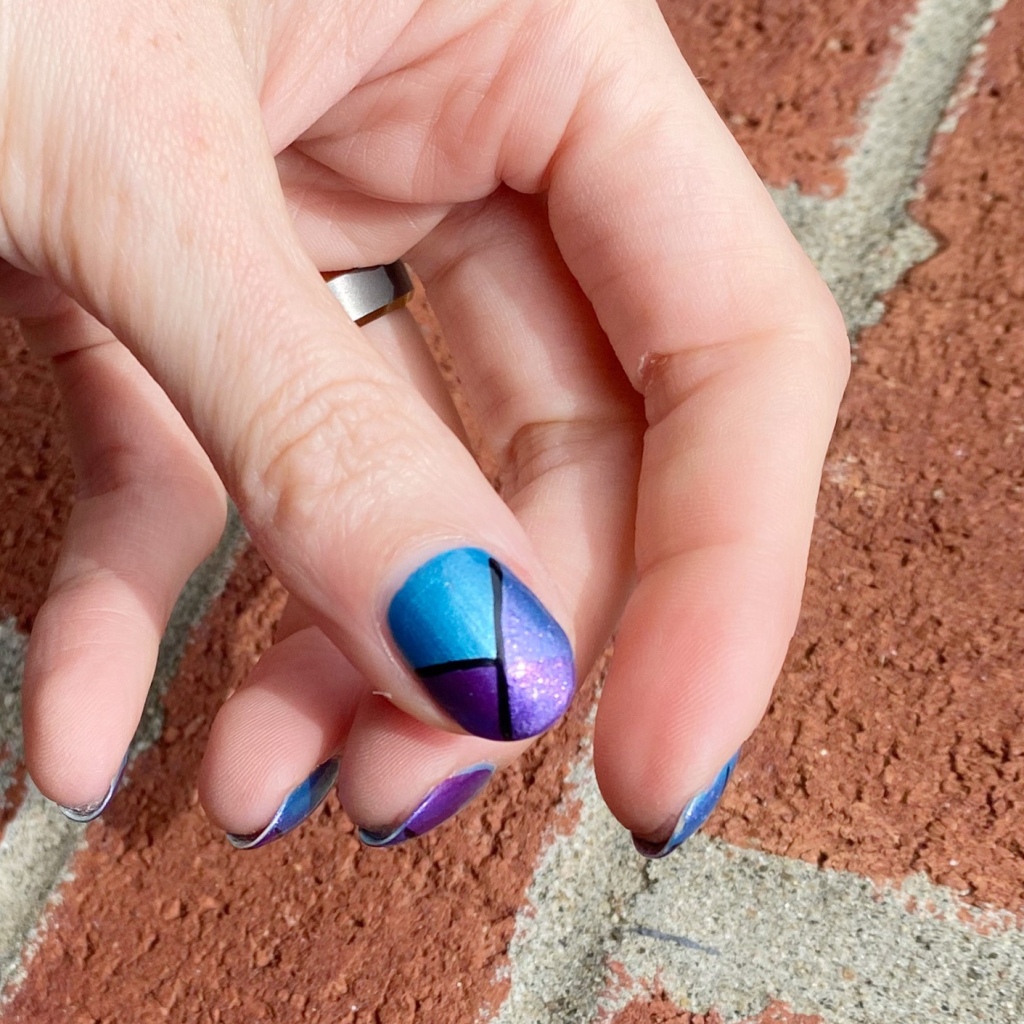
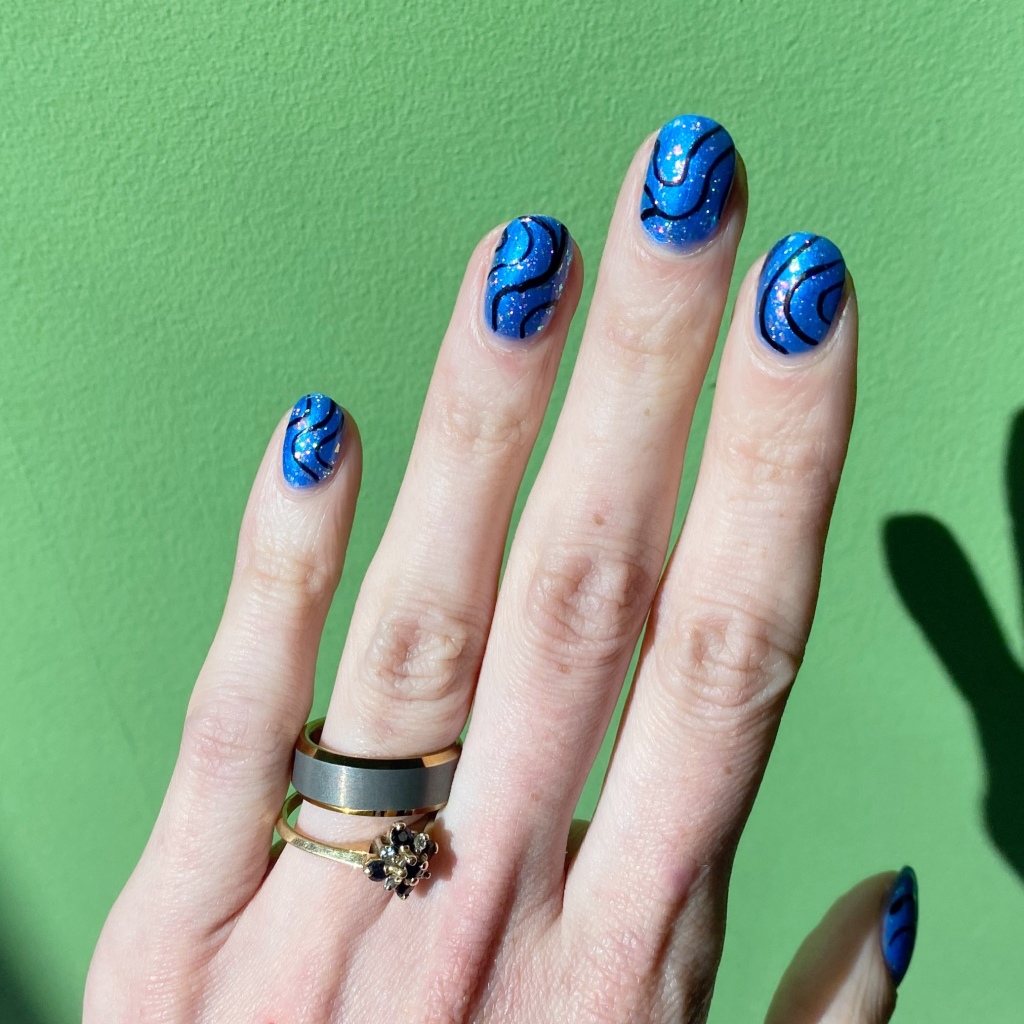
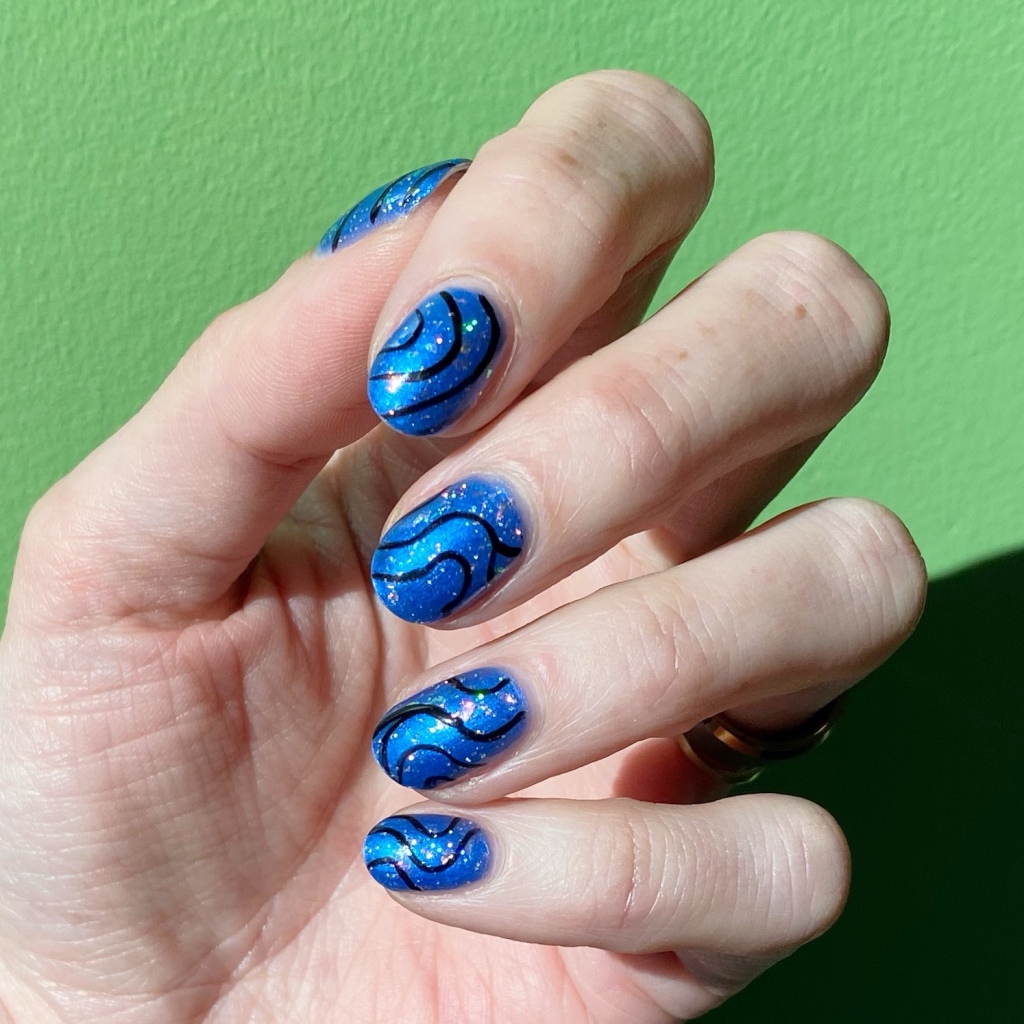
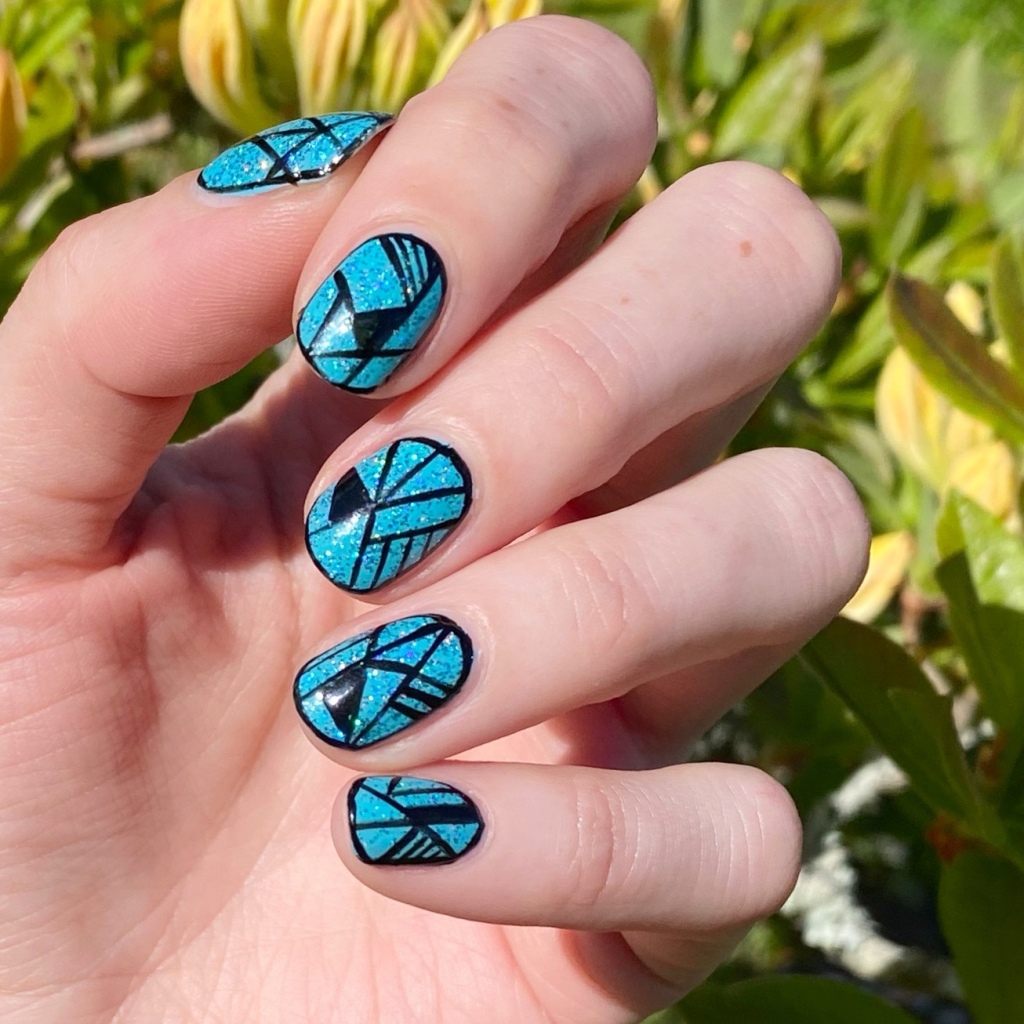
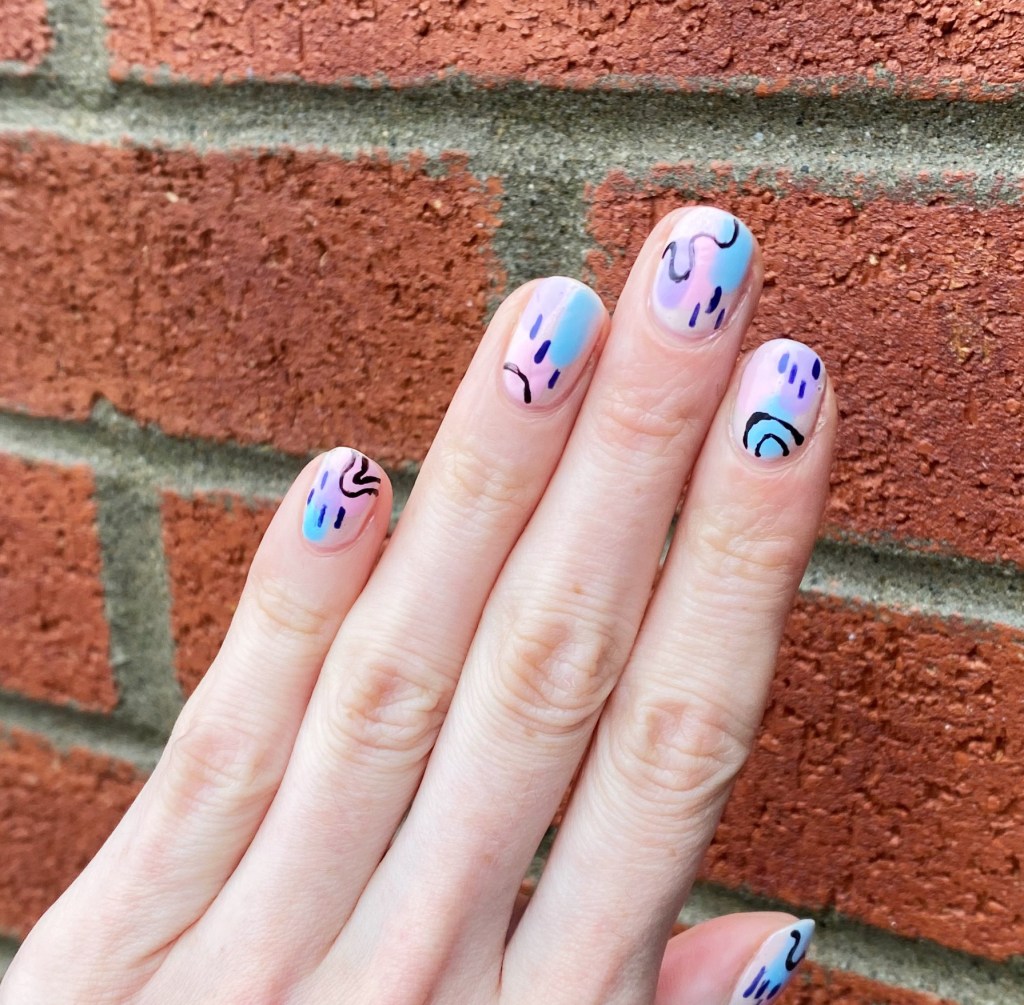
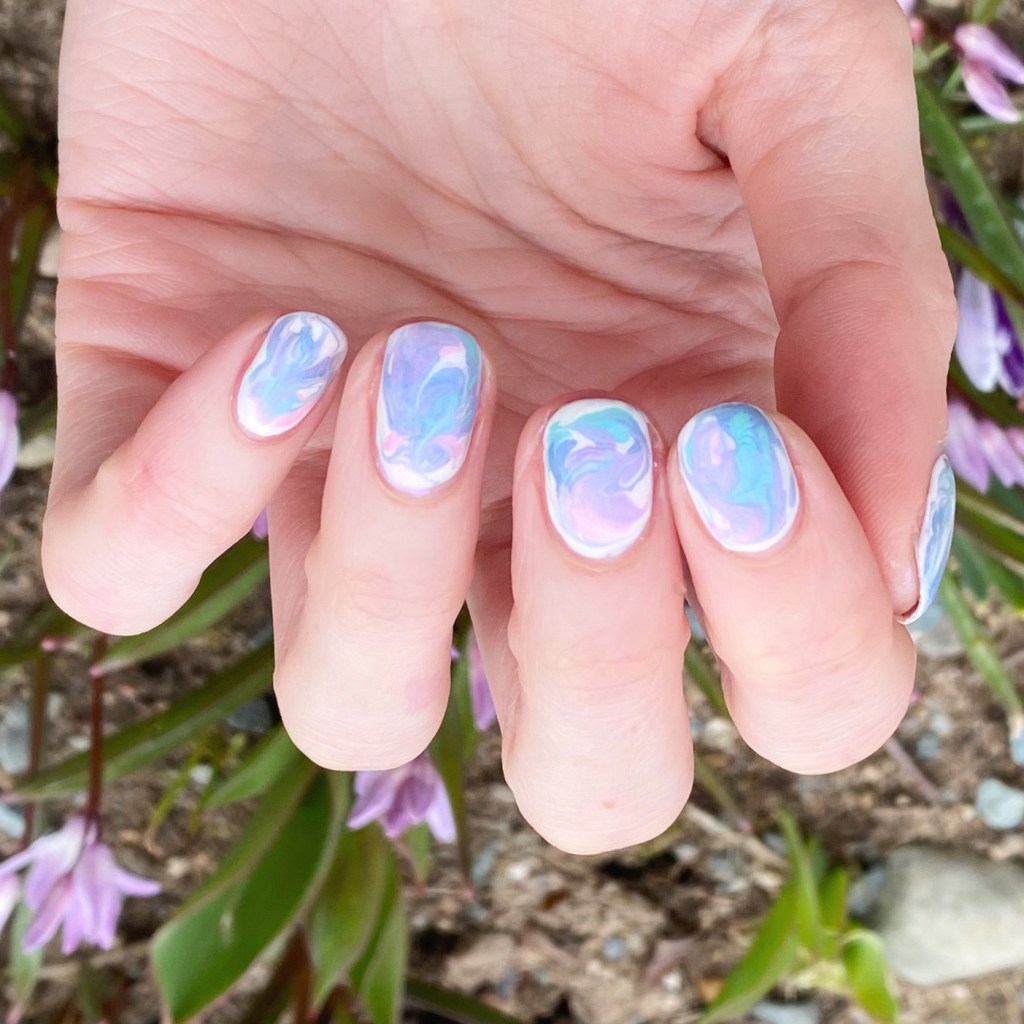
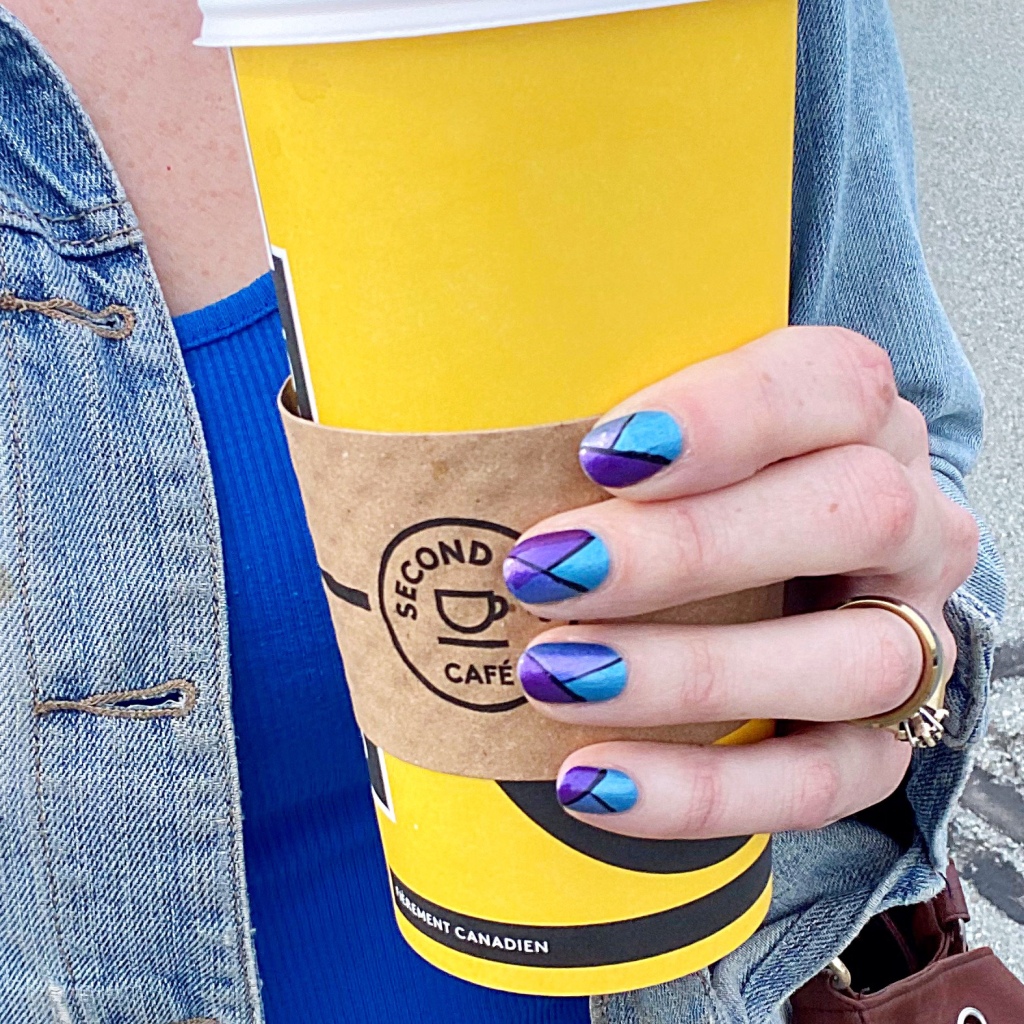
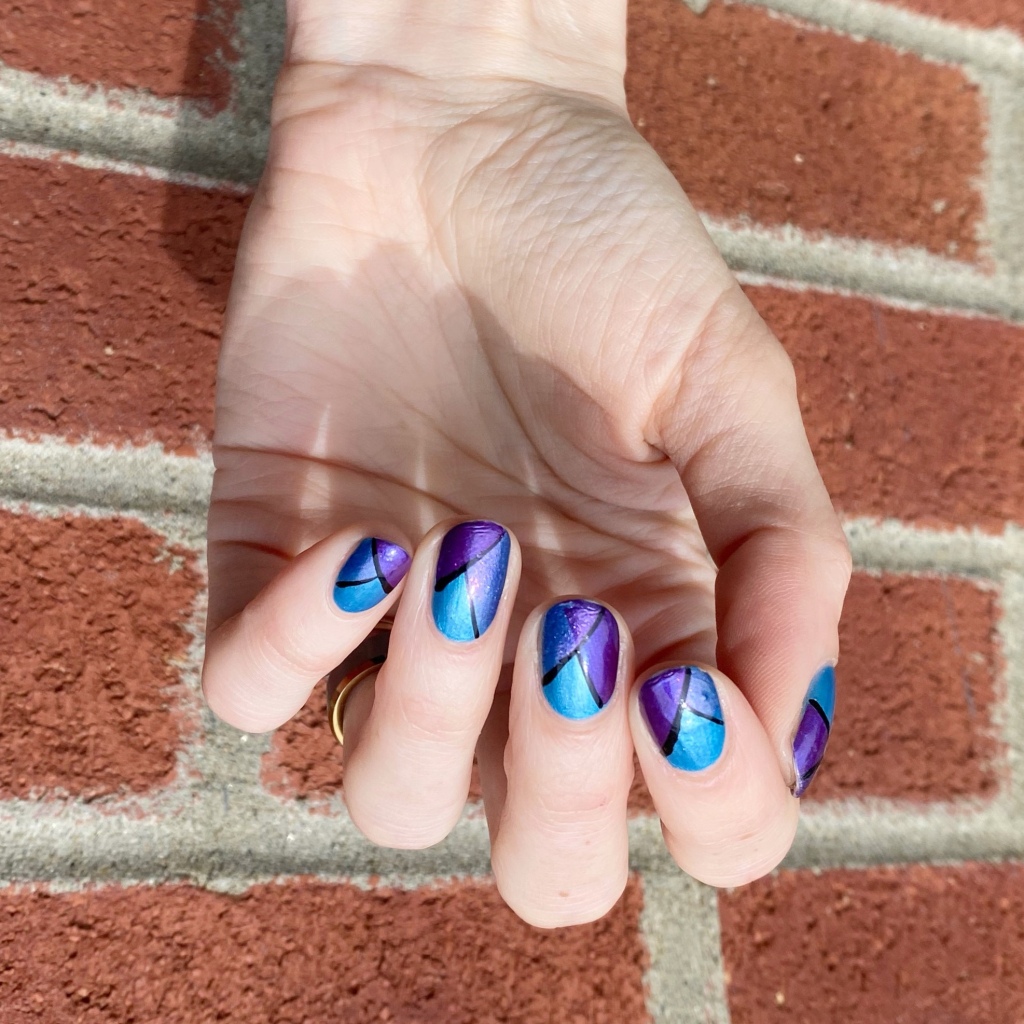
How good are these blues & purples together? I definitely feel like those are my colours lately, right down to my hair colour. But I just love a good colour block, & this design is so easy to do — & you don’t even need any nail art tools!

You definitely could use nail vinyls or tape if you’re not comfortable freehanding though. I like going over my lines with the black though, because I feel like it hides any mistakes you might have done, plus makes the blue really pop!

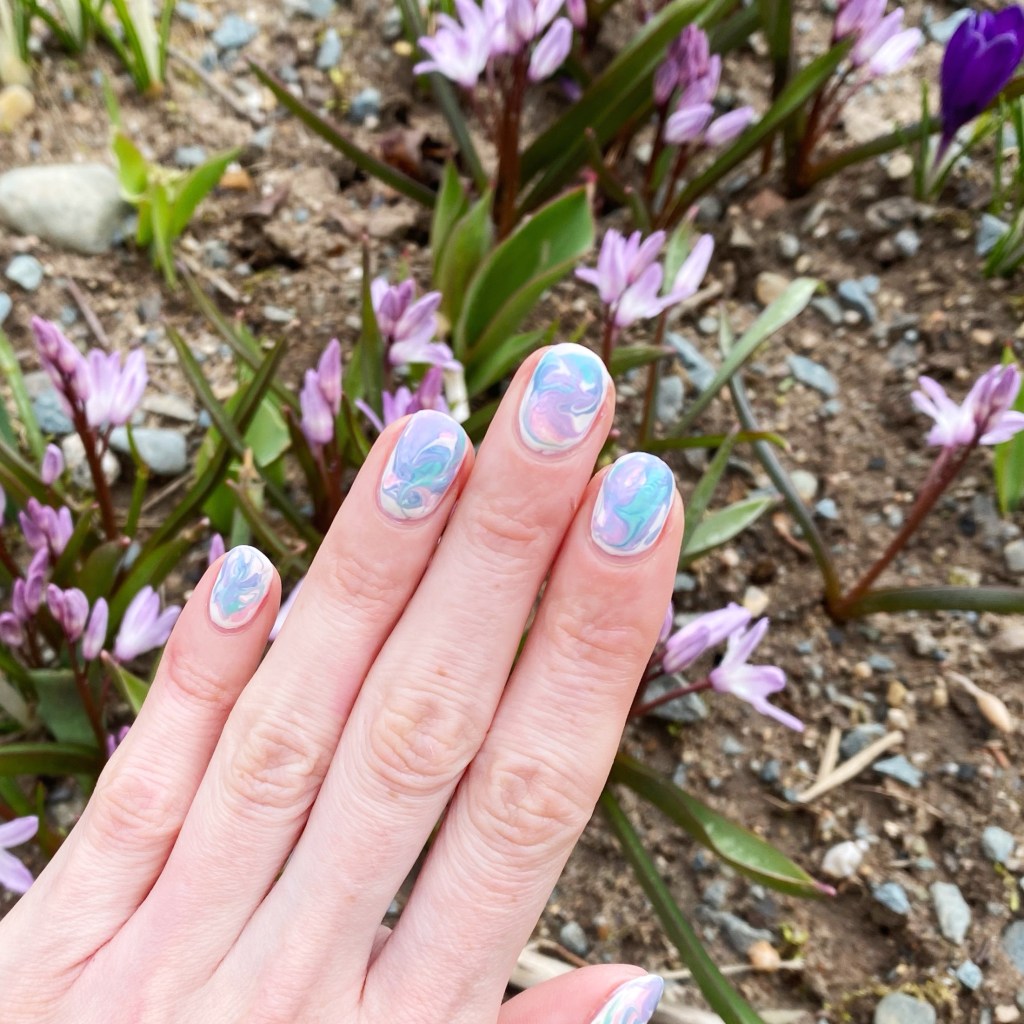
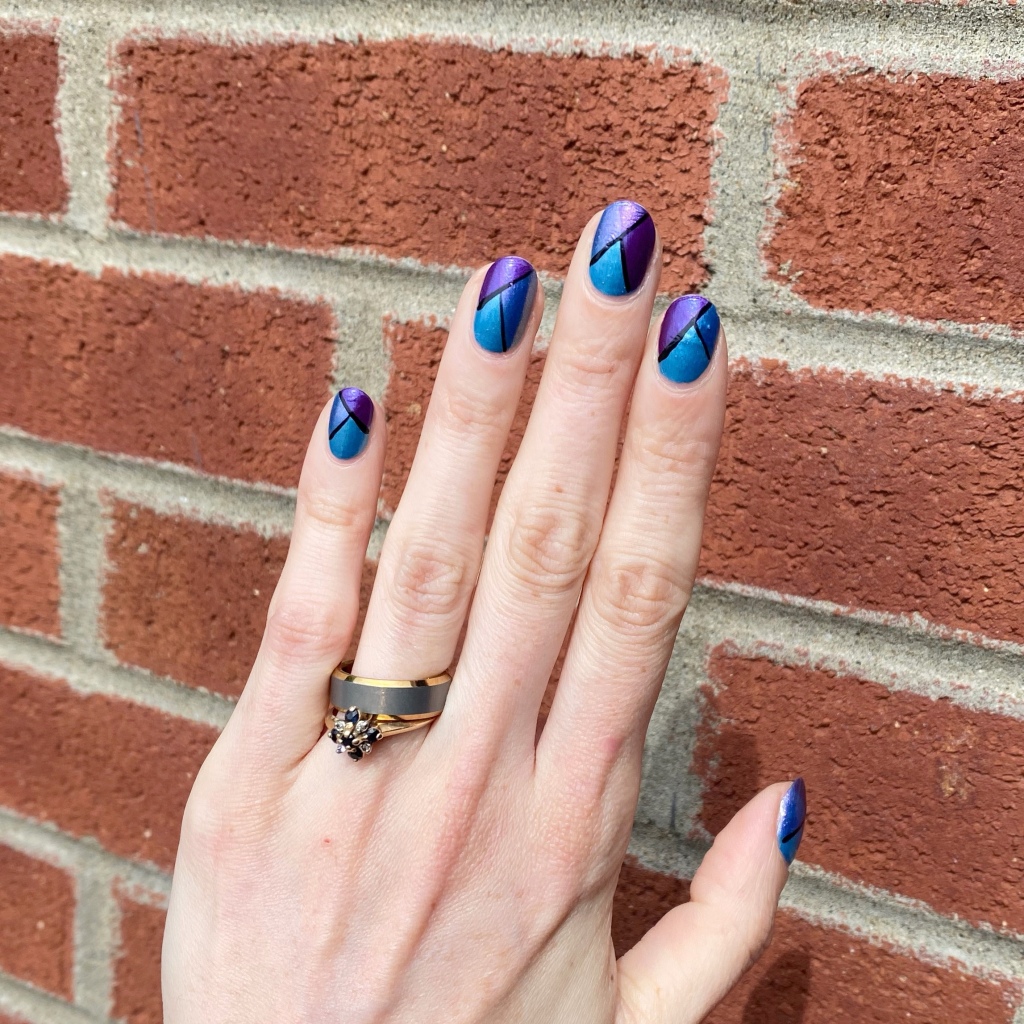
What do you think of this colour block featuring some fun OPI shades from my stash? Do you love how these shades pair together as much as me? Let me know your thoughts down in the comments below & what you’d like to see next?

Happy Tuesday!

🖤

Black Swirls on Blue Shimmer

Good morning lovelies & happy Tuesday! We all survived Monday, & today is looking to be a beautiful day.

Today I’m sharing a somewhat simple to do nail art look, that is still super eye catching! As I’ve been mentioning, I’m absolutely obsessed with layering glitter over nail polish lately. It’s my go to look. But sometimes, I still want something more which is where this nail art look came from. I loved the flakie over blue look, but it felt like it needed something more.

Thank goodness for nail art stripers!

The polishes I used for this manicure are: 

  • Base Coat: China Glaze Calcium Gel Fortifer
  • Top Coat: Seche Vive
  • Ardene Blue Tide
  • ‘Ard as Nails Fairy Flakes
  • Quo by Orly Nail Art Striper Black

This look was sort-of inspired by this previous look. After applying to my base, I saw that design in my Instagram feed & realized I wanted to wear something like that. & I’m so in love with the eye catching result. Obviously, you can never go wrong with glitter (as is my new motto) but it’s fun to add something a little extra to the look.

& seriously, these took no time at all to create which is even better!

What do you think of my blue abstract stripes? I definitely am hoping to get more time for more complex nail art soon, but in the mean time I’ve really been loving these simpler looks so I hope you’re enjoying them too!

Happy Tuesday!

♥︎

Holo & Graphic Geometric Lines

Hello lovelies & happy Thursday! It’s a beautiful, warm sunny day & I’m enjoying every second of it. & the sunshine is making me crave a lot of sparkle. ✨

It’s been a while since I rocked some graphic geometric lines, so I pulled out a Quo by Orly striper I recently found at the thrift store (it had never been used — I was pumped!) & I created this geometric look. & I think the black over the lighter blue is so striking — I just love it!

The polishes I used for this manicure are: 

  • Base Coat: China Glaze Calcium Gel Fortifer
  • Top Coat: Seche Vive
  • Essie In The Cab-Ana
  • Color Club Bougie Baby
  • Quo By Orly Striper Black

These almost look like stained glass, but with only one colour. I think they turned out really pretty. I also can’t stop adding glitter — in particular holographic glitter — to all my base colours.

When I do geometric line designs like this, I’m really not particular in what I’m doing — I kind of just go with what I’m feeling. I originally had just line straight lines, but it felt like something was missing so I added the outline around my nail, & it felt like it brought everything together! & surprisingly, it really wasn’t that hard to do at all.

What do you think about this geometric lines design? Are you feeling the sparkly holo & the crisp black lines? Would you wear a design like this? Let me know all your thoughts down in the comments below & what colour you would wear as your base on a design like this!

Enjoy your Thursday! ♥︎

Fun Pastel Abstract Nails

Hello lovelies & happy Thursday!

I hope you’re having the most wonderful week so far. It’s surprisingly chilly today, albeit sunny, so I’ll try to enjoy that. Today I have a fun nail art look I created on a whim, that I couldn’t wait to share. Abstract nails are such an easy nail art look to do, because there is no “right” or “wrong” way to do them. You just basically get to throw some polish on your nails, & you end up with something fun! I love manicures like that.

The polishes I used for this manicure are: 

  • Base Coat: China Glaze Calcium Gel Fortifer
  • Top Coat: Seche Vive
  • Sally Hansen Miracle Gel Tutu At The Ballet
  • Essie Muchi Muchi
  • OPI Infinite Shine Sickeningly Sweet
  • Sally Hansen InstaDri Gloss-Sea
  • Sally Hansen InstaDri Ghouls Night Out
  • Quo Beauty Stormy Night
  • Nailstuff.ca Mermaid Tail 7mm liner brush

How much fun! I’m not sure what kind of art I was going for, but these kind of remind me of like early 90s TV opening. A fun look to wear.

What do you think about these fun abstract nails? Would you wear this look? Let me know what abstract design you enjoy the most? Share all your thoughts down in the comments below!

Spring Drag Marble

Hello lovelies & happy Tuesday! Another beautiful sunny Tuesday to enjoy (at least here!) today I’m sharing a design I haven’t done in what feels like ages… with a Spring twist. In fact, this pretty manicure was pretty in close in colour to the flowers beginning to pop up in our garden! 🌿🌸

The polishes I used for this manicure are: 

  • Base Coat: China Glaze Calcium Gel Fortifer
  • Top Coat: LA Colors Rapid Dry Top Coat
  • OPI I Cannoli Wear OPI
  • OPI Sickeningly Sweet
  • OPI Nature Strong Cactus What You Preach
  • Quo Beauty Bluebell
  • Essie Muchi Muchi
  • NailStuff.ca 4mm detail brush (I couldn’t find my really thin dotting tool I usually use)

So I’m not going to lie — my top coat of choice for this manicure (the LA Colours rapid dry top coat) is not a good choice for a layered polish design like this, & you can see why on my thumb. It gave it a weird wrinkly look which I was not happy about.

However, over all I love love love this design! A drag marble is always a good idea, & the Spring-y colours in this one really bring the design all together. It feels very 2000s Pucci-like, & I mean that in the best possible way!

What do you think about my Spring drag marble nails? Do you love as much as I do? Let me know all your thoughts down in the comments below!

💗