Pastel Dry Brush & Polka Dots

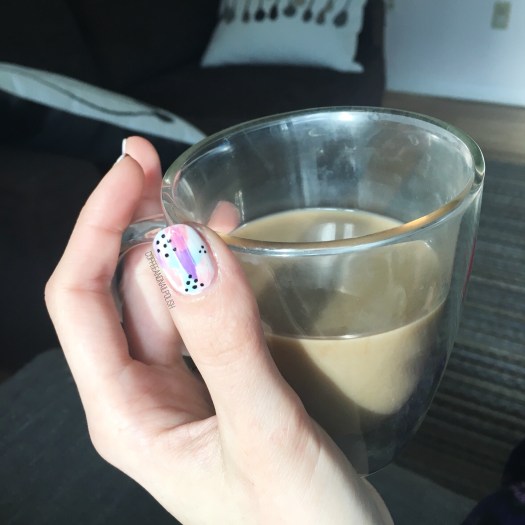
Happy Tuesday lovelies! If it’s possible for the Tuesday after a long weekend to be happy. I mean, I worked 2/3 days of this long weekend so I’m not even sure what a long weekend is anymore! But that’s okay… I’m feeling minuscule-ly better & I have a fun new manicure to share with you.

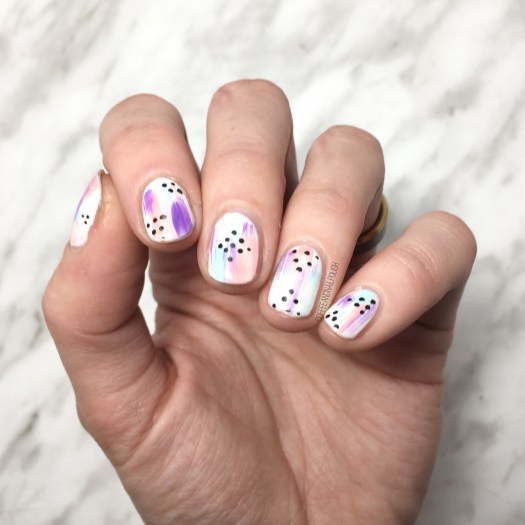
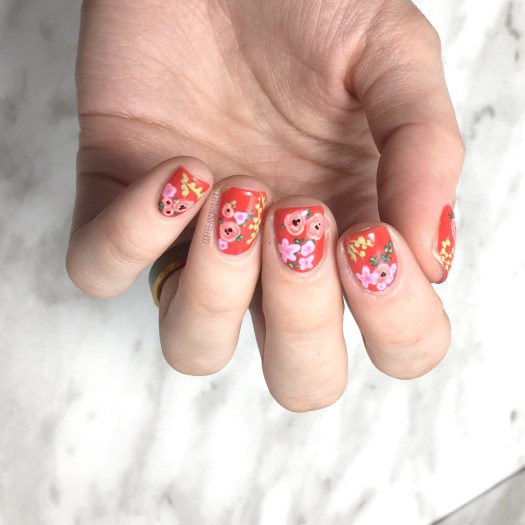
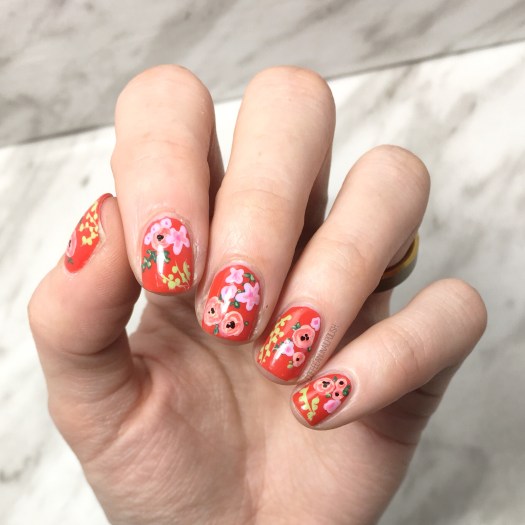
Today’s design is actually inspired by a design from a very long time ago! Okay maybe it was only 3 years ago, but it feels like forever since my nails were that kind of amazingly long. Last time, my polish picks were more in the neon family, so I decided this time to stick to more pastels. & oh yes, do I love how the colours went together!

For this design, the polishes I used were:

  • Base Coat: Quo by Orly Breathable Kiss Me, I’m Kind
  • Top Coat: Seche Vive
  • Wet n Wild Clear Polish
  • Sally Hansen Complete Salon Manicure Let’s Snow
  • Sally Hansen Miracle Gel Ocean Daze
  • Sally Hansen Miracle Gel Bourbon Babe
  • Color Club Pucci-licious
  • Sally Hansen I ♥️ Nail Art pen in black

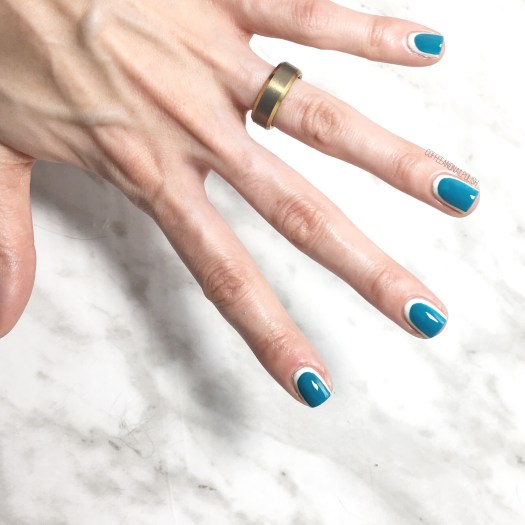
Dry brush is such a fun technique to create on the nails, because depending on the look you’re going for you can use a clear polish or smudgy top coat to blend your colours together & let dry for a few minutes & use a non-smudging top coat to keep the look of your dry brushing more in tact. I wanted to create a more blended look, so I applied a coat of Wet n Wild’s clear polish over top, & brushed it a few times so the shades would blend together better. In this case, it’s good to smear your design. I also tend to do this with other nail art like gradients or Saran Wrap marbles, but I want to colours to blend together as much as possible.

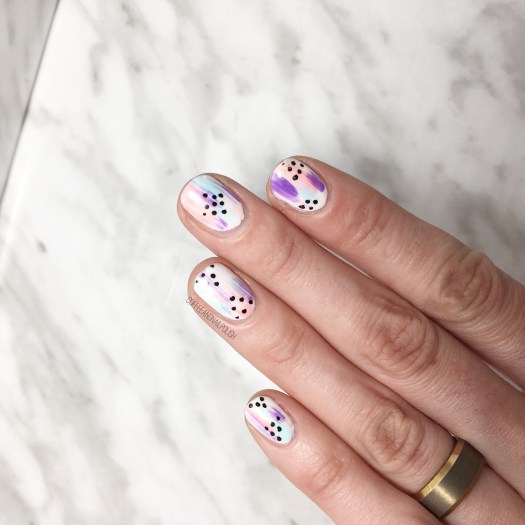
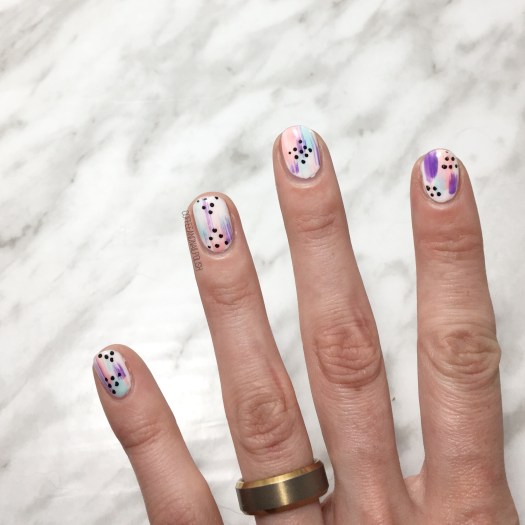
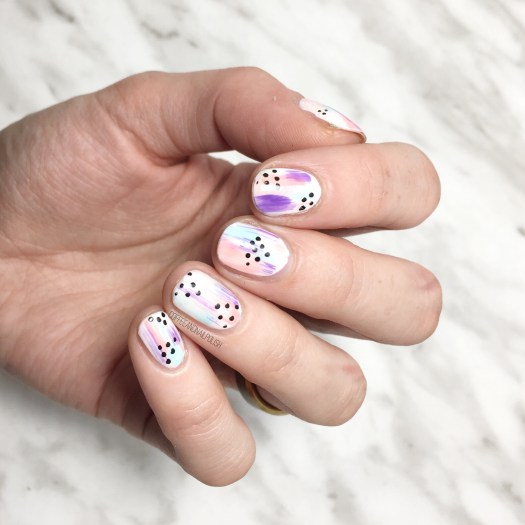
I’m loving the vibrancy of these shades. They remind me of Summer & I love Summer. Suddenly wishing I could find a bikini with a similar dry brush & polka dot pattern on it. Or maybe a dress… something fun & Summery I could wear on more than just my nails.

what do you think of these pastel dry brush & polka dot nails? Is this a look that you would wear for summer? Share your thoughts down in the comments below!

Floral Flash Nails

Happy Tuesday lovelies! I hope you’re enjoying the beginning of your week. Today I’m sharing some brand new nails with you–& yep, more floral! I truly believe you can never wear too much floral. Now if only I had taken more pictures of this design…. sadly I only snapped a few to share with you!

For this manicure, the polishes I used were:

  • Base Coat: Nailtek 2
  • Top Coat: Seche Vive
  • Sally Hansen Miracle Gel In the Sheer
  • Essie Play Date
  • Essie Go Ginza
  • Sally Hansen Complete Salon Manicure Trouble Maker
  • Sally Hansen Miracle Gel Super Charge
  • Essence The Green & The Grunge
  • Sally Hansen I ♥️ Nail Art pen in Pink
  • China Glaze Metro Pollen-tin
  • Sally Hansen I ♥️ Nail Art pen in Black
  • Sally Hansen Royal Hue
  • China Glaze I Sea the Point
  • Bundle Monster detail brush
  • Bundle Monster dotting tool

It always takes so many polishes to create my favourite florals, but when you see it all put together it’s so worth it. Gosh I love floral designs over almost bare or really sheer polishes. They’re is just something romantic about how they come together. Love love love. Also I felt like I needed some untraditional floral colours–like purple roses. Something just a little bit different from my more recent floral & rose designs. I’m a little bit floral obsessed right now–I just picked up a new floral phone case, & I keep buying floral shirts & dresses. There is just no such thing as too much floral! 🌸

What do you think of this design? Are you a fan of negative space florals? Share your thoughts down in the comments below!

Vibrant Colour Blocking

Good Morning lovelies & Happy Saturday!

I don’t know how the weather is where you are, but here in Halifax they’re calling for lots of sunshine over the next little while & I couldn’t be more exciting. I’ve worn dresses for the last few days, & I’m pretty dedicated to keeping my no pants streak going. Obviously, my cheery mood is translating to my nails because I’m all about bright & colourful nails! Today I’m showing off a colour block design done using a few vibrant polishes & nail vinyls.

For this manicure, the polishes I used were:

  • Base Coat: Nailtek 2
  • Top Coat: Seche Vive
  • Sally Hansen Miracle Gel In The Sheer
  • Essie Splash if Grenadine
  • Essie All the Wave
  • OPI I Eat Maine-ly Lobster
  • China Glaze Sun Upon My Skin
  • Xroma Polish & Vinyls Mosaic Stencils
  • Dotting Tool

Oooooh I love so much how these colours go together. This combo is feeling very 90s to me for some reason, & I love it! So blinding, which is perfect because I just bought brand new (giant) sunglasses. 🕶 To me, this is just the perfect bright design… the colours, the pattern. I’m seriously in love with everything about it! Plus I feel like these colours are perfect for making me look way more tanned than I actually am. & when you spend 10+ hours inside, you’ll take any hint of a tan you can get!

What do you think of this colour block design? Would you rock this pattern on your nails? What is your favourite nail polish shade combination? Share all your thoughts down in the comments below & let me know what you’re wearing on your nails for the weekend! 💅🏻☀️🌵

Rifle Paper Co Style Floral

Yesterday was a beautiful Spring day, I had the day off, & I took full advantage of it. In honour of the occasion, I decided some floral nails were in order. Originally I was going to just do some more negative space nails with pastels, but I discovered a bottle of Essie 5th Avenue in my stash I bought a few months back at Lawton’s, & decided red nails were in order. I’ve been loving all the Rifle Paper Co inspired nails that pop up on my Instagram feed, & while these are not even close to an exact recreation, I was inspired by this pattern initially.

For this manicure, the polishes I used were:

  • Base Coat: Nailtek 2
  • Top Coat: Essie Speed Setter
  • Essie 5th Avenue
  • Sally Hansen Miracle Gel Sweet Tea
  • OPI I Eat Maine-ly Lobster
  • Sally Hansen Miracle Gel Pretty Piggy
  • Sally Hansen Miracle Gel Orchid-ing Around
  • Sally Hansen I ♥️ Nail Art Pen in Magenta
  • Sally Hansen I ♥️ Nail Art Pen in Black
  • Essence The Green & The Grunge
  • Sally Hansen Miracle Gel Wet My Thistle
  • Bundle Monster detail brushes
  • Bundle Monster dotting tools

This design definitely looks very similar to this manicure I did a few months back. Something about floral on a red base just looks so good to me. & red nail polish in general… I’m so glad I found this gorgeous polish (& did I mention I scored it for only .99 cents?)

There is something just so lovely about floral. The more I paint them, the more I want to do them again. It was totally worth staying up the extra hour & a half to create them. I’m also going to keep attempting to recreate more patterns from Rifle Paper co. Their brand is such a floral loving girls dream! I pretty much want one of everything on their website (especially the phone cases… all of the phone cases!)

Where do you find your nail art inspiration? What do you think of this floral design? Share your thoughts in the comments below! 🌸🌿

Summer Ready Vibrant Blue & Mint Ruffian Nails

You guys! I’m so excited because it was actually sunny & warm yesterday! Like warm enough I could get away with wearing just a jumpsuit & denim jacket. It was very exciting, like maybe we’ll get Spring after all. In fact this whole week is supposed to be in the double digits! I haven’t been this exciting for anything since Starbucks got almond milk! Especially exciting–I have tomorrow off work & plan on taking advantage with an outside adventure with the Bubs!

Obviously this calls for bright & colourful nails. It’s been ages since I attempted a ruffian design & I really wanted something that would pop! So I grabbed a few of my older Essence shades from deep in my stash for an eye catching ruffian.

For this manicure, the polishes I used were:

  • Base Coat: Nailtek 2
  • Top Coat: Essie Speed Setter
  • Essence Always On My Mint (an Unforgettable Kiss collection)
  • Essence The Gel Lets Get Lost!

Ooooooh this colour combo works so well. This is one of my all time favourite Essence shades, & when I noticed my local Shoppers was taking it out of their Essence display (& had marked them all down to $1) I may have stocked up on extras… like 3 extra bottles… pretty much all the ones they had. It’s just such a good shade! It pairs well with pretty much every colour–purple, pink, mint, light blue, yellow. I haven’t discovered a colour combination I didn’t like. But I have to say, pairing it with mint has definitely become a favourite thanks to this design!

Oh, I’m just so excited with how my ruffian turned out. I feel like I’m getting a lot better with creating that rounded look. It definitely helps that Essence polishes have those beautiful thick brushes. Makes things so much easier! You get a lovely (complicated looking) design with not too much trouble. I love when that happens!

Who else is ready for actual Spring & Summer?! Bring on the iced coffees, sunglasses & maxi dresses. It’s about damn time!

What do you think of this ruffian design? Would you wear this look? Let me know your thoughts in the comments below!