(Even More) Cactus Nails

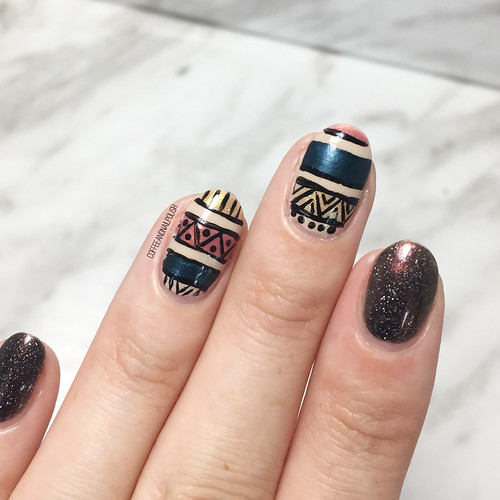
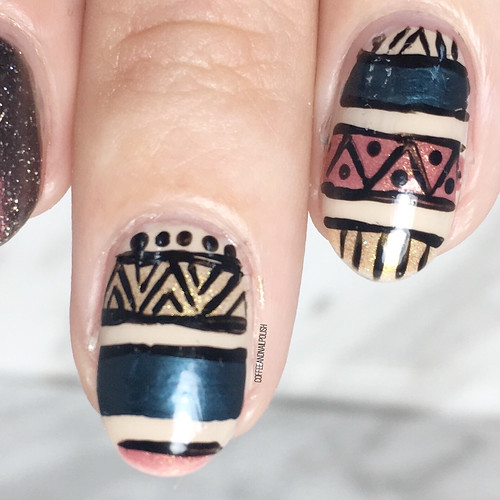
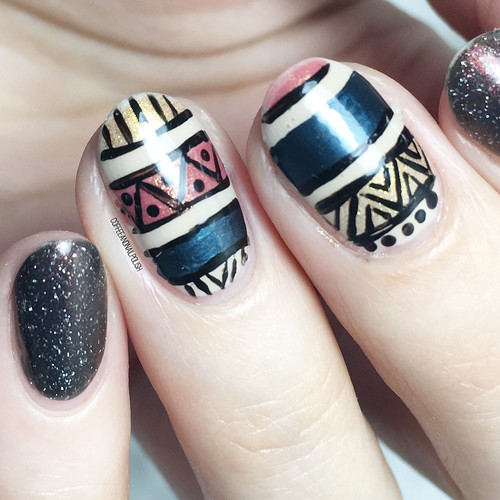
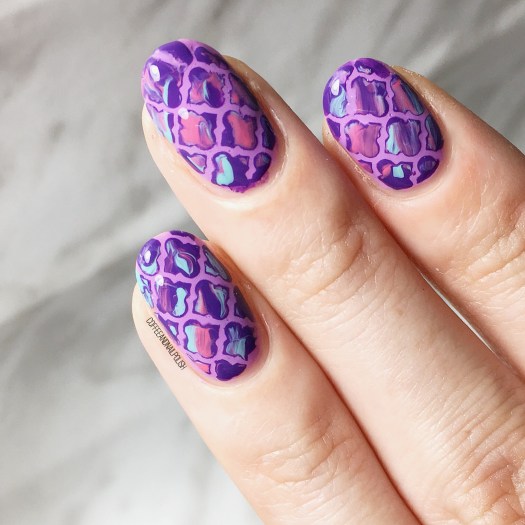
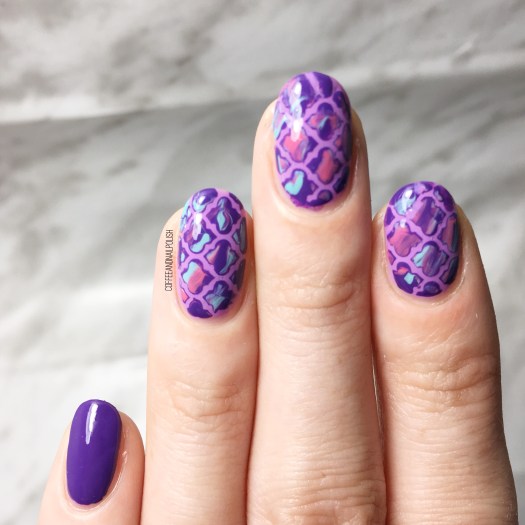
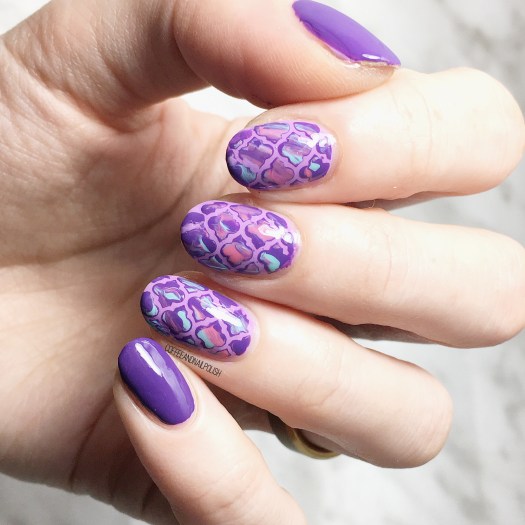
Good morning lovelies. I hope you’re not sick of cactus nails yet! I was inspired by my brand new make up from my previous post, so obviously I had to create some nails to match!

Cactus pattern nails have become a serious favourite design of mine to do, & I love how each nail design always turns out just a little bit different.

For this manicure, the polishes I used were:

  • Base Coat: OPI Nail Envy
  • Top Coat: Seche Vive
  • Essie Turquoise & Caicos
  • Sally Hansen Miracle Gel Get Mod
  • Essie First Timer
  • Sally Hansen Hard As Nails Black Heart
  • Nailstuff.ca 4mm micro detail brush {PR sample}
  • Nailstuff.ca dotting tool {PR sample}

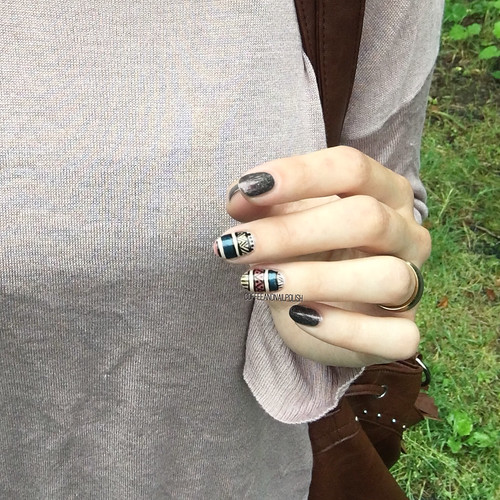
How cute are these? I know I’m slightly bias, but I really like how these turned out. I think adding the black detailing really makes the design pop out more on the nail & reminds me of a pillow I have. Originally I was going to try & do some stamping, but I couldn’t find the plate I was looking for, so freehanding it is! & using my super tiny detail brush from NailStuff.ca was perfect for this tiny little design.

what do you think of this cactus design? Are you sick of cactus yet? Let me know what designs you’d like to see next by commenting down below!

Neon Dotticure Flowers

{PR Sample}

Hello lovelies! Hope everyone is having a lovely Wednesday — here in Halifax it’s raining (again) is I decided the best way to cheer myself up would be creating another look using my newly gifted Sally Hansen Neons!

If your looking for actual swatches of these polishes, you’re in luck–I finally got the energy to swatch & photograph last night so that post will be coming this weekend! In the meantime, I’ve been having a blast coming up with fun & colourful nail art looks using these polishes.

Today’s design is a super simple nail art look I am pretty confident in saying anyone can achieve! All you need in a dotting tool (or a bobby pin) & an assortment of colours.

For this manicure, the polishes I used were:

  • Base Coat: OPI Nail Envy
  • Top Coat: Seche Vive
  • Sally Hansen Miracle Gel In the Sheer
  • Sally Hansen Miracle Gel Electri-Lime
  • Sally Hansen Miracle Gel Fuchsia Fever 
  • Sally Hansen Miracle Gel Lemon Chillo
  • Sally Hansen Miracle Gel Miami Ice
  • Sally Hansen Miracle Gel Peach Please
  • Sally Hansen Miracle Gel Violet Voltage

I was really feeling some vibrant 70s vibes & this design turned out just how I imagined in my head. The pop of colour of the flowers over the sheer base just really works together–very Summer-y & fun, which is what I’m all about right now! & cheers up the blahs brought on by the torrential rain we’ve been having the last couple days. The simplicity of this design also makes me happy–I managed to create these nails in about 30 minutes last night, after I finished all my swatching, which meant I could still make it to bed before 11pm! Haha it’s the simple things in life that make me happy.

what do you think of this neon dotticure floral looking using the new Sally Hansen Neons? Have you seen these polishes in stores yet? I saw them in my local Shoppers Drug Mart just the other day, so you should definitely see them start popping up soon!

*PR SAMPLE* Some of these items were sent to me for review. However, all opinions are my own

Mix & Match Spring Nails

Good morning lovelies & happy Wednesday. It’s a new day & I finally have new nails to share. This look is what I created over my Swatch of Julep Alyssa from my previous post & I’ve been wearing it since Sunday! I really wanted something bright & Spring-y for my Easter festivities, & I loved the look so much I could bare to take it off yet!

For this manicure, the polishes I used were:

  • Base Coat: OPI Nail Envy
  • Top Coat: Seche Vive
  • Julep Alyssa (It Girl)
  • Essie Blanc
  • Essie Peach Side Babe
  • Sally Hansen Miracle Gel Orchid-ing Aside {PR sample}
  • NailStuff.ca Gold Mixed Decoration Nail Wheel {PR sample}
  • TheBaseCoat Drag Marble Nail Vinyls

Seriously loving the mix & match look of this design. The colours are Spring-y but not too Easter Egg-esque & the studs just give it a little something extra. Really, really loving the whole combination. I’m sure in a few weeks I’ll be all about neon (when I’m really craving Summer) but right now these semi-pastel shades are giving me life.

what do you think of this design? Share your thoughts down in the comments below.

Matte Floral over Coral 🌸

First nail art of this brand new year… & obviously I had to go with floral! Who says you can only wear flowers on your nails in Spring & Summer… floral is an all year nail art trend for me. Also, I have to admit, it feels really nice to be feeling up to doing my nails again. & even though I’m a wee bit rusty, it’s like riding a bike how easy it is to get back into the routine again.

For this manicure, the polishes I used were:

  • Base Coat: Essie Grow Stronger
  • Top Coat: Sally Hansen Miracle Gel Top Coat
  • Matte Top Coat: Sally Hansen Miracle Gel Matte Top Coat
  • Sally Hansen Miracle Gel Malibu Peach
  • Essie 5th Avenue
  • Sally Hansen Miracle Gel Sweet Tea
  • Sally Hansen Complete Salon Manicure Red It Online
  • Essie Suite Retreat
  • Sally Hansen Miracle Gel Sugar Fix
  • Essie Off Tropic
  • Essie First Timer
  • Essie Fashion Playground

    I love how this turned out & how the red & blurple flowers pop over the coral polish. This was definitely one of those manicures I went into with no real “plan” but kind of kind winged it… & it turned out so pretty to me! Also it was so exciting to finally get to test out my new nail art tools from NailStuff.ca.

    what do you think of this look? What nail art looks are you excited to try out this year? Maybe I’ll give watermarbling another try!

    Red Plaid Holiday Nails

    Good Morning Lovelies! Can you believe it’s only 13 days until Christmas… where has this year gone?! Even though I’ve been insane at work with Christmas coming, I’ve been trying to do my nails when I can–& trying to get in as many Christmas-y designs in as often as I can.

    (Not going to lie… painting them has been a struggle, but having time to take pictures is another story all together!)

    Today I have some pretty red plaid nails that are a combination of stamping & freehand. I LOVE plaid nails, but sometimes they can be time consuming depending on how many lines you have to free hand. By combining a plaid stamping pattern I had with a bit of freehanding, I managed to come up with a cute & relatively easy plaid look that’s perfect for this time of year!

    For this look, the polishes I used were:

    • Base Coat: Essie Grow Stronger
    • Top Coat: Essie Gel Couture Top Coat
    • Sally Hansen Miracle Gel Good Cheer-y (from the Decadence collection)
    • Sally Hansen Hard As Nails Black Heart
    • L’Oréal Getting Kilty
    • NailStuff.ca Clear Stamper

    I’m not going to lie–I’m a little rusty, & my nails & cuticles have seen better days. But it feels so good to be painting my nails again, & it always feels nice when people randomly compliment me on how pretty my nails are. Of course, then stock comes & they end up a mess… but still nice to have them done in the first place! (& more than just a since colour.)

    Going to try & cram as many Christmas designs in as possible over the next week or so, since I’ve been so bad at actually posting the last few months. But January is coming… & things are going to slow way down so I’ll be able to get back into my regular posting life soon. For everyone who has stuck around (& continues to stick around!) thank you so much! It means so much to me.

    Now the most important question remains… should I do Christmas tree, snowman or penguin nails next? Let me know in the comments below!