L.O.V.E. nails (Happy Valentine’s Day!) 💗

Good morning loves & happy Valentine’s Day!

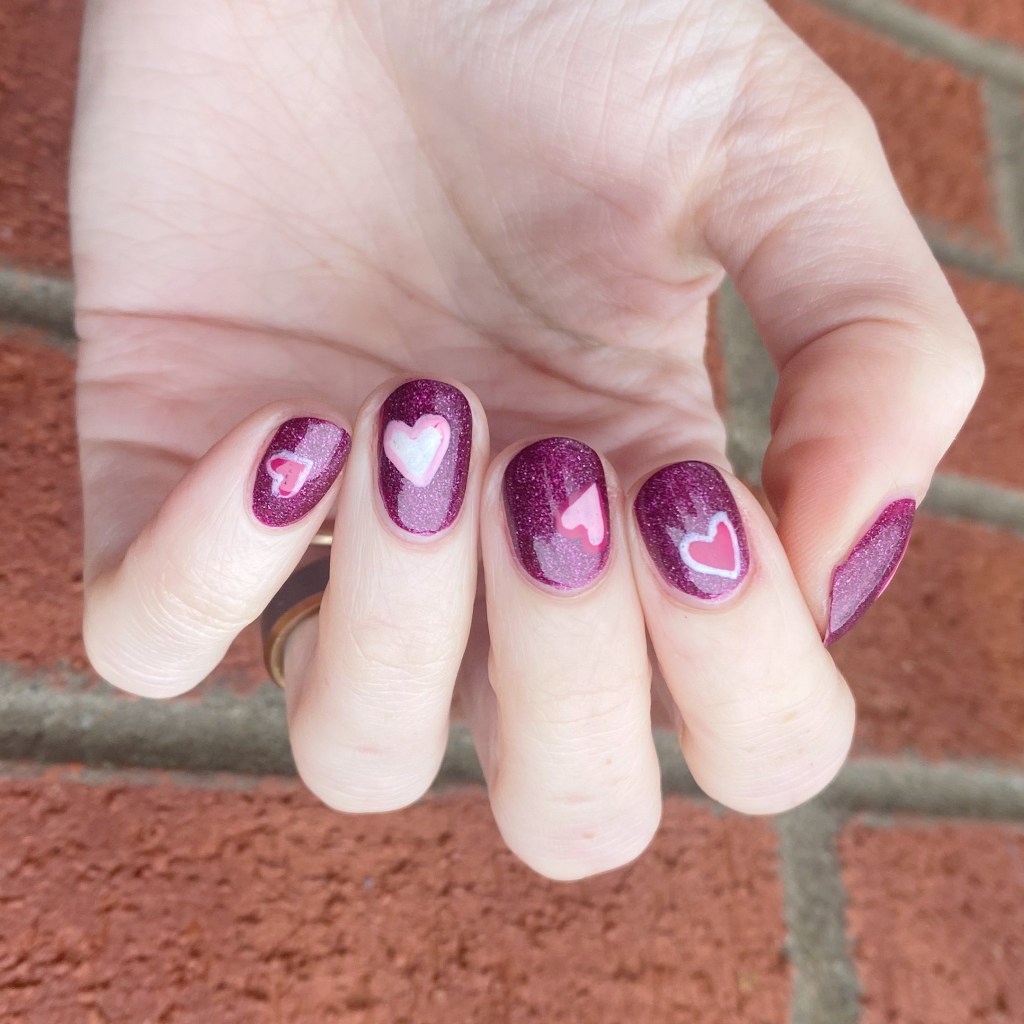
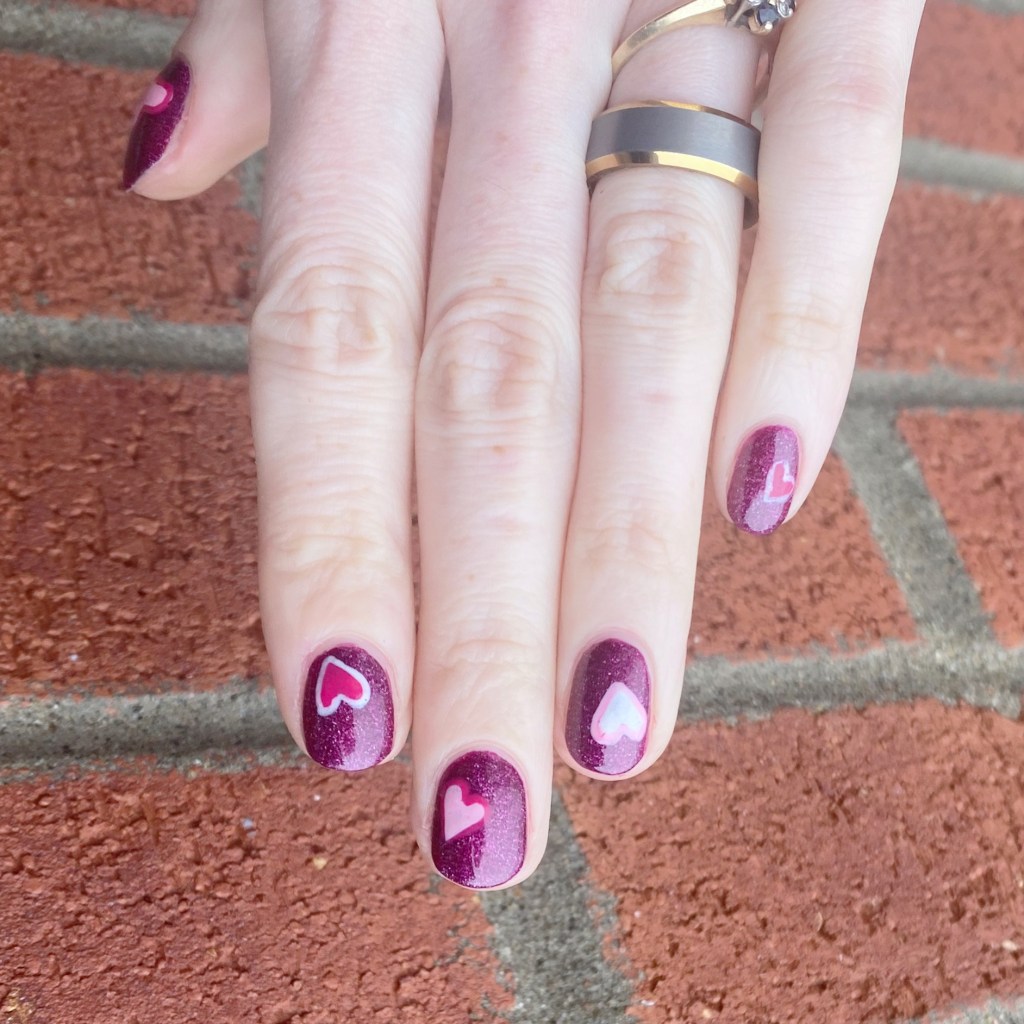
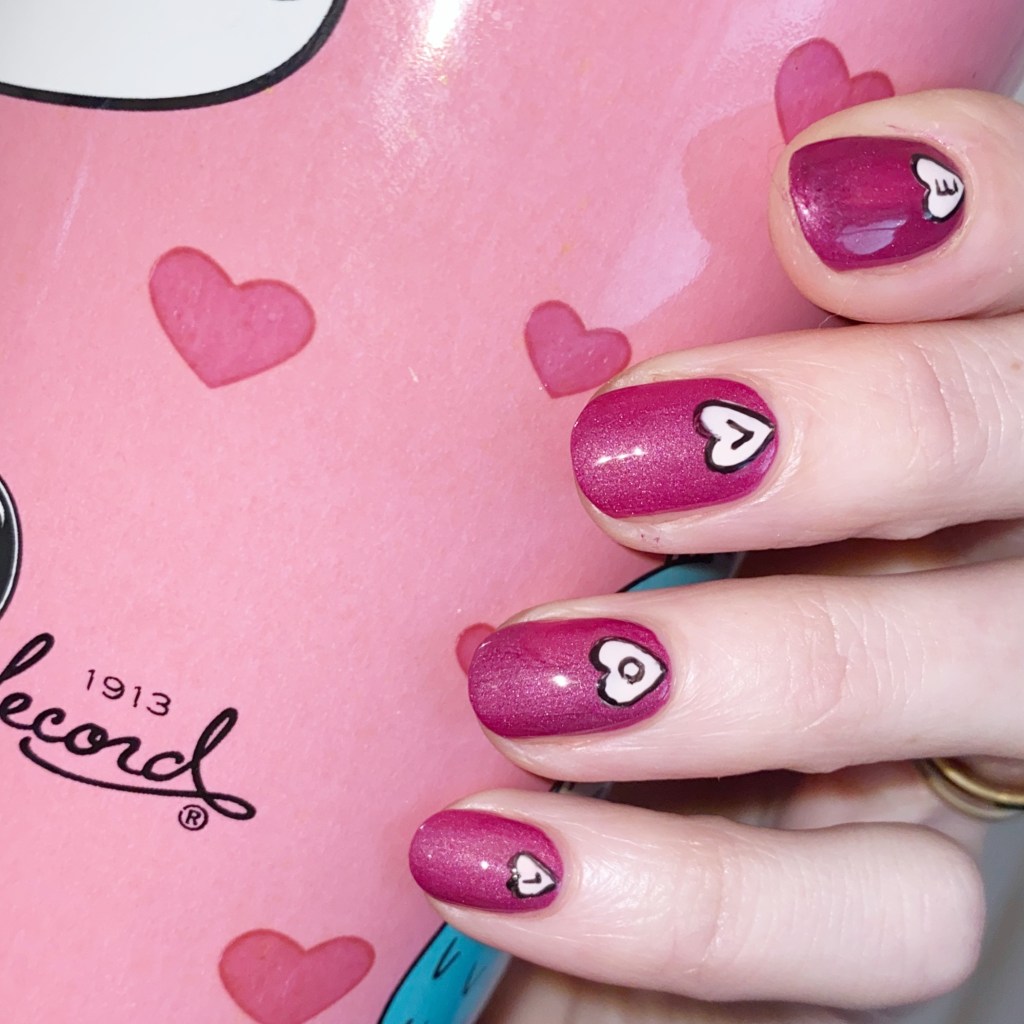
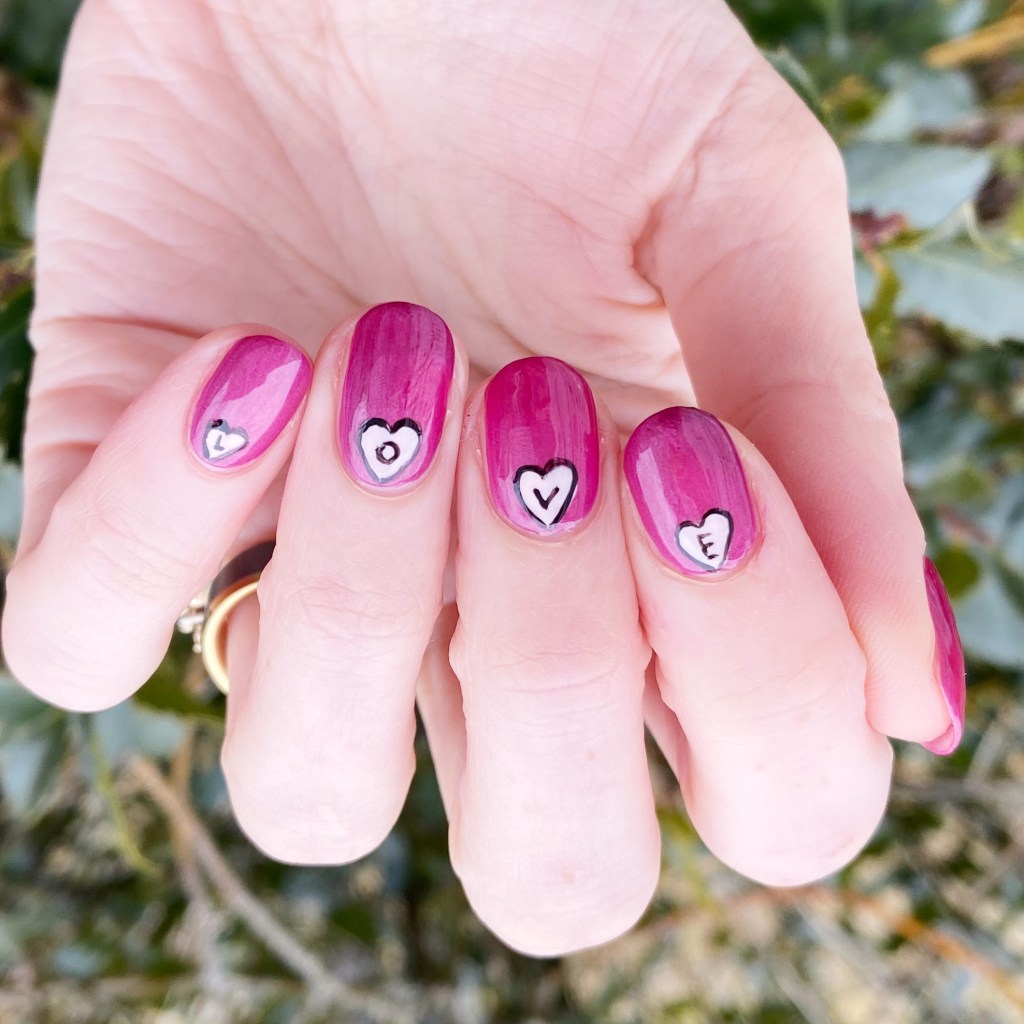
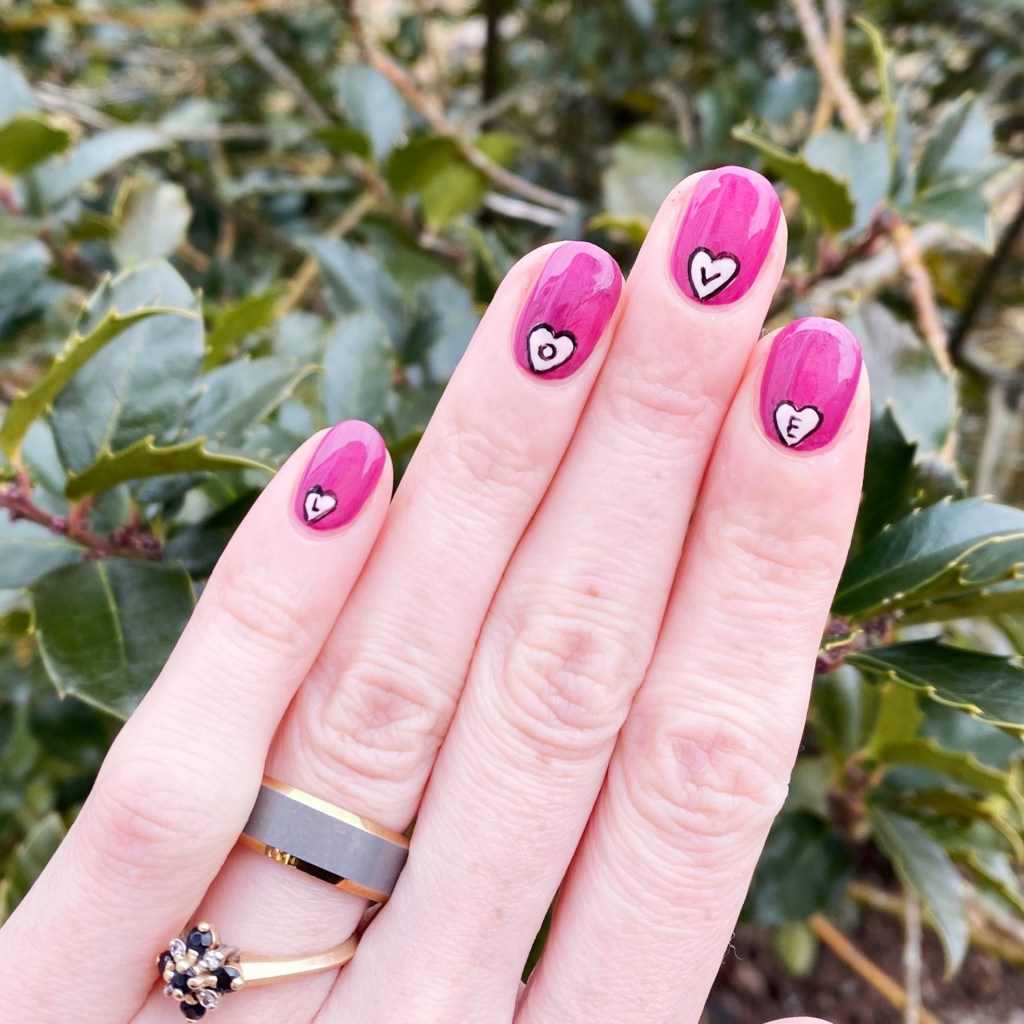
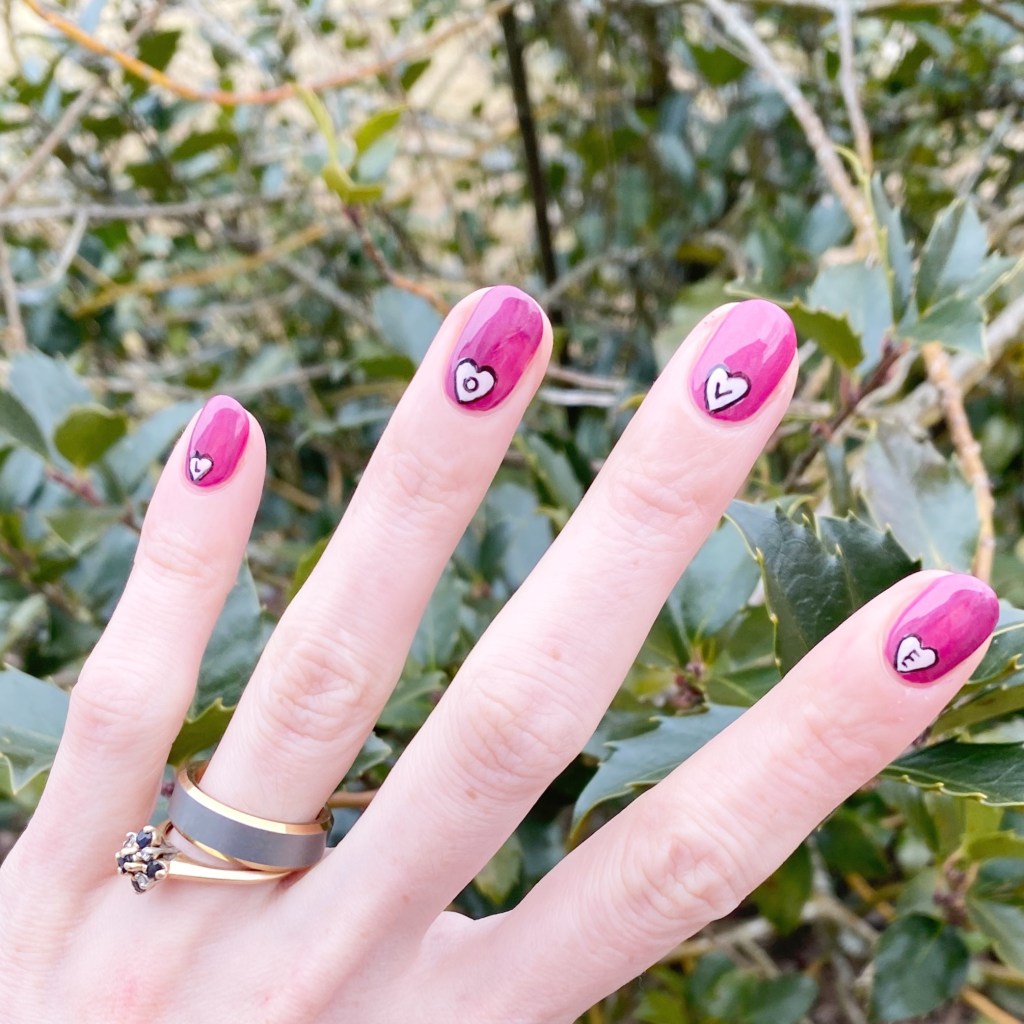
It’s a snowy Valentine’s Day here in Halifax, after a big dumping of snow. Not super impressed with the weather, but that won’t stop me from sharing my last Valentine’s Day look for this year! I really wanted to do more hearts — like accent hearts — but at the last second I decided to write L.O.V.E in the middle of them. & I’m obsessed.

They’re like heart shaped scrabble tiles! & I love it.

The polishes I used for this manicure are: 

  • Base Coat: Essie Hard To Resist Glow & Shine 
  • Top Coat: Seche Vite Fast Dry Top Coat
  • QUO Beauty Velveteen
  • ACO by Ardene Flawless
  • Starrily Vantablack
  • Dotting tool (NailStuff.ca — Dotting Tool Trio)
  • NailStuff.ca 4mm Micro Detail Brush

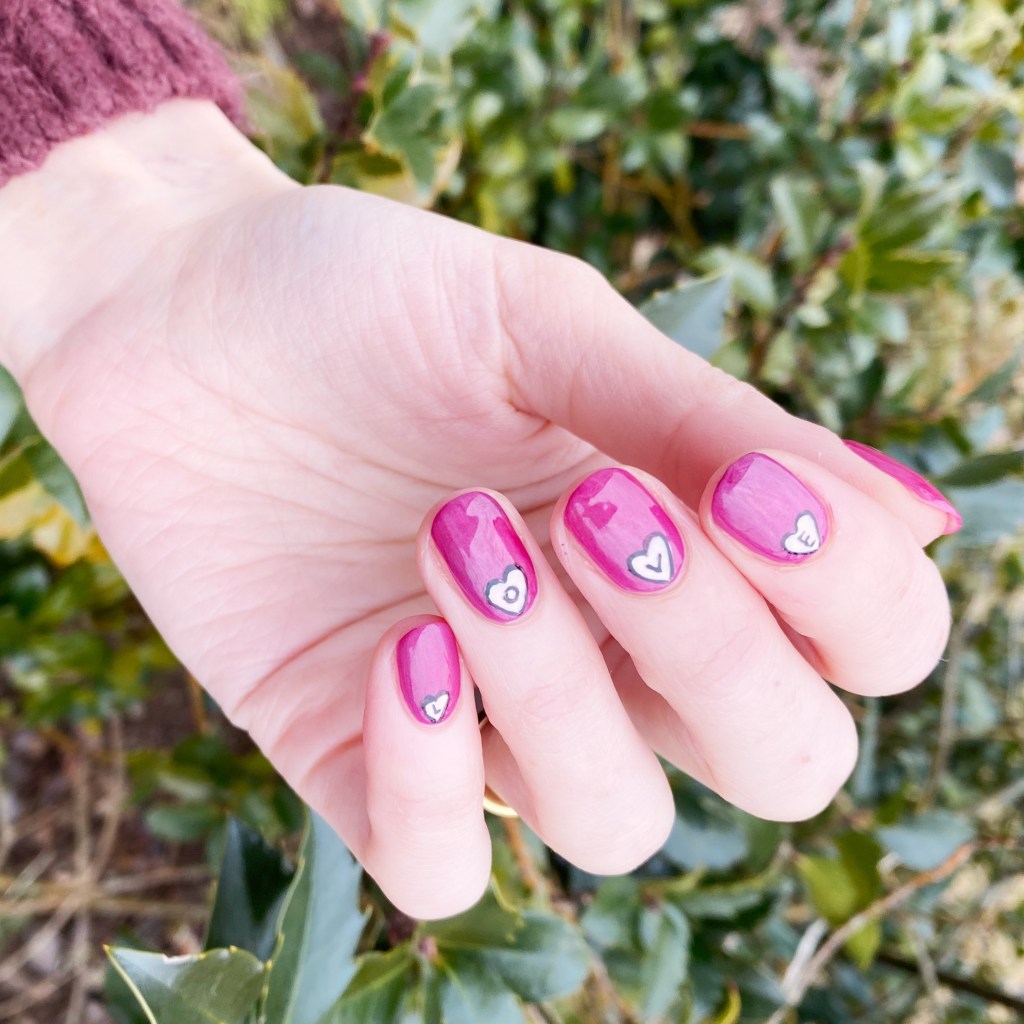
I’m not sure why, but I really wants to do heart accent nails at the base of my nails. But when I finished my little pale pink hearts, they looked a little basic, so I decided to outline them in black — my go to for jazzing up a manicure. BUT THEN, I thought: what if I attempted to spell out Love in my hearts. It was a risk, but it turned out so awesome, so I couldn’t be happier!

What do you think about this love themed design? Do you like this simple nail art? Let me know all your thoughts in the comments below!

I hope everyone has a happy Valentine’s Day, & if it’s not your thing then I hope you enjoy tomorrow which is 50% of chocolate day!

♥︎

Valentine’s Gradient Dotticure

Hello beauties & happy Thursday! & what a gorgeous & sunny Thursday it is here on the East Coast — too bad we’re going to hit another Winter storm tomorrow.

Is it Spring yet?

Today though, I’m concentrating on some more Valentine’s Day inspired nails with a fun (& easy) gradient dotticure. I wanted something pink & fun leading up to the big day, but didn’t necessarily want to go fun on hearts with this look. So I thought why not capture the essence of the holiday with the colours I was feeling, without out right saying Valentine’s. & besides, what is more fun than a dotticure.

The polishes I used for this manicure are: 

  • Base Coat: Essie Hard To Resist Glow & Shine 
  • Top Coat: Seche Vite Fast Dry Top Coat
  • Sally Hansen Good. Kind. Pure. Almond Tan
  • Sally Hansen GKP Eco Rose
  • Sally Hansen GKP Peony Origins
  • Sally Hansen GKP Pomegranate Punch
  • Dotting tool (NailStuff.ca — Dotting Tool Trio)

I wanted a really neutral base shade, that wasn’t white & wasn’t completely naked, which is why I picked Sally Hansen Good. Kind. Pure in Almond Tan. I feel like it’s pretty close to my natural colouring. & then I figured, why not just keep the Good. Kind. Pure. train going with a few more of my favourite pink-y shades from my stash. & bam! A fun gradient dotticure which is perfect for a Valentine’s date night, or to enjoy 50% off chocolate on the 15th. Either way, it was a super easy design to do, so I was excited to wear it!

What do you think about this gradient dotticure design? Are you a fan of these funky easy designs, or do you prefer something a little more complicated? Let me know what you think, & what colour combination you would rock this design in!

Have a happy Thursday loves ♥︎

Pink on Pink Valentine’s Hearts 💗

Hello lovelies. It’s officially one week until Valentine’s Day, so I figured that a good enough time as any to start with a little love-ly nail art. Truth be told, I’m not a huge fan of Valentine’s Day… minus to opportunity to make cupcakes. But I do like the excuse to pull out all of my pink nail polishes at once, so I’m hoping to share a few nail art looks over the next week.

First up, a simple & slightly rustic heart design. I was inspired by my base polish pick, & decided to build my manicure around it.

The polishes I used for this manicure are: 

  • Base Coat: Essie Hard To Resist Glow & Shine 
  • Top Coat: Seche Vite Fast Dry Top Coat
  • OPI DS Extravagance
  • OPI Koala Berry
  • OPI Pinking of You
  • OPI Chiffon My Mi
  • Dotting tool (NailStuff.ca — Dotting Tool Trio)
  • NailStuff.ca Mermaid Tail Nail Brush Trio (11mm Liner Brush)

How cute did these little hearts turn out? I feel like free handing hearts can be kind of hit or miss, so I was a bit scared how they would turn out — especially because I was not in the mood to start my design all over again. I did like the hearts just solid colours, but I wanted to try outlining the hearts, & I’m so glad I did because I feel like it made them pop off the nail so much more vibrantly! & they don’t seem so one dimensional. Absolutely adorable.

What do you think about these adorable pink on pink heart nails? Have you been playing around with some Valentine’s (or anti-Valentine’s) Day designs for this year? I’m definitely thinking pink (duh) & maybe a gradient dotticure? I can’t wait to share what design I end up choosing!

♥︎

Nail Art Warriors for Maria (@so_nailicious)

Hello lovelies.

Today’s post is a special one for a very special member of the nail art community. Maria, aka @so_nailicious, has been a huge inspiration in the nail art world for a long time, & a personal nail art inspiration to me since I really started painting my nails. Over the last year, she has been facing some really tough health battles as she was diagnosed with MS, & as a result been forced to stop doing things that once brought her joy… like painting her nails. So Magda (@redheadnails) banded a group of us together so do some very special manicures in her honour, & I absolutely had to jump at the opportunity!

The colours orange & blue were chosen — orange, which is the colour for MS awareness, & blue which is a colour Maria loves. We also went with a “power” theme, to inspire & show off the strength that Maria is showing in her fight against this heart wrenching disease.

The polishes I used for this manicure are: 

  • Base Coat: Essie Hard To Resist Glow & Shine 
  • Top Coat: Seche Vite Fast Dry Top Coat
  • Sally Hansen Xtreme Wear Pacific Blue (the original formula)
  • Sally Hansen Complete Salon Manicure One in a Melon
  • Sally Hansen InstaDri Pump-kid
  • Starrily Vantablack
  • Nailstuff.ca clear stamper & scraper set
  • Essence “Stamp It!” plate
  • Unknown stamping plate (bought as part of a set of Dollarama in my early nail art days)

As I mentioned, I was super proud to do these nails in honour of Maria, as her nails & nail art has been an inspiration of mine for a long time, & I wanted to show even though she may be struggling right now & unable to do one of the things she loves, she’s still inspiring her friends in the nail art community everyday!

Check out #nailartwarriorsformaria on Instagram to see all the other beautiful & empowering manicures!

Hot Pink & Polka Dots

Hello beauties & happy Tuesday! A very, very snowy Tuesday here. The weather definitely cannot make up its mind lately.

Today I have a pretty design to share that I actually did a little while ago, but didn’t get a chance to share. I thought that it would be gorgeous for a pre-Valentine’s Day design, so I wanted to share.

The polishes I used for this manicure are:

  • Base Coat: Essie Hard To Resist Glow & Shine 
  • Top Coat: Seche Vite Fast Dry Top Coat
  • Essie Swoon in the Lagoon
  • Sally Hansen Miracle Gel Blacky-O
  • Dotting tool (I always use mine from NailStuff.ca — Dotting Tool Trio)

Gosh I love a good polka dot design. It’s literally the easiest & quickest nail art I think you can do — & it always looks so put together. This is definitely a great nail art look for anyone wanting fun nails, without wanting to put an hour+ into painting something.

What do you think about this nail art look? Is this a nice prelude to February & the Valentine’s Day looks to come? Let me know all your thoughts down below!