Hello loves & happy Friday! & happy first day of August — how crazy is that?
How is everyone enjoying their week so far? I’ve been enjoying the very warm temperatures while simultaneously dreaming about pumpkin spice lattes & Halloween costumes. I’m a complicated girl, what can I say. I’ve also found myself thinking about Autumn-y nails & nail designs.
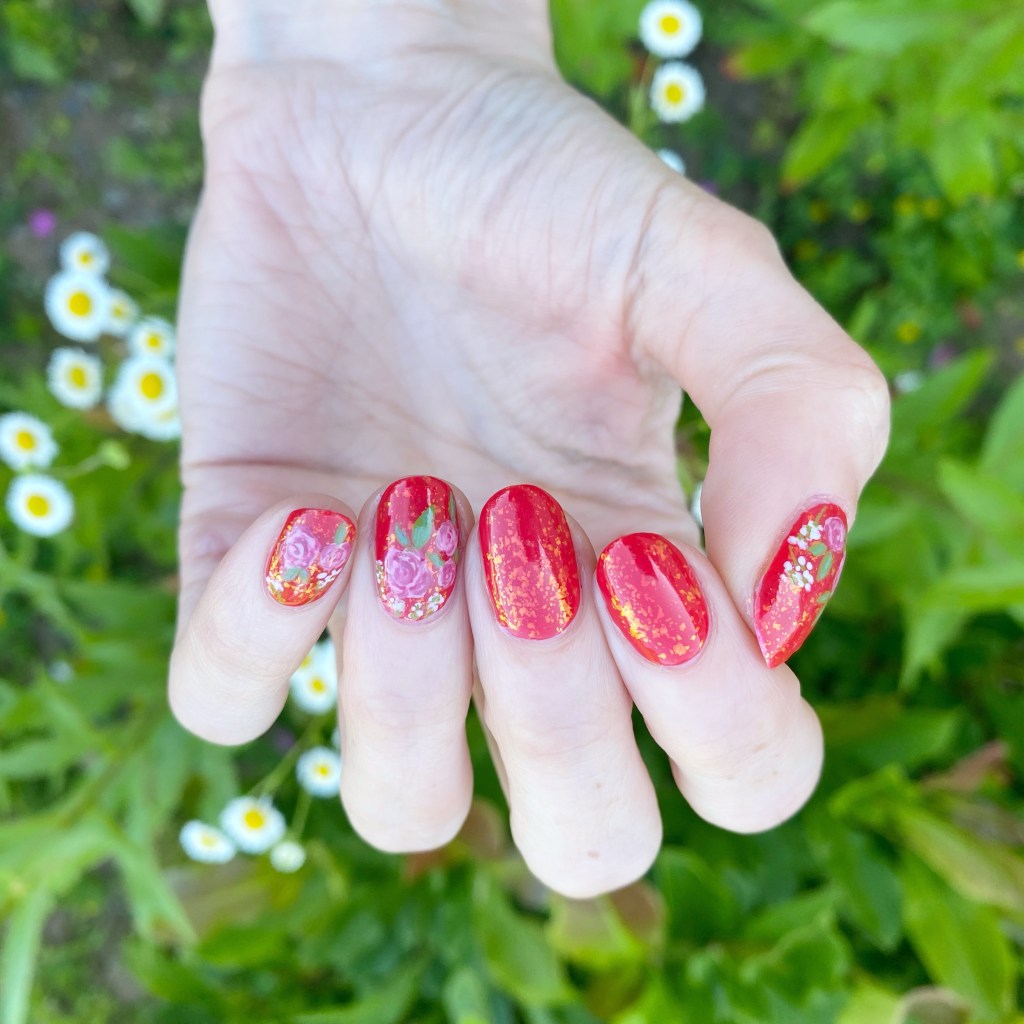
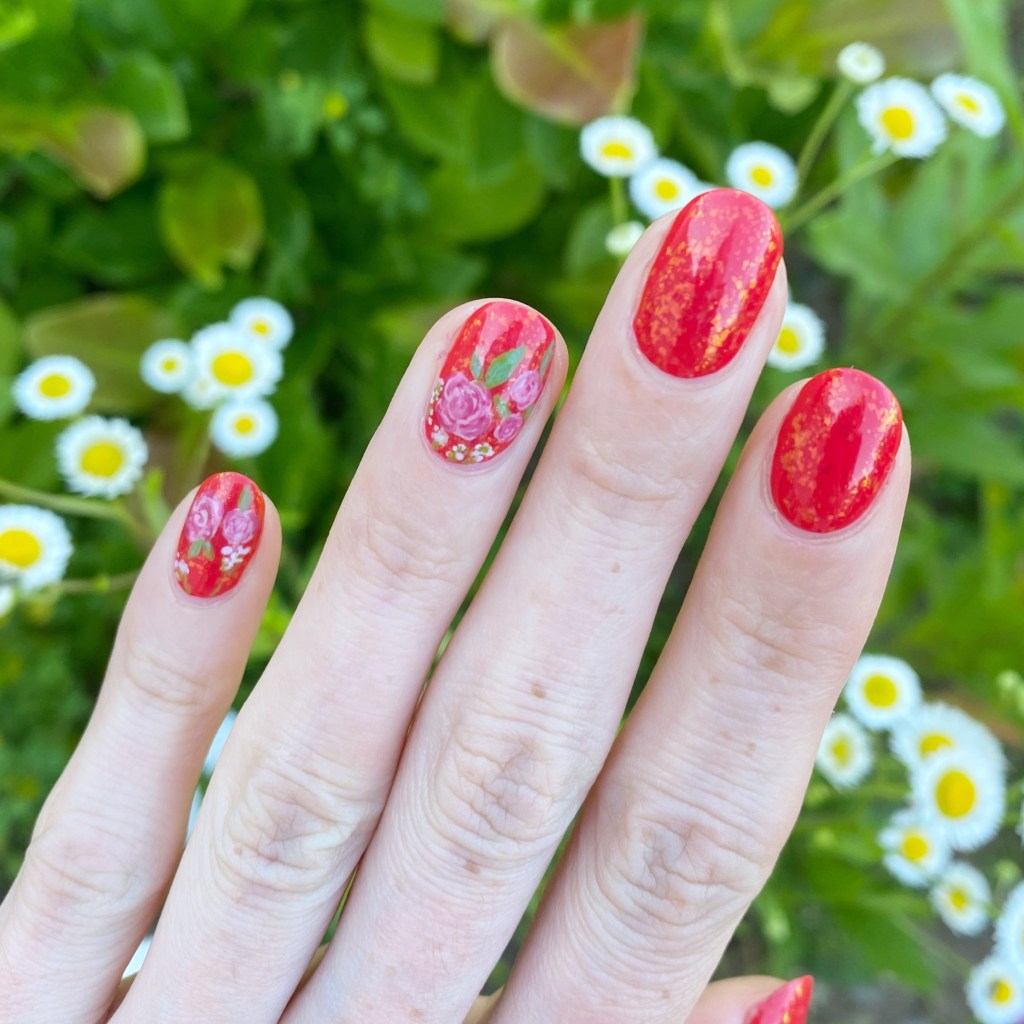
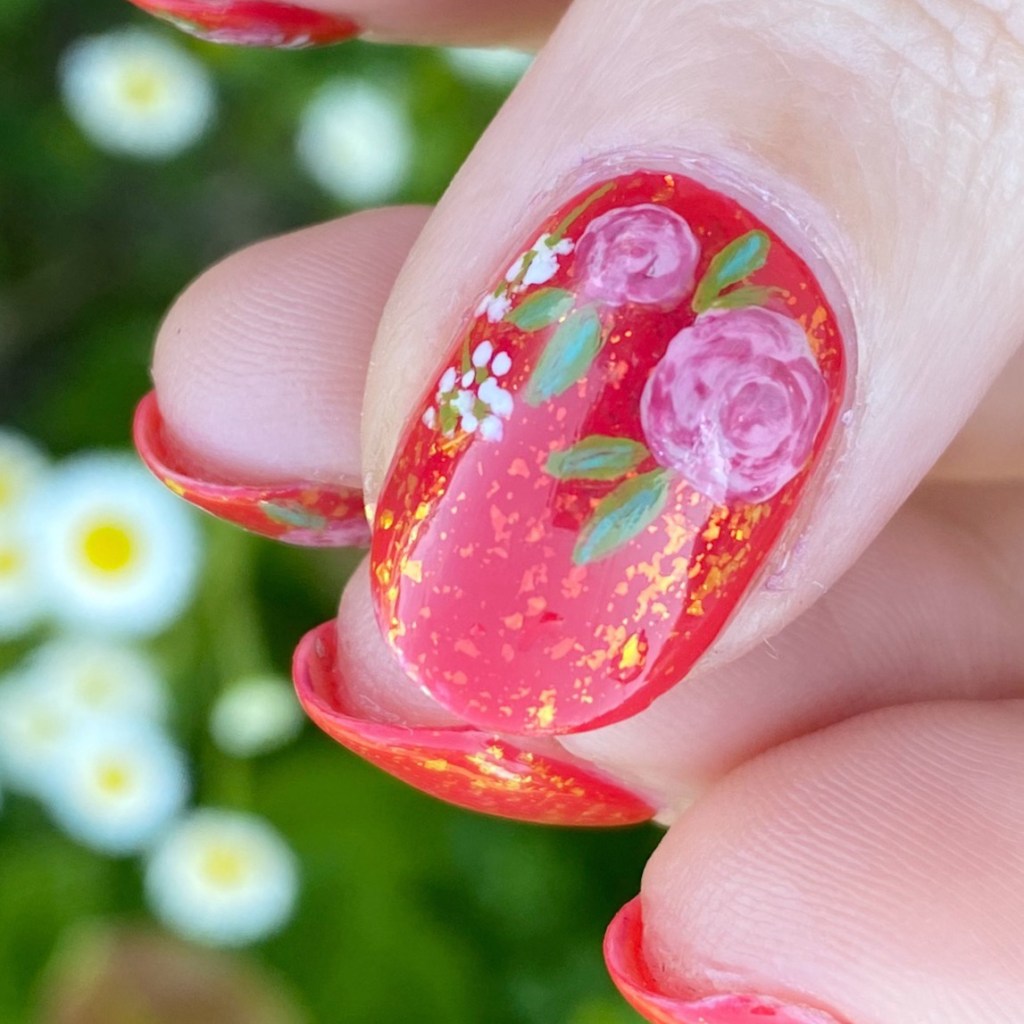
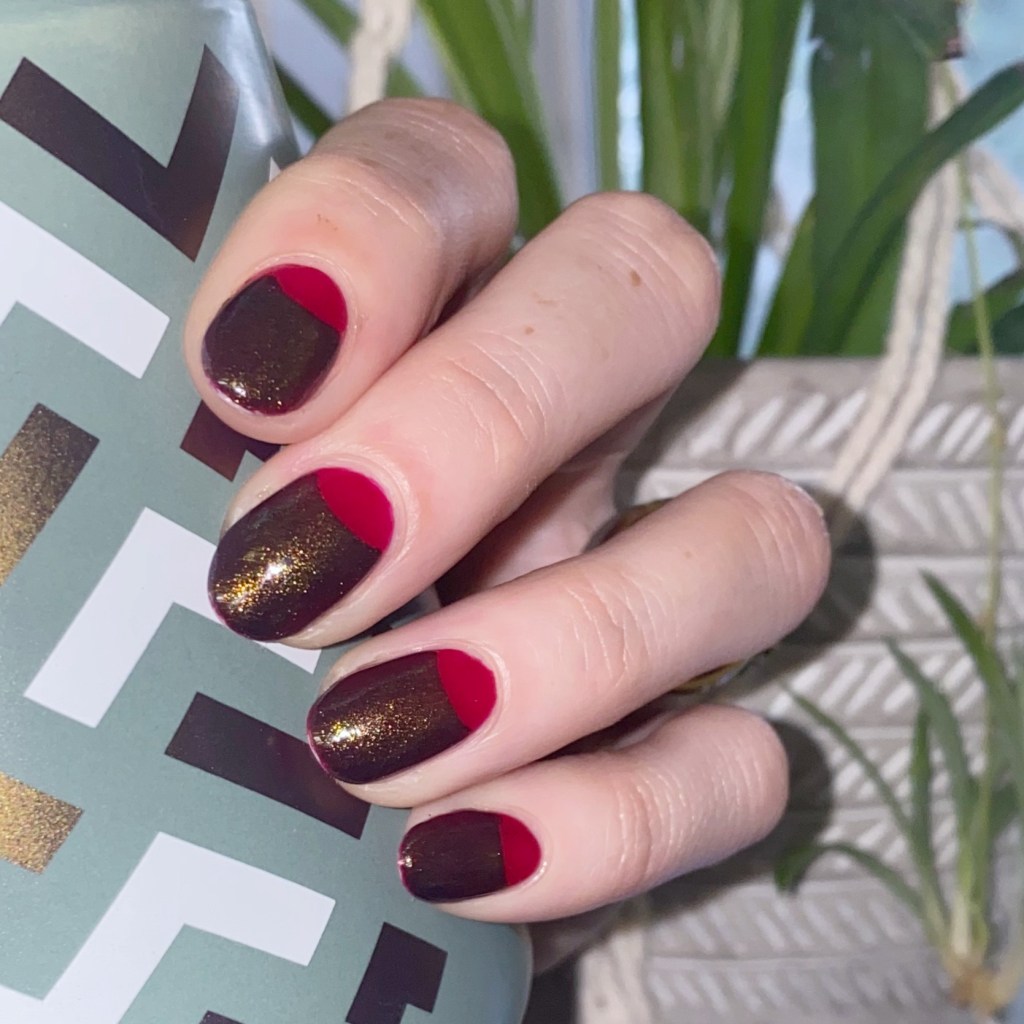
Today’s look, I guess, you could call somewhat Autumn inspired. I was thinking about a red on red half moon idea… but then added some shifty top coat, & they turned into something different entirely. I’m calling them villain-esque, because they totally look the part.


The polishes I used for this manicure are:
- Top Coat: Essie Good To Go Top Coat
- Base Coat: China Glaze Calcium Gel Fortifier
- Butter London Saucy Jack
- Essie Tailored By Twilight *pr
- Sally Hansen Miracle Gel Top Coat Moonlight
- Paper hole reinforcements

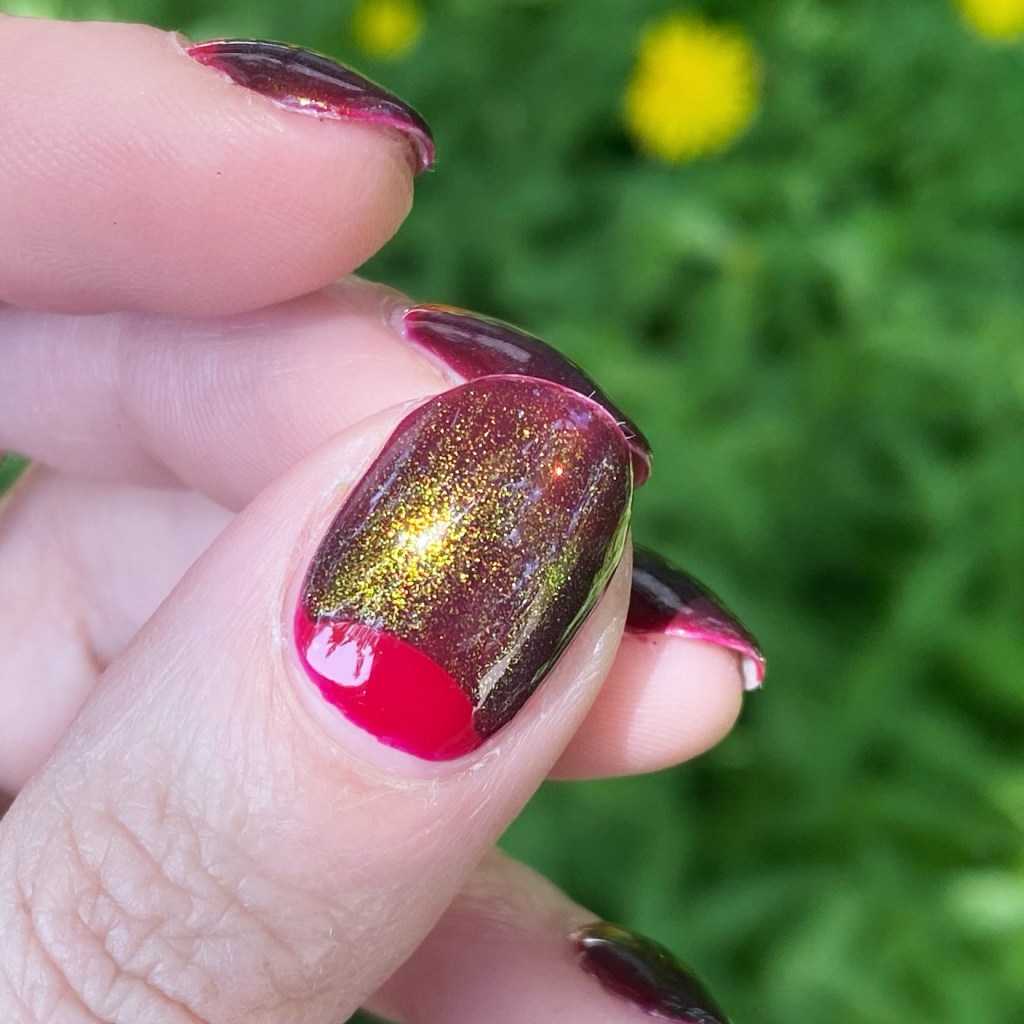
What do you think about this combination? I really like the dark red over the light red, but the addition of the golden shimmer topper really gives it an extra something. Obviously, this look is a little dark for the hot days of August… but I’m a risk taker.
Also I will never not love a half moon manicure. It’s also reminding me I really, really need to play with my nail vinyls more. I have so many just sitting untouched in my folder, waiting to be used. I need to rectify that soon (&maybe get some new ones that are fall themed for the ‘ber months.)
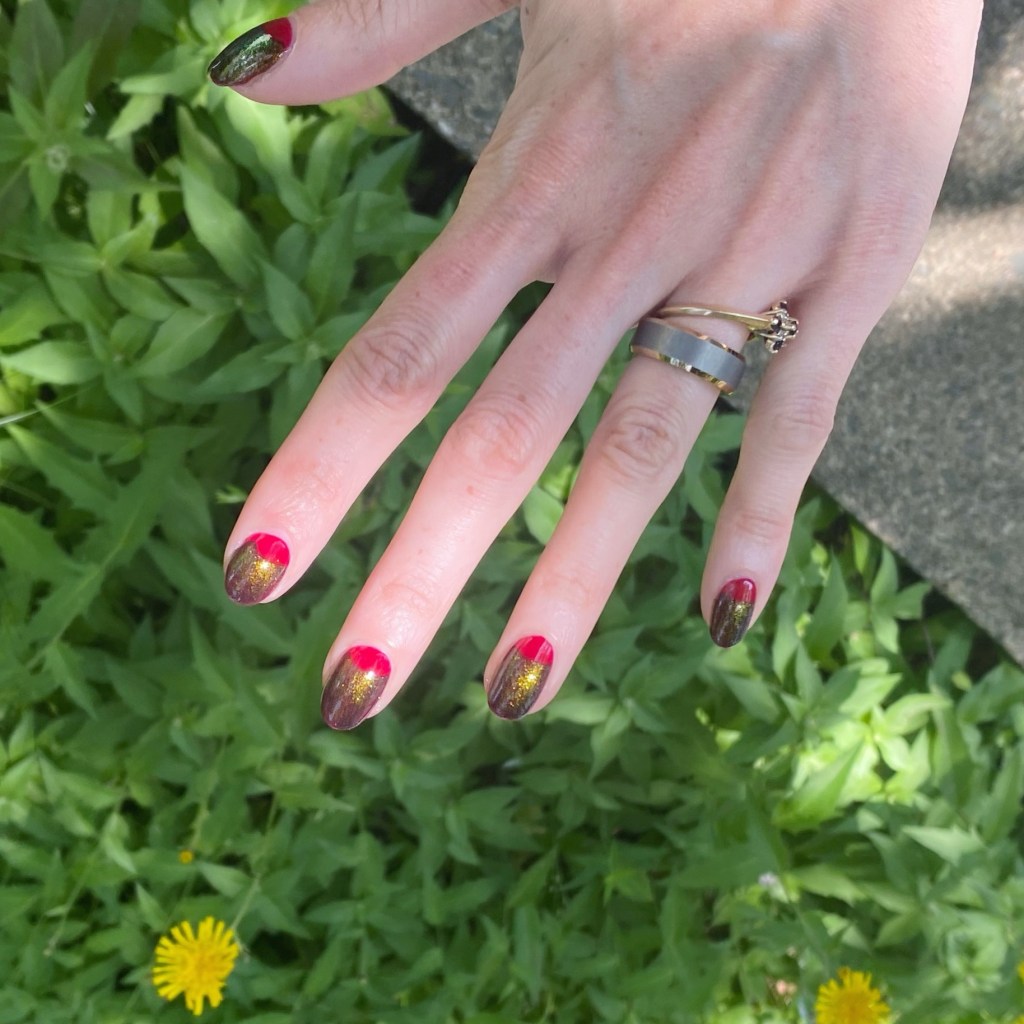
What do you think about these half moons? Do you like this design as much as I do? Are you a fan of the half moons for easy nail art?
Happy Friday! Enjoy your weekend!
♥︎