Pink Flakie Glitter Placement

Hello lovelies & happy Wednesday! Is it chilly where you are — because it’s definitely chilly here.

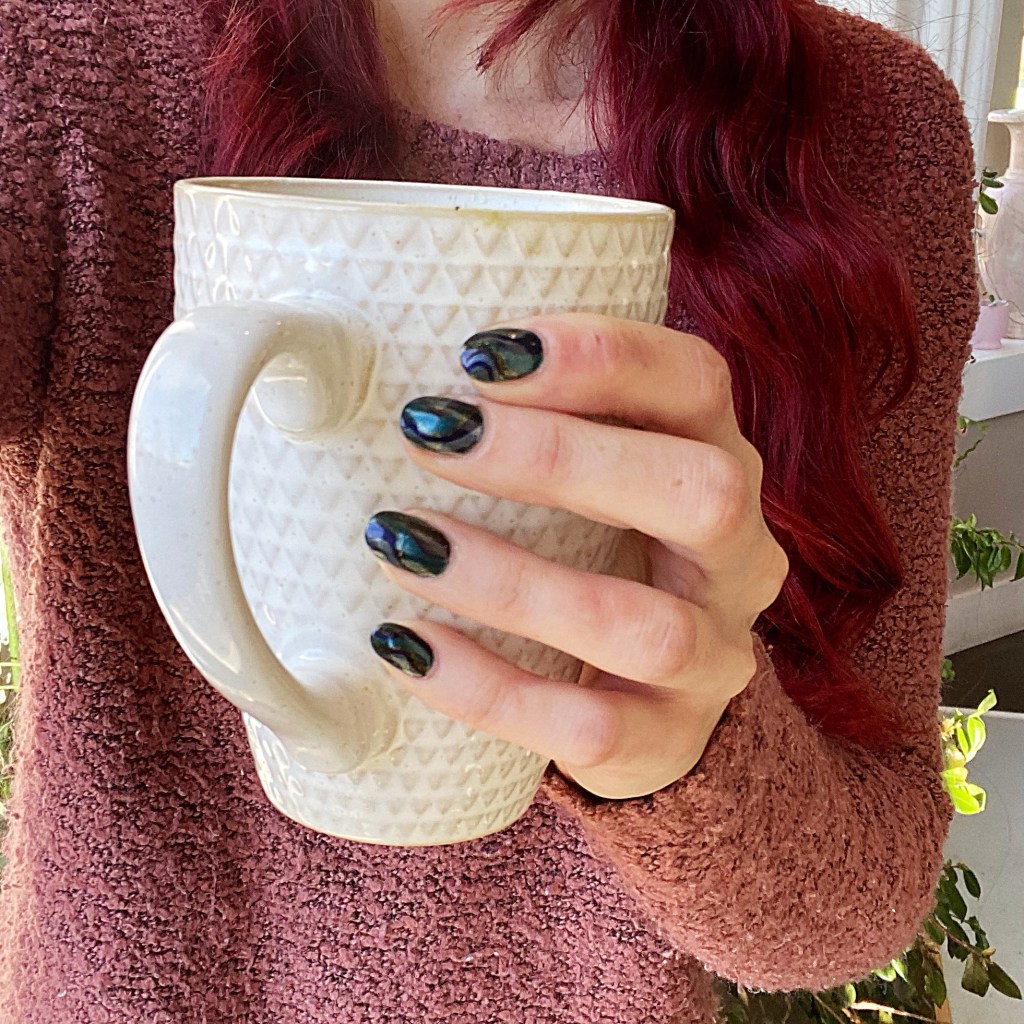
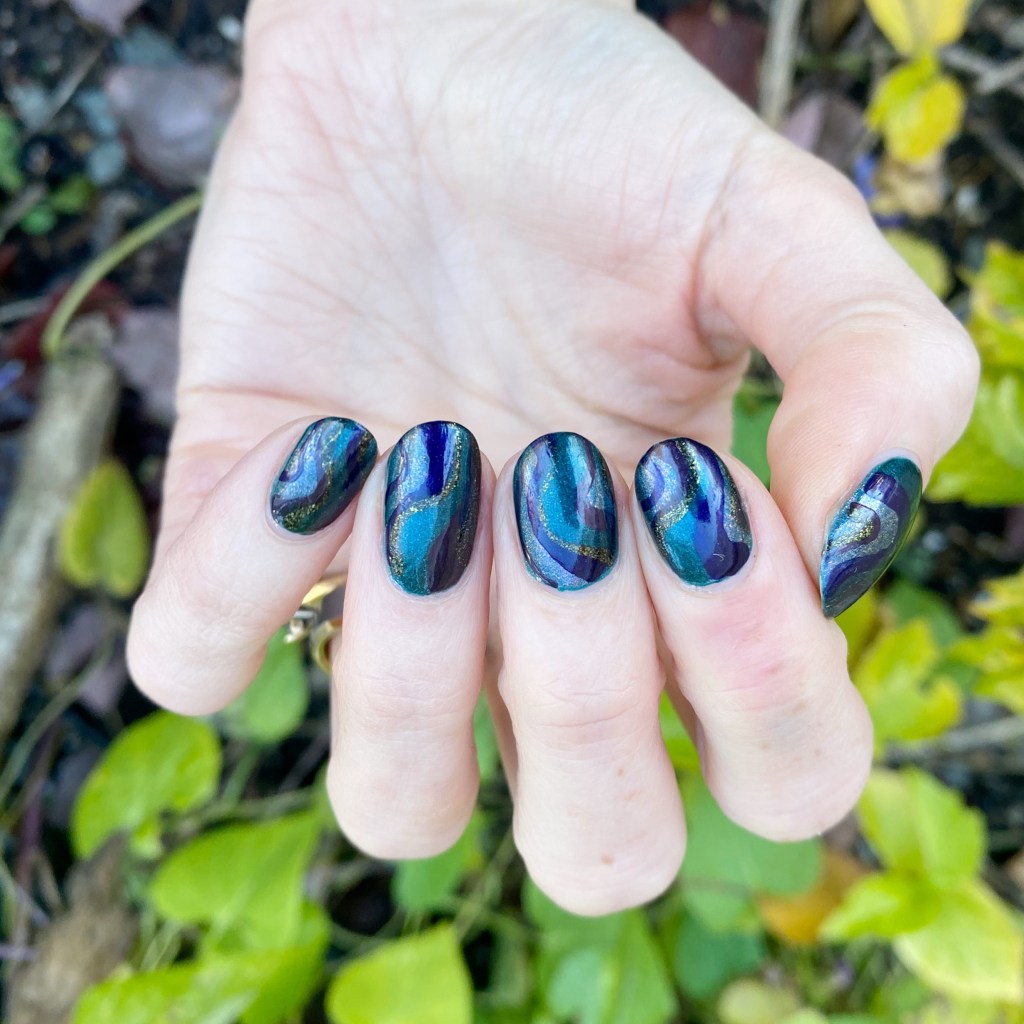
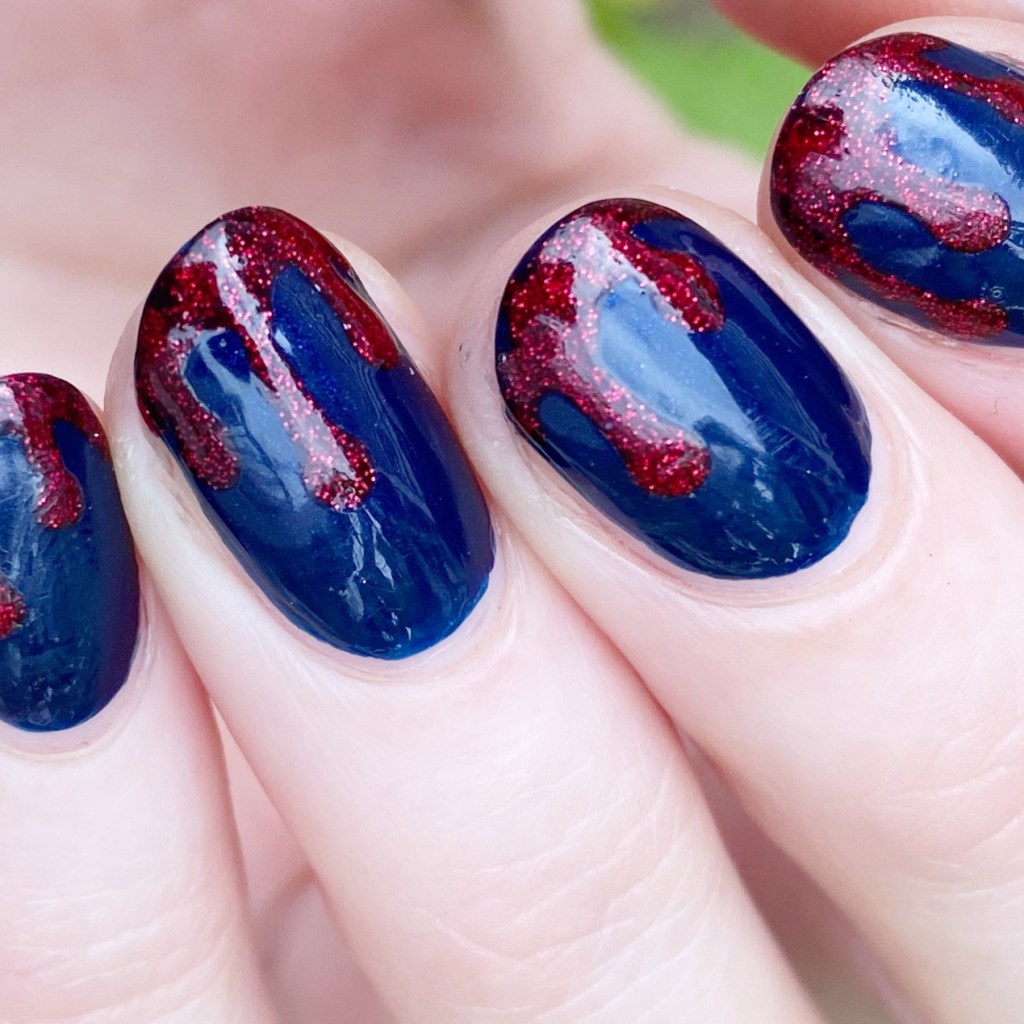
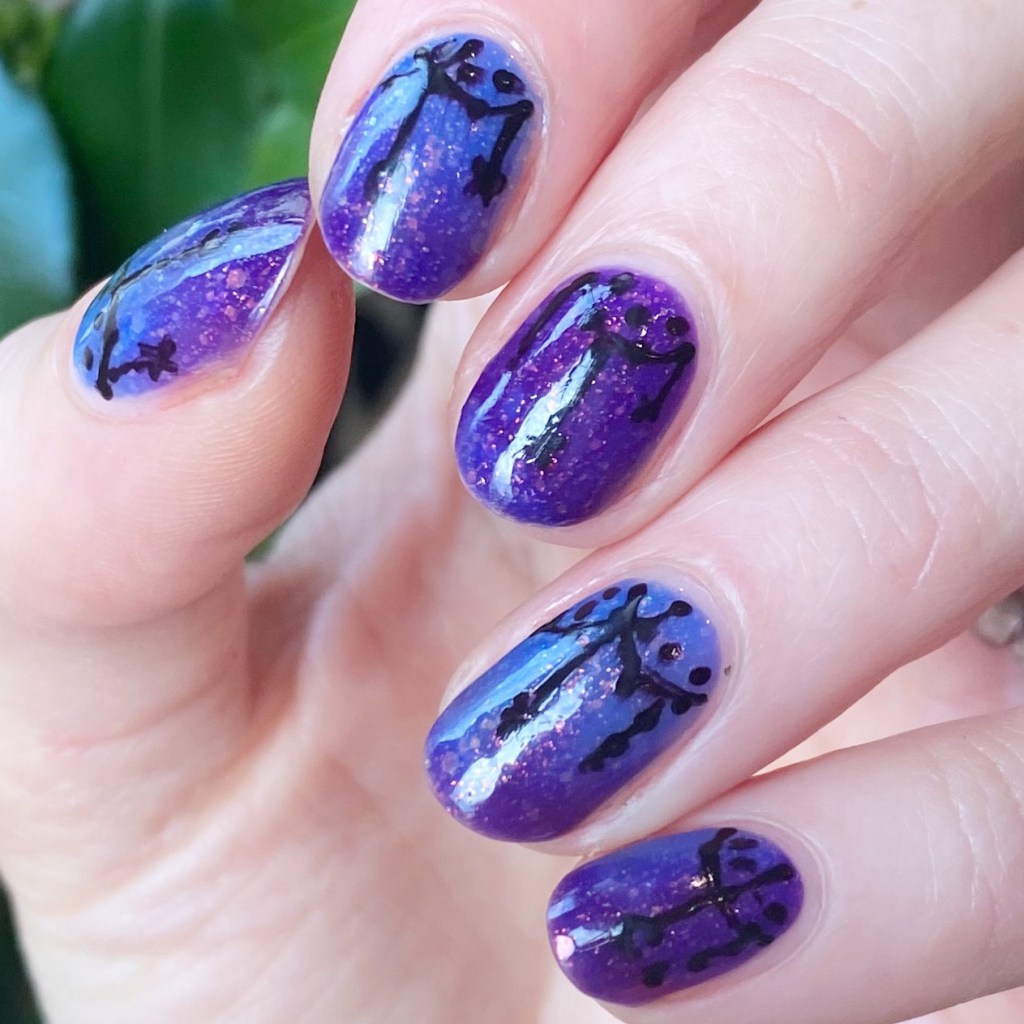
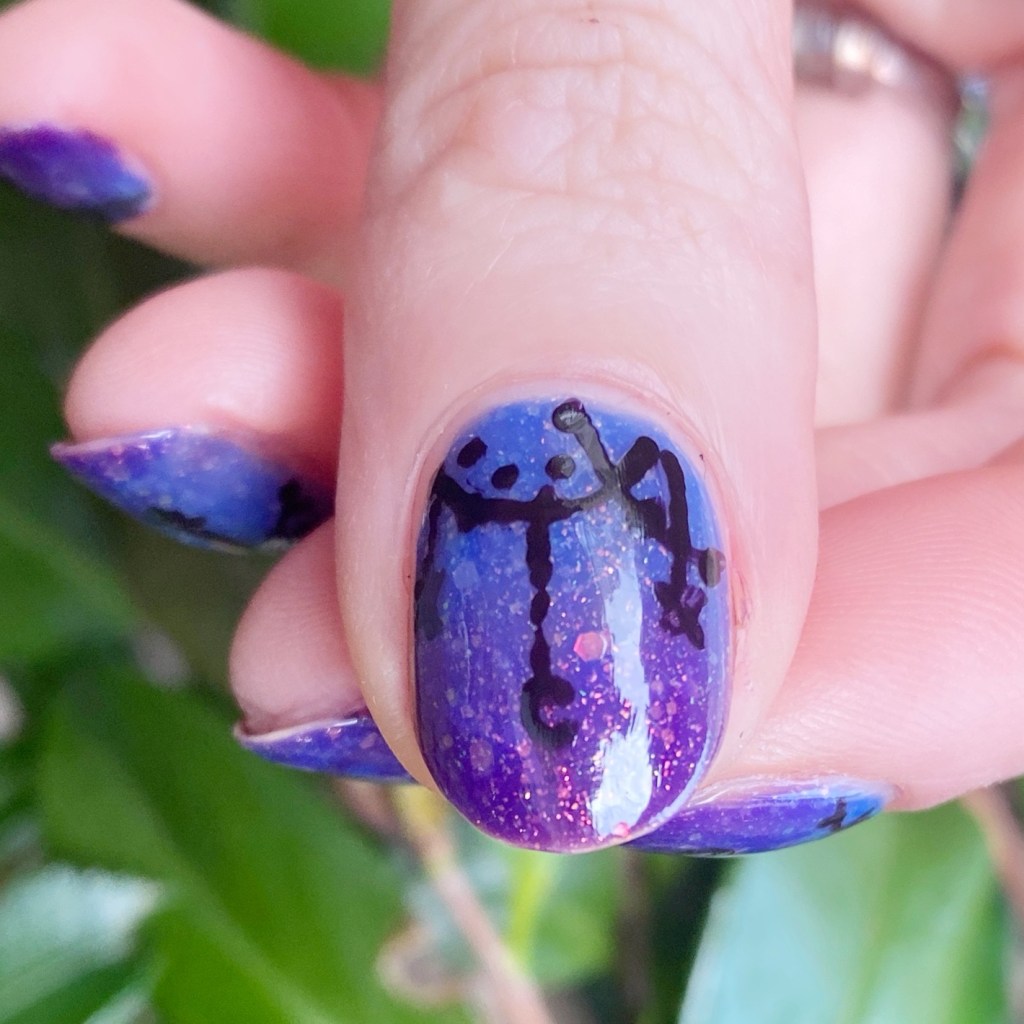
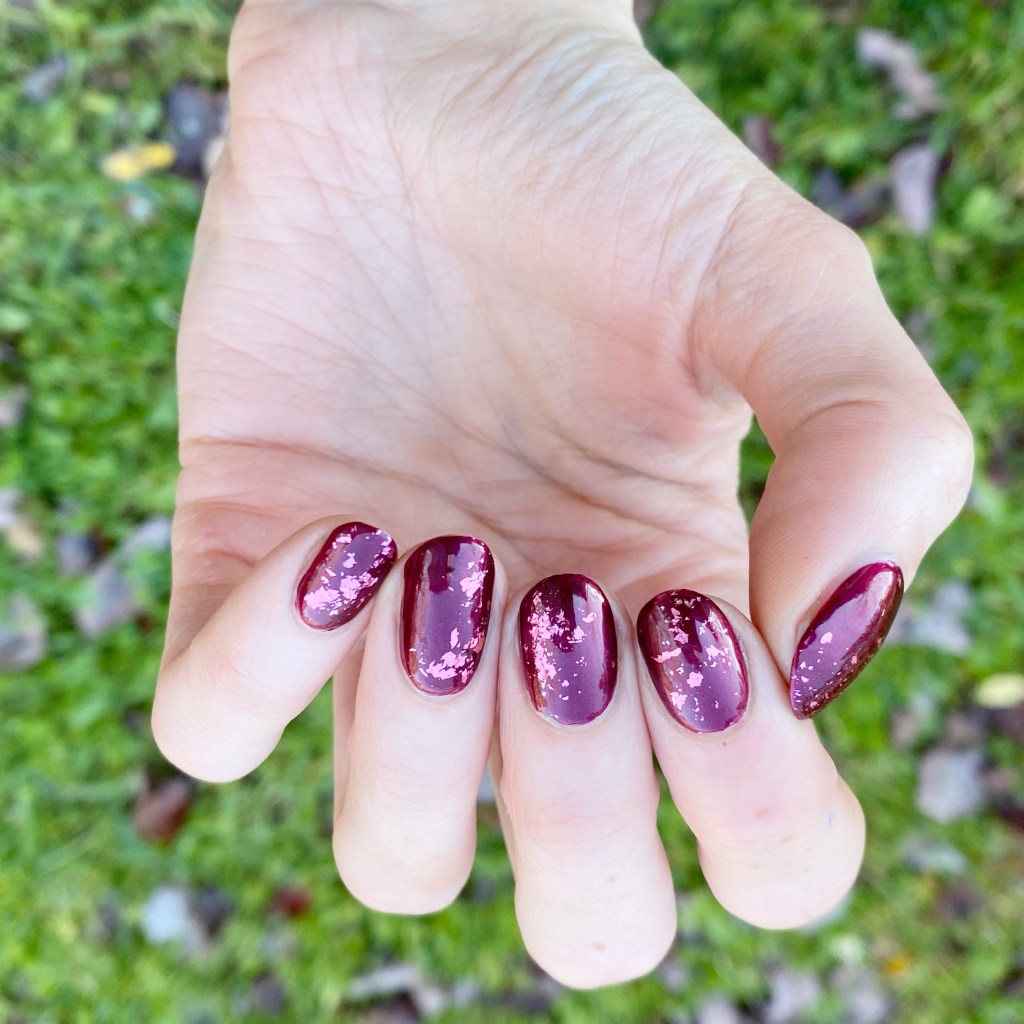
Today I have another simple but beautiful design to share with you. I was already wearing this beautiful berry polish, & decided what it really needed was some glitter placement. My original plan was to do gold, but when I was browsing through my box of glitters I saw this beautiful pink flakie glitter I was gifted c/o: NailStuff & decided it would look just stunning over this base!

& I was right!

The polishes I used for this manicure are: 

  • Top Coat: Sally Hansen InstaDri Top Coat (red bottle) 
  • Base Coat: Sally Hansen Miracle Cure
  • Sally Hansen Miracle Gel Frosted Berries
  • NailStuff Pink Foil Glitter (no longer available)
  • Sally Hansen Salon Chrome Top Coat (no longer available — but works so good for applying these kinds of glitters!)
  • Small Nail Art Brush

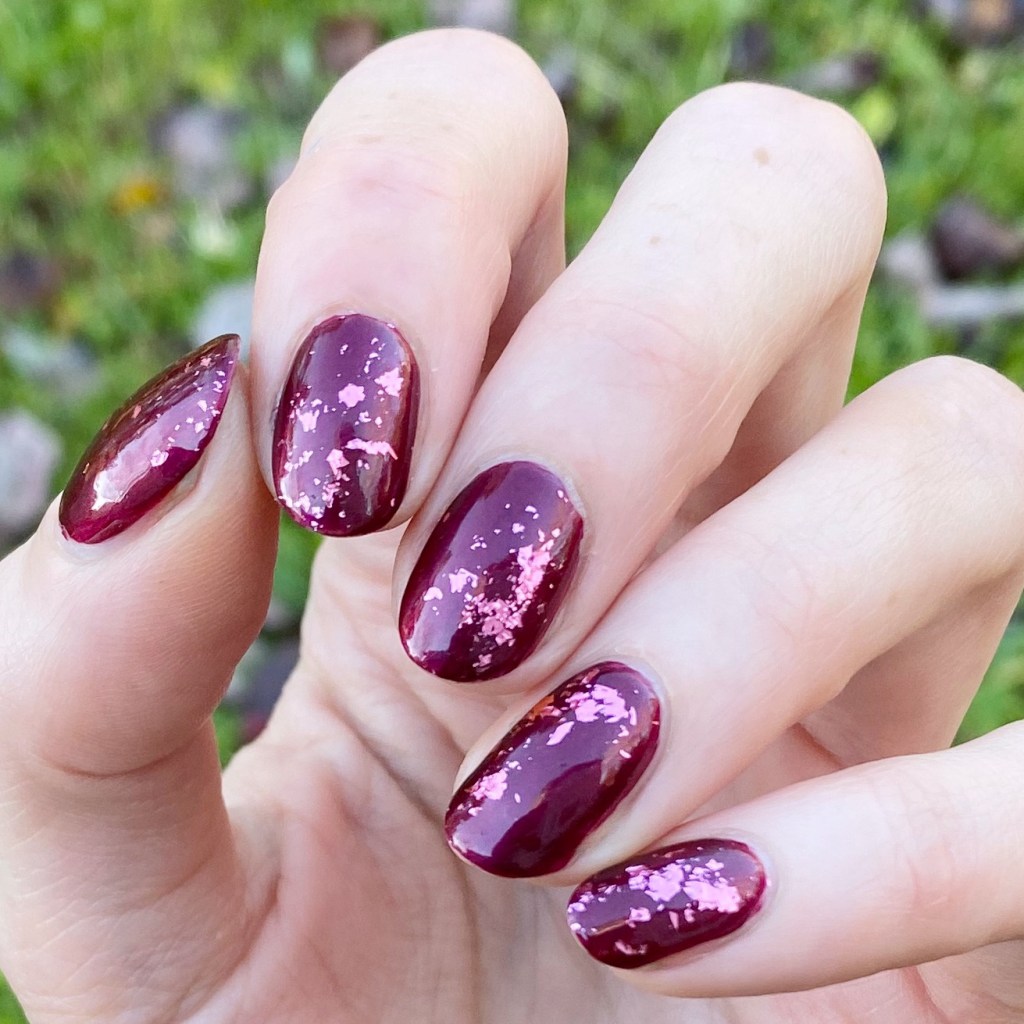
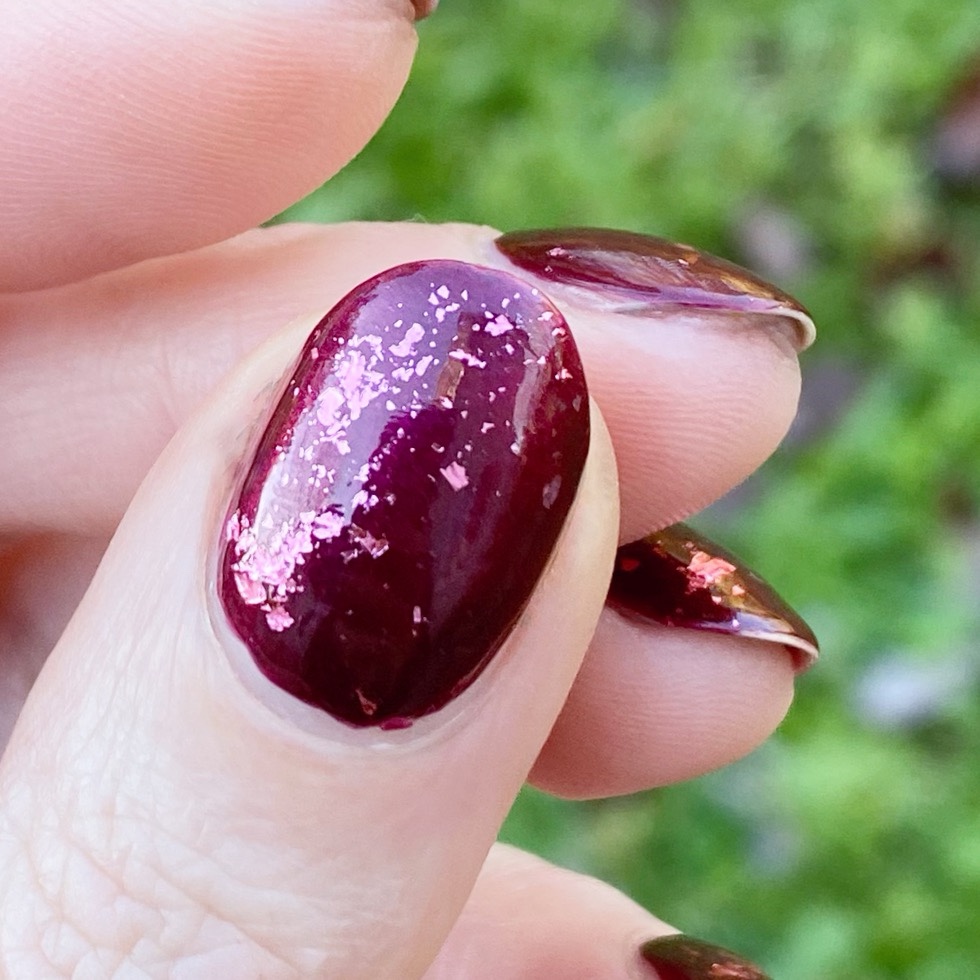
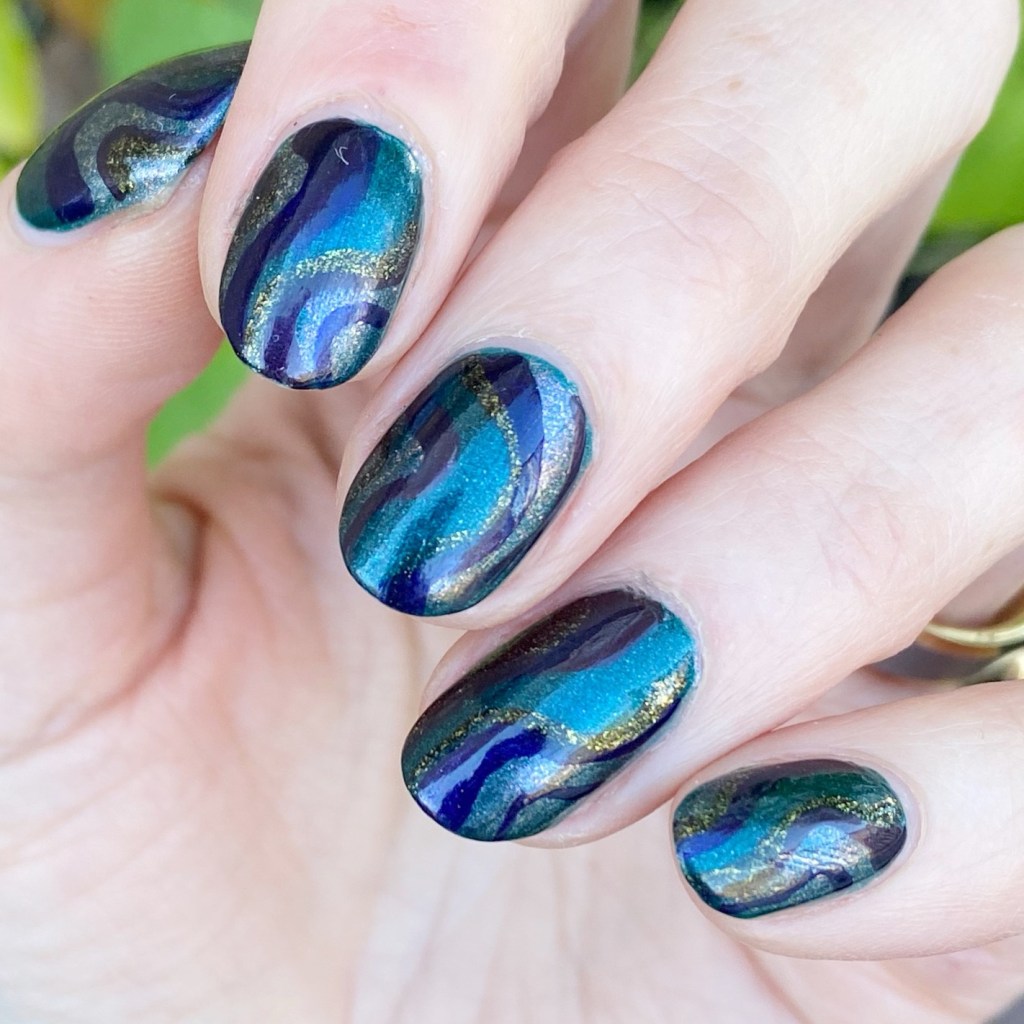
How pretty is this combination? I’m so glad I went with these pink foil flakies rather than gold. Obviously gold would have looked beautiful as well, but there is just something extra special about the pink on pink. I can’t believe this is my first time using it!

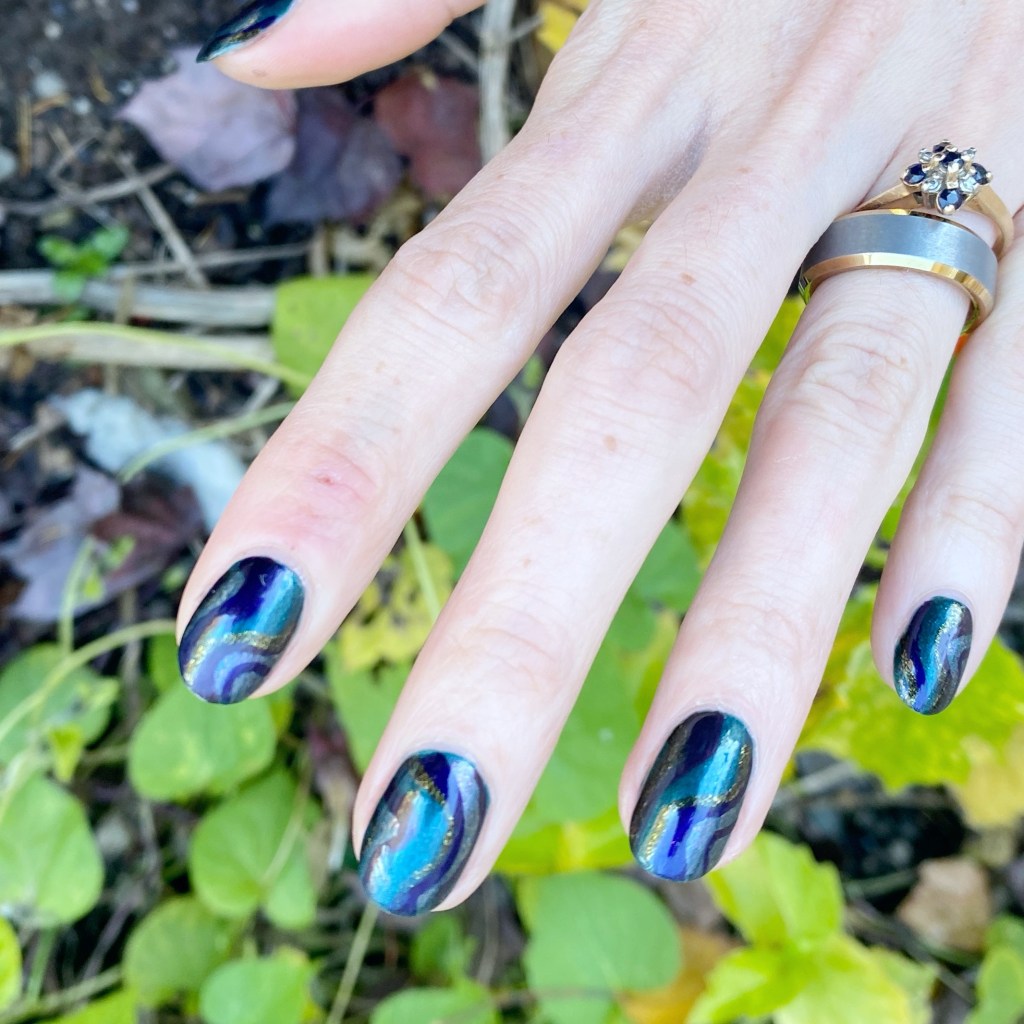
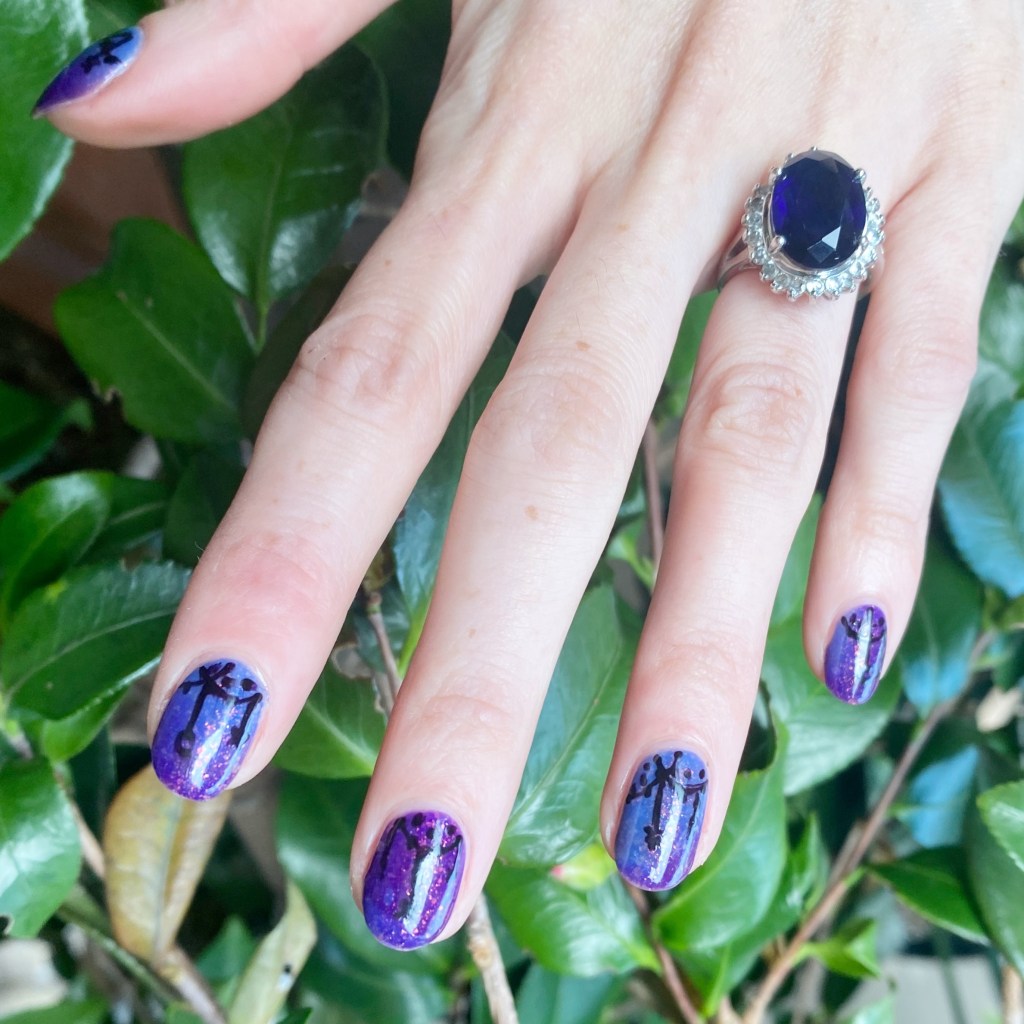
Also this is a beautiful not-holiday look that could definitely be used for a manicure for an upcoming Holiday party because it has that touch of something a little extra special. Obviously I don’t need an excuse to wear glitter, but if you did — I definitely recommend pulling out some glitter to add to an otherwise simple manicure!

What do you think of this pink flakie glitter placement look? Do you like the contrast of lighter pink on darker pink? Are you also in shock that it took me this long to use this beautiful pink glitter? Let me know all your thoughts down in the comments below!

Happy Wednesday!

♥︎

Jewel Toned Autumn Abstract Stripes 💎💙

Good morning lovelies & happy Monday! It’s a chilly morning here on the East Coast — I actually broke out my winter jacket. Brrrrrrr.

With Halloween now over, we’re in that inbetween nail art stage where I’m never quite sure what to paint on my nails. But I was inspired by yesterday’s Swatch Sunday post to create a beautiful jewel toned design & I’m absolutely infatuated with how they turned out.

The polishes I used for this manicure are: 

  • Top Coat: Sally Hansen InstaDri Top Coat (red bottle) 
  • Base Coat: Sally Hansen Miracle Cure
  • China Glaze Emerald Fitzgerald
  • China Glaze December to Remember
  • China Glaze Up All Night
  • China Glaze Glamcore
  • China Glaze Cast A Spell
  • NailStuff 11mm Mermaid Tail brush

I won’t lie — this design was kind of time consuming. But when you look at the end result, it was totally worth it! From far away, the whole design is kind of dark, but when you look at them up close you see the details of the abstract stripes & it’s such a beautiful combination.

The colours all compliment each other really nicely, & the whole design—to me—just screams November vibes.

What do you think about this jewel toned abstract stripe design? Do you love the complexity of it, & the beautiful colours? What designs call to you during the month of November?

Let me know all your thoughts down in the comments below!

🖤

Glittery Blood Drip Nails 🩸✨

Hello lovelies & HAPPY HALLOWEEN! 🎃 My most favourite day of the year has arrived, & obviously I couldn’t let it pass by without one more design on my nails! & this one is fun because it kind of fits the vibe of my costume for work.

I always love a blood drip design on my nails, but this year I wanted to make it more fun by using a glittery red. Because who doesn’t want to bleed sparkle.

The polishes I used for this manicure are: 

  • Top Coat: Sally Hansen InstaDri Top Coat (red bottle) 
  • Base Coat: Essie Hard to Resist (purple)
  • Sally Hansen InstaDri Midnight Drive
  • Sally Hansen Miracle Gel Red It Twice
  • NailStuff dotting tool trio
  • NailStuff 7mm Mermaid Tail liner brush

Check out that beautiful drip! This is not the first time I’ve attempted a go at this design, but I will say I think it’s the most proud of the freehanding of my drips! They actually look like they could be blood dripping down my nails!

I also think it shows that even if you’re rocking shorter nails (like I am right now), you can see have fun & awesome nail art on them!

What do you think of my final Halloween look of 2025? This has been such a fun month of nail art, & I’m super proud of every design I crafted this month!

Happy Halloween! I hope everyone has a safe & fun evening— with a ton of your favourite candies!

Witchy Thermal Half Moons

Hello lovelies & happy Thursday!

Surprise — another post this week, with some Halloween adjacent nails. These are less spooky, & more aesthetic— with a bit of nail Polish magic. I wanted to create some kind of witchy design over a thermal polish, which would be sort of revealed, & I think I was successful! ✨

The polishes I used for this manicure are: 

  • Top Coat: Sally Hansen InstaDri Top Coat (red bottle) 
  • Base Coat: Essie Hard to Resist (purple)
  • Cadillacquer Nostalgia
  • OPI Lincoln Park After Dark
  • NailStuff 7mm Mermaid Tail Brush

I tried to freehand a kind of witchy design at my cuticles, which I think turned out very cool (although I wish it were a smidge daintier). That way, when my hands heated up & went the lighter blue, it would be kind of “revealed” on my nail. Like magic. ✨

& I love absolutely everything about them. Now if only they could give me the powers to make Halloween last a little bit longer — it feels like it’s just slipped away!

What do you think of these witchy aesthetic half moons? Do you like the thermal polish reveal? Let me know all your thoughts in the comments below & let me know what Halloween manicure you plan on wearing tomorrow!

Happy Halloween Eve! 🎃

GLAM NAILS CHALLENGE OCTOBER 2025 — Haunted House

Hello lovelies & happy Wednesday! I hope everyone is having a lovely & safe week so far. It’s a busy week as we prepare for Halloween, but we have one more prompt for Glam Nails Challenge October, & I couldn’t wait to share my design with you — even if I’m posting it a bit late in the day!

The final prompt for October is Haunted House, & I’m super proud of my spooky haunted house design I created.

The polishes I used for this manicure are: 

  • Top Coat: Sally Hansen InstaDri Top Coat (red bottle) 
  • Base Coat: Essie Hard to Resist (purple)
  • Sally Hansen Miracle Gel Sugar Fix
  • Sally Hansen Miracle Gel Beatnik
  • Sally Hansen Complete Salon Manicure Dark Hue-mor
  • Quo by Orly Nail Art Striper in black
  • Wet n Wild Nail Art Stickers Trick Me, Treat Me style
  • LA Colors Crackle Top Coat Black
  • NailStuff.ca Mermaid Tail 7mm Liner Brush

I tried my best to create an atmospheric spooky background for my design, & painted the graveyard/spooky background. Then, I had a Wet n Wild nail art sticker that was a haunted house that I placed on my ring finger — which saved me from having to handpainting it! & the pink moon just seemed like a fun little touch to add as well.

& with that, we are done Glam Nails Challenge October for another year! Crazy to think that we are so close to the end of 2025. It’s been a crazy year, so I’m excited to close out the year with some fun designs.

If you’ve been following along with this challenge thank you! I had so much fun painting my nails this month, & sharing all my Halloween design with you!

Have the lovelies rest of your day!

♥︎