(More) Freehand Tribal Print Accent Nails

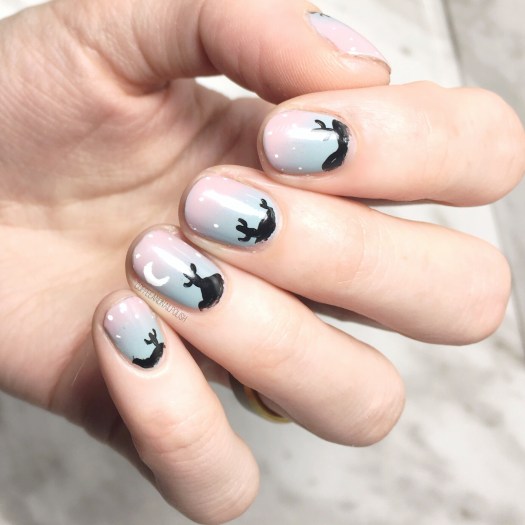
Hello lovelies! Hope everyone is enjoying their week so far. I’m super excited today because not only did I get the chance to do some nail art, but I managed some freehand nail art!

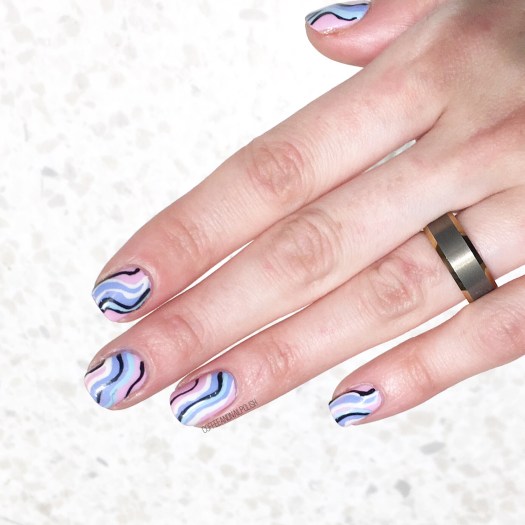
It feels like absolute ages since I had any time for anything more complicated than polka dots on my nails, but I had a quick minute the other night to do my nails & you better believe I took it! I had been scrolling through my Instagram feed after my Swatch Sunday post, & obsessing over some tribal/Aztec inspired designs from the past & decided I wanted no, needed to do some accent nails! So I grabbed one of my custom engraved detail brushes from nailstuff.ca, & went to work.

For this manicure, the polishes I used were:

  • Base Coat: Sally Hansen Complete Salon Manicure Strengthening Base Coat
  • Top Coat: Essie Gel Couture Top Coat
  • OPI Gelato on My Mind
  • Essence You & Me?
  • Sally Hansen Miracle Gel Beatnik
  • Essence Black is Back
  • China Glaze Friends Forever Right?
  • Nailstuff.ca 7mm detail brush {PR SAMPLE}
  • Nailstuff.ca dotting tool {PR SAMPLE}
  • Straight nail vinyls

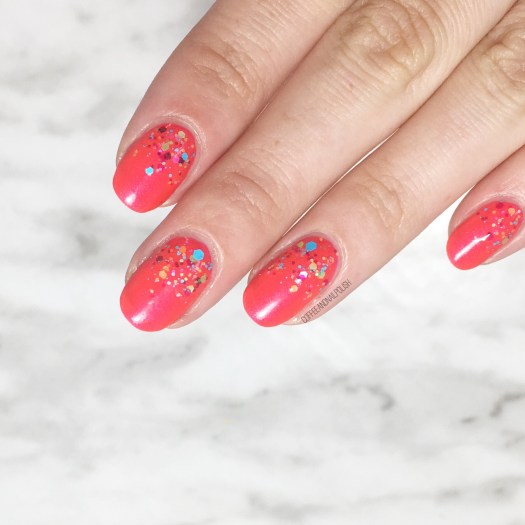
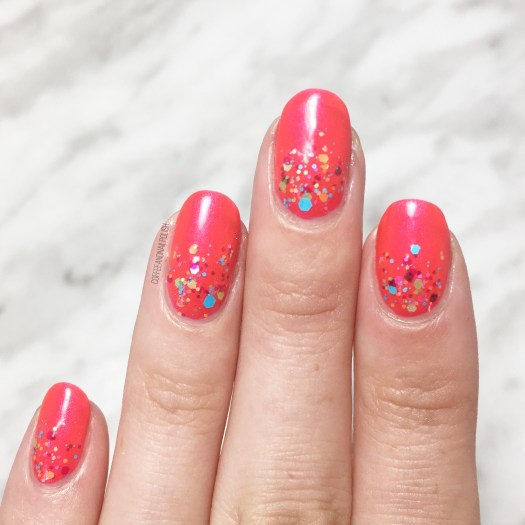
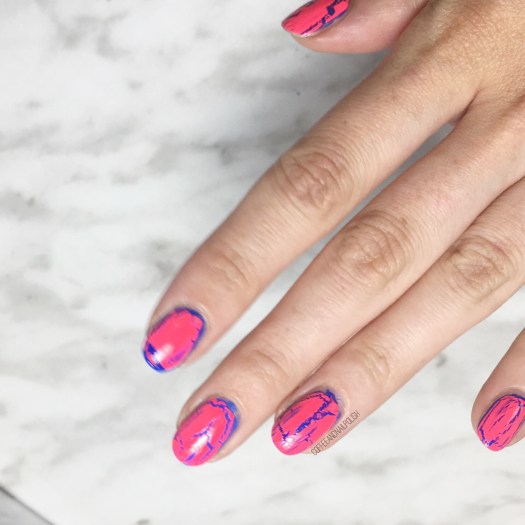
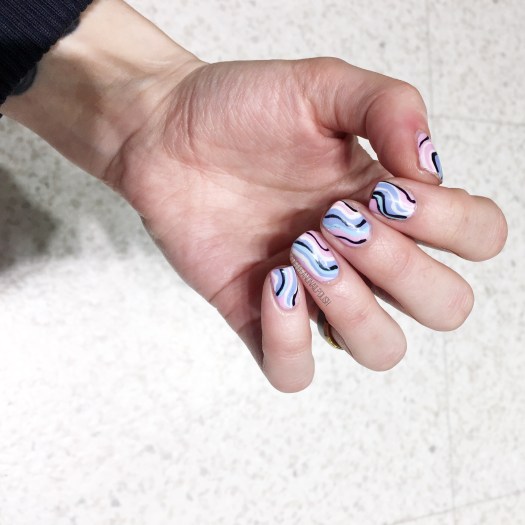
So my line work is definitely sloppier than previous designs, but I feel like I’m just out of practice. Plus I didn’t grab my thinnest detail brush, which definitely made a difference in my freehand work. Also I totally cut a few corners & used vinyls for my blocks of colours, just to save me a bit of time. But over all, I really like how this turned out. Obviously I wish I could have done this look on all my fingers, sometimes all you have time for is an accent nail (or two.)

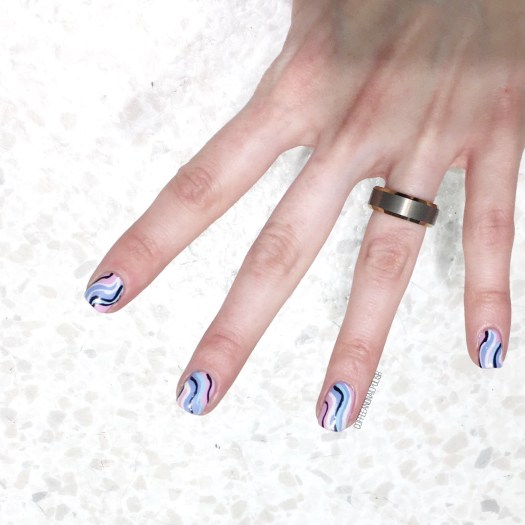
Also trying out this Essie Gel Couture Top Coat again to see if the lasting power is good. I’m really on the hunt for something that will help my manicures last longer, as I’m just not able to do my nails every night like I used to. Maybe someday when my nights are more free, but right now I need something that will keep my nails from chipping after a day.

Also plan on picking up a bottle of Orly Bonder Base as I’ve heard that it can really improve Manicure lasting time as well! & that is what I need in my life!

so what do you think of these accent nails? Do you think tribal/Aztec nails look better as accent nails or a full hand design? Let me know your thoughts in the comments below!

Gradient Desert Scene

Hello lovelies & happy Thursday!

Today I’m doing sort of a throwback Thursday post as today’s manicure is one I did a while back but never shared. I was scrolling through my phone last night, & stumbled across this design & knew I had to post it! Especially because I have no idea what I wouldn’t have shared them in the first place. Thankfully I kept a list of the polishes I used, so even though these were done a while ago, I could still share exactly what I used to create this look!

For this manicure, the polishes I used were:

  • Base Coat: OPI Nail Envy
  • Top Coat: Seche Vive
  • Essie Parka Perfect
  • Sally Hansen Complete Salon Manicure Rose to the Occasion
  • Essence Black is Back
  • Sally Hansen CSM Let’s Snow!
  • Nailstuff.ca mermaid tail detail brushes
  • Edge Perfection cuticle barrier
  • Latex free make up sponge (I buy mine at Dollarama)

I love love love doing these landscape gradient nails. It’s kind of like a galaxy nail, but less work. & of course I added cacti in the distance, because they’re my favourite.

Seriously, I cannot understand why I never shared this design when I originally did them. The gradient looks nice, my freehand work isn’t awful. Maybe I was just saving it for right now (without realizing it?) Either way I’m happy to share this look with you now!

What do you think of this gradient landscape look?

Would you like to see more of these designs on the blog?

Hit like if you’re into this kind of nail art & share down below what else you’d like to see me do!

Rainbow Glitter Gradient (Party on my Nails!)

Hello lovelies! Hope everyone is having a fantastic week so far. I’m super excited today because I finally did something other than just a single colour on my nails! 🎉 I managed to add a fun glitter gradient to my Swatch Sunday shade for this week & I’m loving how much fun this simple nail art turned out!

Seeing as it is Pride Week here in Halifax, I thought a colourful rainbow glitter gradient would be perfect for the occasion.

For this manicure, the polishes I used were:

  • Base Coat: Sally Hansen Complete Salon Manicure Strengthening Base Coat
  • Top Coat: Essie Gel Setter
  • ORLY Fireball
  • China Glaze Point Me To The Party
  • ACO by Ardene DAFUQ

I know I’ve written before my love for glitter gradients–they’re just so easy to do! & for those of us who might not have a lot of time, they can give you fun & fancy nails with minimal effort.

For this look, I started with my base colour & then took my first glitter (China Glaze Point Me To The Party) & after brushing off some of the polish, started at my cuticle line & brushes the glitter upwards. I went over the same spot a few times to build up the glitter amount. Finally I decided that we needed some blue, so I grabbed a blue glitter topper (ACO by Ardene DAFUQ) & dabbed on some blue glitters as well. Lastly, I sealed everything in with a thick coat of Essie Gel Setter to give this look some lasting power.

& now my nails are ready to party! 💅🏻

I’m really digging the combination of Fireball with this glitter. Makes me think of a fiesta, & feels very Summer-y to me. & even though I won’t be able to partake in any of the amazing Pride events happening this week, my nails are totally ready (just in case).

What do you think of this design? Where would you wear this design? Let me know down in the comments below! & share any nail art you’d love to see me do now that I’m (slowly) getting back my posting mojo.

🌈

Blast from the Past — Crackle Nail Polish

I’m sure if you’ve been a part of the nail polish community for any amount of time, you’ve seen quite a few nail polish trends come & go: feather nail polish, magnetic nail polish, textured nail polish & of course… crackle nail polish.

For those who don’t know what crackle nail polish is, it was a kind of topper you would apply over already painted nails, that would crack as it dried, revealing the base colour underneath. I was first introduced to crackle nail polish back with the Katy Perry Teenage Dream collection from OPI, & though it was the most genius idea, so naturally my obsessive brain had to own as many crackle polishes as possible! Thankfully, even nail polish company & their friend seem to come out with their own version of crackle so it was easy to get my hands on a whole slew of brands, colours & finishes!

Most of my shades have long since dried up & are pretty much impossible to use, but every so often I get the urge to pull out one of my bottles still holding on & play around with it. Thank you nostalgia.

For this manicure, the polishes I used were:

  • Base Coat: Sally Hansen Bamboo & Green Tea Strengthener
  • Top Coat: Essie Gel Setter
  • My blues from my cobalt blue comparison post
  • Icing Shatter nail polish Electric Graffiti

As you can see, even though this polish is about 7 years old, it still works semi well in terms of the crackle effect (minus my pointer finger… I have no idea what happened there!) Like I said, I collected quite a few of these shades during the heigh of their popularity, but only a few of them still work to this degree. & now that my nail art techniques have improved over the years, I don’t really grab these shades like I once did.

& just for fun, I wanted to share the very first mani I ever did using this fun polish. Please excuse the awful quality in all regards (painting, photography, ect)

As you can see, the actual cracking abilities of Electric Graffiti has dwindled over the years, but for a polish way past prime, I’m impressed I can still get any crackle out of it. I feel like because the formula has thickened up a lot, that’s the reason the shatter is different. A thinner application would definitely give me a reaction much more like my throwback manicure… wondering if adding a bit of thinner to the bottle would revive it. I’m curious to find out.

what are your thoughts on the crackle/shatter nail polish trend from years past? I know some people have very strong feelings about these polishes (& how much they hate them). Let me know if you’re team crackle or hate it?

Blue & Pink Abstract Stripes

Good morning lovelies & happy Saturday! It’s been a while since I posted, but I have a new manicure to share with you!

This design was actually originally done earlier in the spring, but I never got a chance to share! Since I haven’t really had a chance to do any nail art since our baby girl arrived, I thought I would share this look with you now!

The polishes I used for this manicure were:

  • Base Coat: OPI Nail Envy
  • Top Coat: Seche Vive
  • Sally Hansen Complete Salon Manicure Rose to the Occasion
  • Sally Hansen Sugar Fix
  • Art Club Nail Art Striper in Paisley Blue
  • Kiss Nail Art Striper in white
  • Kiss Nail Art Striper in Black

I can’t remember the last time I did an abstract stripe design, but it most definitely has been a while. (I went back through my Instagram feed, & this post from May 2018 seems to be my last time doing this technique, with a similar colour scheme. I guess I really love creating this style using shades of blue.

& honestly looking at these nails, it really makes me want to buy nail art stripers in every shade so I can do these kind of looks more often–I have a Sally Beauty gift card from Christmas waiting to be used that I feel like using on a few new stripers from some more line love!

what do you think of this design? What are your favourite colour combinations when it comes to stripes? Share down below!