Joe Fresh Gel Look in Key Lime Pie 7 day test. 

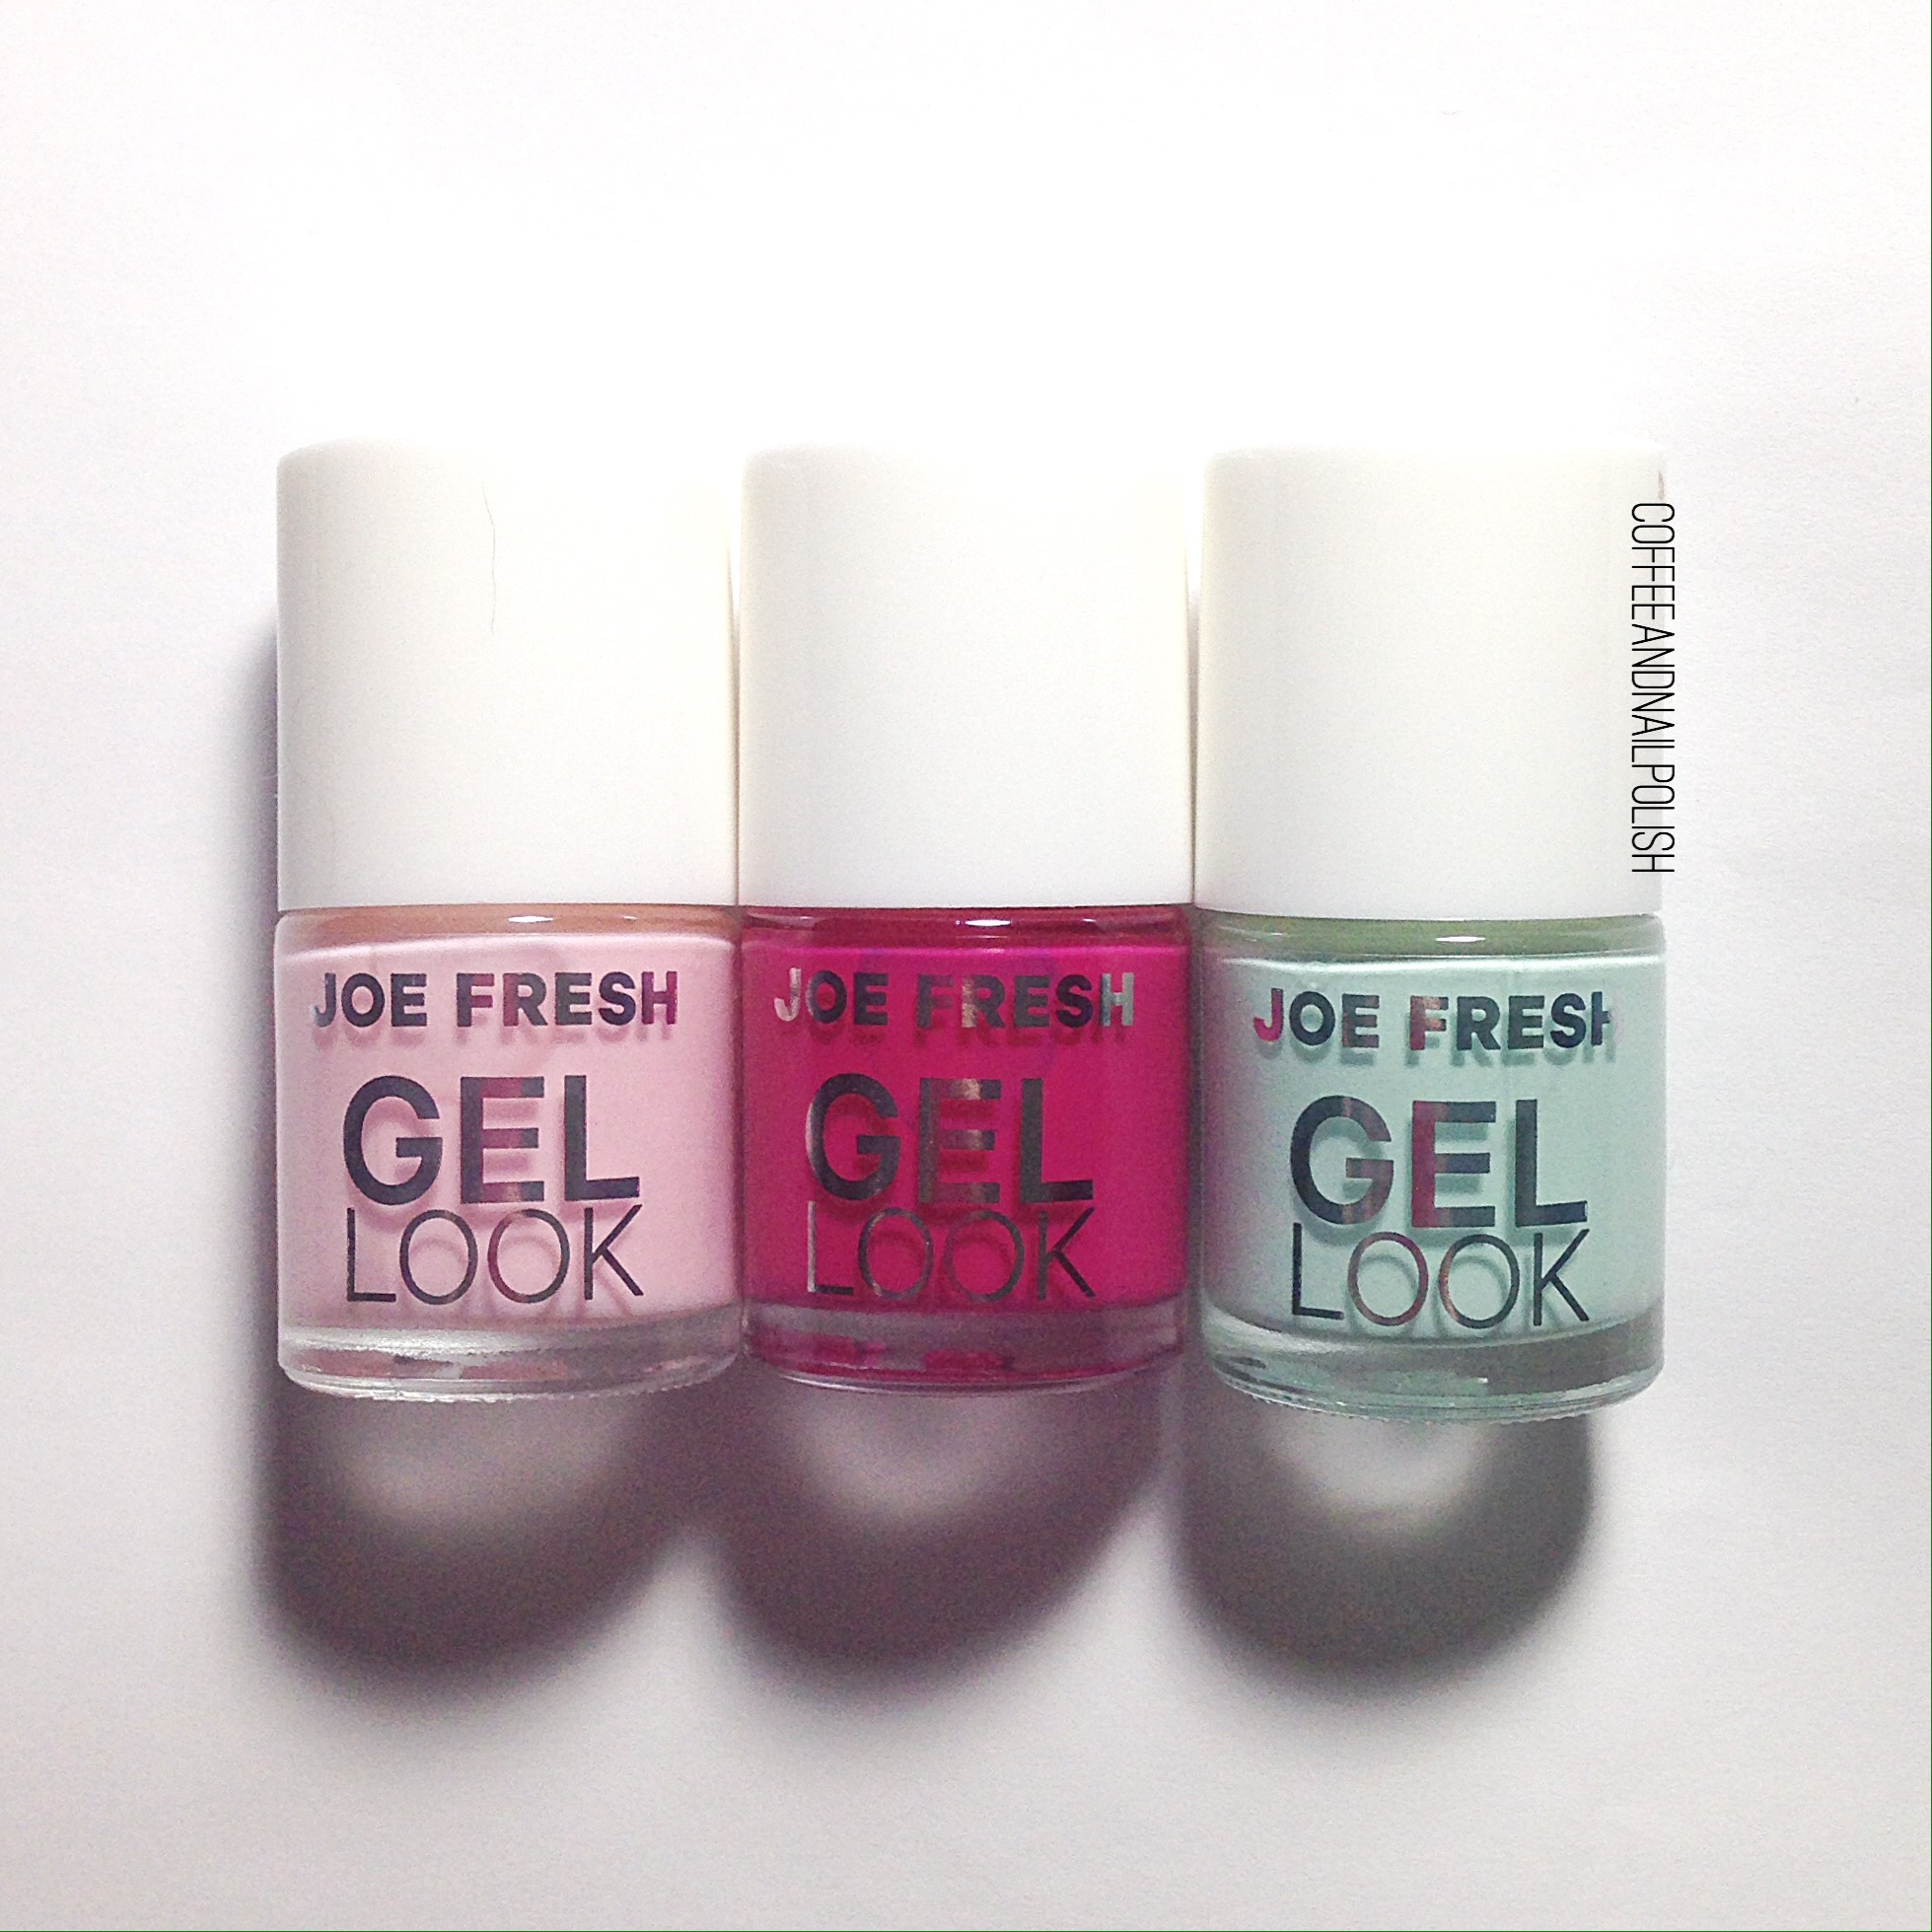
As I teased in my last post, I wanted to test out the durability of the new Joe Fresh Gel Look polishes. They boast up to 14 day durability, so I wanted to see how long I could get the polish to last on my nails. I used to never wear my polish more than a day or two, but now that life has gotten busier I need a polish in my life that lasts between mommy mani time! 

Day one:

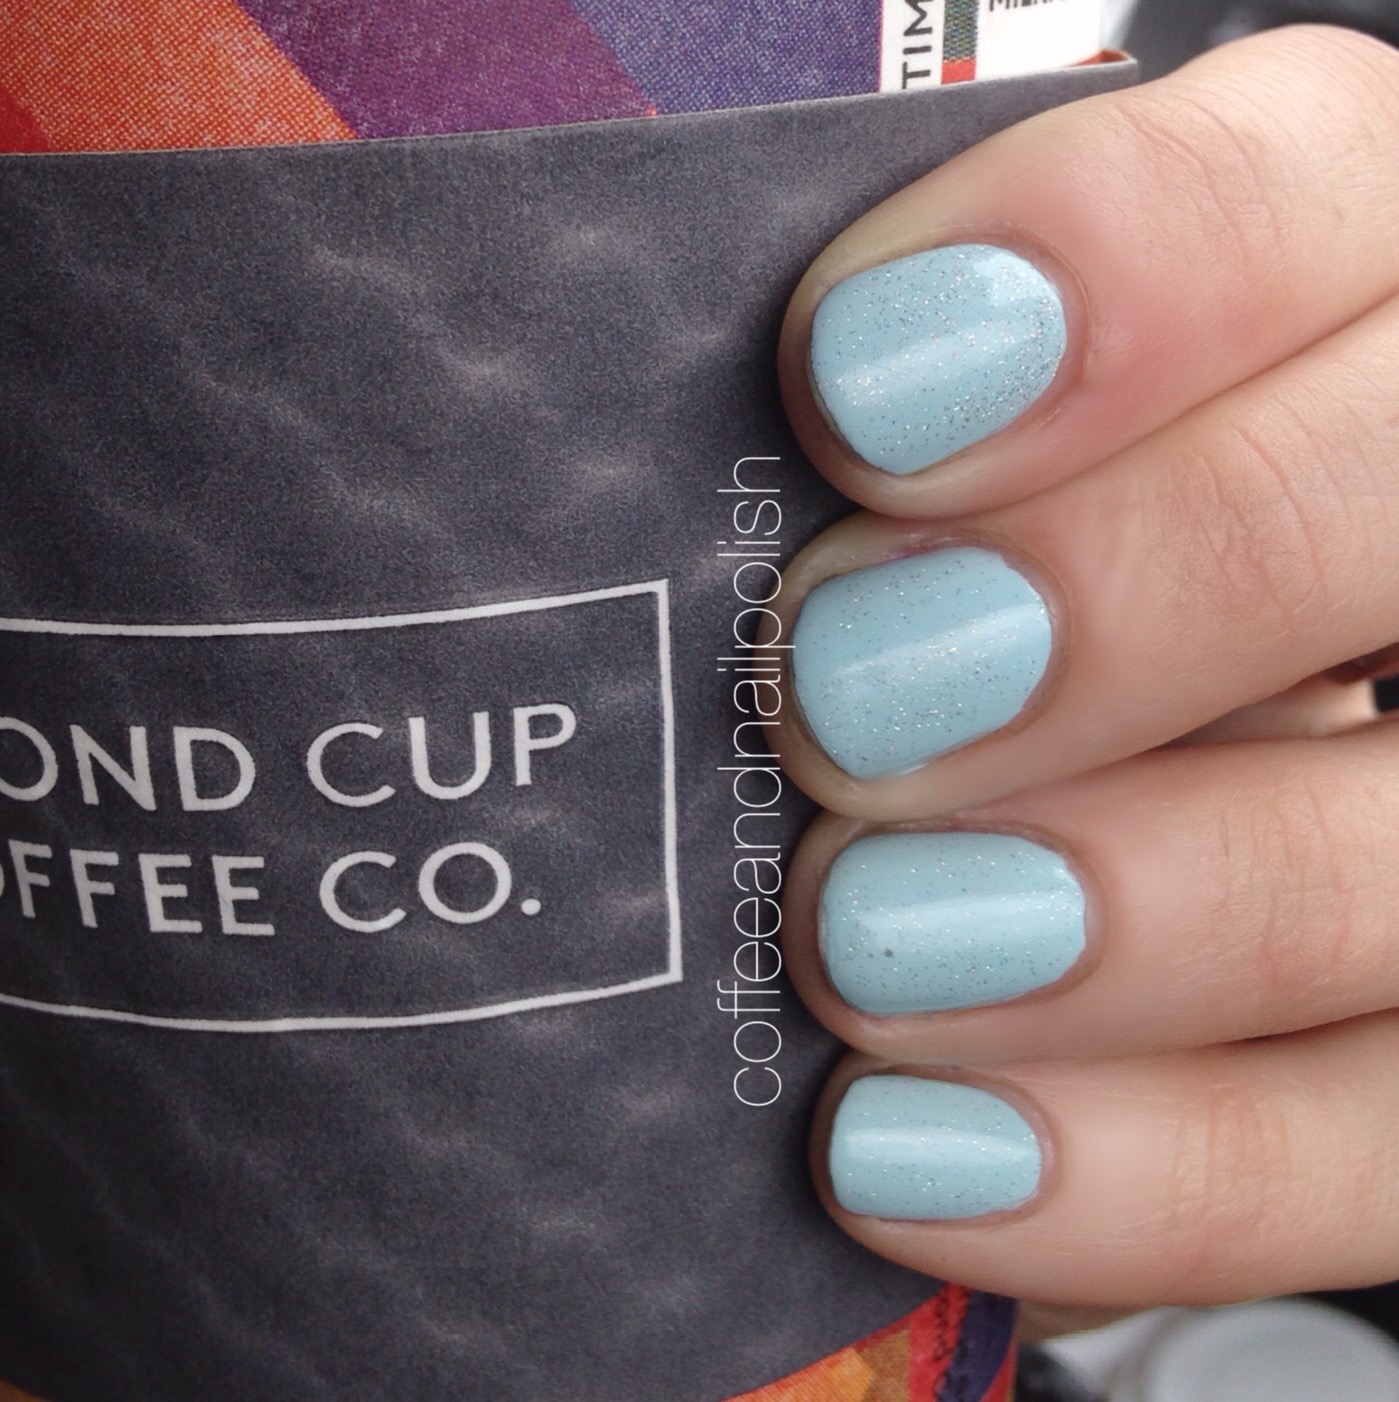
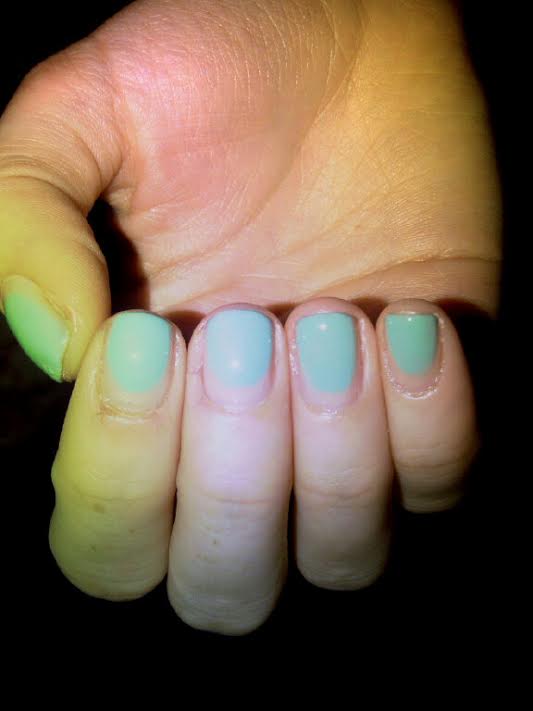
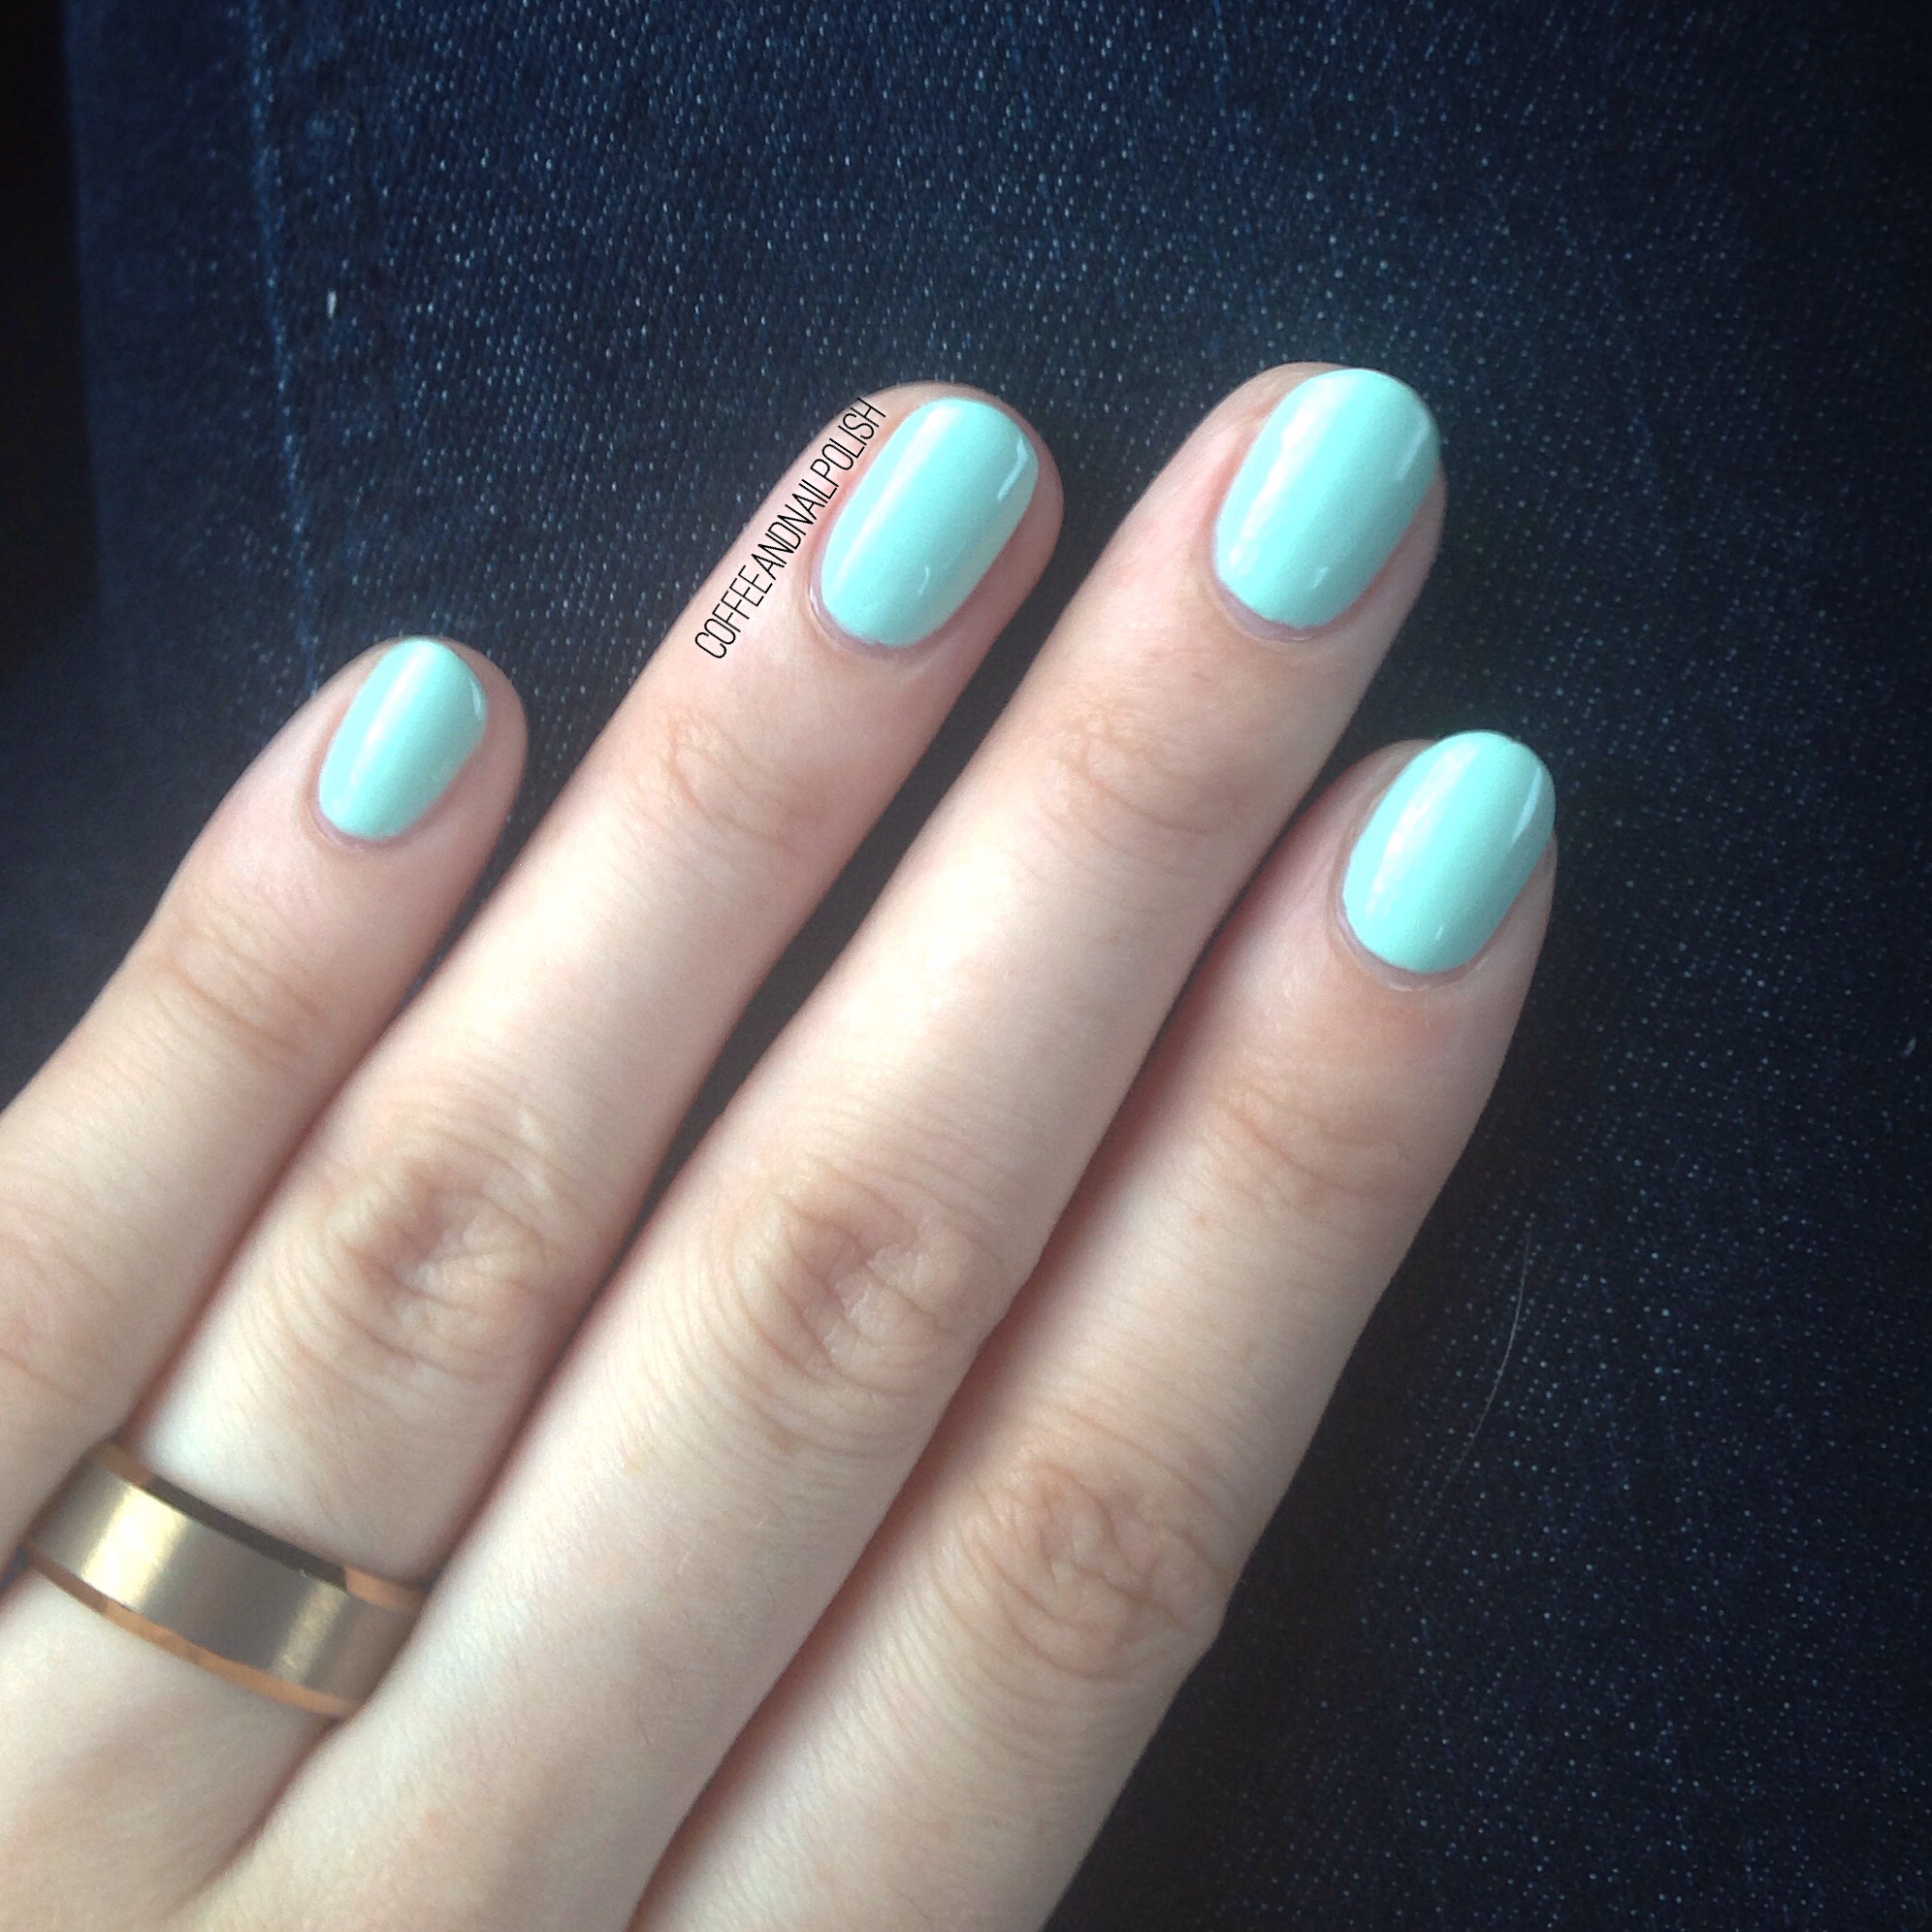
From my original post, Key Lime Pie on the first day. For those who don’t remember from my previous post, I used three coats for application, with no base or top coat required. 
Day two:

After a day of wear, (and many diaper changes on top of other Mummy duties!) polish still looked  the same as the day before. 
Day Four:

After four days of wear, there was minimal tip wear, most notably on my thumb and pointer finger. Also you can really notice the growth at my cuticles after four days. 
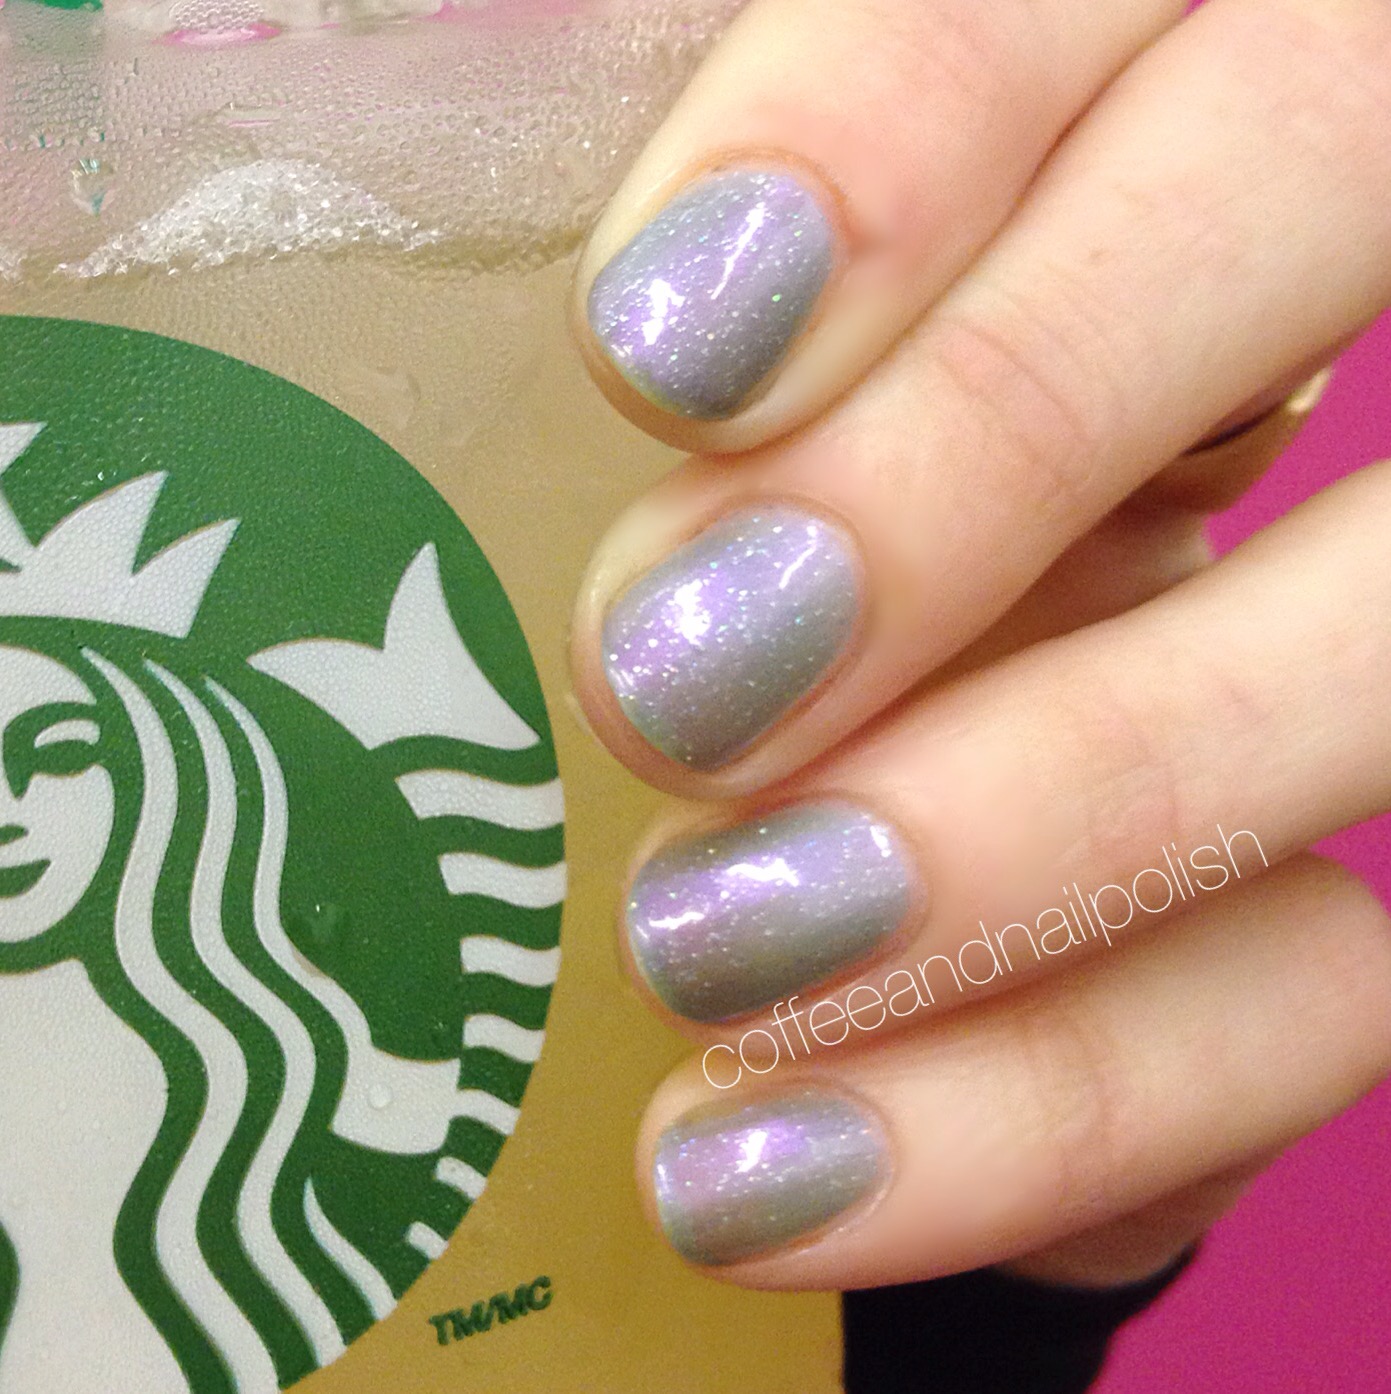
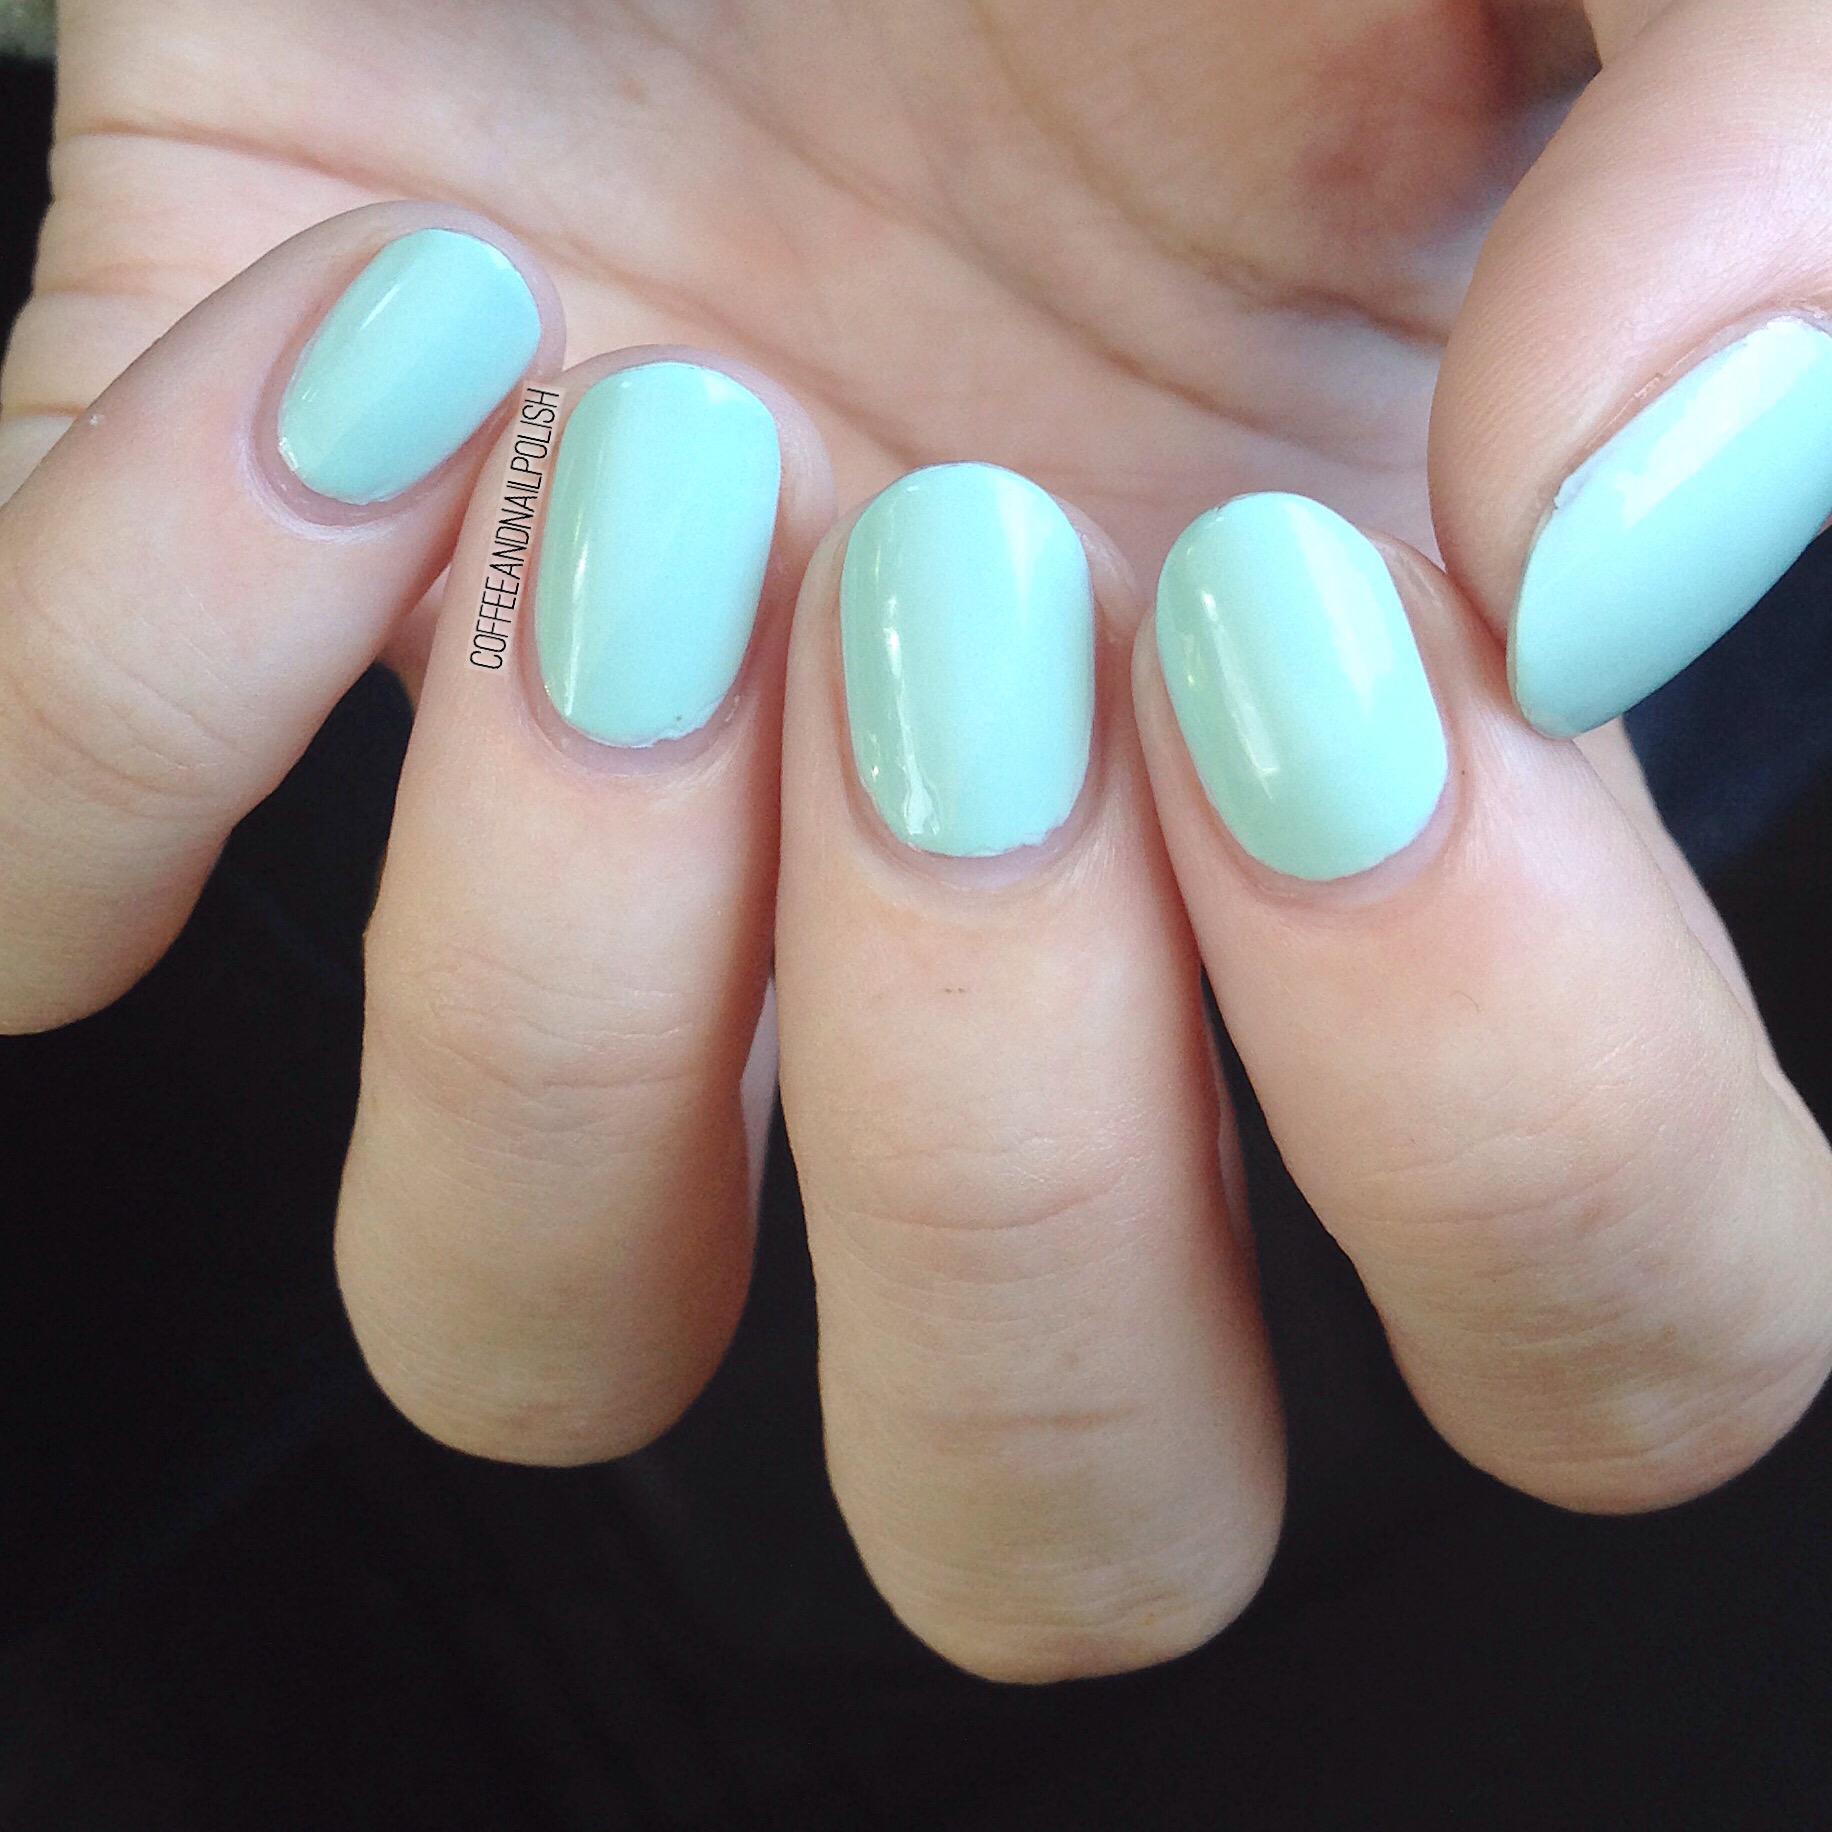
Day Seven:

After 7 days of wear there is noticeable chipping on my pointer, as well as serious tip wear on my other fingers. You can also see how much growth is at the cuticle after a week of wear. My other (dominate) hand saw similar chipping, although more. 

The chipping was enough for me that I wouldn’t want to go longer than I did (not to mention the growth at the cuticles). That’s not to say it couldn’t last longer, but for this experiment 7 days was my cut off. And for a polish that requires no base or top coat, I thought that was pretty impressive!

As mentioned in my previous post, these Joe Fresh Gel Look polishes can be found at your local Loblaws or Superstore for $5.

SWATCH POST: Joe Fresh Gel Look polishes

Hello loves, it’s been a while!

For those who don’t follow me on Instagram, I gave birth to our son last week so I’ve been spending the last little while snuggling with little Bubs and being a Mommy (with naked nails!) But I finally got a minute for my nails, which was perfect because I just so happened to receive these brand new Joe Fresh Gel Look polishes to test out!

The colours I received for review  were Cotton Candy, Raspberry Tart and Key Lime Pie. These polishes are designed to last as well as gel polish, without requiring a UV Light, base coat or top coat. As you can see from the release that came along with my polishes, they boast that this polish can last up to 14 days! I’ll have a second post coming where I review the lasting power of the polish to see how long it lasts for me.

For my below swatches, I applied my polish as directed with no base coat and no top coat.


Continue reading “SWATCH POST: Joe Fresh Gel Look polishes”

SWATCHES GALORE! (What I’ve been wearing)

again with the unplanned hiatus! I’ve been busy busy busy with work with no time for much else! However, I can never go polish free so I thought I would share a few swatches of the polishes/polish combinations I’ve been wearing the last couple weeks.  


Hard Candy Sky (topped with China Glaze Fairy Dust) — I picked up a few of the Hard Candy 20th anniversary polishes at my local Walmart last month and obviously this one had to be in the bunch! Love love love! This polish makes me think of Buffy the Vampire Slayer and her pretty pastel nails which is exactly why I feel in love with polish in the first place! Sadly my Fairy Dust didnt want to show up for the camera but looked pretty in person as always. 

CND Vinylux Dazzling Dance—Duochrome! Purple! Holo glitter! 💜 I picked up this gorgeous polish at my local Winners for $3! I’d been watching it for months, and finally realized it was waiting for me to take it home. This was 4ish coats with still visible nail line so next time I’ll add some undies. But even still… 😍  


ORLY Mirrorball — I’m kind of on a holo kick lately and Mirrorball is perfection. Just look… Words are not even needed. 🙀 (you will definitely be seeing more of this beauty later 😉) 


ACO by Ardene 80s Prom Dress — (layered over China Glaze Seas the Day)  bright fushia pink with camera shy micro glitters. Definitely a perfect Summer colour! Again it’s pretty sheer on its own so undies were a must. I’m curious to try it out with a darker shade. 


Nubar Absolute — Blue holo. Seriously I’m holo obsessed right now and need them alllllllll. I tried my best to capture the holo in the sun, but don’t worry in person it cannot be missed! I also realize that I’m going to have to spurlge and pick up a few more Nubar holos because damn they’re so pretty! 


ACO by Ardene Crystal Fog layered over Hard Candy Zombie. Zombie is another 20th anniversary release from Hard Candy that the Mr. picked out for me, probably because we’re obsessed with iZombie lately! It’s a gorgeous purple on its own, but add a coat of Crystal Fog by ACO by Ardene and it turns into the most amazing duochrome. I don’t usually wear dark polishes in the Summer but this is definitely going to be an exception! 


Joe Fresh Quartz — it was not easy to capture the shift of this polish on camera…. Just kidding!  the above shot says everything you need to know. I literally spent all day staring at my fingers moving them around.  Shifty gorgeous duochrome PERFECTION! I have a few Joe Fresh polishes in my stash but this is definitely my new favourite. It’s just so perfect. 
So what polishes caught your eye the most? Are you team duochrome or team holo? Also what’s your favourite polish to wear when you just don’t have time for nail art? Let me know in the comments below! 💜💜💜

Out of this world Galaxy Nails–with a bonus tutorial!

IMG_1891

After being inspired by two of my fellow nail art girlies on Instagram (mymintnails and banulovesnailpolish) the other day, I was in the mood for Galaxy nails. The last time I did them was in April during the early weeks of this blog, and I hadn’t tried them since so it felt like a good time.

IMG_1893


IMG_1892


The polishes I used for this manicure were:

  • OPI Who Are You Calling Bossy?!?
  • Unnamed Blue Joe Fresh Metallic Polish I got as part of their holiday collection this season.
  • LA Splash Heiress.
  • LA Splash Glitz & Berry.
  • LA Splash Maroon.
  • Quo by ORLY Trashy Glam.
  • ACO by Ardene Showtime.
  • China Glaze Fairy Dust.
  • Sally Hansen Diamond Flash Top Coat.

I’m seriously so happy with how my galaxies turned out. I’ve done galaxy nails a couple of times now, and always get frustrated by the fact I don’t find they look very Space-y. However thanks to using ACO by Ardene’s Showtime for glitter placement (the stars) and China Glaze’s Fairy Dust I managed to create my very own galaxies on my nails.

And I thought since I’m trying to create more tutorials I would share my steps for creating this manicure. I know everyone has their own way of creating galaxy nails, these are just the steps I took for the above manicure.


IMG_1895

  1. Paint all nails black (OPI Who Are You Calling Bossy?!?) and apply quick dry top coat.
  2. While that is drying, applying OPI Glitter Off Base Coat around cuticle area. I do this to keep the sponging I do when creating gradients and other like manicures off my fingers and minimize clean up.
  3. Sponge on first colour (the unnamed Blue Joe Fresh polish with shimmer.) Depending on how sheer the polish is, you may have to sponge a couple times to be able to see the polish.
  4. Continue sponging using a variety of other colours. I try to keep my sponging in a line so you get that galaxy look. I also will apply some polishes thicker than others, or just sponge small spots so that it’s not too heavy handed.
  5. Using a dotting tool, place stars in random places on nail. (ACO by Ardene Showtime.) I also used some of the bigger glitters in Showtime for along the sponging.
  6. Apply a coat (or two) of Fairy Dust over everything. Then, after a couple minutes apply your top coat to seal everything in. Once that’s dry, you’ll be able to peel off your protective layer around your cuticles, and clean up what you might have missed around your cuticles.

And tada! You now possess galaxies on your finger tips. Galaxies are one of the easiest nail art designs you can probably do because they can be done with pretty much any polish, at any level, in whatever style you want! And the plus side is–it’s almost impossible to screw them up.

IMG_1896


In case you’re interested, my ring is courtesy of Kristalized_Designs on Instagram (who also happens to be my sister!) She designed two gorgeous midi-rings for me, and is going to be designing a little something special for an upcoming giveaway I’m going to be holding. She’s in the process of getting her Etsy page up and going, but you should definitely check out her page for a sneak peak at her designs. Everything is hand made and one of a kind (there is even a picture of her making the above ring.)


So what do you think of these galaxy nails?

Nails for Days.

Wow, I’ve been MIA again…. we’ve been house sitting for my parents which means I don’t have all my polishes (or nail art tools) at my disposal. However, I have still been painting my nails the last week so I thought I would share with you the simple manicures I’ve been playing around with. I’ve been testing out the combination of using Essence Gel Look top Coat with Essie’s Good to Go top coat, and I have to say it’s been working for me. Usually I have chips in my polish by the end of day 1 (or sometimes half way through), but most of these manicures I’ve worn for 2+ days with minimal chipping. Considering I’m not gentle on my hands, that is actually kind of amazing.


flying dragon3 flying dragon

The polishes I used for this manicure were:

  • China Glaze Flying Dragon (purple)
  • Essence Petal to the Metal gold topper.
  • Essence Gel Look top coat.
  • Essie Good to Go top coat.

Oh China Glaze Flying Dragon… how I love you. You are now, and will forever be my favorite nail polish color…. I just wish you didn’t chip so damn fast! Thankfully though, adding my top look combo gave me these nails for THREE days with very minimal chipping until day three (when it all went to hell). I do love the combination of the Essence Gold Topper over dark colors though… looks so regal. (Also makes me crave fall a little bit… some one slap me!)


crackle crackle2

The polishes I used for this manicure were:

  • Sinful Colors Be Happy (blue base color)
  • Icing Electric Graffiti (pink shatter)
  • Essence Gel Look Top Coat.
  • Essie Good to Go top coat.

I was feeling some crackle, since I haven’t used it in years. I used to love playing with crackle, and Icing’s Electric Graffiti was definitely my favorite of the ones I owned. That hasn’t changed. So bright, and so awesome.


ruffian2 ruffian

Polishes used for the manicure were:

  • Joe Fresh Latte (nude base)
  • Nicole by OPI Oy Oy Oyster (nude shimmer)
  • Essence Dive with me to the Island (teal ruffian)
  • Essence Gel Look Top Coat.
  • Essie Good to Go Top Coat.

Oh man, I had such high hopes for the manicure… I had visions of a gorgeous nude and teal ruffian… except the nude color my mother owns (which is dark for her) blends PERFECTLY into my skin… so it just looked like I didn’t paint for enough down on my nail. And the shimmer I added didn’t show up enough. Next time I’ll definitely go with something not so perfectly matched to my skin tone.


So as you can see, I’ve still been playing around with polish I just haven’t been as nail art crazy as normal. I’m also still bumming hard about my shorties, but they’ll grown… unfortunately just not over night (I wish!) Next week I’m on vacation from work so it will be A LOT more nail art time. In fact, in honor of my best friend who is getting married next week, I think I’m going to do a whole week of wedding manicures, for both bride and bridesmaids. And then at the end of the week, I can share the manicure my friend is letting me do for her nails for the wedding. =)


coffee

Now it’s time to finish my coffee, and get started on a super cool manicure I hope to share with you tomorrow.