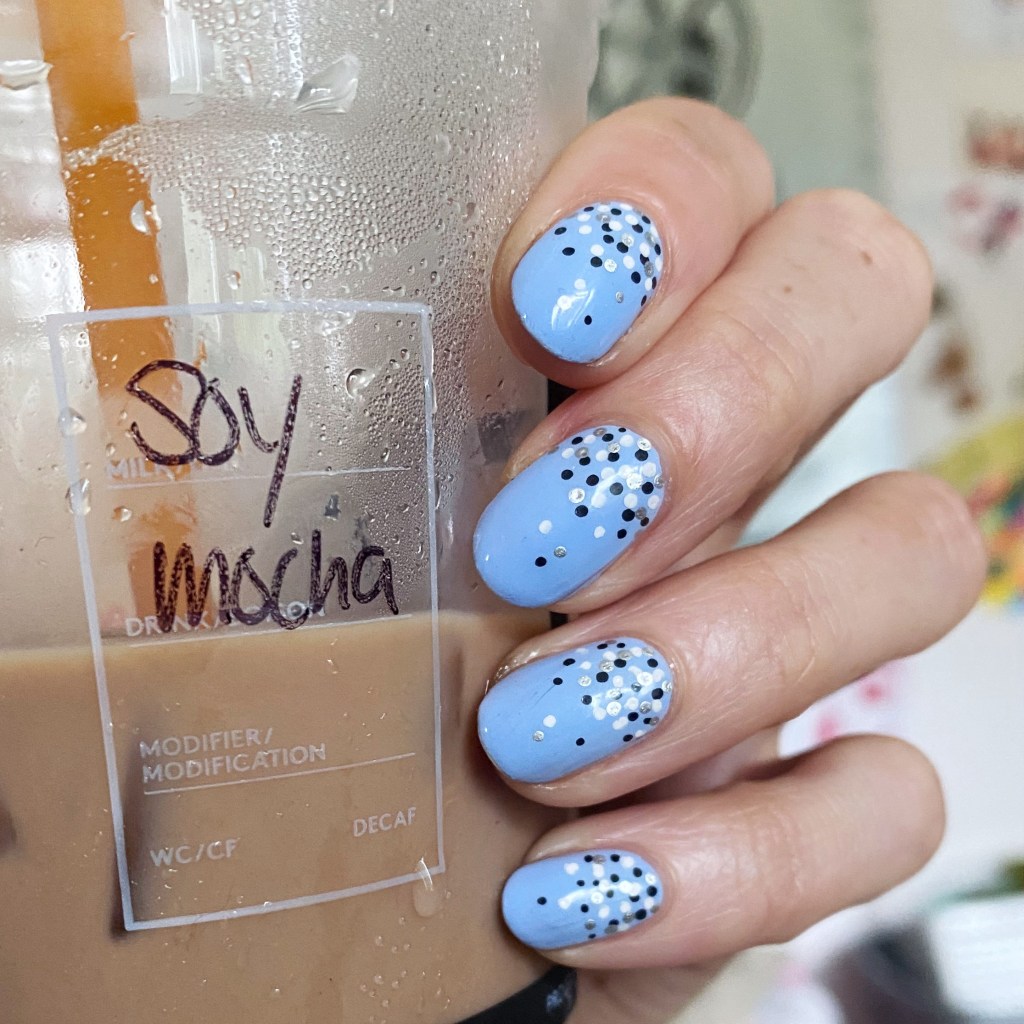
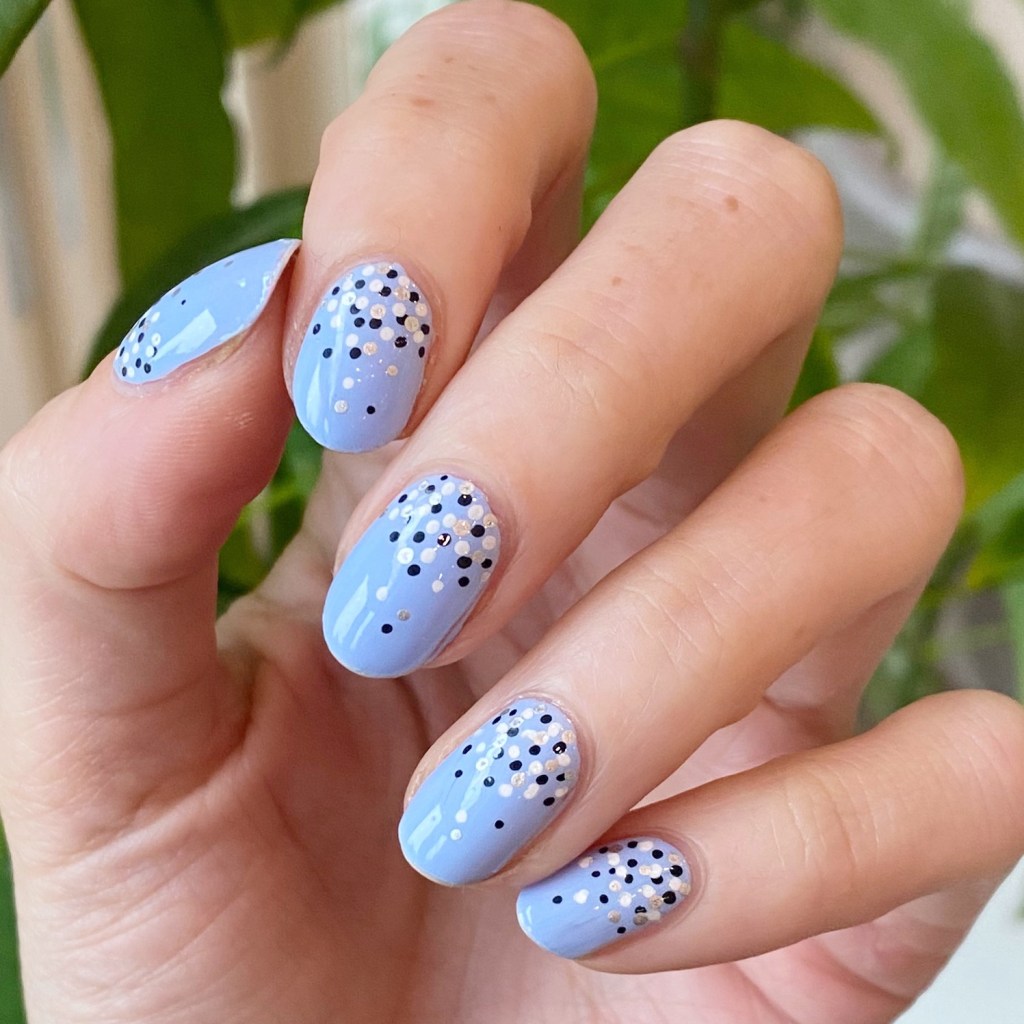
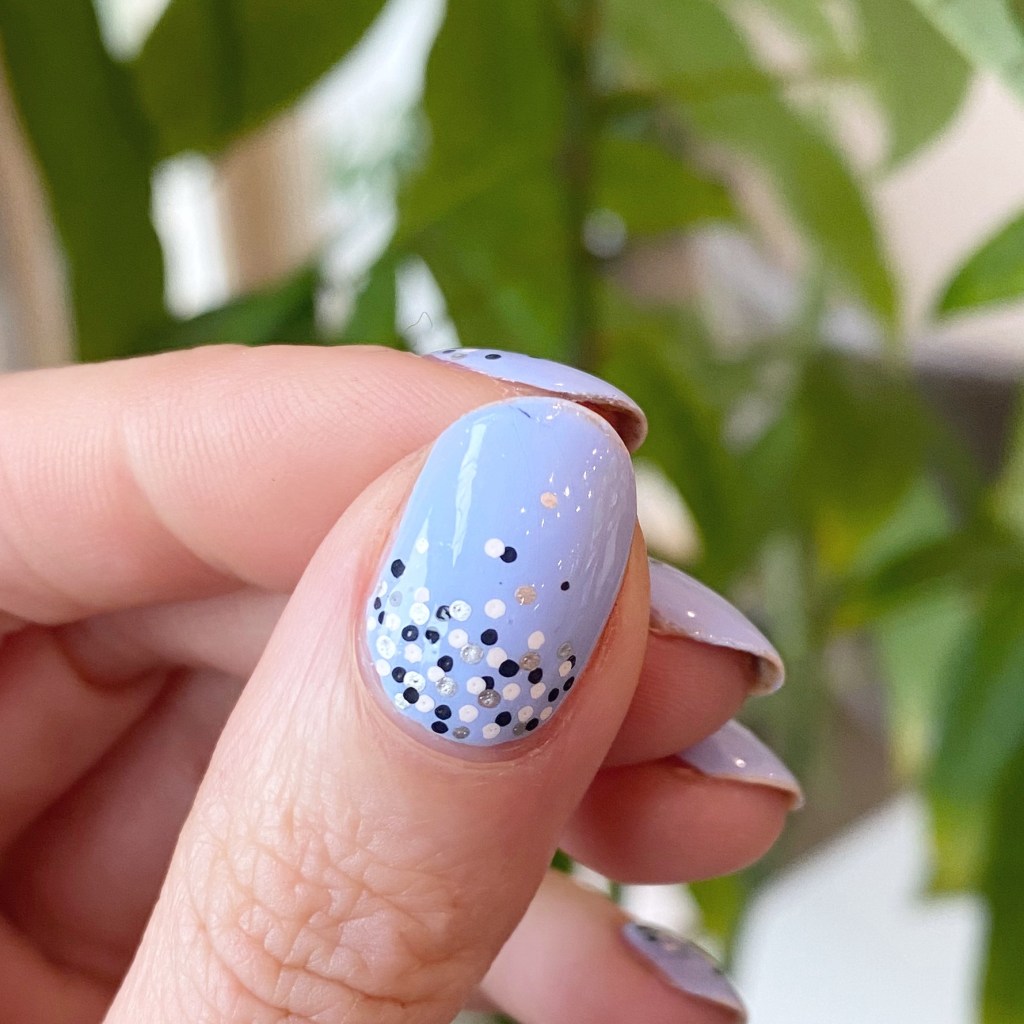
Hello loves & happy Friday! I hope everyone is enjoying their week so far. It’s been a beautiful week here so far, but honestly I won’t like — the nights have been giving Autumn. It’s been cool, & nice, & has me craving pumpkin everything. I’m just such a basic girl, & I’m okay with that.
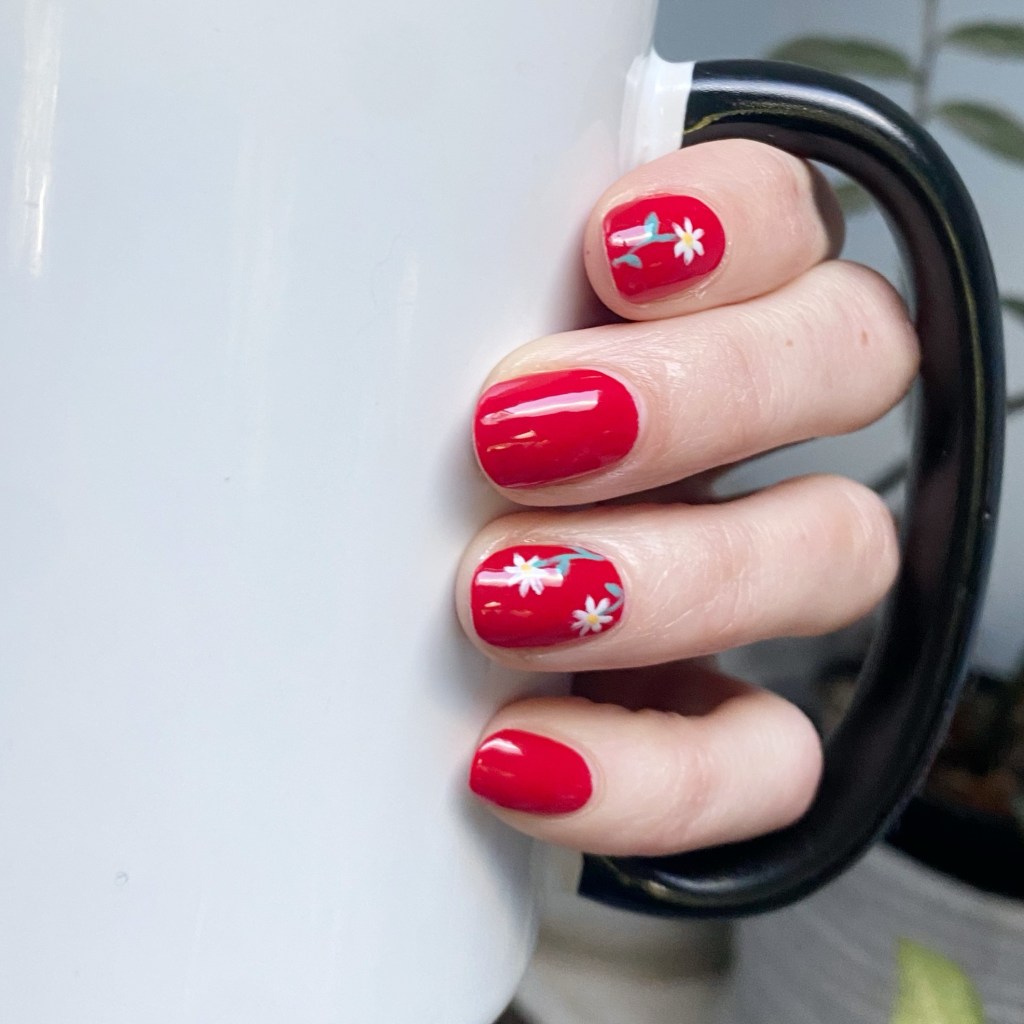
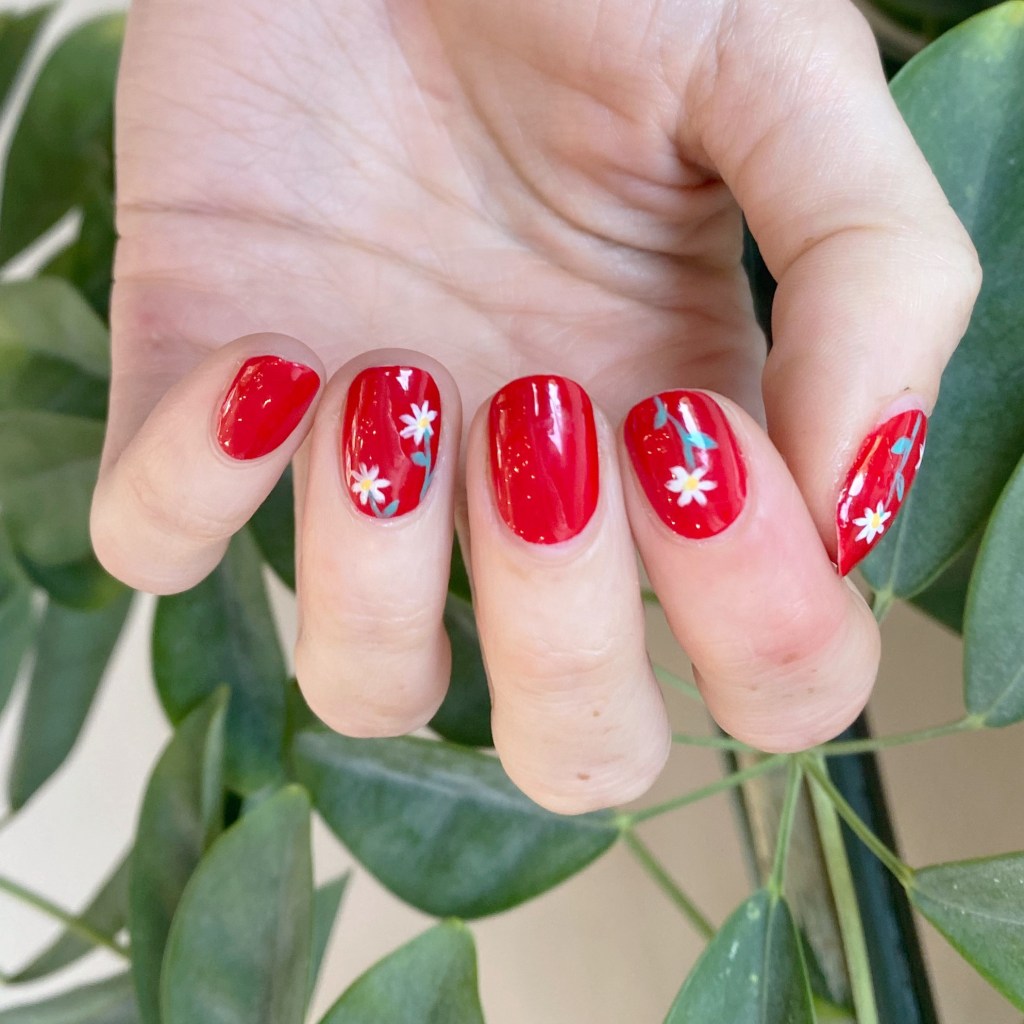
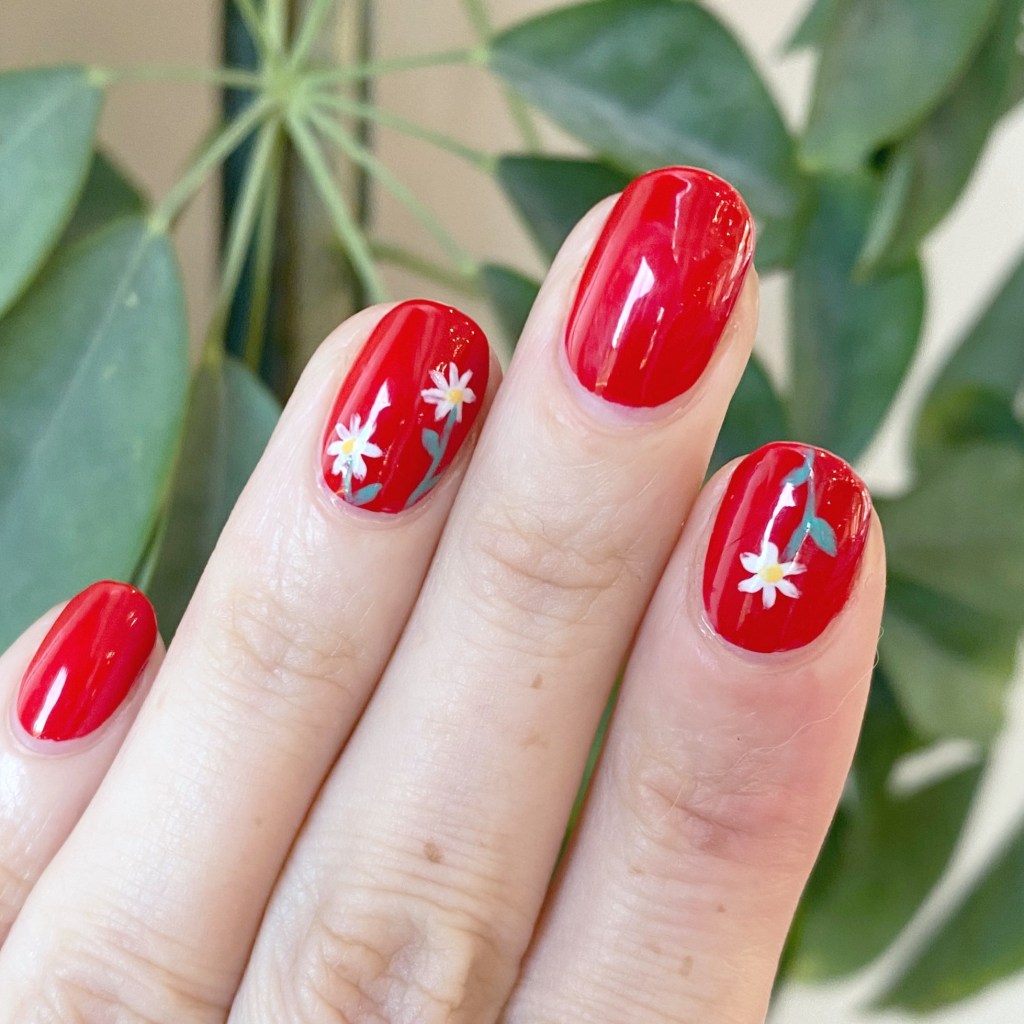
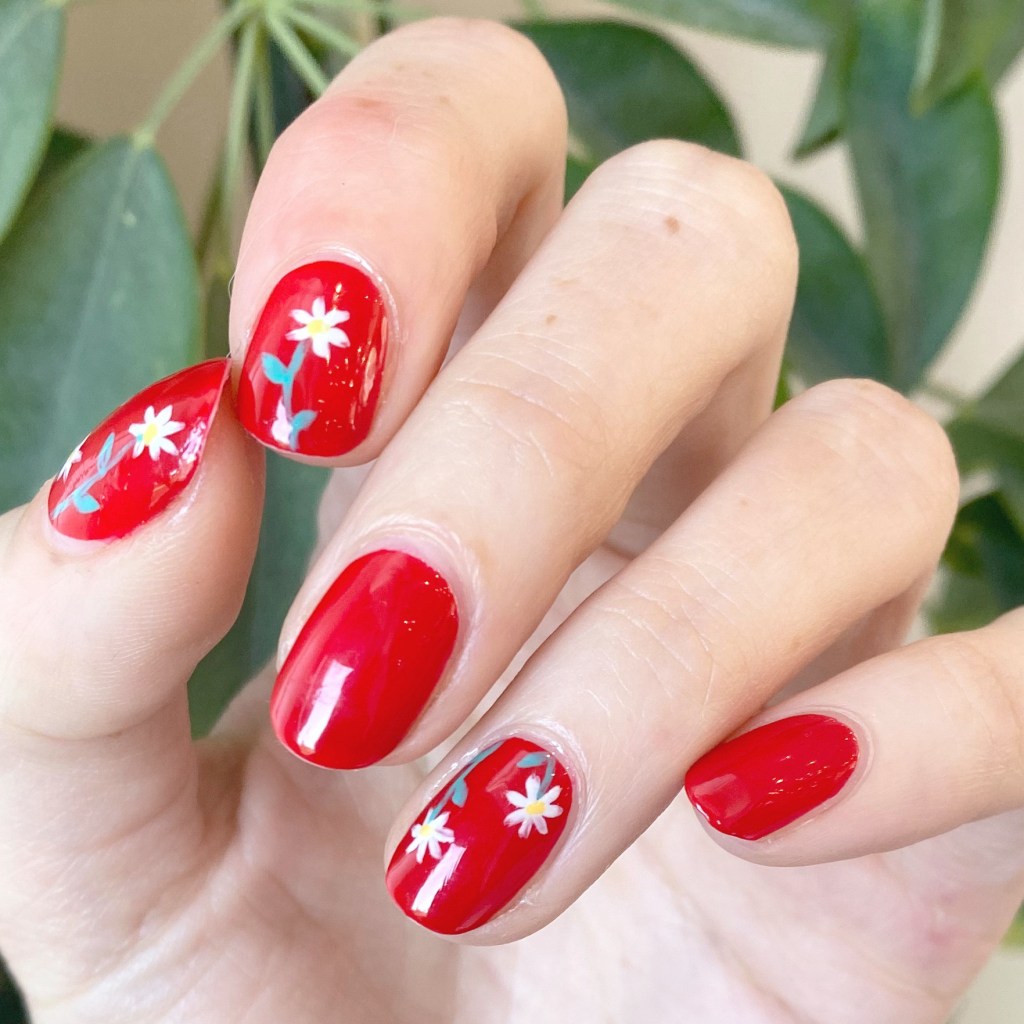
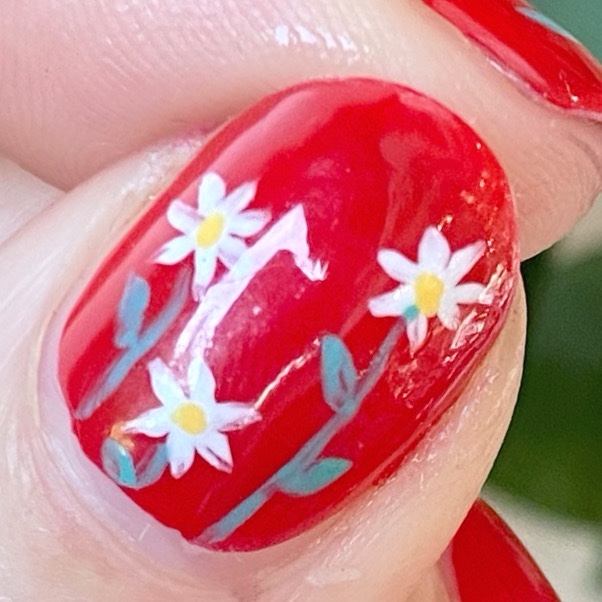
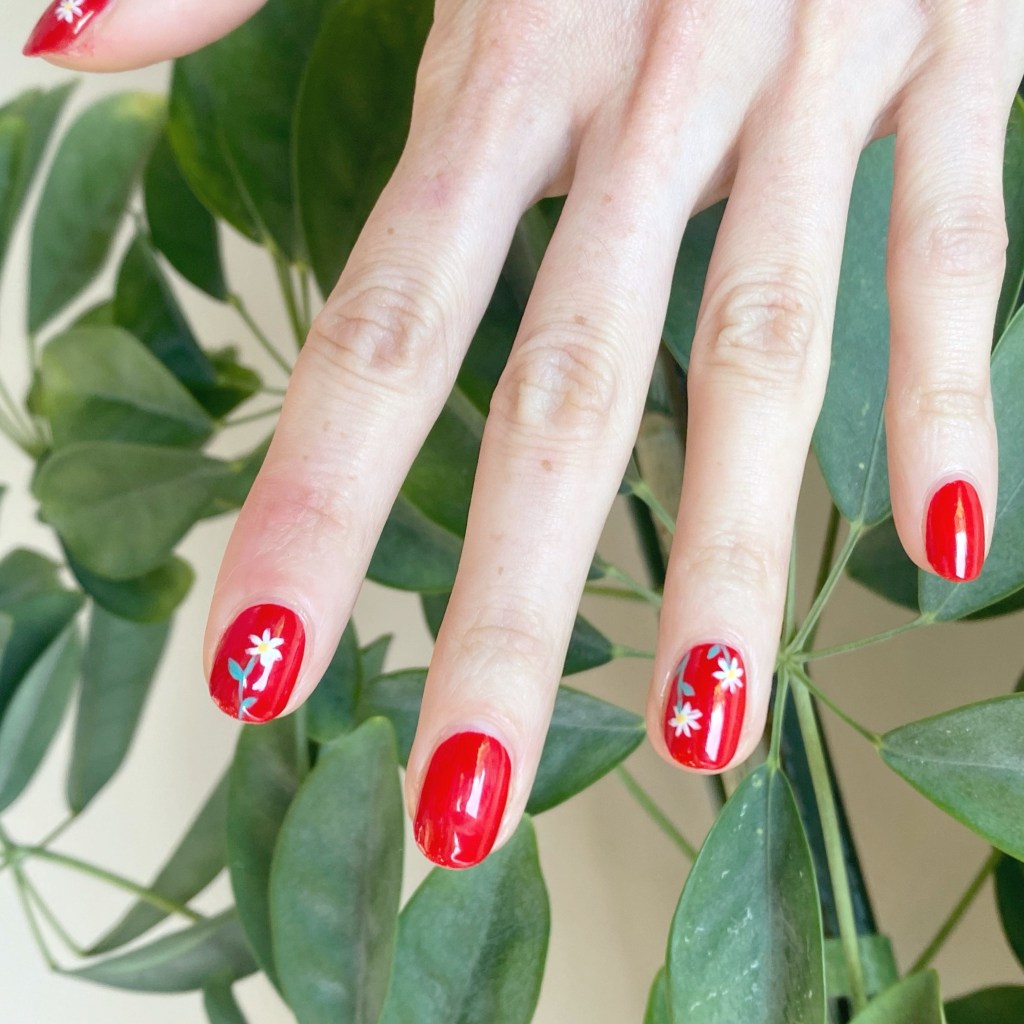
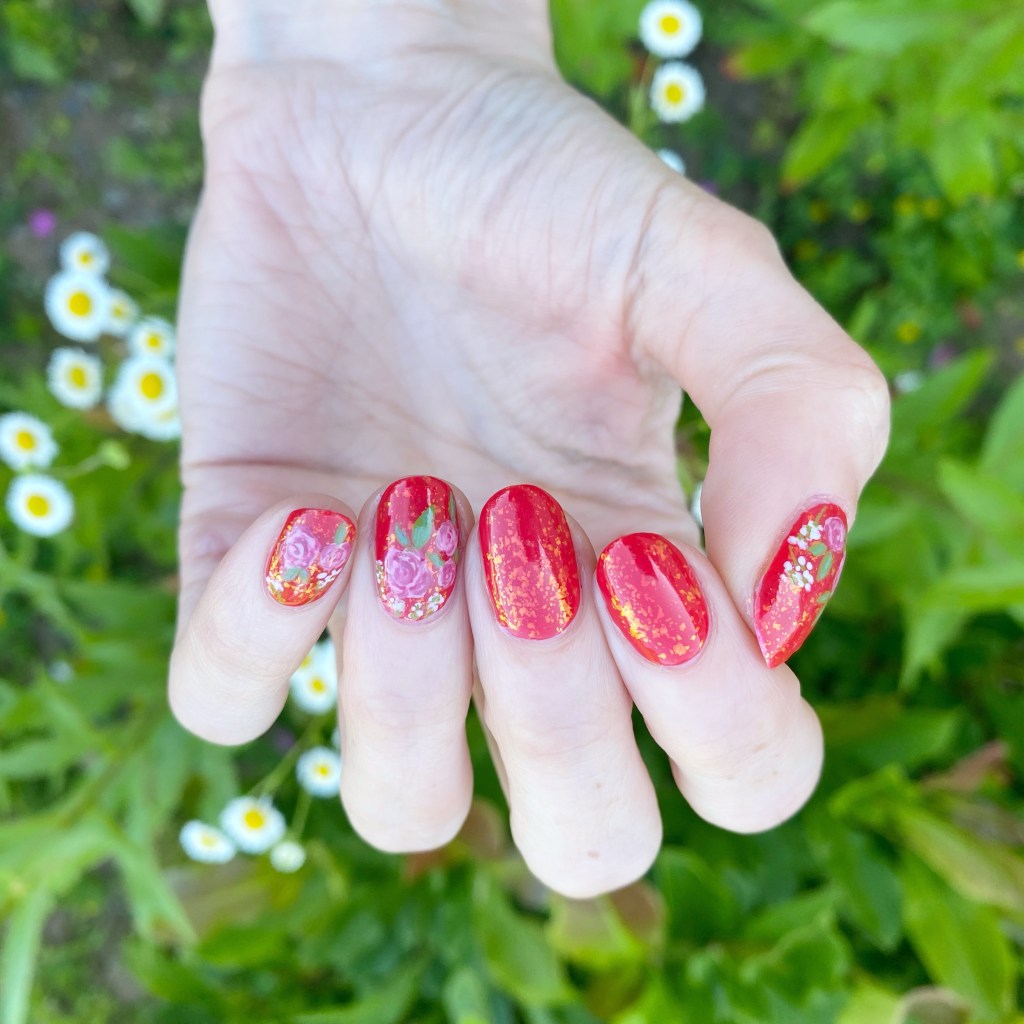
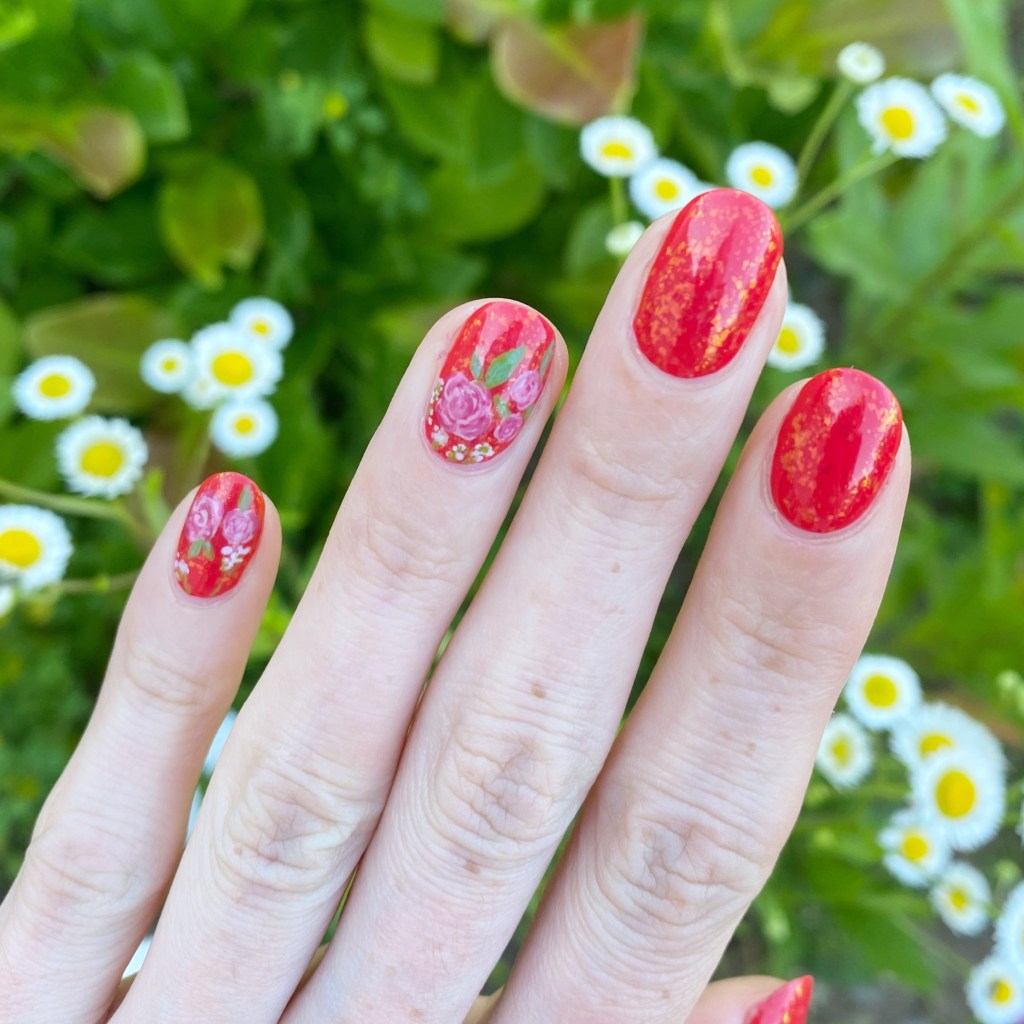
But, I won’t jump into the Autumn vibe nails quite yet — I’ll wait until Starbucks releases their PSL at least. So I have some pretty floral nails to share with you.
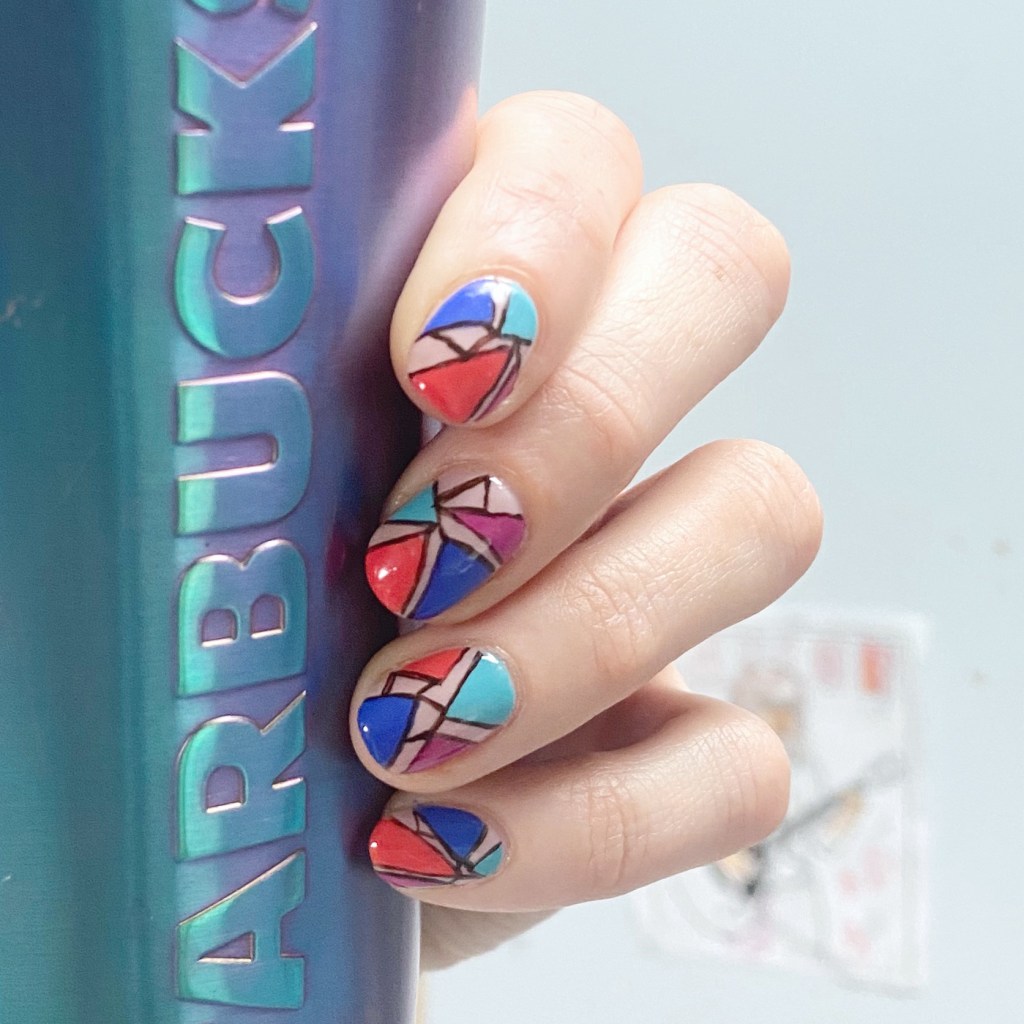
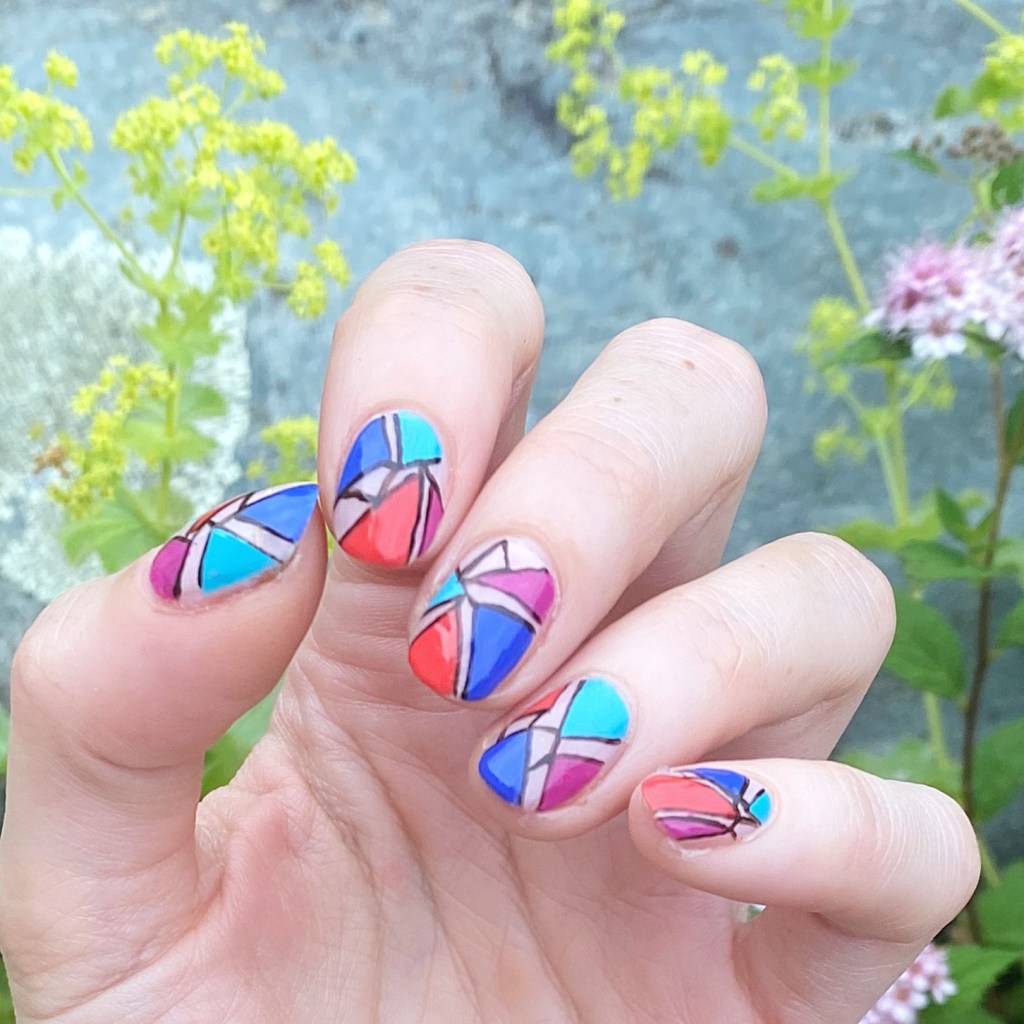
The polishes I used for this manicure are:
- Top Coat: Essie Gel Setter Top Coat
- Base Coat: China Glaze Calcium Gel Fortifier
- Essie Gel Couture Electric Geometric *pr
- Essie Shine of the Times
- Essie Princess Charming
- Essie Mrs. Always Right
- Essie Gel Couture Gossamer Garments *pr
- Essie Wind in the Willow *pr
- Essie Bustling Bazaar
- OPI I Cannoli Wear OPI
- Nailstuff.ca Mermaid Tail 7mm liner brush
- NailStuff.ca Dotting Tool

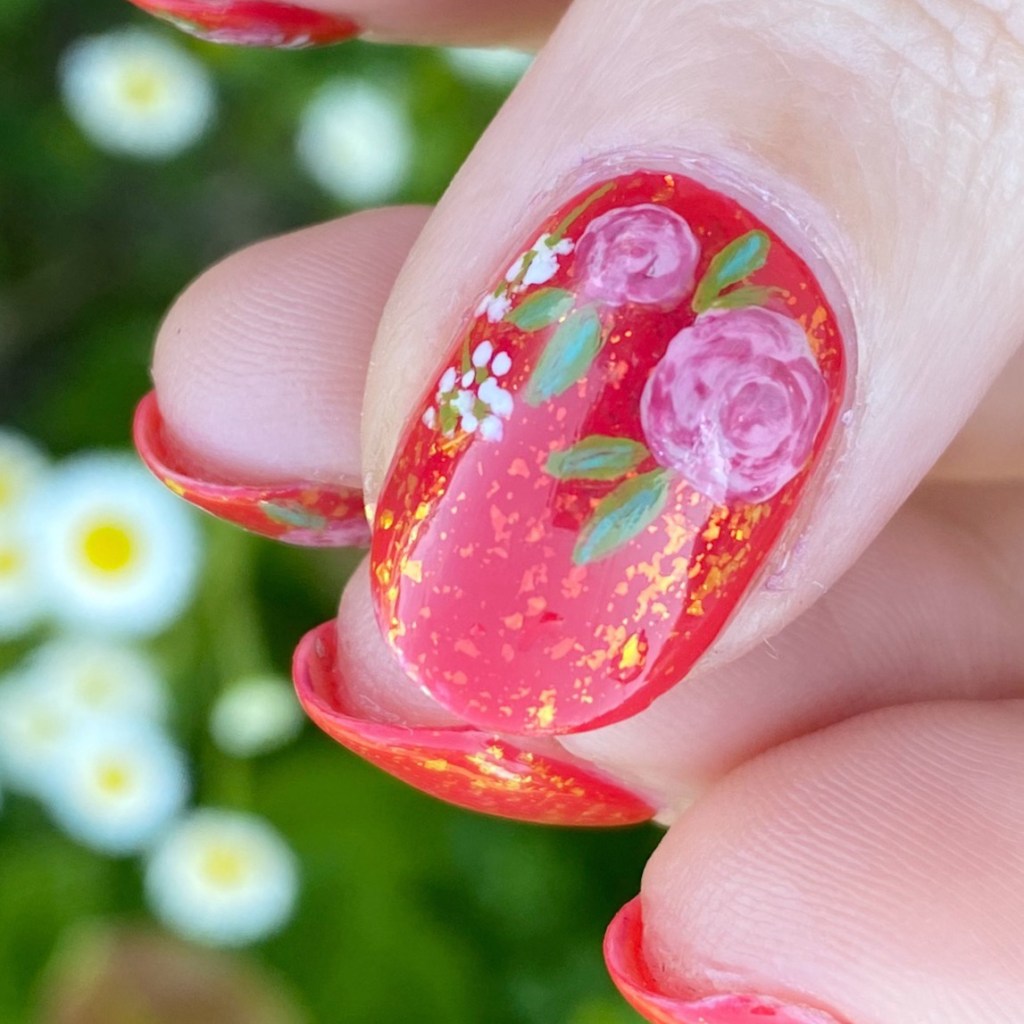
I absolutely love these. I love the base with the glitter. I love how my roses turned out. I love the little bit of babies breath. I just think the whole design came together beautifully, & I truly adore them.
Also, my 10 year wedding anniversary is coming up this September, & I think I’m going to recreate my wedding nails (again) 10 years later. I did it back in 2018 so I thought it would be fun to do now… what do you think? Would you like to see me do another recreation of my original wedding nails, or maybe what I would do now if I were to paint my nails to get married?
Let me know what you think!

Do you love these romantic roses? Let me know all your thoughts down in the comments below. Happy Friday!
♥︎