Hello lovelies & happy Wednesday! We are quickly approaching the end of November, if you can believe it — Christmas is officially one month away!
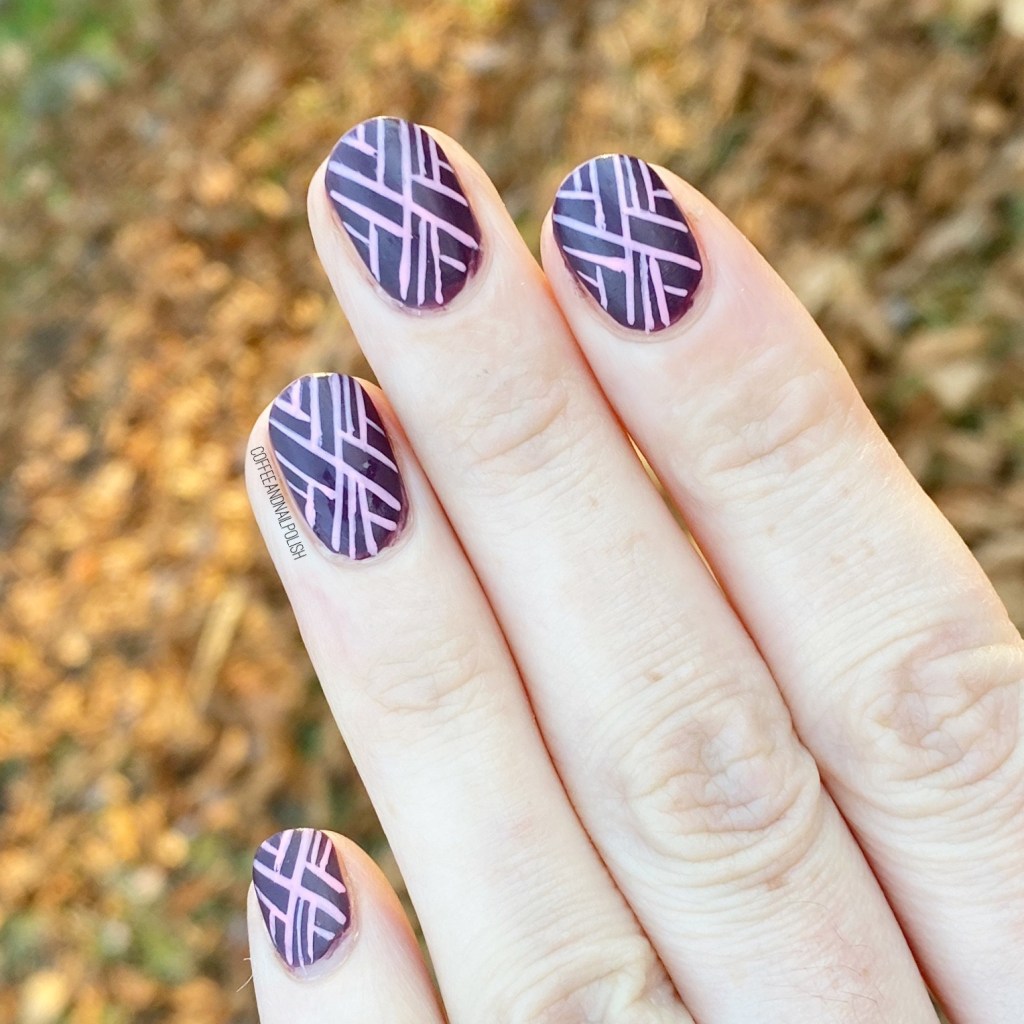
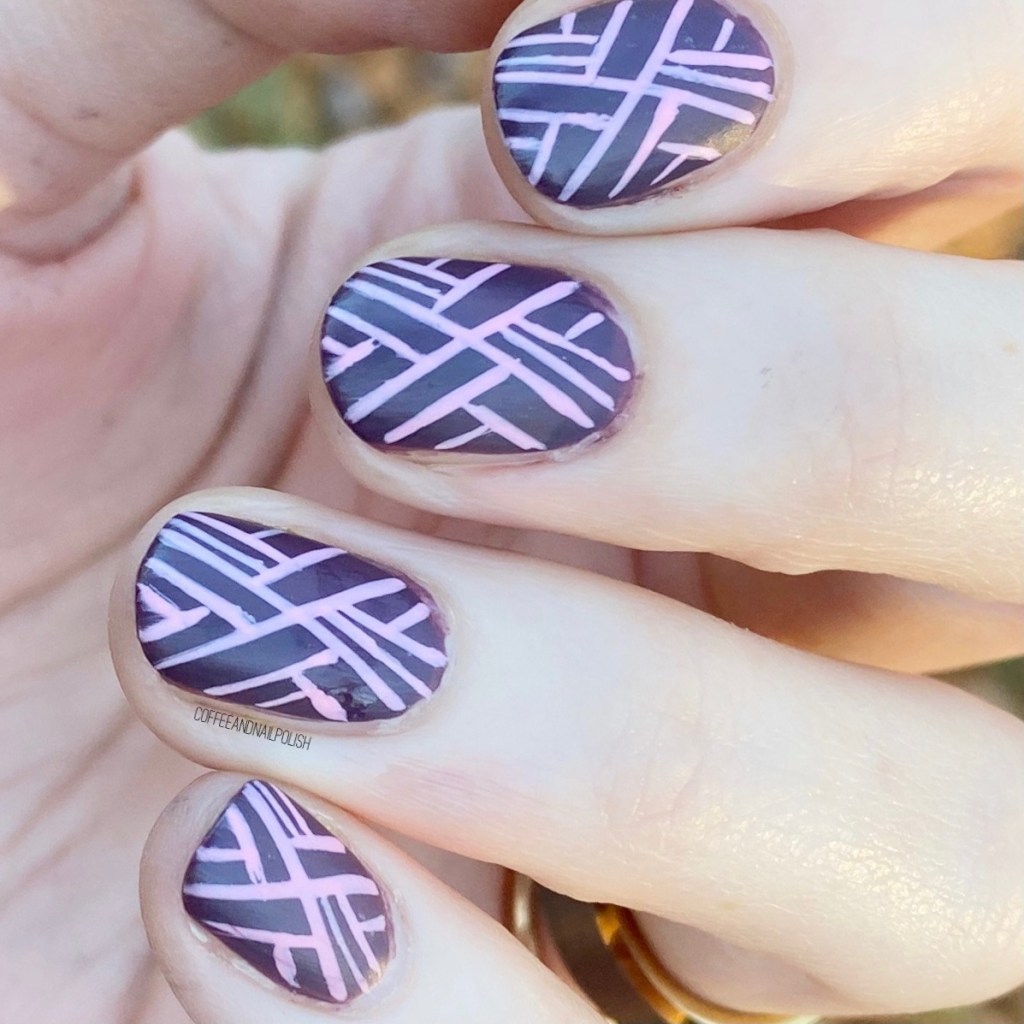
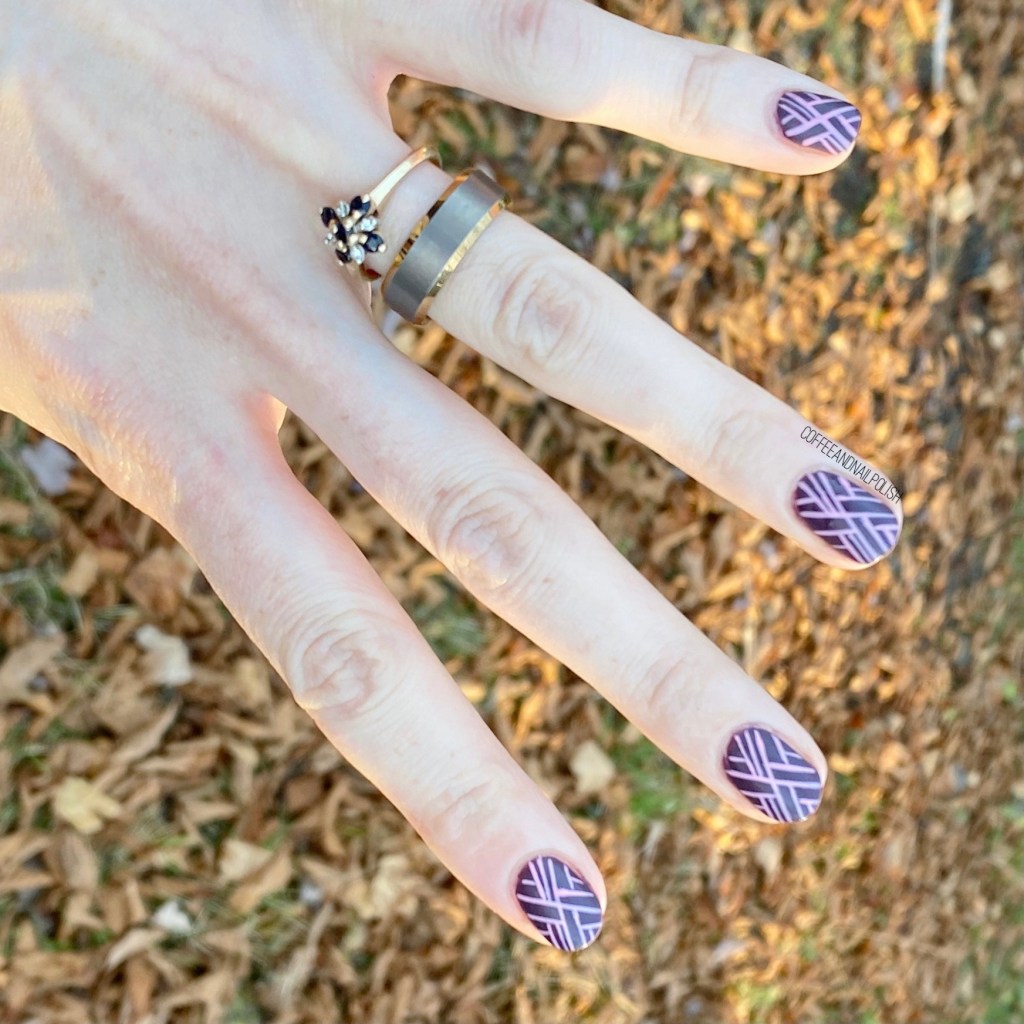
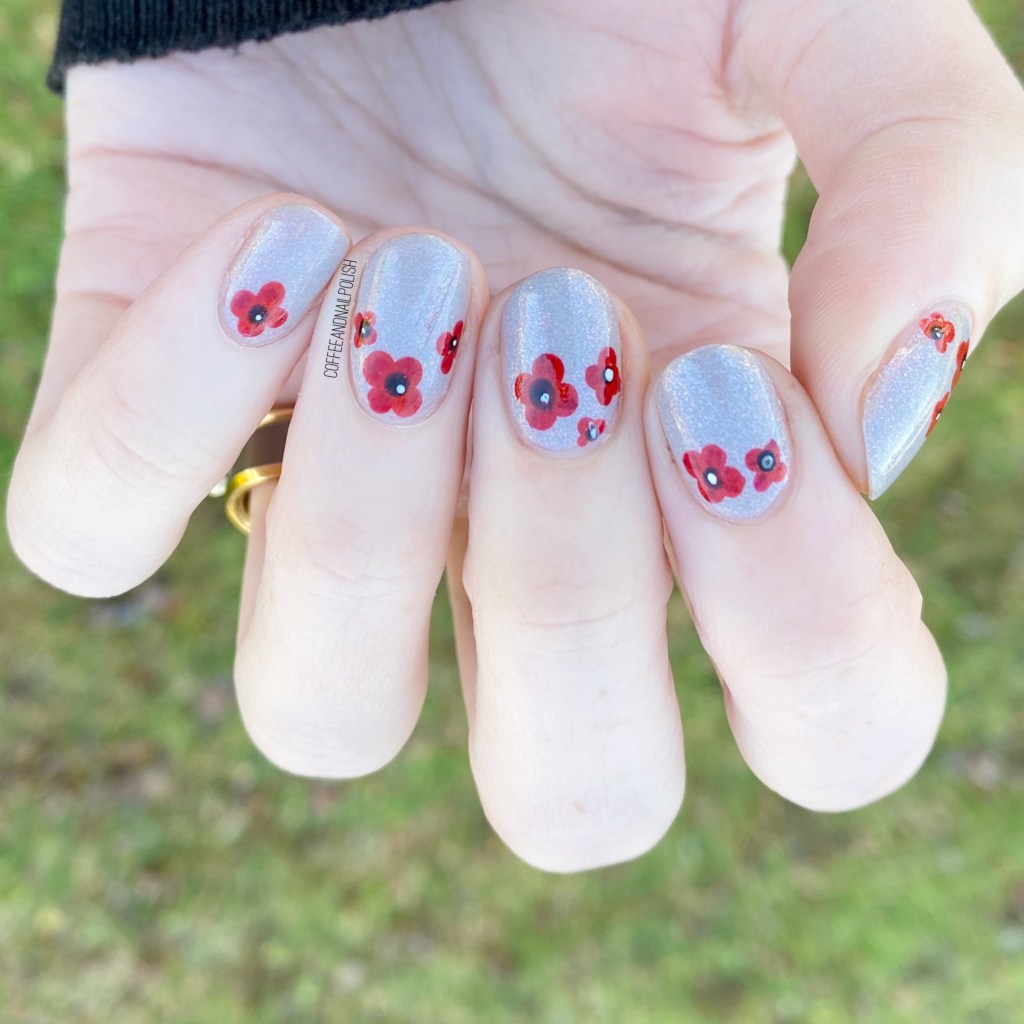
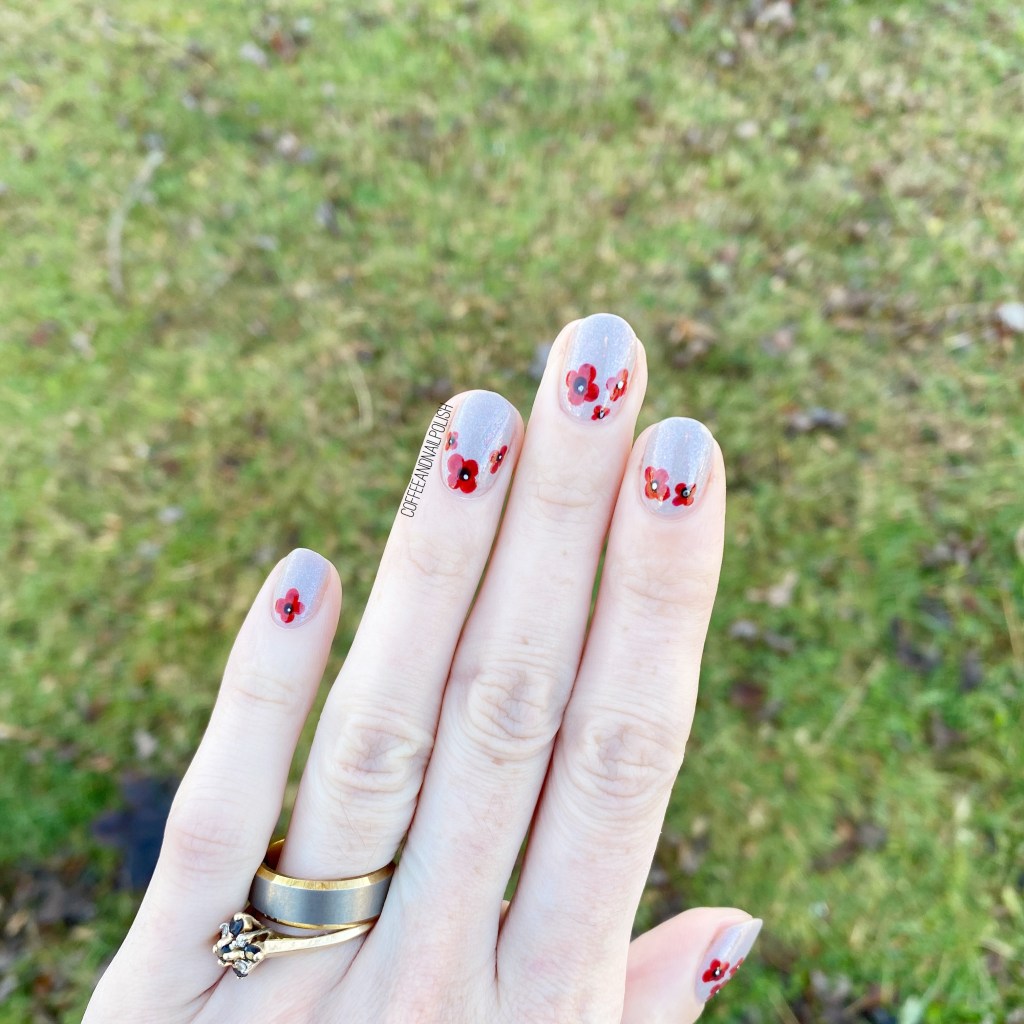
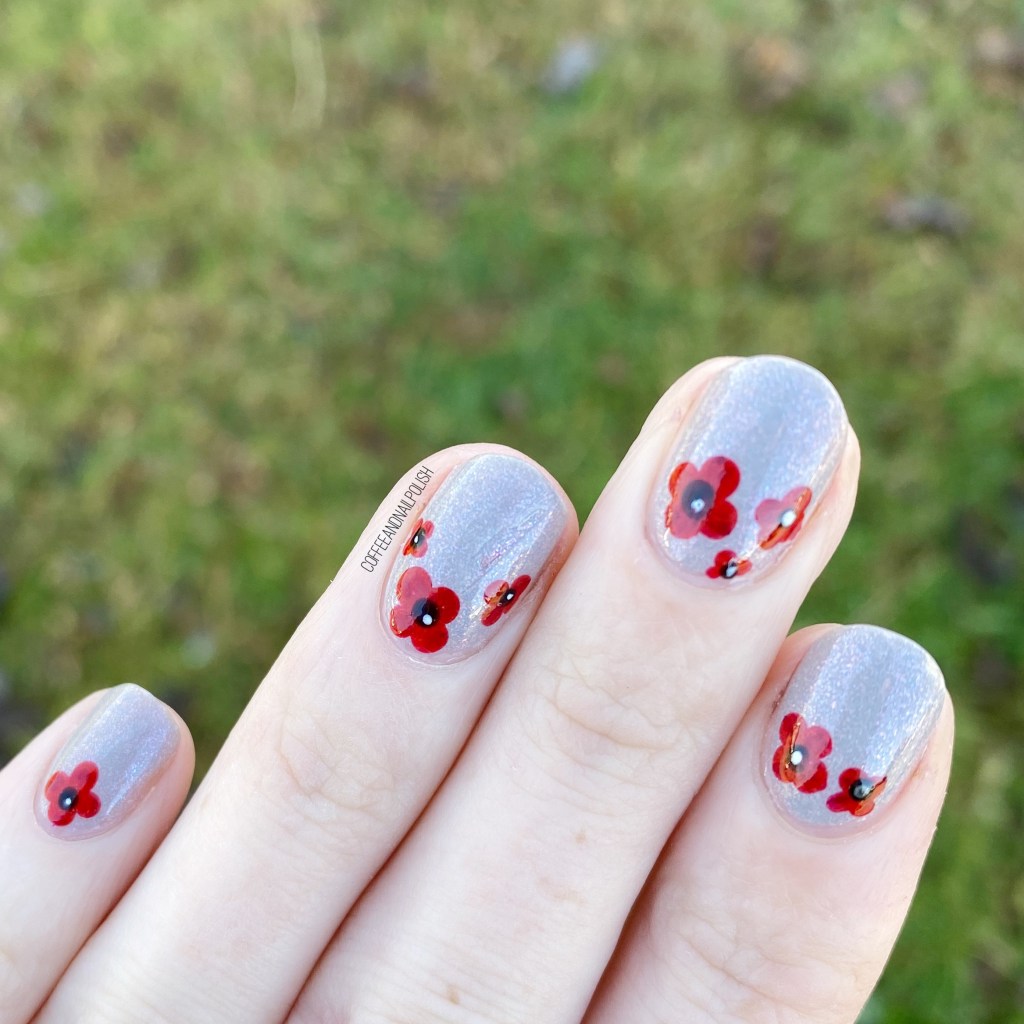
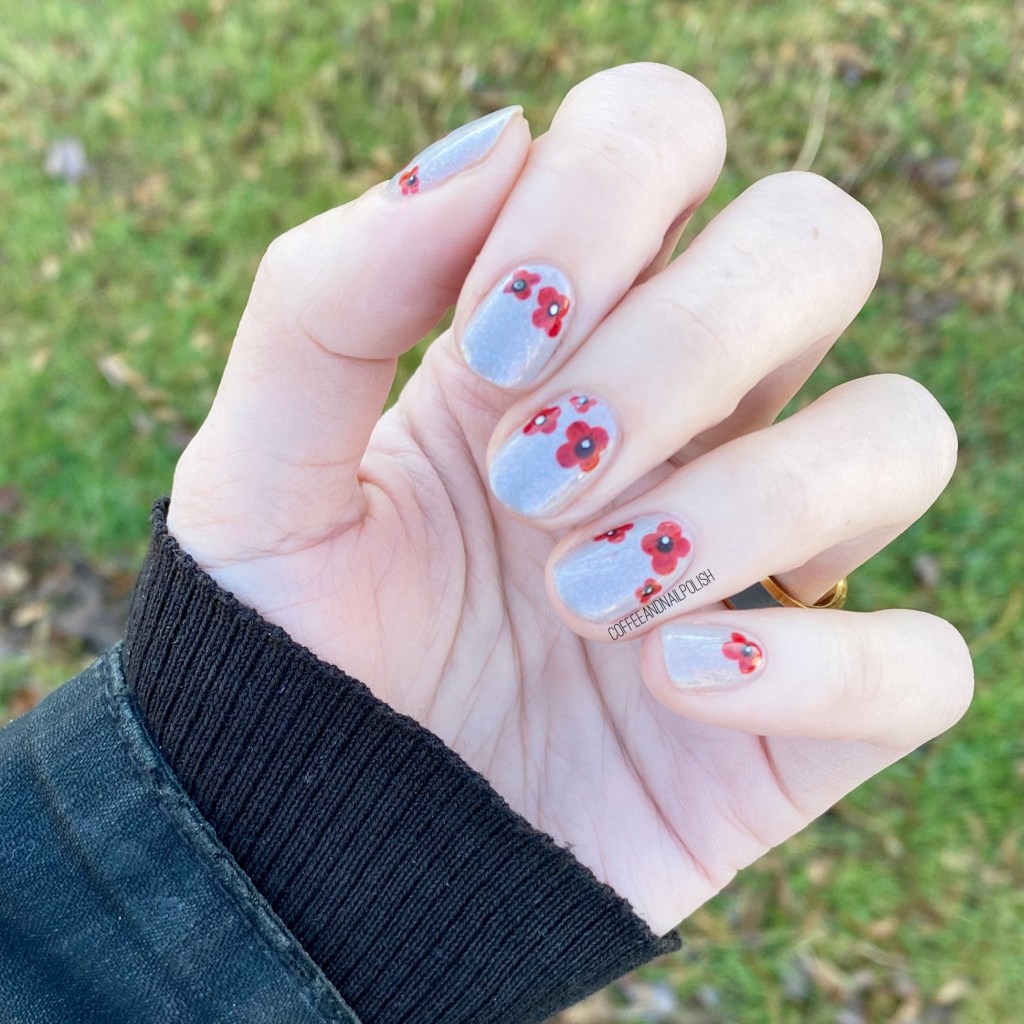
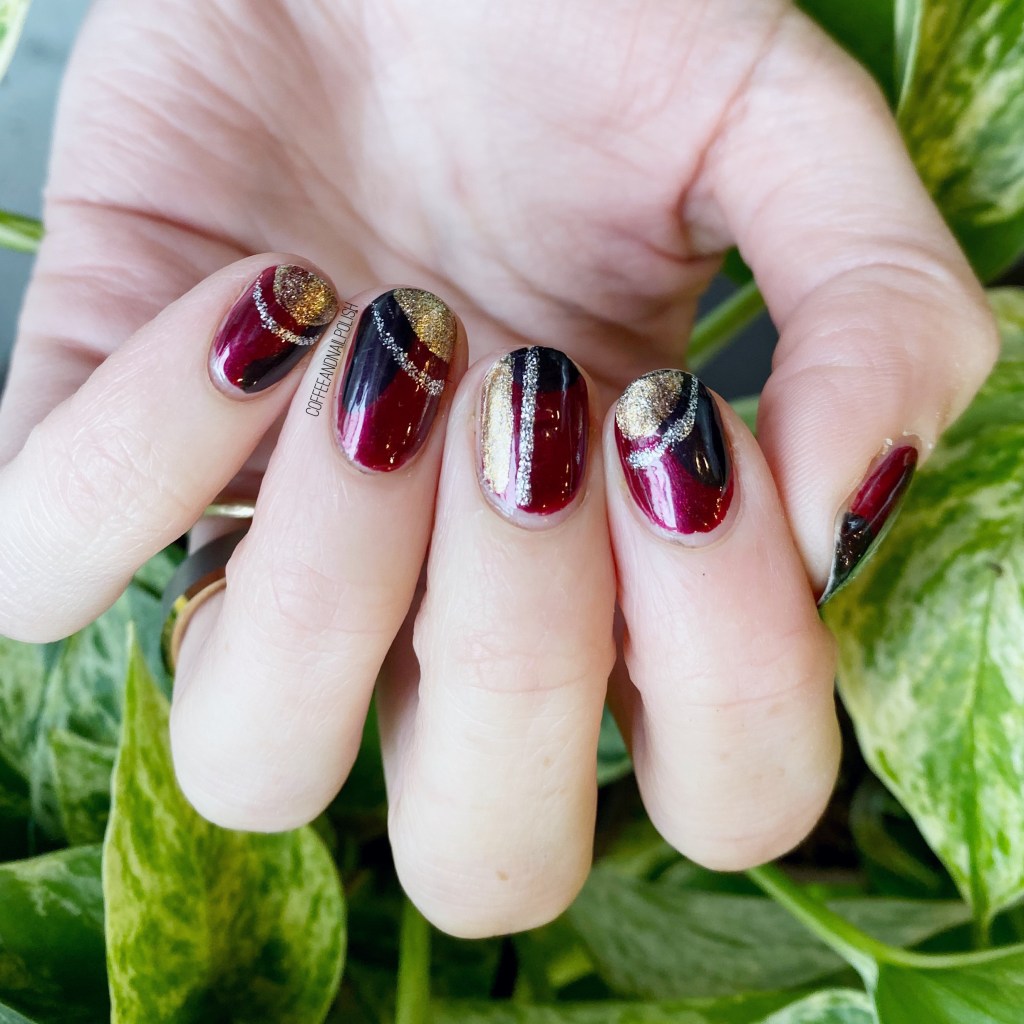
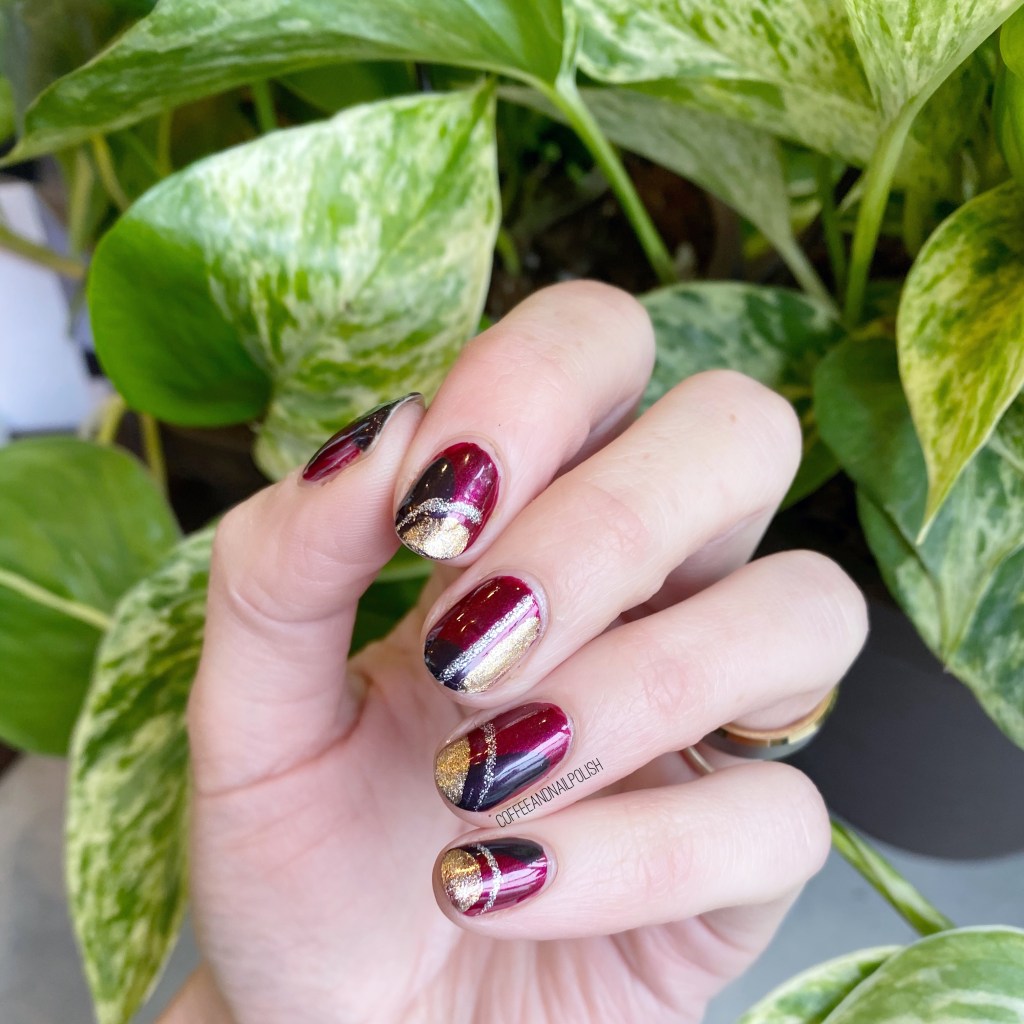
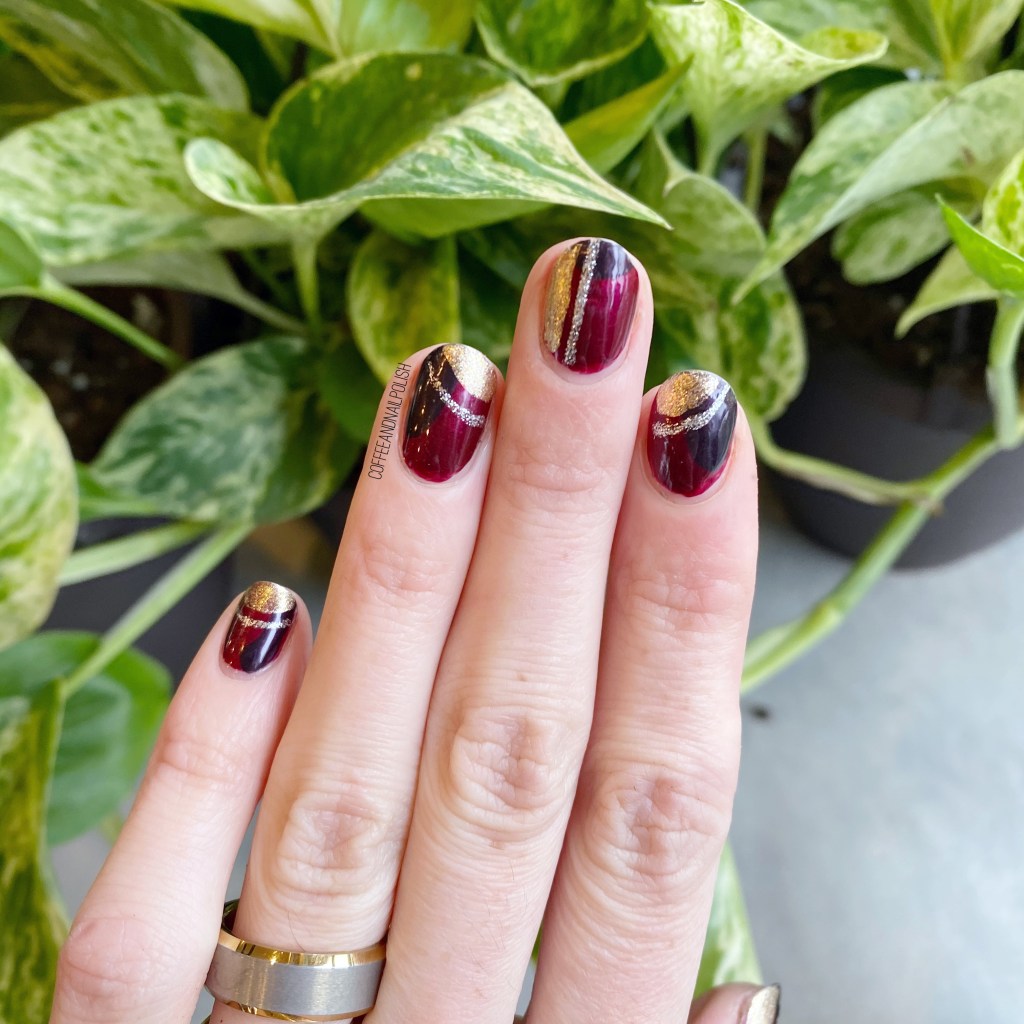
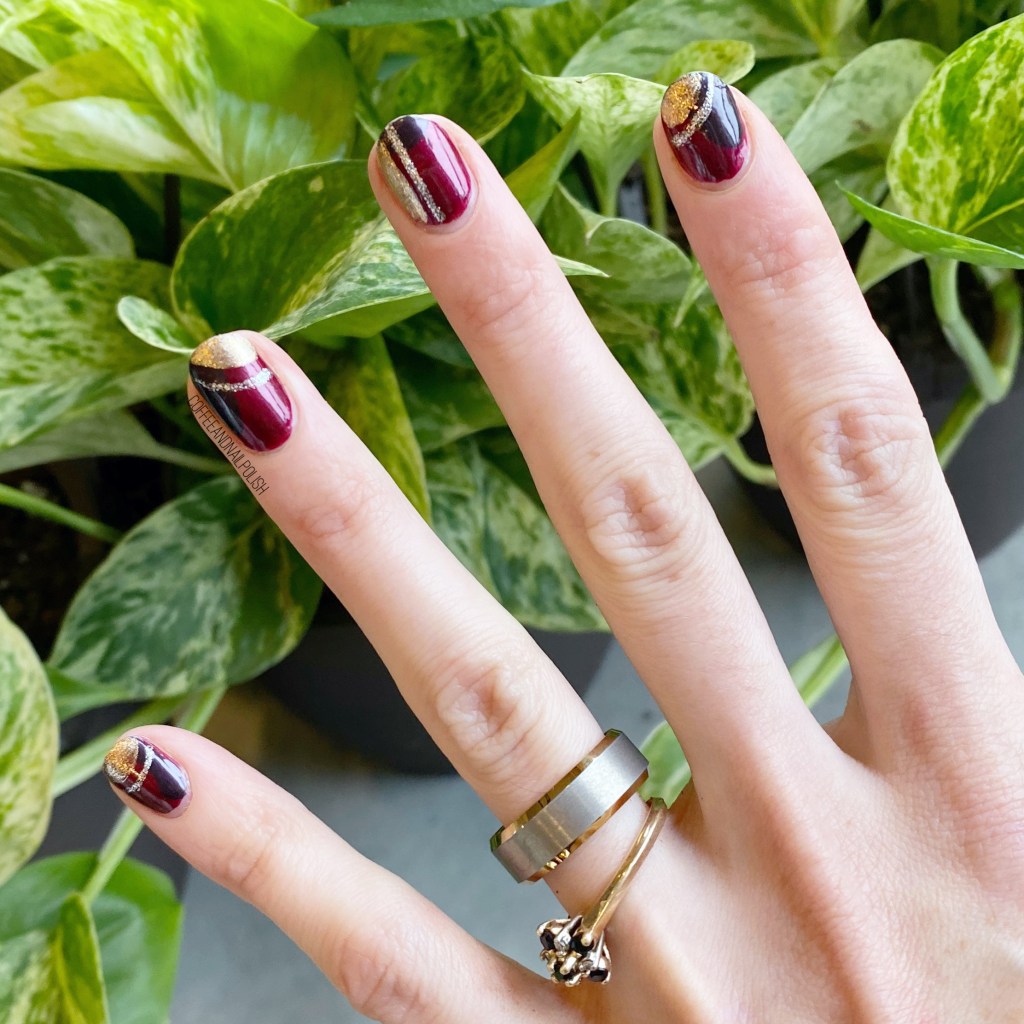
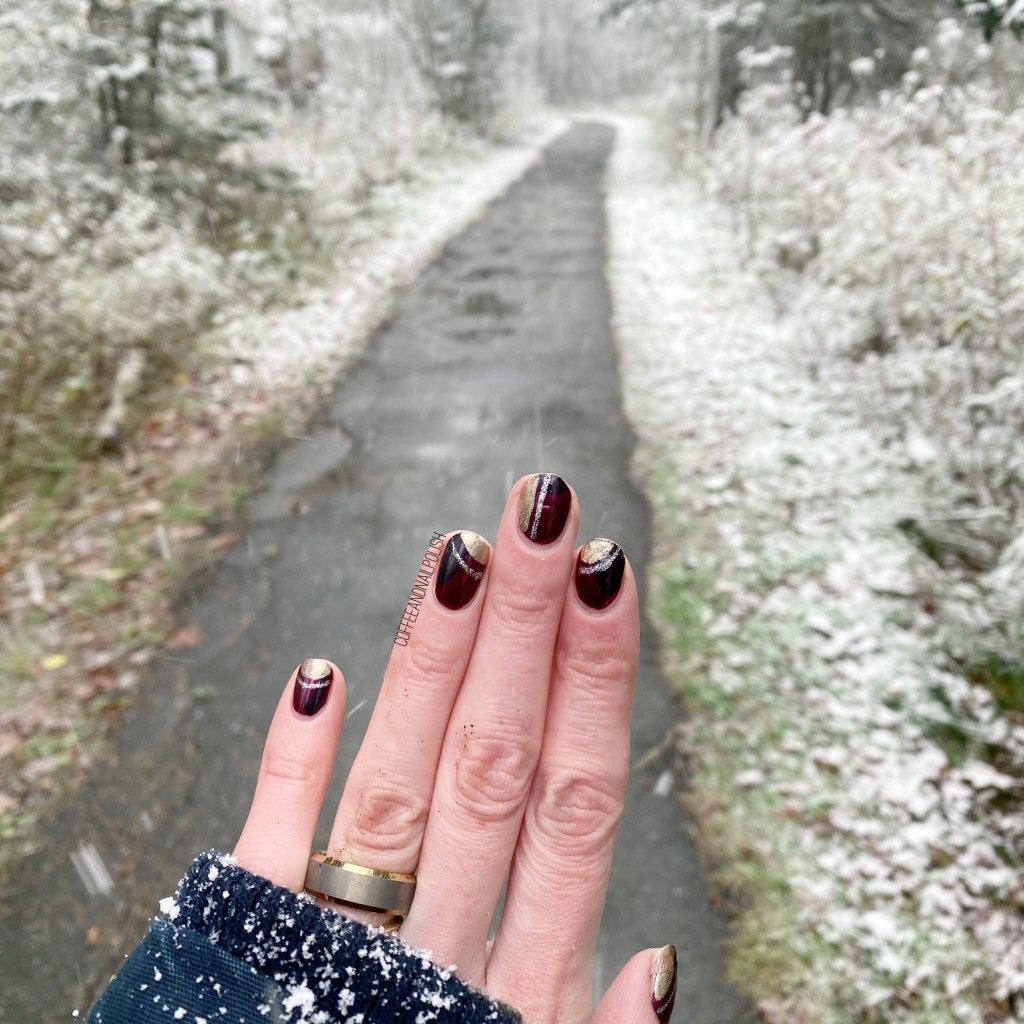
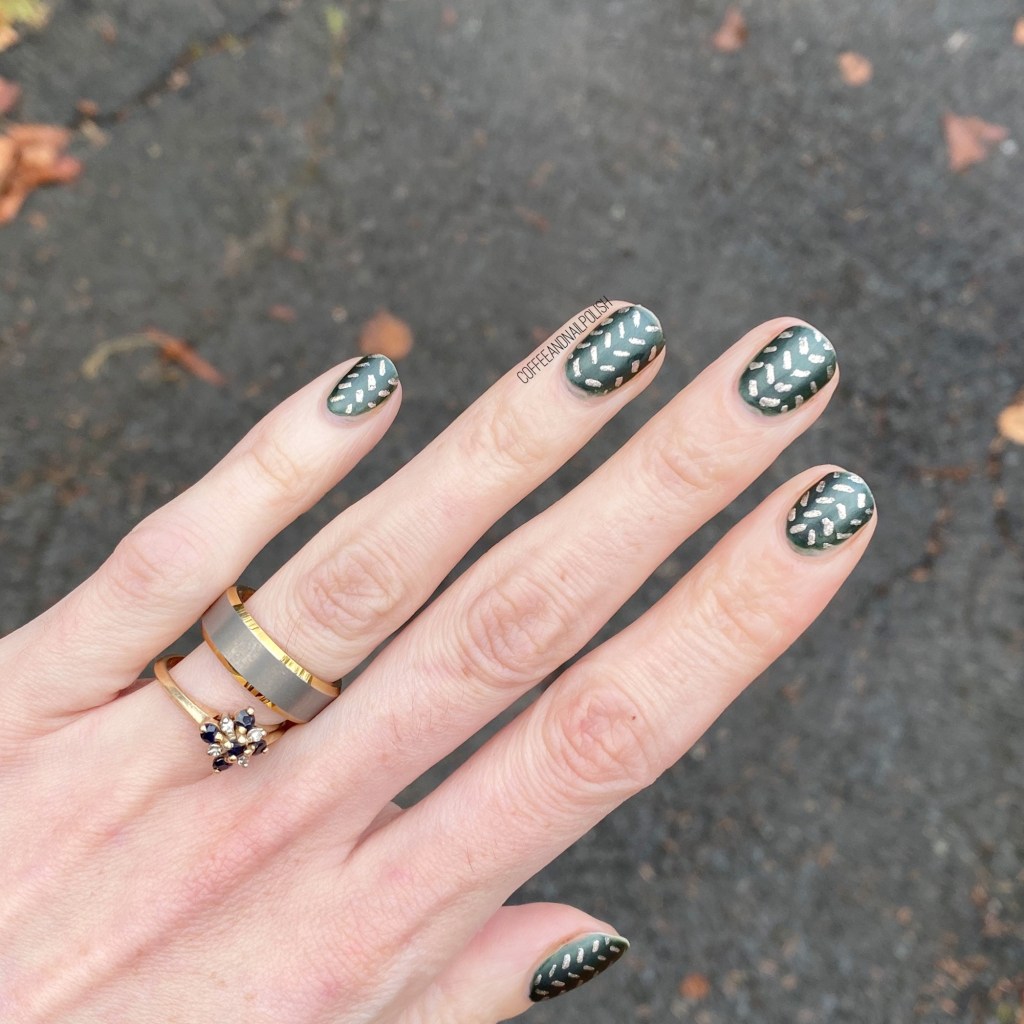
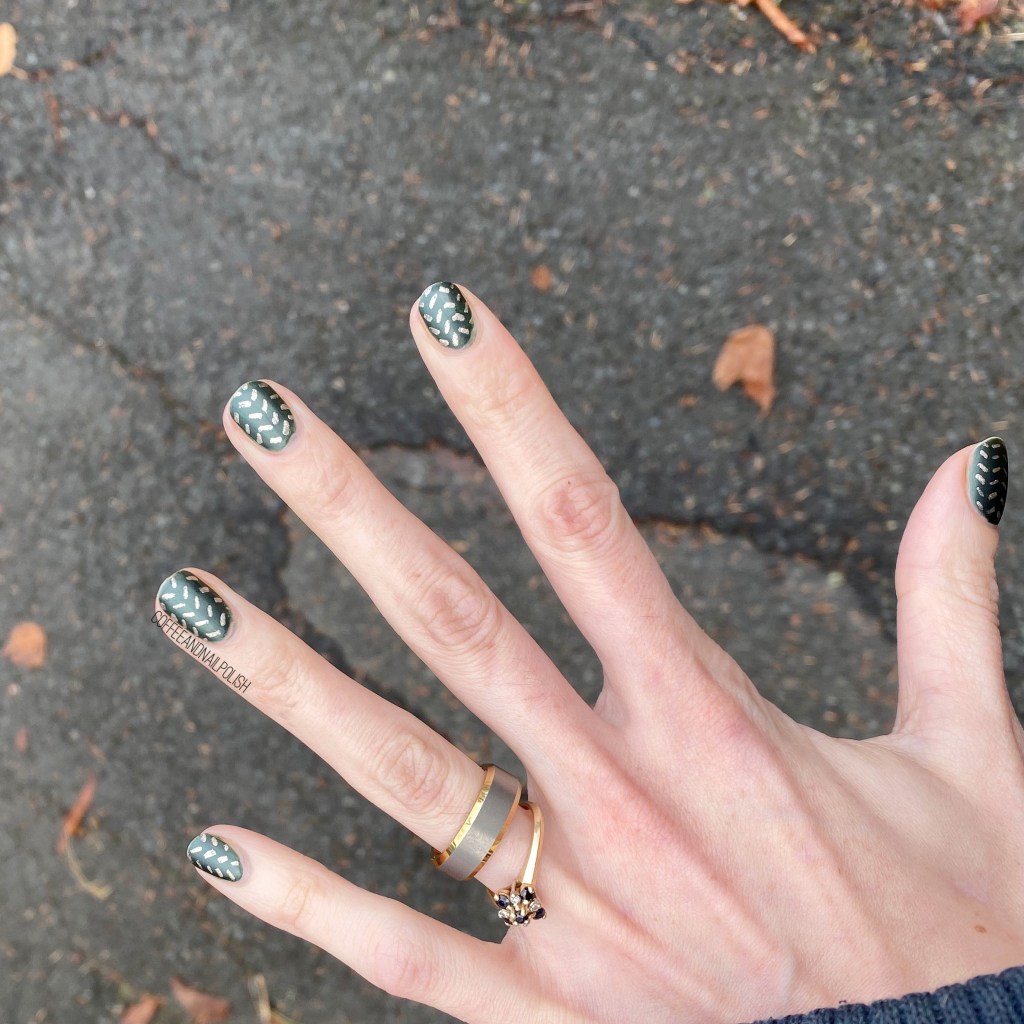
Today I’m sharing another nail art look inspired by one of my favourites on Instagram — @xglitzandpolishx! I was inspired by one of her old designs, & decided it was perfect for this time of year. & it would look amazing over my base of Zoya Ray from Sunday’s Swatch Sunday post.
For this manicure, the polishes I used were:
- Base Coat: Sally Hansen Hard As Nails
- Top Coat: Essie Gel Setter
- Matte Top Coat: Sally Hansen Miracle Gel Matte Top Coat
- Zoya Ray
- L’Oréal Feeling Kilty
- NailStuff.ca Mermaid Tail Nail Brush Trio — I used the 9mm size. (COFFEE10 saves 10%)
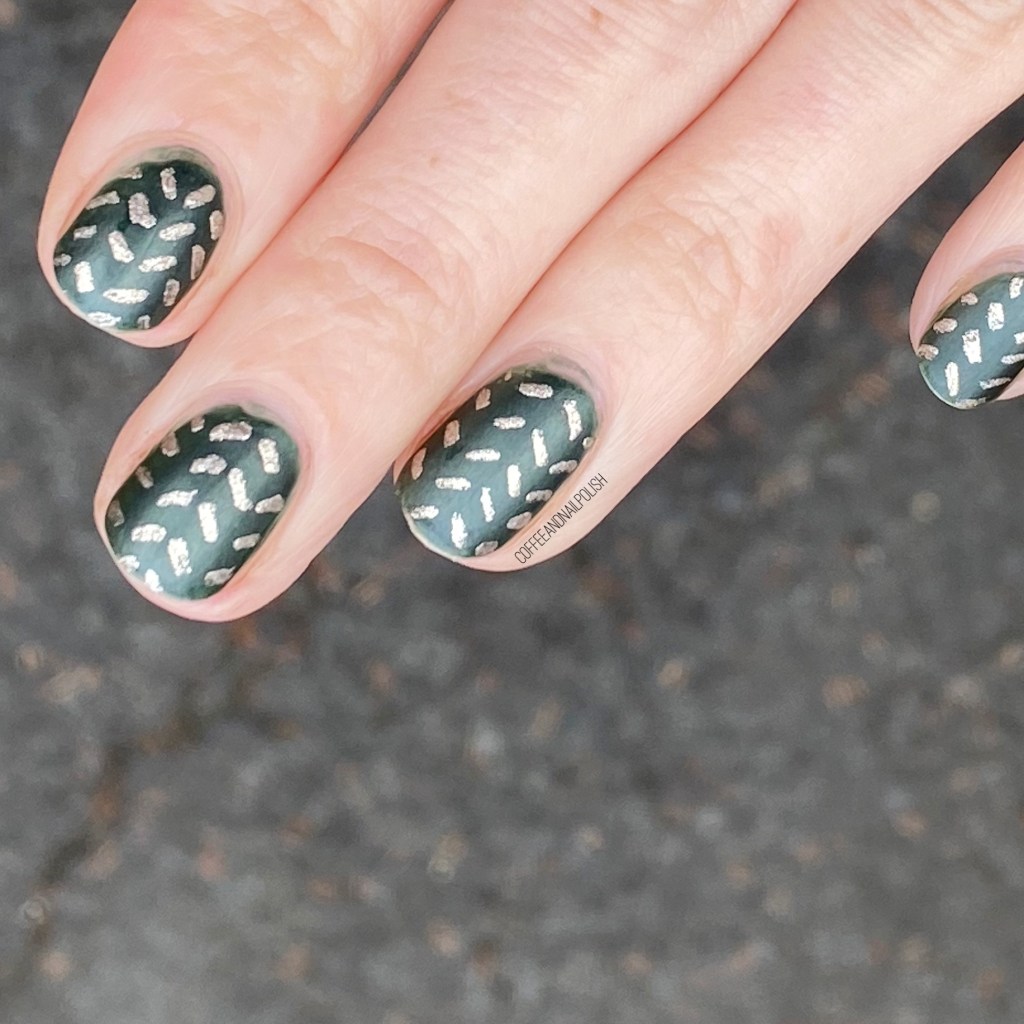
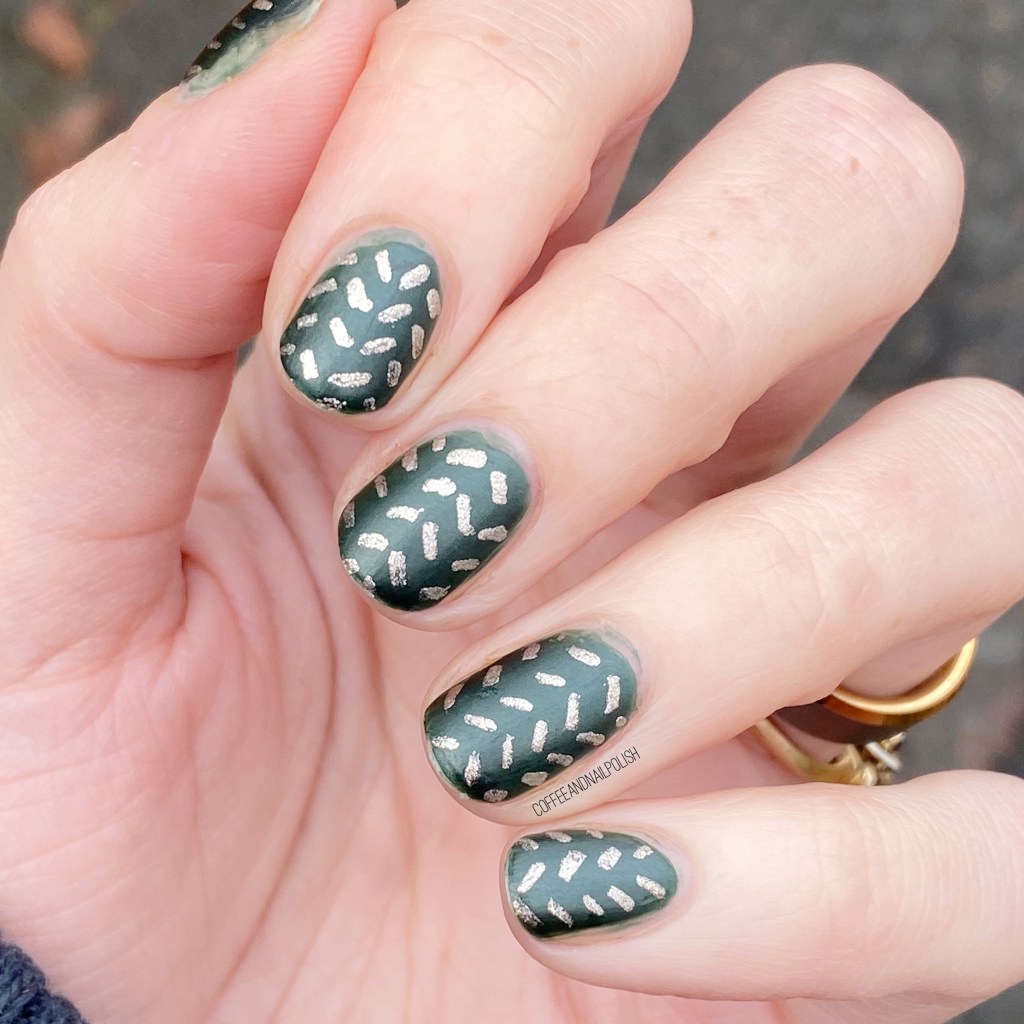
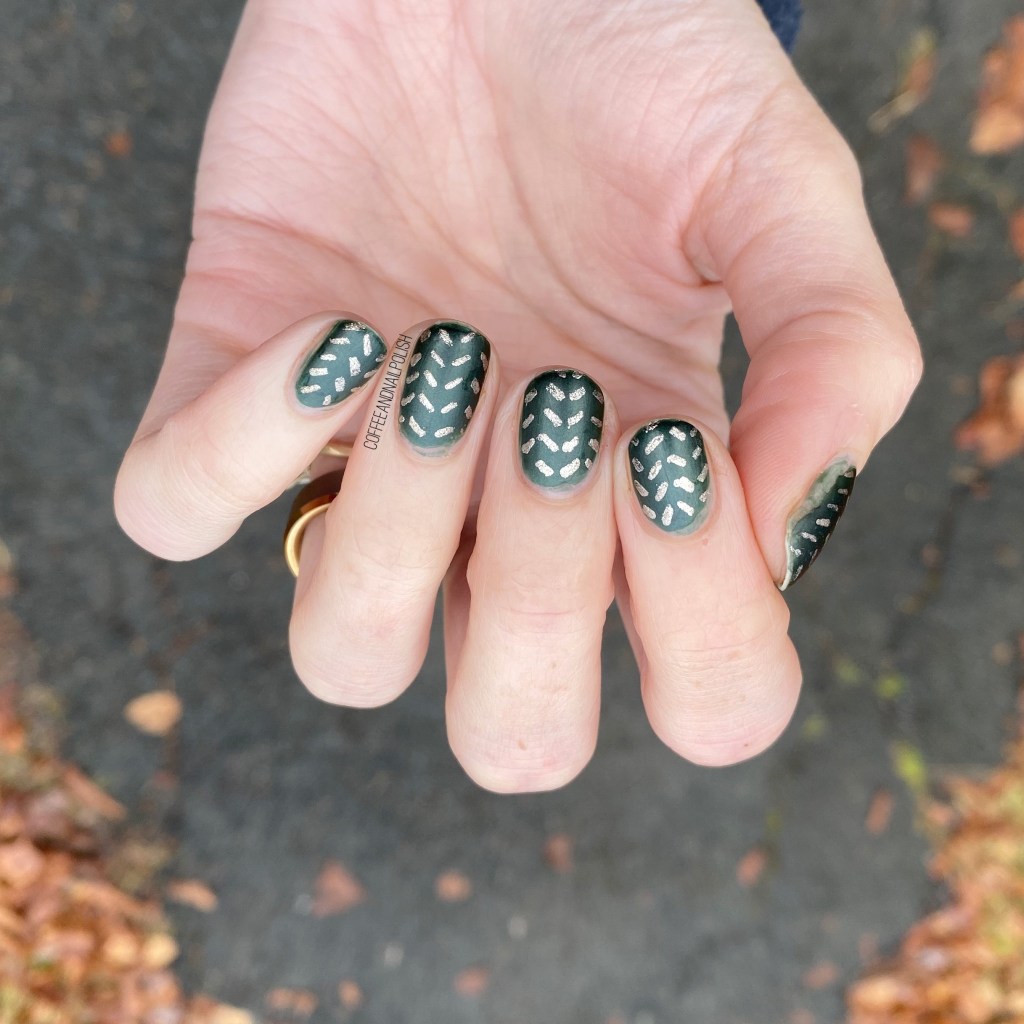
This design took a bit of patience, but was actually super easy to paint! It kind of reminded me of a doing a dotticure, but instead of polka dots, you’re doing dashes instead. The end result just looks like knit, & I’m totally obsessed with it. I’ve actually been meaning to recreate this look for a long time, so I’m glad that I finally did! & I’m totally going to do it again with some more colour combinations.
What do you think about this look? Would you wear this knit pattern on your nails? Was nail art look have you been meaning to recreate lately? Let me know in the comments below!