Mermaid Nails

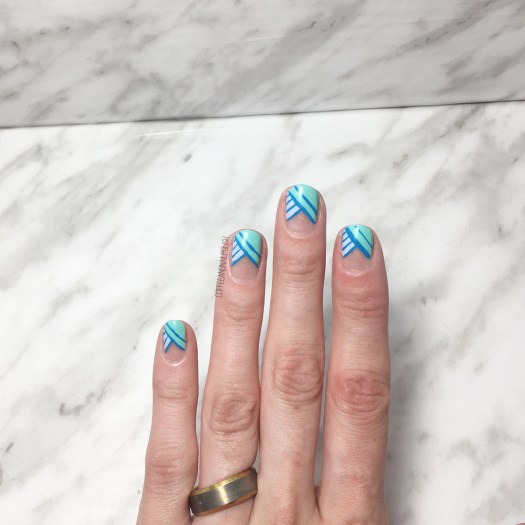
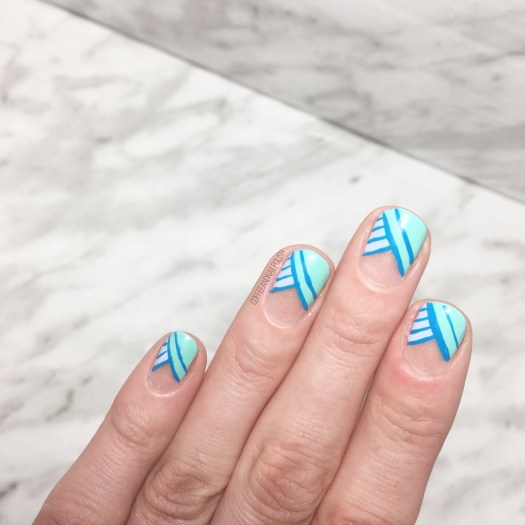
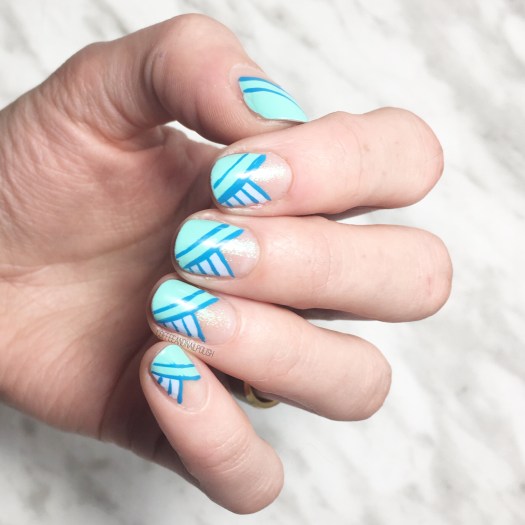
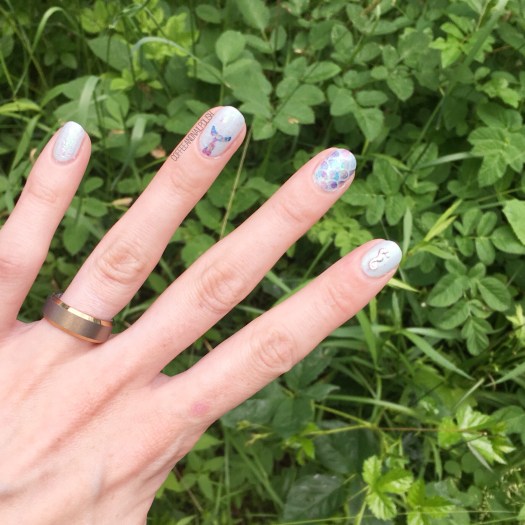
It feels like ages since I last pulled out my mermaid stencils for some mermaid nails. The other night I was playing with some new flakies from NailStuff.ca & after looking at them on my nails, I couldn’t help but think they would make an amazing base for a mermaid nail design! I’ve had this mermaid tail idea floating around a while, so I grabbed some more vinyls from What’s Up Nails (I believe it’s suppose to be a whale tail) & have it a go.

For this manicure, the polishes I used were:

  • Base Coat: OPI Nail Envy
  • Top Coat: Essie Speed Setter
  • FingerPaints Fun Peel Off Base Coat (to apply flakies)
  • Sally Hansen Miracle Gel Ocean Daze
  • NailStuff.ca Flakies — these guys aren’t currently available but there is a huge selection here!
  • What’s Up Nails Scale Stencils
  • What’s Up Nails Whale & Tale Stencils
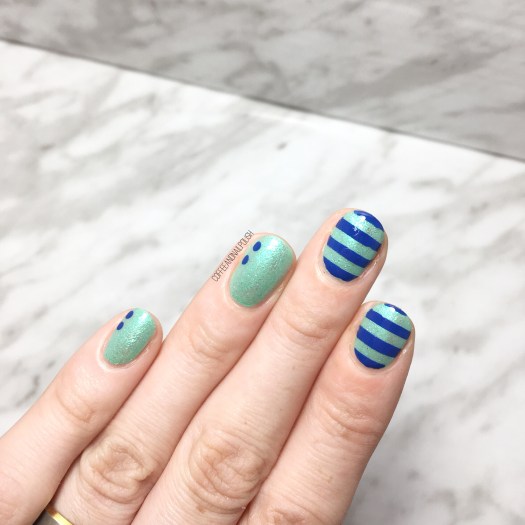
  • Color Club Eternal Beauty
  • Layla Cosmetics Mermaid Spell
  • Color Club Crystal Baller
  • Wrenn Polish Mesmerizing
  • Wrenn Polish Summer Sands
  • NailStuff.ca Summer Nail Wheel — Silver seahorse stud

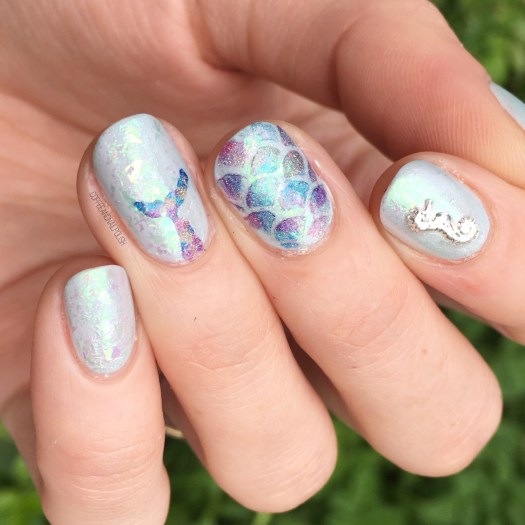
This design didn’t quite turn out how I pictured on my head, but that’s mostly the tail look on my ring finger. I really wish it was bigger. I do however love the holo scales over the flakie base just makes me so happy! I also wish I had done that look on the majority of my fingers with just the stud being my accent! (& if I had more of these nail vinyls left, I probably would have… going to need to buy some more ASAP!)

Also holo & flakies have to be the most beautiful combination. Definitely trying out these flakies OVER holo next!

What do you think of this mermaid nail design? Are you a fan of the holo & flakie combo? Let me know what you think down in the comments below! 🧜🏼‍♀️

Easy Purple & Turquoise Half Moons 🌙

Happy Wednesday lovelies! Today I have another set of half moons to share with you, this time featuring a blurple & turquoise colour combination I’m kind of obsessed with! It’s been a while since I went with half moons, & colour combination was inspired by a t-shirt dress from Forever 21 that I own & love.

Colour blocking makes me happy. It’s a great way to test colour combinations out.

For this manicure, the polishes I used were:

  • Base Coat: OPI Nail Envy
  • Top Coat: Essie Speed Setter
  • Quo by ORLY Venice
  • Essie In the Cab-ana
  • Paper Reinforcements (from the Dollar store)

Was half moons with paper reinforcements anyone else’s first nail art technique they learned? I remembering doing them back in the day & feeling like I was a nail art expert. For those of you who are still getting into nail art looking for easy designs… half moons are a great option with endless colour combinations. You can go subtle for more work appropriate designs or go crazy neon! I also love adding polka dots on top of my design for a little extra design.

what do you think of these half moons? What colour combination would you pick? Let me know in the comments below!

Even More Negative Space Half Moons!

Happy Wednesday lovelies! Who else can’t even believe it’s already Wednesday. It feels like this week is speeding by like crazy. Dreaming of the weekend already… it feels like it’s almost here. Which means spending all weekend (hopefully) barbecuing!

Today’s design is one I actually did back in June, during my super crazy two weeks at work, & never got a chance to share with you! This design was actually what I wore when I had my first Head Office visit at work. I was super nervous as this was the first time I was meeting one of my big bosses, so I wanted to make sure I was representing the brand as best as I could…. right now to the nails!

The polishes I used for this design were:

  • Base Coat: Essie Grow Stronger
  • Top Coat: Essie Gel Setter
  • Icing Mermaid Mint
  • Claire’s Matte Pastel Nail Polish Sorbet Mint
  • Claire’s Matte Pastel Nail Polish Sorbet Blue
  • Jordana Cosmetics Pop Art Nail Design in Blue Abstract

You know what’s awesome about working for a company which is geared towards a tween audience—you always have an excuse to do something fun with your nails! We sell a lot Nail goodies, so I’m always getting inspiration from them! This design was kind of a recreation of an old design that I had done, but with a few different polish picks.

You can seriously never go wrong with a good negative space chevron look. & the colour combinations are endless!

What do you think of this design? Are you as obsessed with negative space chevron looks as I am (I don’t think anyone is!)

Share down below all your thoughts!

Mani Swap with @mugglenails

It feels like forever since I had to opportunity to join one of my fellow nail art addicts in a mani swap. So I was super excited to be able to team up with a fellow Canadian nail polish addict @mugglenails in a fun design swap. Meghan always comes up with such creative nail art patterns & colour combinations. So it was really fun to scroll through her feed to pick a design to recreate!

I had narrowed it down to two designs of hers, but in the end I kept coming back to this blue & aqua design. There is something about the colour combination which felt so nautical, I just couldn’t get it out of my head. Very, very Summery! For her design, Meghan recreated my green vine design from a few months back.

For this design, the polish I used were:

  • Base Coat: OPI Nail Envy
  • Top Coat: Essie Gel Setter
  • Essie First Timer
  • Icing Stores Mermaid Mint
  • Essie All the Wave
  • Born Pretty Store Aurora Rainbow Nail Striping Tape (item #40423)
  • Medium sized dotting tool

There is something about this colour combination that just makes me swoon. Maybe because it feels so Summer-y & reminds me of the ocean. I mean, I’m an East Coat Girl… the ocean is in my veins. I will always adore a nail design with a nautical theme. All this design needs is a quick accent anchor for it to go full nautical. But I kind of like the fact that it’s kind of subtle–it makes this design a much more everyday look. This colour combo isn’t my everyday choice, & yet I’m completely obsessed with it!

What do you think of this mani swap? Do you think my recreation was successful? Share your thoughts down in the comments below!

Vintage Roses (take #17283)

You know when you did that perfect pair of jeans or shirt or outfit that looks amazing, & fits your perfectly, & just makes you look amazing? You wear it constantly (maybe more than you should), because it just looks so good? That is how I feel about floral & vintage rose nails. & that is why I have ANOTHER floral design to share with you.

This design is actually inspired by an old design of mine, this time using blues instead of pinks. Yep, I’ve done a different version of these simple roses a lot but they never get old to me, so hopefully they’re not tired to you.

For this manicure, to polishes I used were:

  • Base Coat: OPI Nail Envy
  • Top Coat: Essie Gel Setter
  • Essie Find Me an Oasis
  • OPI Angel with a Leadfoot
  • Sally Hansen Complete Salon Manicure Rose to the Occasion
  • Essie Bachelorette Bash
  • Sally Hansen Insta-dri Petal Pusher
  • YSL Beauty Vert D’Orient
  • Essie First Timer
  • NailStuff.ca Mixed Decoration Nail Wheel in Gold
  • Small dotting tool
  • Small detail brush from Bundle Monster

Oooooh these roses over white is definitely one of my favourite accent nails to do. I love all floral nails, but there is something about vintage roses that just looks so good: easy to do, but looks beautiful & complicated every time. Not to mention, roses are one of the easiest florals to do because I find (for me at least), they’re one of ten hardest florals to mess up.

My tutorial on how I do roses is Here.

So what do you think of this design? Are you a vintage roses person or do you prefer other floral? Share your thoughts down below!