Christmas Penguin accent nails!

Good morning lovelies! I’m back again, & I have another Christmas-y design to share… after all it’s only 3 more days until Christmas. (When did that happen?) Today’s look is a surprisingly easy look that I’ve done & redone over the years & always come back to.

I actually did this nails last weekend, but anyone else who works in retail this time of year probably understands the craziness which is my life right now… barely any time to breathe, let alone write a blog post… just counting down the days to my two days off over Christmas. It’s going to be GLORIOUS!

For this look, the polishes I used were:

  • Base Coat: Essie Grow Stronger
  • Top Coat: Essie Gel Couture Top Coat
  • Sally Hansen Miracle Gel Sprinkled With Love
  • Sally Hansen Miracle Gel Make It N-ice
  • Sally Hansen Hard As Nails Black Heart
  • Sally Hansen Hard As Nails Let’s Snow
  • Sally Hansen Miracle Gel Good Cheer-y
  • Sally Hansen Complete Salon Manicure Fiery Island
  • Small dotting tool
  • Small nail art brush (obsessed with my collection from www.nailstuff.ca

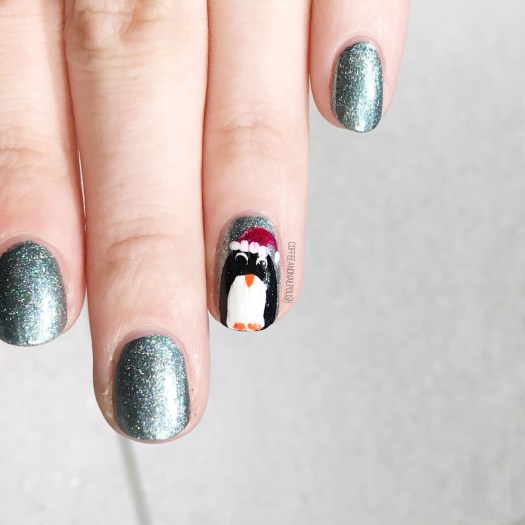
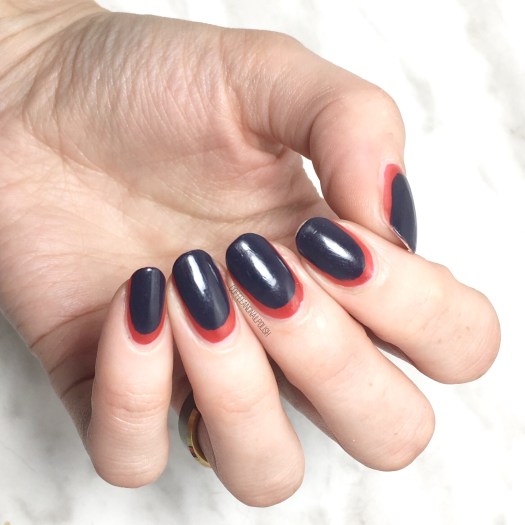
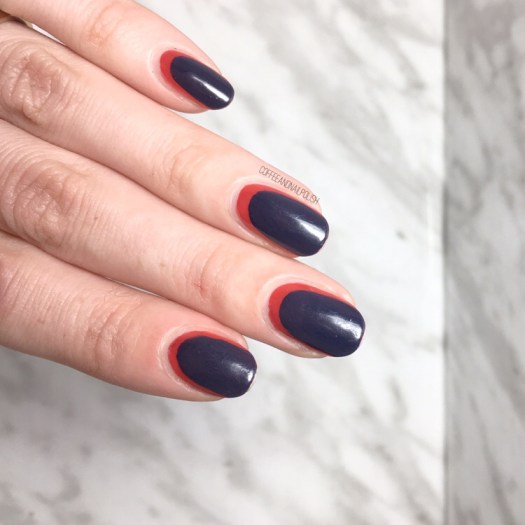
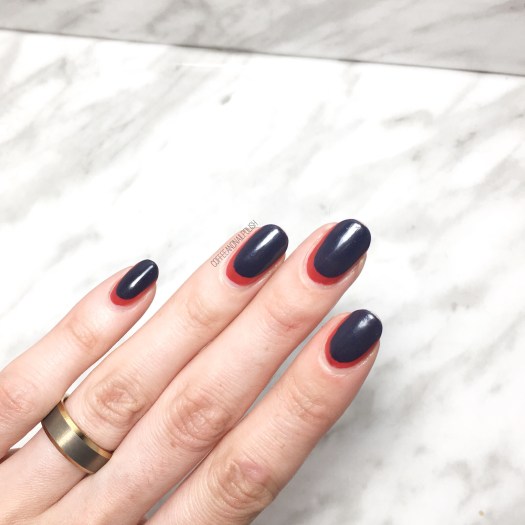
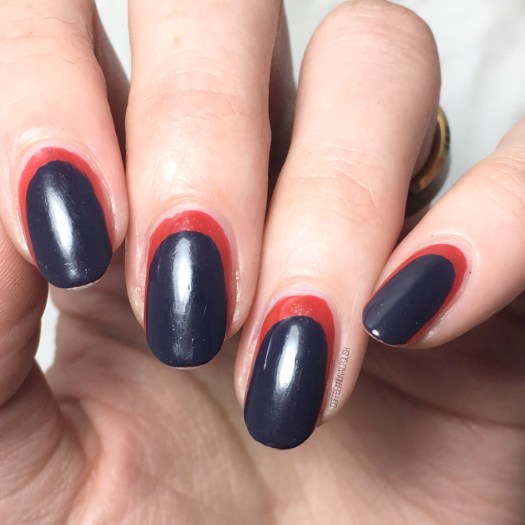
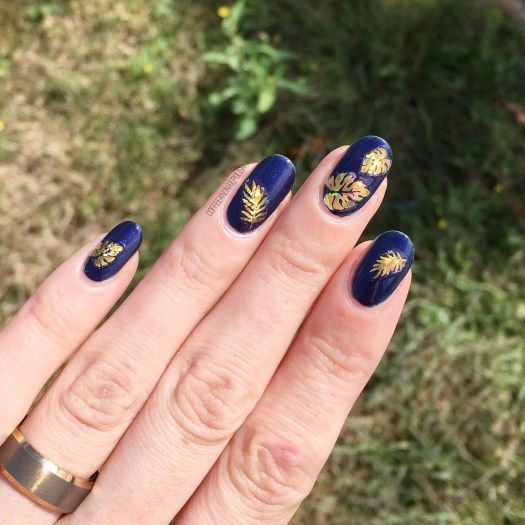
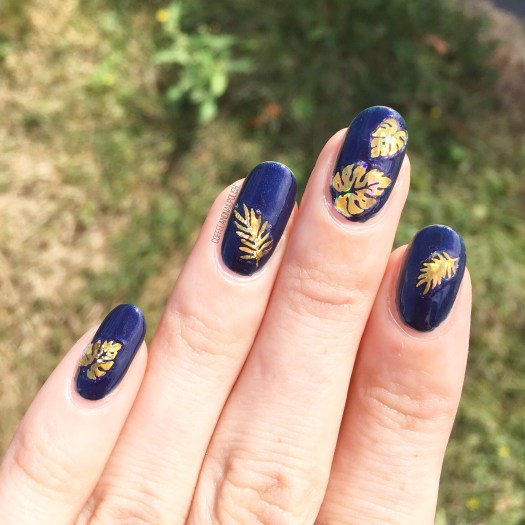
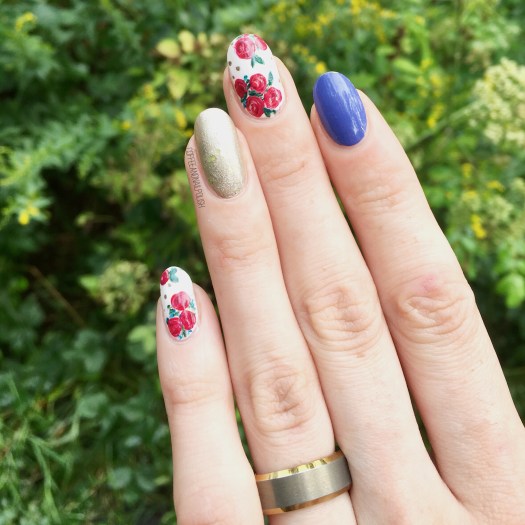
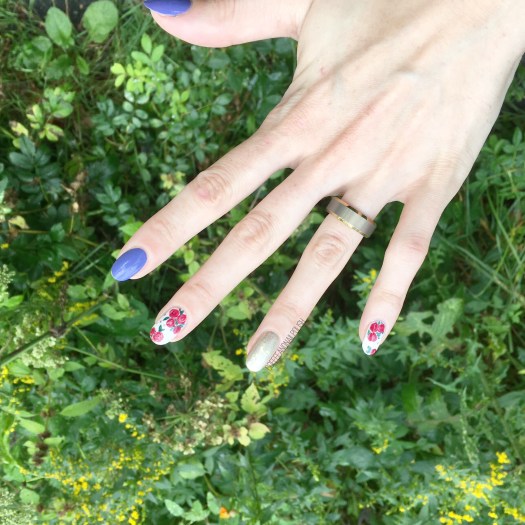
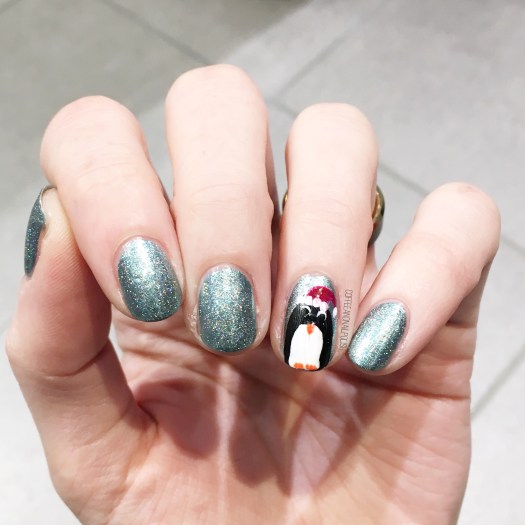
First I started off by laying Make It N-ice over Sprinkled with Love for a little extra sparkle…. because tis the season. & then I freehanded my little penguin over top on both my ring fingers to make my look more festive. I first saw this look on Pshiiit Nails (via Pinterest) & just loved how it looked so I needed to recreate. & obviously I had to add a little a festive Christmas-ness with some Santa hats!

My only complaint is that my top coat smeared my penguins a little. I’ve been testing out the Essie Gel Couture Top Coat & while the lasting power is amazing, it’s not my favourite top coat for putting over nail art because it does seem to smear designs. Guess I’m still on the hunt for the perfect one!

what do you think of this penguin design? Have you figured out what you’re wearing for Christmas? Let me know down below!

Fall Ruffian 🍁🍂

The weather here in Halifax is feeling much more seasonal, & I can’t lie–I’m digging it. A lot. I’ve just been waiting for the moment when I could finally wear tights & dresses, & it’s here. If it could stay this perfect seasonal weather until, oh I don’t know… November, that would be just fantastic.

Today’s look is a super easy design that requires no tools at all–just a tiny bit of patience. I love the simplicity of this design & how well the two colours paired together.

For this design, the polishes I used were:

  • Base Coat: OPI Nail Envy
  • Top Coat: Essie Speed Setter
  • OPI My Chihuahua Bites!
  • Essie After School Boy Blazer

I’m just absolutely love the dark over the bright. It pops so well. Essie After School Boy Blazer is one of my all time favourite blues & I’m still so in love with it all these years later. One of the most perfect navy’s I own.

Gosh, I just love love love the look of a ruffian design–it’s a great alternative to a simple french manicure or half moon design. Also I apologize about the tip wear–I wore this design all day at work before getting a chance to take pictures, but thankfully they weren’t too worse for wear!

what do you think of this ruffian design? What colour combo would you pick for a ruffian look? Let me know down in the comments below.

Born Pretty Store 3D Nail Art Stickers (item #40422) Review

Good morning beauties & happy Tuesday. Today I’m showing off some brand new nail art stickers I recently received in a review package from Born Pretty Store. They were so kind as to send me a few nail art goodies in exchange for my honest thoughts & reviews, & I couldn’t wait to break into the package!

These nail art stickers are item #40422 & come in both gold holo & silver holo. I picked both colours, but since I was feeling a purple base, I figured the gold would pop more over top. The stickers themselves come with a large sheet of different sizes & style, which is perfect when trying to pick what kind of look you want to do. For my nails, I decided to go more simplistic using the larger size stickers.

Application was super simple. All you need to do is paint your base colour (I picked Joe Fresh Gel Gothika Blue) & let dry some. To speed up the drying process, I did apply a quick dry top coat to my base, mostly because if my nails were fully dry, I could be more selective about sticker application. When my nails were dry, I then carefully peeled my stickers off their sheet with tweezers, & applied them onto my nail. I made sure to press them down really well, & flatten any possible air bubbles. Then, when I was happy with my look, I sealed everything in with top coat.

I wore these nails for a full day of work (stock day at that!) & they lasted pretty well. I did find that my nails where the sticker went close to the edge of my nail–like my middle finger & pinky nail–had some issues with the sticker lifting but that could be because I was not as precise with my top coat to fully seal the sticker in. The best bet is to aim to make sure that the stickers are placed more centrally on the nail, or you just make sure your sealing all the edges really well.

As you can see down below, my stickers definitely seemed to stand out a bit from its base–they were for the most part sealed onto my nail, but seemed raised against my base colour. I don’t know if this was because I had used a top coat already but when I use these again I will definitely try it over just the base colour & see if it helps the issue. These stickers are definitely not the first brand I’ve had this issue with, so I’m thinking it’s more an issue with my application.

I’m definitely a fan of these stickers & the easy way you can create a nail art look using them. I even had someone ask me where I got my nails done! As I mentioned above, you can find these guys at the Born Pretty Store website (item #40422) & they come in both silver & gold. I definitely want to try pairing both colours together the next time I use them, so see what kind of look I can create.

Don’t forget, you can use my Born Pretty discount code COFFK31 to save 10% off any regular priced items.

Recreating my Wedding Nails (Happy 3rd Anniversary to us!)

Happy Wednesday lovelies! Not only is today the middle of the week & halfway to the weekend, but today marks 3 years since I married my best friend. If you’ve been around originally, you may remember my original post featuring the nails on our special day.

Naturally, I wore a floral design–which is a surprise to no one. & in honour of this day, I decided I really wanted to recreate my original design. & spoiler: I love it just as much today as I did on this date 3 years ago.

For my recreation of this manicure, the polishes I used were:

  • Base Coat: OPI Nail Envy
  • Top Coat: Essie Speed Setter
  • Essie Suite Retreat
  • Sally Hansen Miracle Gel After Altar
  • L’Oréal Getting Kilty
  • Julep Vivien
  • Sally Hansen CSM Killer Heels
  • Sally Hansen CSM Red It Online
  • Sally Hansen CSM Rose To the Occasion
  • Sally Hansen CSM Blush Against The World
  • Quo by ORLY the Antidote
  • Essie Off Tropic
  • Quo by ORLY Diva
  • Essie Sew Psyched
  • Nailstuff.ca Mermaid Tail Nail Art Brush
  • Dotting Tools

I’ve written before how much I love going back to recreating my manicures, & I’m so glad I got to do the same for this one. I know some people go for more classic wedding & bridal manicures, but it just felt more “me” to do a full floral look (with something blue & a gold accent nail.) & no matter how much time passes, I don’t see myself ever getting “over” floral nail art. It’s just too perfect.

How did you wear your nails for your wedding day? Did you go more classic or a little more fun? (& for those planning to get married soon, do you know how you’re wearing your nail yet?)

& for fun, a few pictures from our wedding day ♥️

SWATCH SUNDAY — Zoya Yves

Happy Sunday my lovelies! Today’s post is a goodie–something perfect for these cooler Fall days. 🍁 Today I’m sharing a polish from the Zoya Winter 2015 collection called Yves. This beauty was found last Summer at my local Winners & has been sitting untouched in my Melmer, just waiting for the perfect opportunity to be worn. & what is more perfect that the beginning of Fall.

Yves is a sapphire blue matte polish with a scattered blue shimmer. For my swatches, I used two tricky coats, but I could have definitely gone with 3 as I had some bald spots that could have benefited from an extra coat. I also used 2 coats of thick base coat under my swatches as this is definitely a stainer. & nobody wants their nails permanently stained blue. (I’m already dealing with blue hair dye that doesn’t want to fade for me.)

This polish is definitely gorgeous. & it’s been way too long since I wore just blue on my nails. I was quite impressed with how the polish dried down (to its satin matte finish) but I think I love it even more with top coat over top–you can really see that blue shimmer & it feels much more jewel like. Down below you can really see just how stunning it is with top coat (& just ignore those spots where I could have benefited from an extra coat of polish.)

& a close up to see those blue shimmers!

Zoya Yves is definitely a stunner, & I’m living for these jewel tones right now. 💎 Fall has me feeling all these dark shades I’ve been ignoring during Summer months & I’ve ESPECIALLY missing my darker shades. They’re just so good!

I found this shade at my local Winners, but if you need this polish in your life, you can pick up the beauty at NailPolishCanada.com as well as the Zoya Website. After googling the rest of the shades in the collection, I’m definitely going to need to pick up a few of the others. You can never have too many jewel toned polishes in your collection for Fall.

What do you think of Zoya Yves? What Fall Polish are you currently wearing? Let me know down in the comments below!