Icing’s Peek a Blue.

Today I’ve got an older polish from the depth of my stash to share with you.

blue4

This is Icing’s Peek A Blue, which is a sparkly blue polish that I picked up from Icing last summer. It was on clearance, so I managed so score it for a sweet $2.49 (it was regularly $5.00)

blue3

Peek a Blue is a very, very sheer light blue polish scattered through out with slightly darker micro glitters. I’ve applied two coats of it over a two coats of Sinful Colors Be Happy, as it would take quite a few layers to make it even close to opaque. But because the base of Peek a Blue does have it’s only tinge of color, the base color of Be Happy doesn’t really change it much. It still very much looks like the polish in the bottle, even with layering it over another color.

blue3 blue

The second I saw this polish, I remember thinking I need that! And now I remember why. Even though it’s very sheer, it’s just beautiful on the nail.

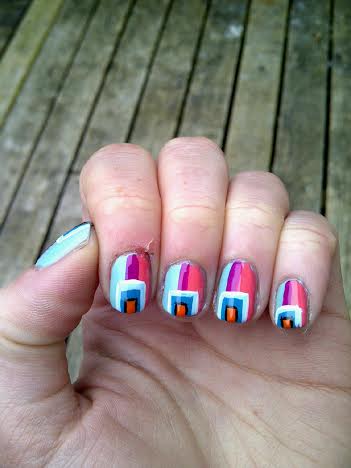
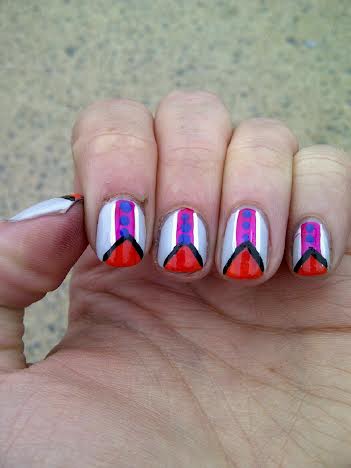
Tomorrow I have some pretty nail art to share with you using Peek a Blue as my base color. =)

Back to Bright.

One slightly subdued manicure, and I’m already back to the bright colors. I just can’t escape them. The calender says it’s almost Summer–even if the weather won’t agree–and my mind instantly craves anything bright.

Today’s mani came as a result of having no idea what I wanted to wear on my nails. After spending 20 minutes going through my stash, plagued with indecision, I finally decided on China Glaze’s Metro Pollen-tin from the Spring collection, with ACO by Ardene in Hot Tamale on my pinky. Originally I was just going to do a simple polka dot accent nail, but as you can see once I started with the dots…. I just couldn’t stop! They even spread to my thumb!

dots3

Unfortunately I used way too many polishes on my accent nails to remember them off the top of my head. However, the main polishes I used were China Glaze’s Metro Pollen-tin and ACO by Ardene Hot Tamale which has to be one of my favorite pinky-corals. In person, it is much more neon but still manages to apply in two slightly thick coats. It was my go-to color last Summer, and I have a feeling this Summer will be no different.

dots

dots4

So many colors!

Pretty in Pink gradient.

Sometimes I like my manicures complicated, and sometimes I just want something simple on my nails. These would definitely fall on the more simple end of the spectrum. After a couple days of super bright and colorful nails, I really wanted to rock a somewhat softer manicure. After browsing pinterest for an hour or so, I decided on a gradient as I haven’t done a (successful) one in a while. With my nails so short right now, I find it a lot harder to create gradient, if only because I don’t have the room to move around on my nails. But even though these are a very, very subtle gradient, I do love how they turned out. With my best friend’s wedding come up shortly, I’m going to need to figure out something to do–as I’m guessing super bright and colorful neon nails won’t work with her wedding plans haha.

pinkgradient pinkgradient2

For this manicure the polishes I used were:

  • ACO by Ardene in Bridezilla — pale ivorny//off white base color.
  • Essence Love Letters Collection Rosy in Love — pales pink of the gradient.
  • ACO by Ardene in Kiss by a Rose — darkest pink of the gradient.
  • QUO by Orly in Sugar Cookie — pale glitter on each nail.
  • Sally Hansen Diamond Flash top coat.

Oh man, I wish you could see the beauty that is Sugar Cookie, but sadly my camera just didn’t want to capture it. It was part of the Quo by Orly holiday mini-collection that my boyfriend got me for Christmas, and I’ve yet to find a manicure to pair it with. It’s really sheer, so it’s unfortunately impossible to wear on it’s own (it would take about 15 coats to get it opaque), but I love the look of it. So pretty!

pinkgradient3

Color block — take two.

As you’ve kind of noticed, I’ve been killing color block manicures lately. Sometimes I have a hard time deciding on just one bright color, so I have to used them all. (Haha, maybe not all. I own 300 polishes so that would be quite a time consuming manicure.)

Today’s bright and colorful manicure is a combination of some fun Summer colors. It took me a little while to get done, but I love the finished product. I painted everything completely free hand, so my lines are not perfectly straight–but I find that adds to the charm.

geometric

The polishes I used for this manicure were:

  • Sinful Colors in Be Happy.
  • Sally Hansen Xtreme Wear in Coral Reef.
  • Art Club Striping Polish in Paisley Paradise.
  • Essence Color & Go  in Let’s Get Lost!
  • Art Club Nail Art Duo in Baby Blue.
  • Stripe Rite Striping Polish in white.
  • Stripe Rite Striping Polish in orange.
  • Stripe Rite Striping Polish in black.
  • Sally Hansen Diamond Flash top coat.

geometric3  geometric2

I really, really love the look of these. They’re just really fun! And the best part about a manicure with this many colors is that I can pretty much match it to any outfit. =) We’ve still got some serious grey skies happening right now, so at least my nails are spring-like.

Bright and Colorful nails!

I have a fun manicure to share with you today.

With the Summer quickly approaching, I’ve been feeling the bright colorful polishes lately, and I really wanted to do a color blocking manicure. I came up with this random pattern while I was painting my nails–I started with the triangles, and then went from there. I’m not sure what to actually call this pattern, but they’re bright and colorful which was what I wanted.

four

five

one

For this manicure the polishes I used were:

  • Essence I’ve Got a Crush on Blue! (from their love letters collection) — blue grey base color.
  • Revlon Siren — orange triangles.
  • ACO by Ardene Lollipop Queen — Pink stripes.
  • ACO by Ardene Lagoon — blue polka dots.
  • Stripe Rite Striping Polish in back
  • Stripe Rite Striping Polish in white

Even though I had no plan going in with this manicure, I love how they turned out. Sometimes it’s nice to just start something, without knowing what you’re doing, and have them turn into something neat. Also I managed to create those triangles with just my regular polish brush (before I added the black stripe outline). Sure, they’re not exactly perfect but they ARE triangles, so I couldn’t be happier! =)