Neon Squiggles ➰

Hello lovelies & happy Friday! I know, I skipped a day of posting this week — sometimes you just need a day to take a break & relax. But I’m back today & I have a manicure I’m really obsessed with. It has all the Summer vibes that I’ve been looking for.

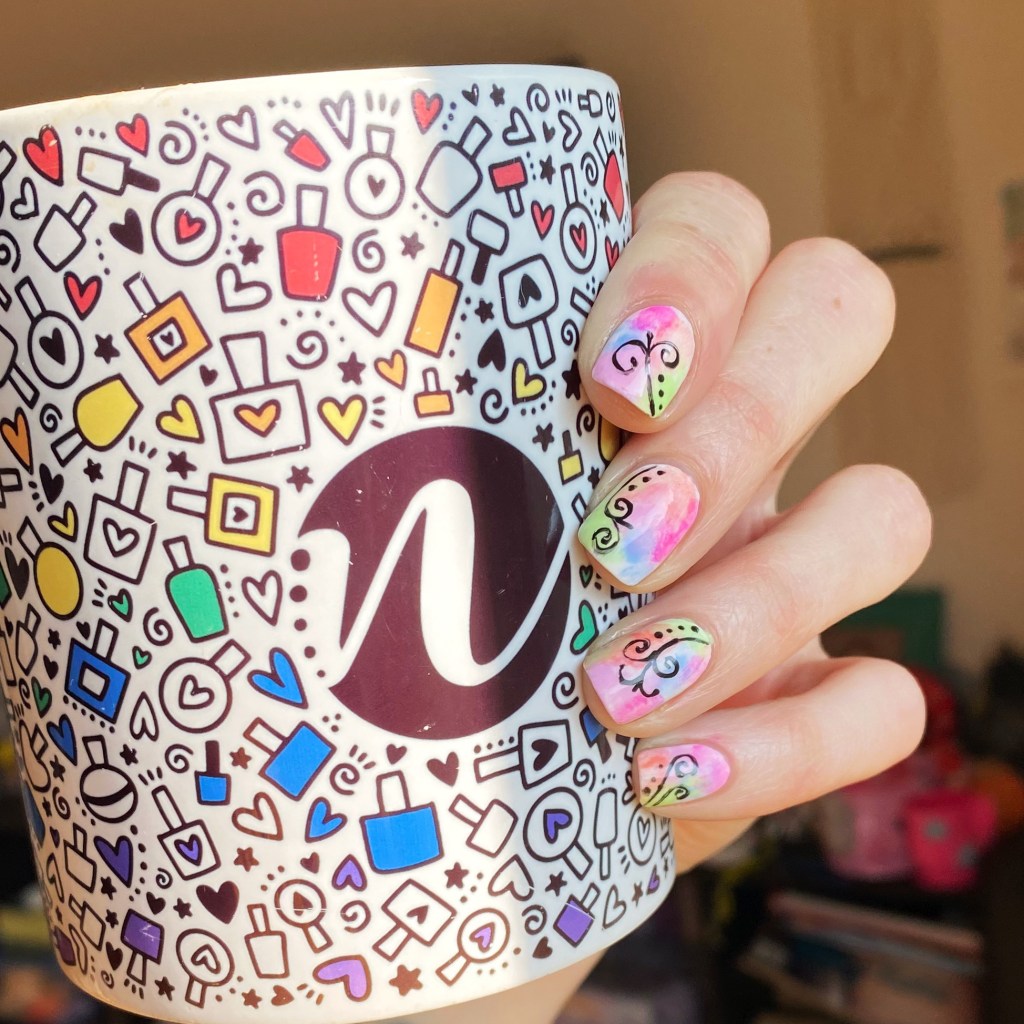
I really loved a sponged neon base, & I just found my make up sponges the other day, so I knew it was time for another version of one of my favourite looks! & I couldn’t be happier with how it turned out.

The polishes I used for this manicure are: 

  • Base Coat: Londontown KUR Nail Hardener & Base Coat 
  • Top Coat: Seche Vive Fast Dry
  • Essie Blanc
  • Sally Hansen Miracle Gel Peach Please
  • Sally Hansen MG Sugar Crush
  • Sally Hansen MG Violet Voltage
  • Sally Hansen MG Electri-Lime
  • Sally Hansen MG Fuchsia Fever
  • OPI Who You Callin’ Bossy?!
  • NailStuff.ca 4mm Micro Detail Brush

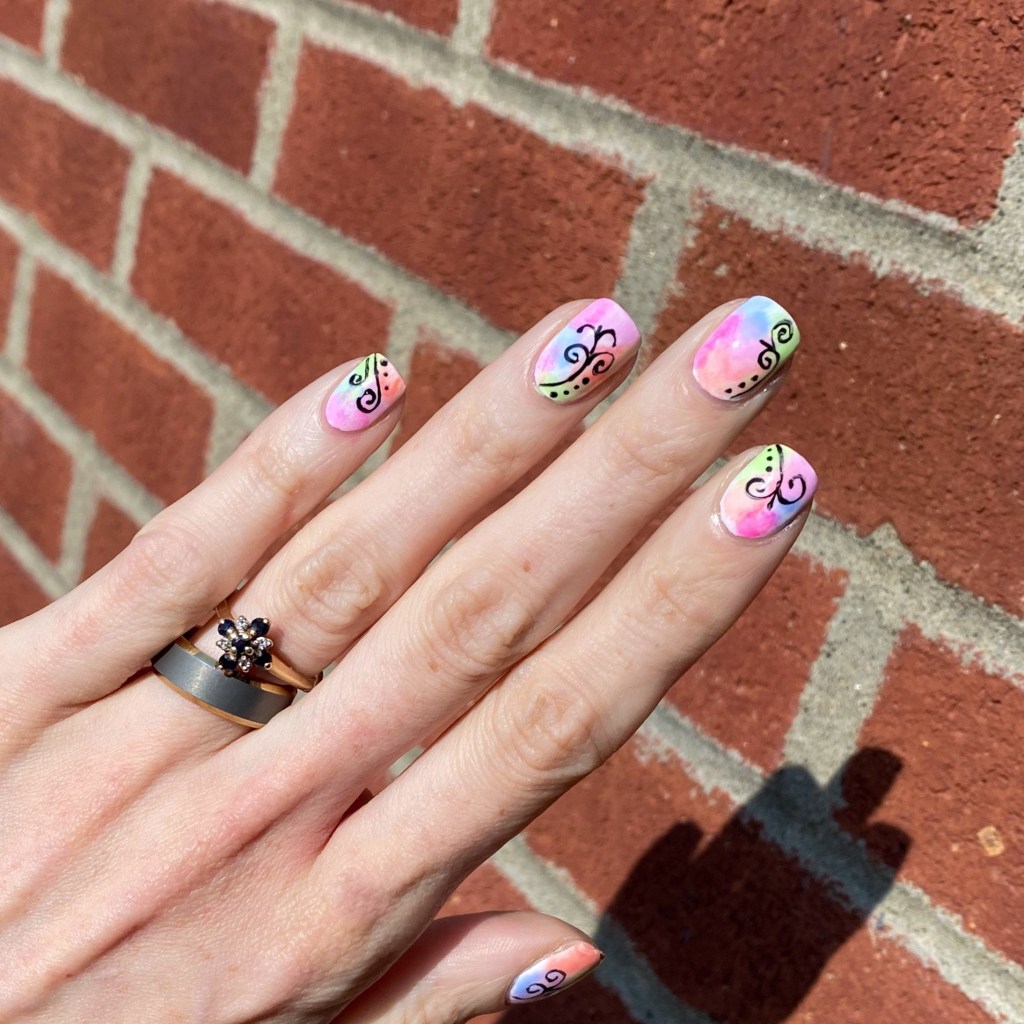
Love this vibrant base, but obviously I needed to draw some kind of pattern overtop. It’s been a while since I tried one of these swirly looks, but I think it turned out really fun. I have no set plan going into it, I just tried to create something that looked unique… & I think I was successful! My ring finger is probably my least favourite of all my nails, but over all I love love love how it looks. I’m very happy with it!

What do you think about this neon swirl look? Are you busting out the neon now that the days are getting warmer? Let me know all your thoughts down in the comments below, & share what your favourite neon nail polish is down in the comments below!

Spring-y Pastel Sponge (Happy 8th Birthday Coffee & Nail Polish)

Hello lovelies & happy Wednesday!

Sorry for being MIA this week, so far. It’s been rough — the kids have been & fighting some viruses which has led to a couple hospital trips. I actually originally had planned on posting this look yesterday, but spent the previous evening in the ER with my daughter (she’s fine!), & didn’t get home until 7am.

So not a lot of nail posting was happening yesterday. Just napping. & a very sleepy day at work.

But I did do these fun pastel sponging nails with the intention of sharing for my 8th Blog-iversary yesterday, so I really wanted to share these with you! Especially because they’re pretty, & springy, with just a sprinkling of holo glitter.

The polishes I used for this manicure are: 

  • Base Coat: Sally Hansen Good. Kind. Pure Hardener
  • Top Coat: Essie Speed Setter
  • Sally Hansen Miracle Gel Sun-showers
  • Sally Hansen MG She’ll-ebration
  • Londontown Lakur Mint No Chip
  • Essie Playdate
  • OPI Gelato on my Mind
  • China Glaze Fairy Dust
  • Latex Free Make Up Sponge

Such an easy look to do, & I always love these spongy designs for Spring. They make a great base for other nail art designs, or they’re just pretty on their own! & a layer of China Glaze Fairy Dust is pretty much mandatory, especially when sunny days are expected.

I’ve been doing these sponge nails a long, long time. When I was looking for a nail design to celebrate my blog-iversary, I wanted a look I’ve been doing a while, & this one just felt right!

Can you believe this blog has been around for 8 years now? While I’ve been blogging since it became a thing, 2003 or so, I don’t think I’ve had a continuous blog for this long. So it’s so exciting! & here is to many more years—as many years to come as the internet will have me.

Have a lovely day 💕

Rainbow 🌈 Nails

Good Morning Lovelies & Happy Monday. Today I have a special manicure to share with you in honour of it being Pride Week in Halifax right now — some rainbow nails. This past weekend, I went out to celebrate & attended my very first Drag Show ever! So in honour of that, I wanted to create a design bright & colourful, & with a touch of glitter.

For this design, the polishes used were:

  • Base Coat: OPI Nail Envy
  • Top Coat: Essie Speed Setter
  • Sally Hansen CSM Let’s Snow
  • Sally Hansen MG Just Maui’d
  • Sally Hansen MG Bourbon Belle
  • Sally Hansen Xtreme Wear Mellow Yellow
  • Essie First Timer
  • Quo by ORLY Pep in Your Step
  • China Glaze Fairy Dust
  • Latex Free Make Up Sponge
  • Wet n Wild Clear Polish
  • This design was super simple to create. I started off with a plain white base (my current favourite White polish!) & then sponged each colour over top of the white. Next I took a clear nail polish that would streak the colours together & repeatedly brushed over the nail so they blended. This is a trick I like to use with gradients, sponged looks & dry brushes because it blends them together really well (especially good with gradients!) & then I finish with actual top coat after. I also felt like this design needed a little bit of glitter, so I added some fairy dust as well.

    I really love this combination of colours & the rainbow-ness of it. It was the perfect design for the awesome night I had out dancing! I’m very proud to live in a city which can celebrate Pride with such festivity & inclusivity. There really is an event for everyone!

    What do you think of my rainbow nails? 🌈 Have you ever attended a drag show before? Share you comments down below & let me know what you think!