Burgundy Drag Marbles

1D9C03D5-EF5B-4BAD-B713-6A2C0AA2D0BA

1A413EFC-2994-4B64-9DF9-7E617BBC6D1D

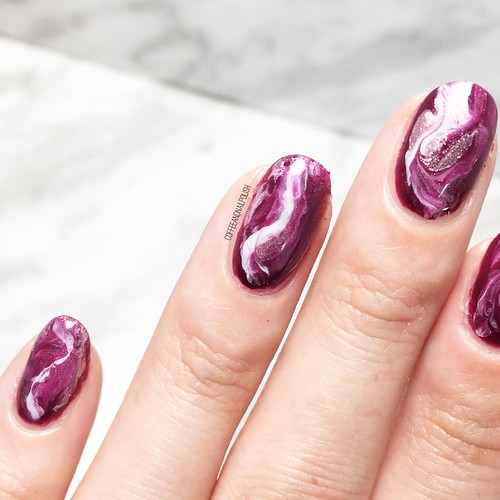
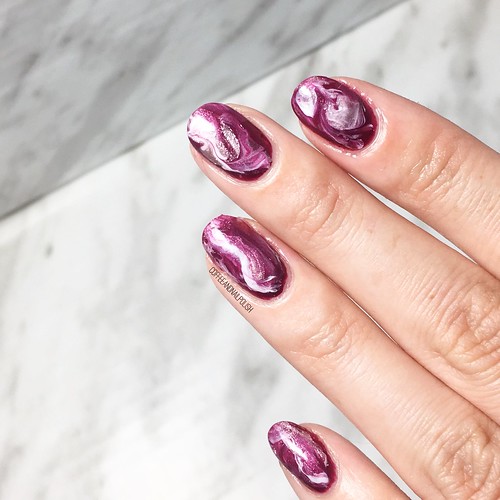
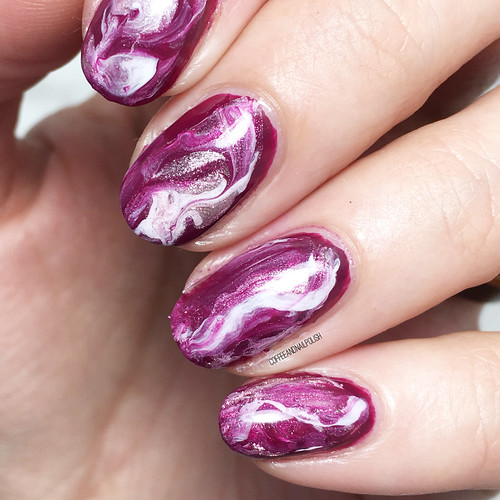
Hello loves & happy Tuesday! Today I’m sharing a fun drag marble design with you.

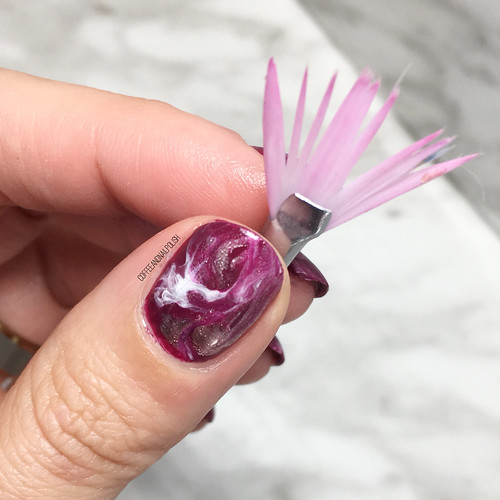
It’s been a while since my last drag marble look, so I was excited to grab a few Autumn colours to create a fun look. As you can probably tell from my last post, I’m really loving maroon/dark red/burgundy shades right now. & you know what goes really well with burgundy? Gold. Especially rose gold!
21E90DD3-6AAF-465B-A036-B6CA3AA96CBB

813C4560-8EBB-4A79-ACE2-AA23B1499639

For this manicure, the polishes I used were:

  • Base Coat: Still wearing gel to protect my natural nails right now.
  • Top Coat: Essie Gel Setter
  • Quo by ORLY The Antidote
  • Quo by ORLY Barely There
  • Quo by ORLY Soul Sister
  • Fan Brush (Mine is an old Bundle Monster Brush)

.
80A33638-B346-43BF-8F10-13F7A626EDF5

0AB77DEA-A433-4B81-A104-12A9FE341688

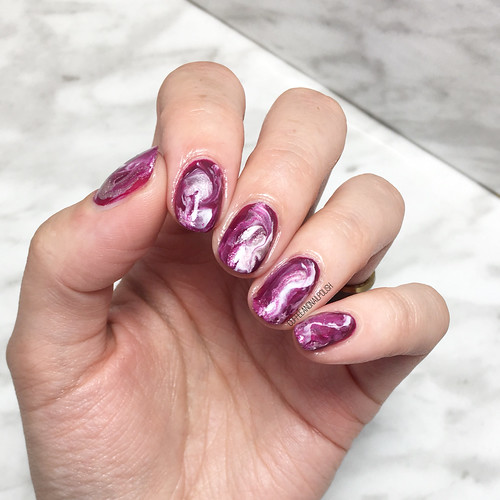
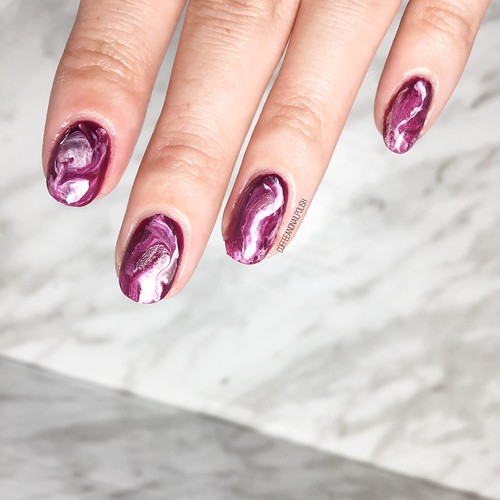
For this marble, I decided to use a fan brush to as it’s a bit simpler than using a dotting tool/toothpick to apply the polish. Basically I start off by painting my nails my base colour (Quo by ORLY The Antidote) & then applied dots of all three polishes (The Antidote, Barely There & Soul Sister) on my nail, & used my fan brush to drag the polish together along my nail to create the marble look. It also is a lot less messy than a lot of marble techniques, which is great (especially since red polish is not easy to clean up around cuticles!)
78D4C436-5E0F-4850-9F8A-12889C66C3CE

86638ACA-383B-46B1-B2A3-29402C15770E

My nails having been taking a hit lately, so I feel good pulling out my Quo by ORLY Breathable shades again. I love this line because it feels like I’m giving my nails a break, even when I’m wear nail art. In fact, I need to go buy two new shades I saw at Shoppers Drug Mart that I think would be amazing for Fall/Winter nail art, all while keeping my nails taken care of.

AFB79E31-B0A2-4FD8-855A-84535B7E869F

D76623B2-1E46-4AE4-B8B5-49F498698035

What do you think about this drag marble design? Would you rock a design like this? What colour combination would you love to see me do next? Share all your thoughts down in the comments below!

Fall Leaves 🍂 Nail Art Recreation

E8C7A357-B8D6-4ABB-A930-82C28D6396CC

B971C433-7837-4656-B6CB-069566BC4426

Hello lovelies & Happy Friday!

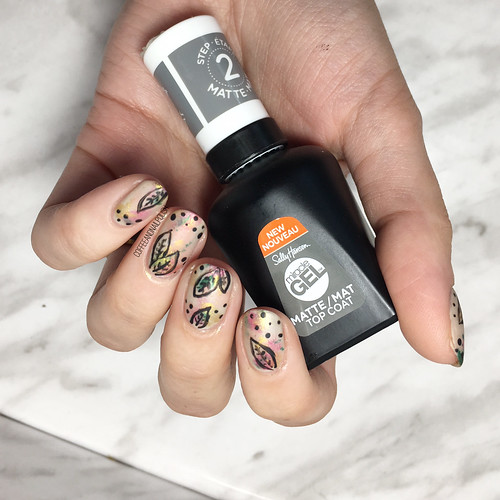
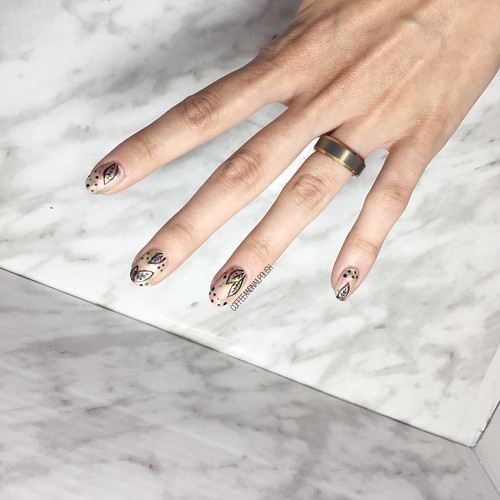
Today I have a fun nail art look to share with you that is a recreation of an old favourite: this Fall leaf design. This design was one of the first designs I ever posted on Instagram that I was the most proud of. So while browsing through my old designs, I decided it was definitely long overdue for me to recreate this design!

28294277-6B43-482E-B5C5-7FC301D46CBC

A3D30523-B31F-4289-AE5B-1365F27AC403

For this manicure, the polishes I used were:

  • Base Coat: Gel overlay
  • Top Coat: Essie Gel Setter
  • Top Coat: Sally Hansen Miracle Gel Matte Top Coat {PR sample}
  • Quo by ORLY Breathable Heaven Sent {PR sample}
  • Sally Hansen Miracle Gel Good Cheer-y {PR sample}
  • Wet N Wild Blazed
  • Rimmel 60 Seconds 830 Camouflage
  • Mariposa Nail Polish gold shimmer (no name)
  • Black Acrylic Paint
  • Nailstuff.ca Dotting Tool Trio

.

1CB0DB52-50FD-4AB3-AF60-E1DE237F0F5B

C2FB8302-EC8D-4DEE-9888-B9A9D49BB01E

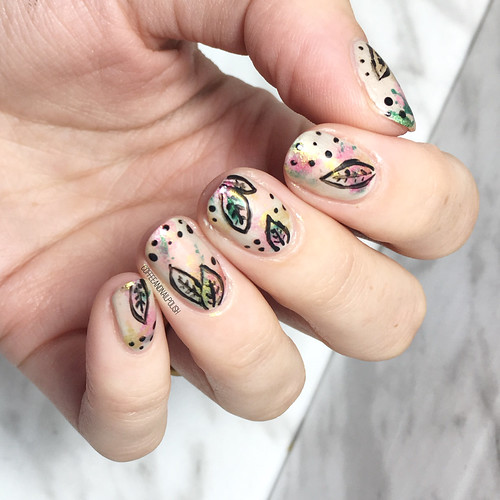
So obviously with it being five years since I first painted this design, I wanted to change things up a little bit & play around with the look. Instead of black polish, I used acrylic paint because I knew it would make it easier to start over if there was any mistakes. I also used my 11mm mermaid tail brush from NailStuff.ca, but looking back I should probably should have went with a small size for thinner lines.

Also this time I decided to add some matte top coat over my design, & it really made the design & colours pop! I’ve been absolutely loving the Sally Hansen Miracle Gel matte top coat.

F9EE6409-C6A5-4715-AF2C-278ADDB1018B

857606B3-7283-43DD-942F-5358C79B6065

Just for fun, a couple shots of this design before I added my matte top coat.

Obviously I think both versions of this design are fabulous, but I’m just slightly more in love with the matte version. Something about this time of year just has me craving matte-ified nails more often, & honestly I feel like metallic nails (which I also craved more often during Autumn) pop so much more when they are matte.

53C032A2-95B1-49F6-9A59-1052AB010FD3

6180732B-733C-40E3-AAA6-2818016FF6F5

So what do you think about my updated version of this design? Which do you prefer: matte or glossy? Share your thoughts down in the comments below & let me know which version is your favourite!

VACATION NAILS — ocean inspire Saran Wrap splatter.

1F5E8430-715C-417A-BCAE-E9504FD66D57

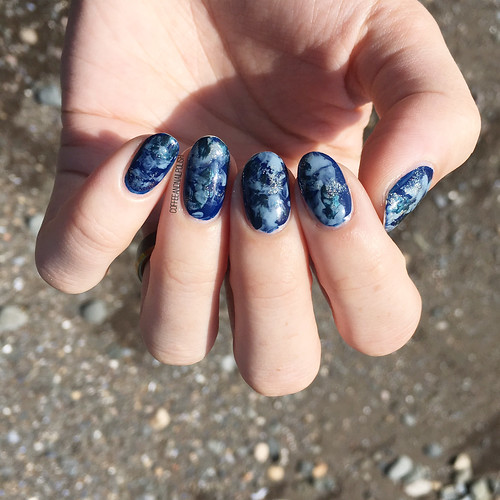
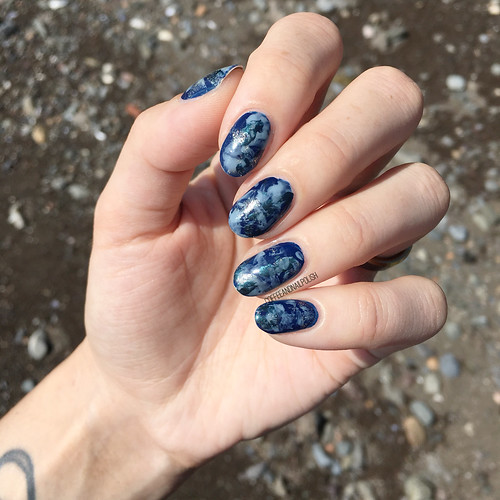
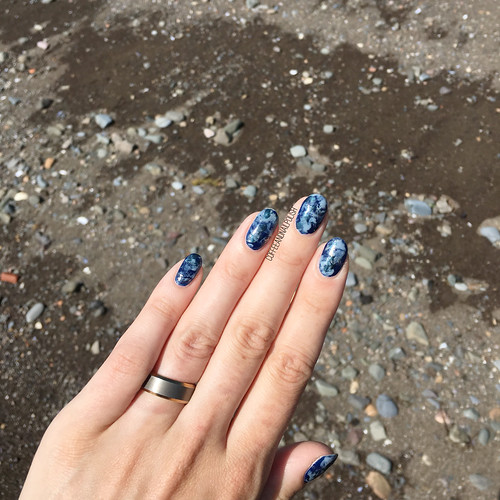
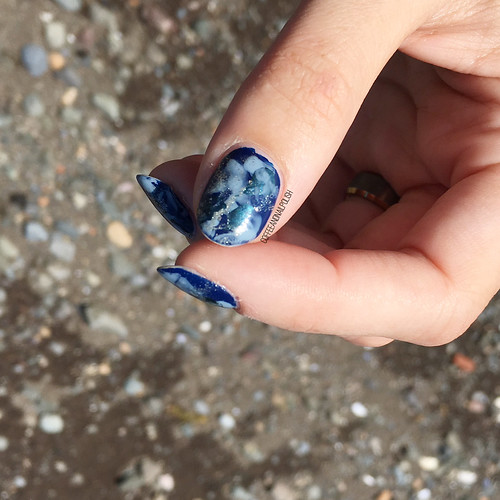
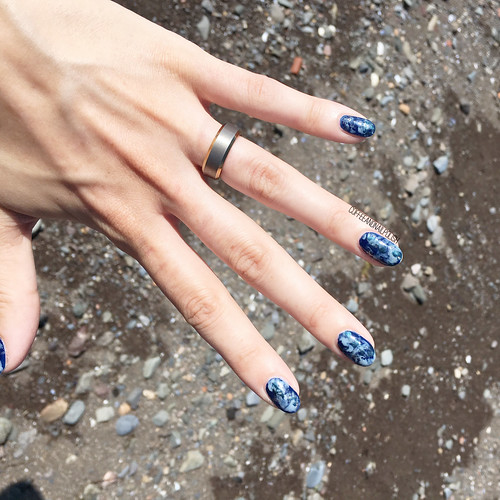
Hello lovelies! Still on vacation, but even though I’m on vacation that doesn’t mean I’m not painting my nails! Like I wrote in my last Swatch Sunday post, visiting my parents means I get to take advantage of my Mom’s massive nail polish collection she uses for her jewelry. So I decided to take a few of her polishes to create an ocean inspired design perfect for an East Coast vacation!

F34B5EC3-7B73-4533-AA58-9DCA32EA5AE6

8A74833B-53E3-482F-8C77-05F680D8F910

For this manicure, the polishes I used were:

  • Base Coat: Duri Rejuvacote
  • Base Coat: Quo by ORLY Bonder
  • Top Coat: Essie Speed Setter
  • Sally Hansen CSM A Bleu Attitude
  • Quo by ORLY April Showers
  • Santee ACO6433
  • China Glaze Cattle Drive Me Crazy
  • Crinkled up Plastic Wrap

3018B7E9-EBC3-4FDD-93EC-DFD4089C3E5F

E64A490C-0B87-4396-B6C5-DEB22E22FE9D

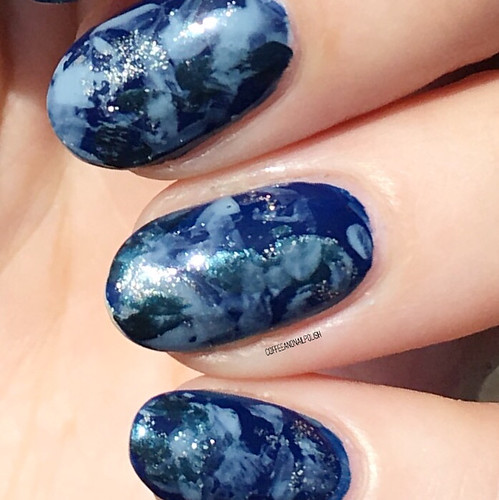
Obviously, being away from my own nail polish stash & supply, I’m not going to attempt to crate one of my more complicated designs–like floral– which is why something like a Saran Wrap splatter is such a perfect design! Easy to do, minimal clean up, but still looks fancy & fun! & obviously because my nails were inspired by the ocean I had to take pictures of this look right on the beach! 🌊

E48B8A14-A26F-4691-94A7-6096C8740489

B41F6E90-4326-4640-B16E-54C51E272DFB

Looking at these close up, I realized how much these look like the mussel shells we used to collect off the beach as kids! This colour combination is definitely one of the best versions of this design I’ve done, but I find that happens whenever I do anything in shades of blue! They always just turn out so beautiful!

5AF41BE9-0F54-48A7-9807-9714C422E7C0

What do you think of this look? What do you do about your nails when you’re on vacation–do you still paint them, or go with something like soak off gel that lasts 2+ weeks!

Let me know your vacation nail routine down in the comments below!

Constellations for #GlamnailschallengeAug

E6977ACF-5A94-4F59-8A9C-D551E98E0379

770EA117-F39E-4804-8605-8A97DA8C6271

Hello lovelies & happy Monday! Today I’m sharing another design for #glamnailschallengeaug!

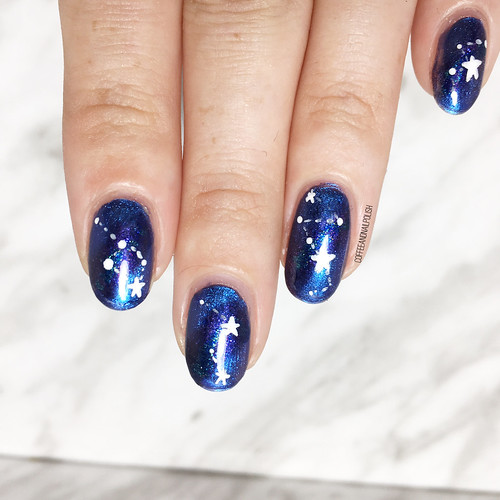
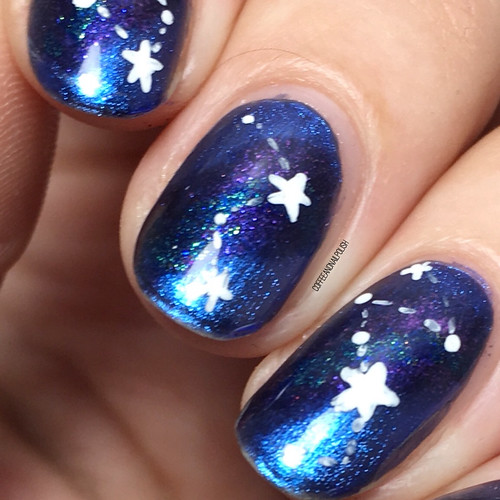
Today’s prompt is Constellations. 🌌 I did galaxy nails just a few weeks ago, so I wanted to do something different enough from that design & try my best to recreate the prompt on my nails. Usually I am such a perfectionist it can cause me to get frustrated when things aren’t “perfect”. This whole prompt has been about painting my nails, stepping out of my comfort zone, & creating nails that are “perfect enough”.

DE58EC5F-3B2D-496F-8C30-399A110F8D08

EC2A6733-F331-47EC-BFFE-C27B73468DF3

For this manicure, the polishes I used were:

  • Base Coat: Sally Hansen Complete Salon Manicure Strengthening Base Coat
  • Base Coat: Quo by ORLY Bonder
  • Top Coat: Essie Gel Couture
  • OPI Miss Piggy’s Big Number
  • OPI Ink
  • OPI The Sky’s My Limit
  • White Acrylic Paint
  • NailStuff.ca 7mm Liner Brush
  • NailStuff.ca Dotting Tool Trio
  • Latex Free Make Up Sponge

78593710-7BD2-4194-AEB0-65BE45AACAF5

FFC0E01D-CB49-41F0-A272-DADBFECAA2CB

I’ve been experimenting a bit with acrylic paints for nail art lately, mostly when creating nail art in bit unsure about, like his design. I wasn’t sure how I wanted to “attach” my stars to show off the constellations, so I drew my dots & stars first, applied my top coat, & then drew my lines. By putting top coat in between the dots/stars & the lines, I could easily wash off the lines & redraw them without acetone ruining my look.

I probably wouldn’t switch to using acrylic paint for all designs, like my florals, but it certainly works really well for designs like this, & I have a feeling it would also be really useful for more different or advanced patterns. I’ve been going through some older designs & really obsessing over the swirly designs I used to do, so I feel like I’m definitely going to be trying out more of those looks coming up! I’m feeling very inspired.

A2D03432-7656-41DA-AFED-034AFCC7C7C5

E82CCCBD-A26A-4F49-89A7-F18229DBD5A4

I am really really loving how this look turned out, especially in keeping the background not too busy as I normally would in a galaxy/space design. I wanted to kind of create a background that looked like those magnetic polishes I see all over Instagram, but have yet to own. Subtle, definitely there. & I feel like I managed to achieve that, especially using the polishes I picked.

480C91D3-83F3-4480-BDA7-D7DCAC2E4759

What do you think about this look? Are you loving the manicures I’ve been creating this month? Like this post & leave a comment if you’d like to see me do more of these nail art challenges!

& don’t forget to check out the hashtag #glamnailschallengeaug on Instagram to see the other pretty nails posted for the challenge! I just love seeing all the beautiful & different interpretations that we’re coming up for the same idea!

Paisley Nails for #glamnailschallengeaug

20C21DF2-7FD2-4327-B783-BCCADD3BE0CD

FE4B871E-FB83-4A90-9C74-86801842BC45

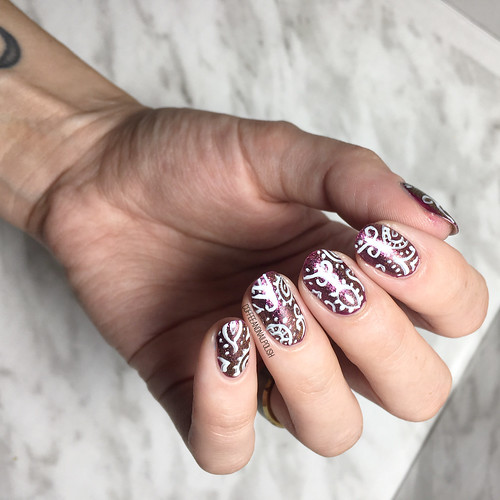
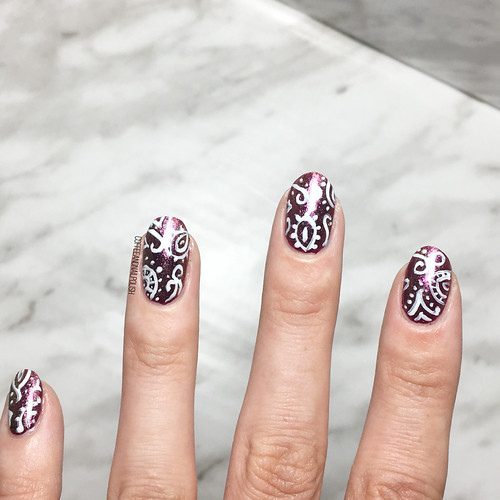
Good morning lovelies! Today I have another fun manicure I created for the Glam Nails Challenge for August! Today’s nail art prompt was one I was a little bit scared about: Paisley.

I’ve never actually attempted a paisley pattern before, mostly because it’s always looked really intimidating, & not in my nail art wheel house. But because this challenge is all about inspiring me to try new looks, I decided to make an attempt at free handing it.

8B8DD59E-8950-4AF0-95DF-78BED907855B

C706132E-7C53-4DAF-BC6A-E8C07BFF6505

For this manicure, the polishes I used were:

  • Base Coat: Sally Hansen Complete Salon Manicure Strengthening Base Coat
  • Base Coat: Quo by ORLY Bonder
  • Top Coat: Essie Gel Setter
  • Essence Plump Power
  • Quo by ORLY Wrong So Right
  • Sally Hansen Miracle Gel Get Mod
  • NailStuff.ca Mermaid Tail Nail Brush Trio

6FCC6EED-8436-435A-A2DB-26CBF5939BFD

84BDEEAE-2C9B-4D80-8F51-04ABFA8FB704

So I’ll be honest, the first attempt at starting this pattern was with a different colour & I didn’t even get one nail done before I was removing it. I’m a perfectionist, so trying something I’ve never done before (& not doing it well) can be overwhelming for me. My second attempt with this darker bronze colour was a much better attempt!

FC6CC879-0ED6-4A32-9734-74C5CD229654

E77D95AD-DB5B-4DD3-B107-C3EA9AF85488

Is this a perfect paisley recreation? No. Is this paisley-esque enough for me? Absolutely! I tried really hard to get that whirly look of Paisley & I’m incredibly impressed with the design, & especially with the fact I repeated it on my Cinderella hand so I could wear these nails for a few days. & yeah, I know these aren’t perfect. But they’re beautiful enough for me, & that’s all that matters.

C843FB6C-7A73-46AC-A17E-0270DE6B23A3

What do you think of this paisley design? Would you wear this manicure? Share your thoughts down in the comments below!

& don’t forget to check out the hashtag #glamnailschallengeaug on Instagram to see the other pretty nails posted for the challenge! I’m definitely excited to check out what everyone has done!