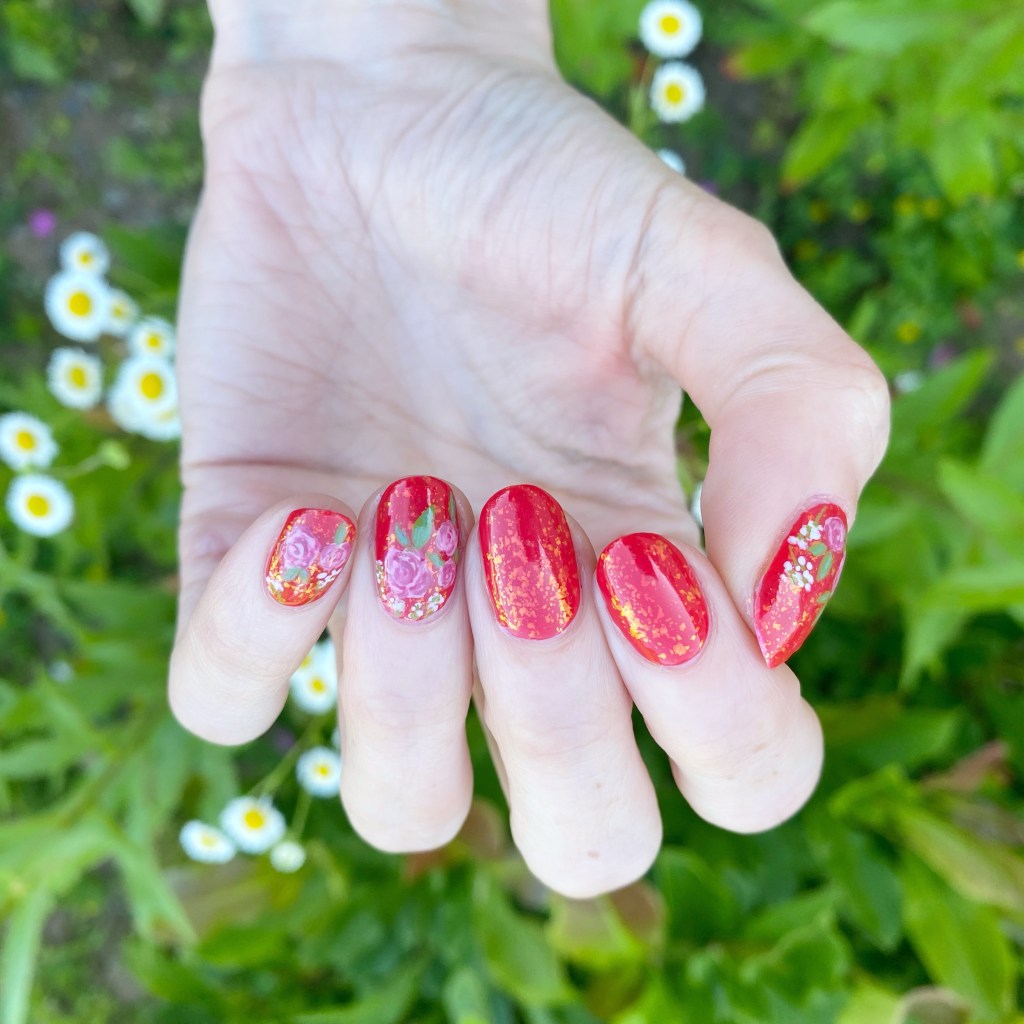
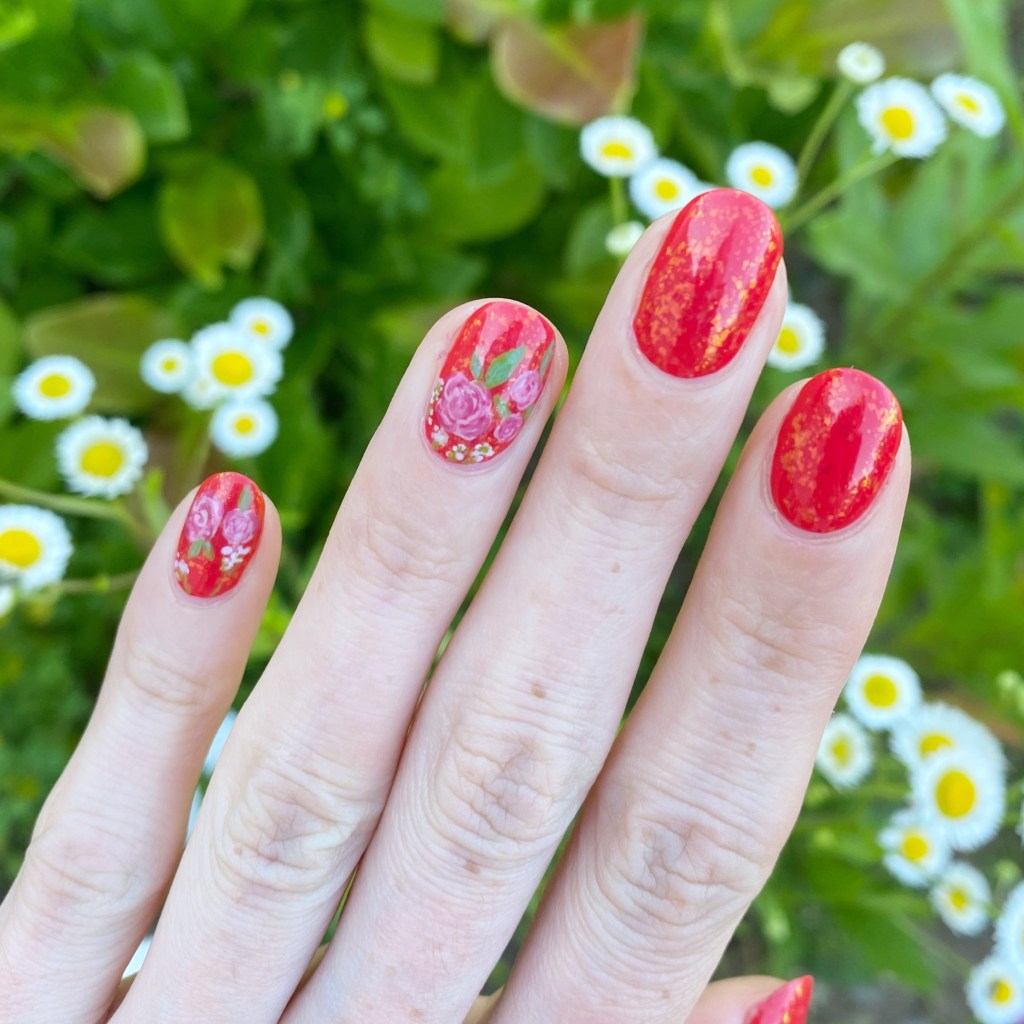
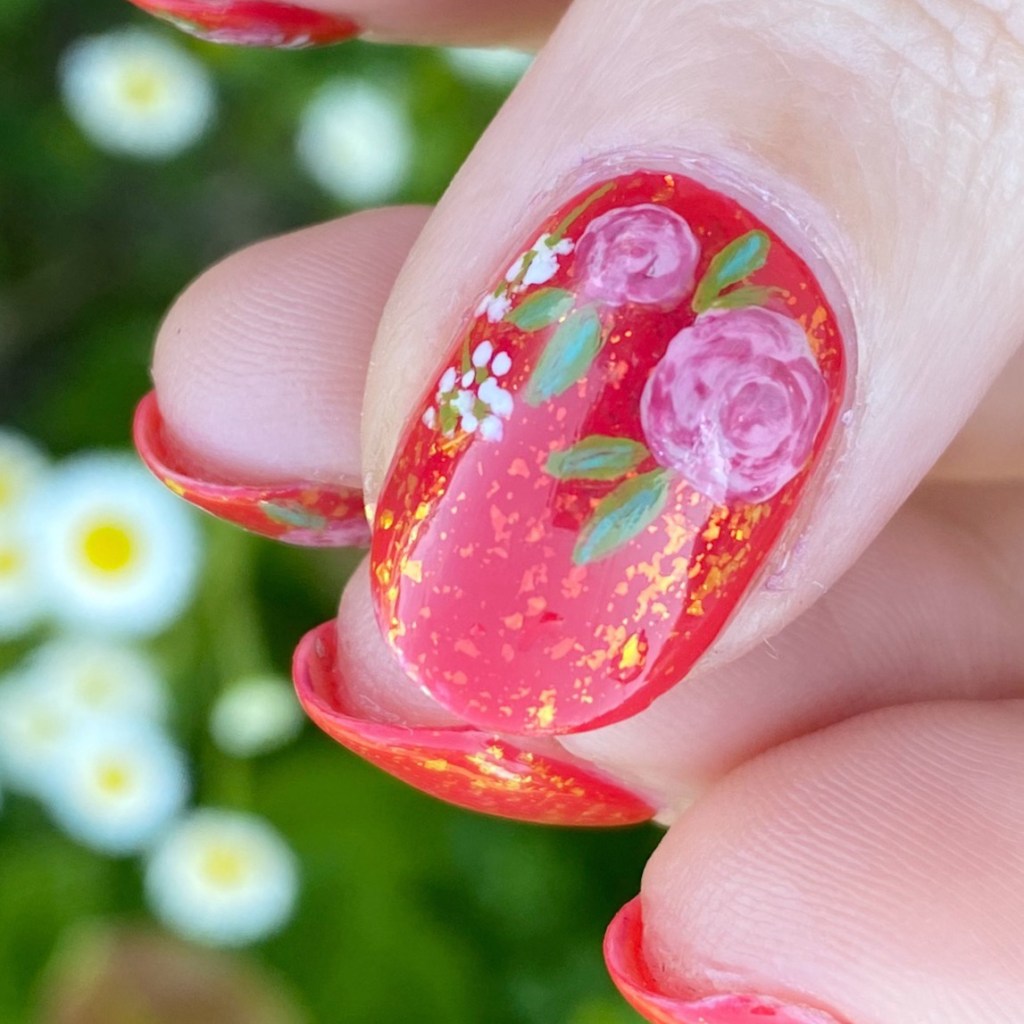
Hello lovelies & happy Wednesday. I hope everyone is having a beautiful Summer day on this last week of July. Truly crazy how quickly this Summer is slipping by, but I’m trying my best to enjoy it. However — only 27 days until Starbucks releases their PSL, which we all know is the official start of Autumn haha.
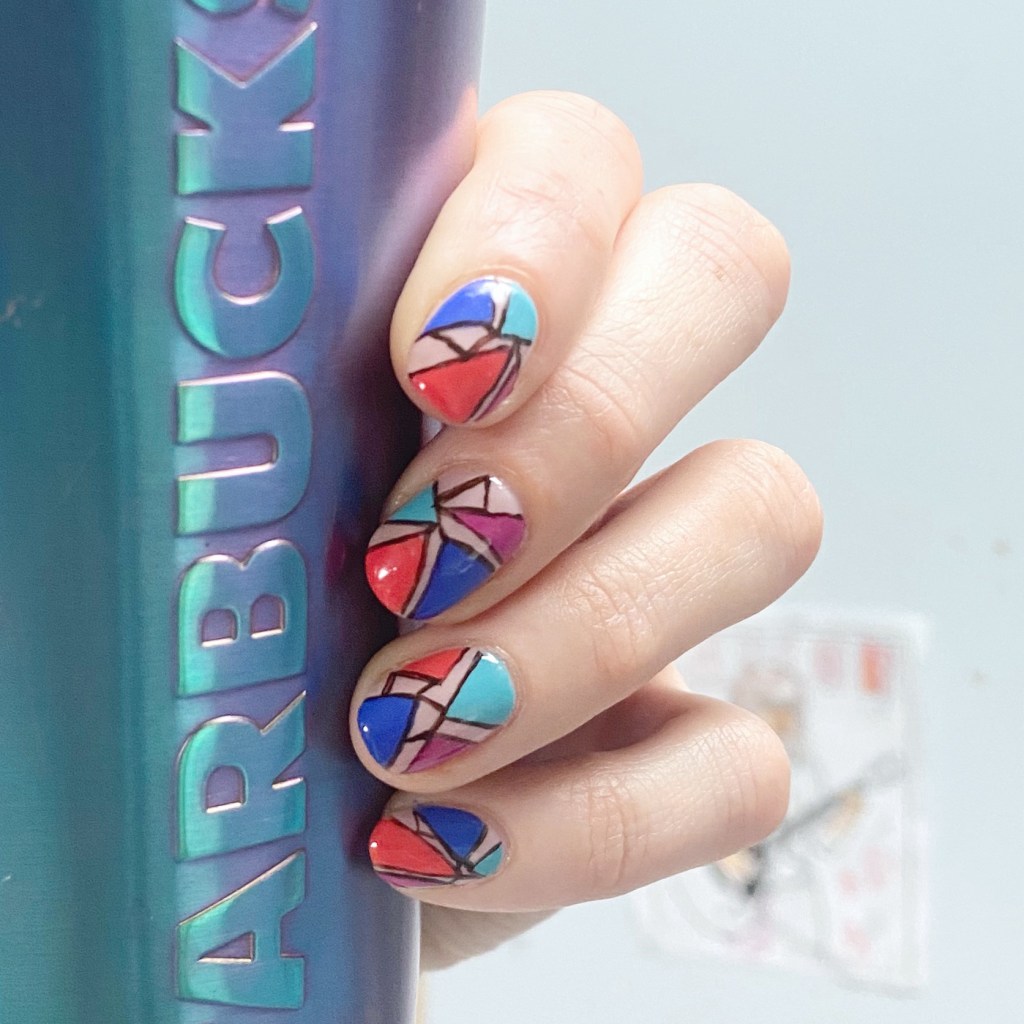
Today though I have a cute simple nail art look to share. It’s been absolute ages since I last shared an ombre skittle look. so I thought it was time to pull it out again. The colour scheme was inspired by my 8 year old who told me I should wear teal nails. What do you think — did I nail it?
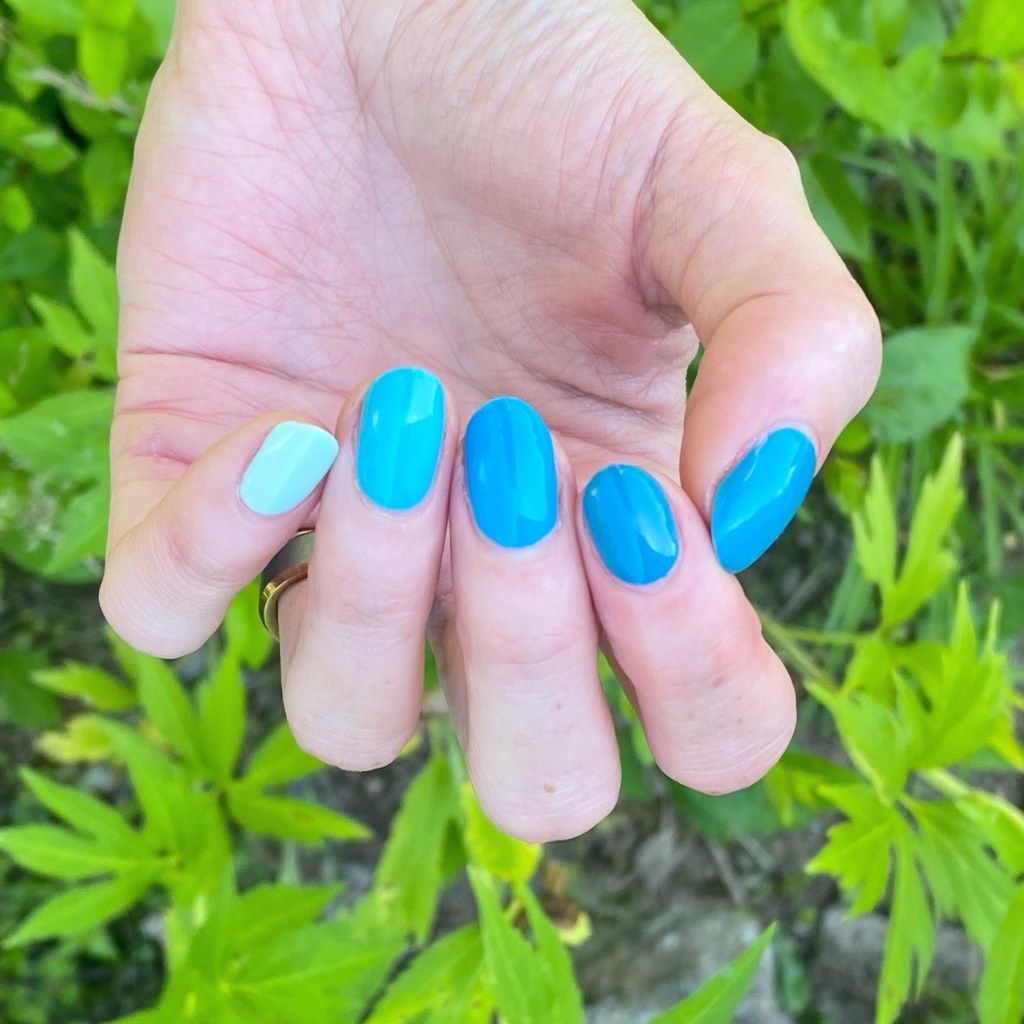

The polishes I used for this manicure are:
- Top Coat: Essie Gel Setter Top Coat
- Base Coat: China Glaze Calcium Gel Fortifier
- Essie Mint Candy Apple (pinky)
- Essie In The Cab-Ana
- Essie Off Beat Chic *pr
- Essie Revenge’s A Beach
- Essie Garden Variety
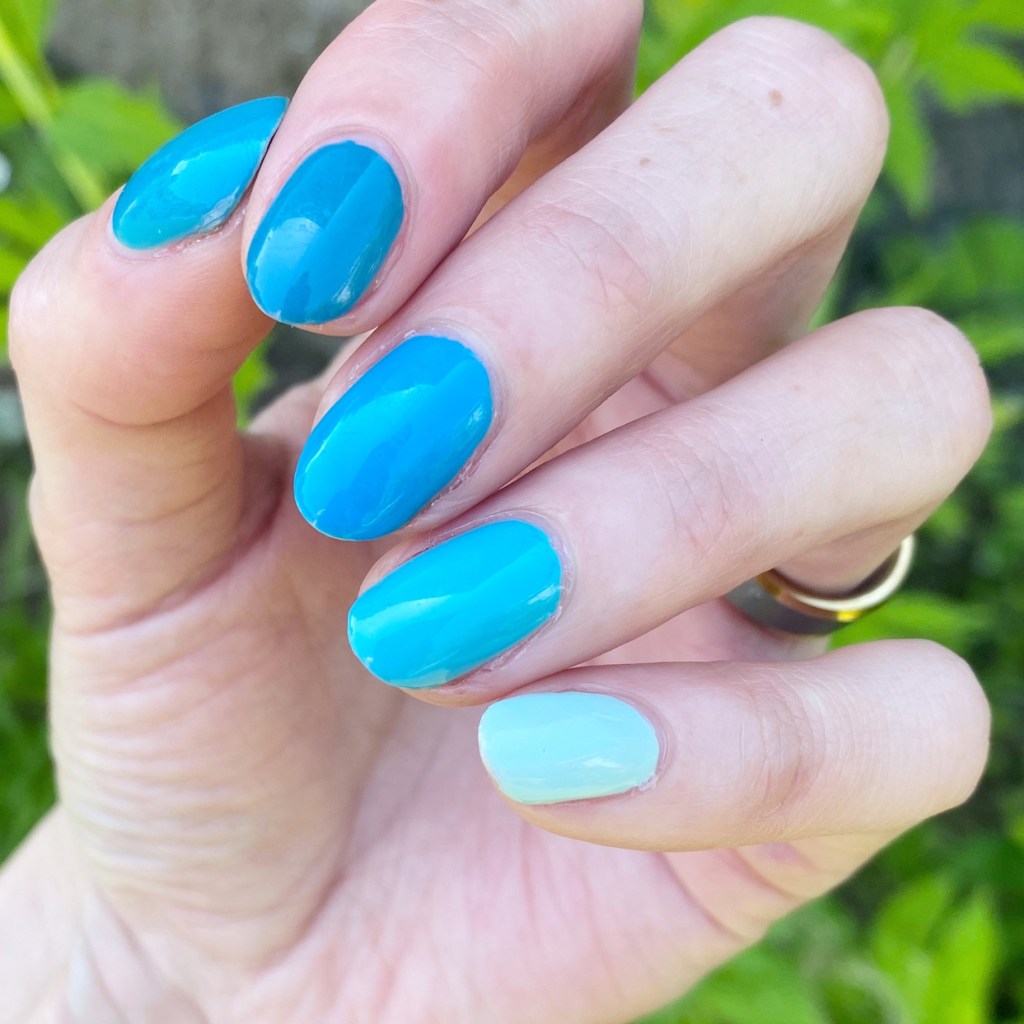

I’ve always loved these ombre tone skittles because they’re just to easy. The hardest part is just pairing the colours together, & making sure you have that light to dark effect on your nails. Surprisingly — okay, maybe not so surprising — I had enough Essie’s to easy accomplish this look.

What do you think of this simple teal ombre skittle look? Are you a fan of these Muti shade designs? Let me know all your thoughts in the comments below, & which colour you would rock an ombre look like this using!
Happy Wednesday.
♥︎