Leopard Print & Stripes

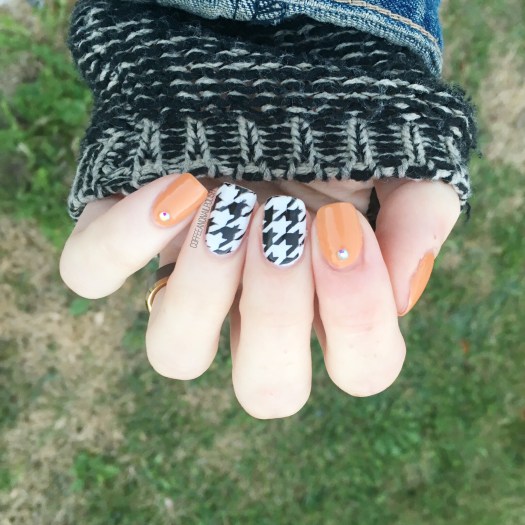
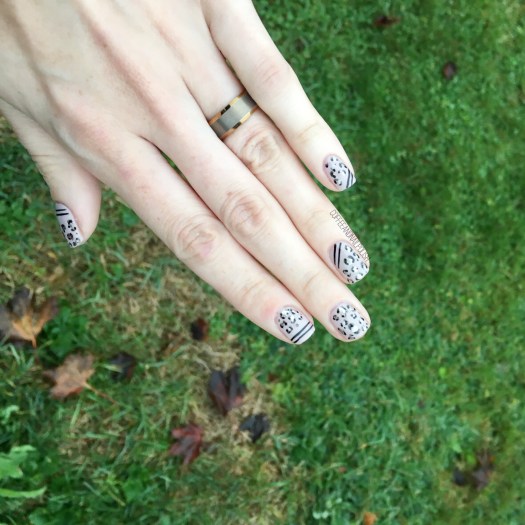
Happy Saturday lovelies! I know, a Saturday post… how crazy is that?! Today I’m sharing a super fun design I did a few days ago. First off, yes my nails are exact short again–the crack on my middle finger let go. BUT that’s okay, because I’ll just create fun designs that make me happy.

& this leopard print look makes me extra, extra happy!

For this manicure, the polishes I used were:

  • Base Coat: Witchcraft protein Hardener
  • Top Coat: Essie Speed Setter
  • China Glaze What’s She Dune
  • L’Oréal Feeling Kilty
  • Sally Hansen I ♥️ Nail Art pen in Black
  • Kiss Nail Art Striper in Black
  • Small dotting tool

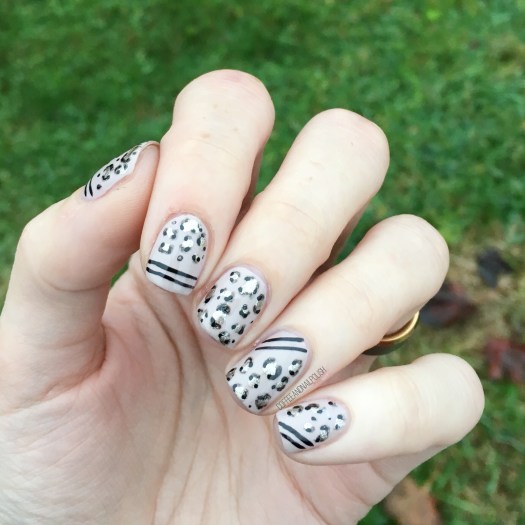
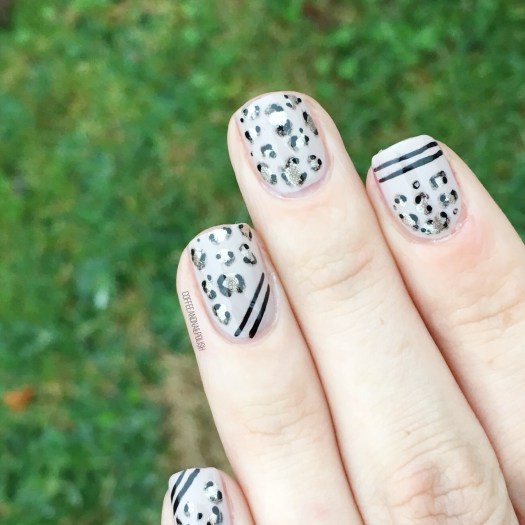
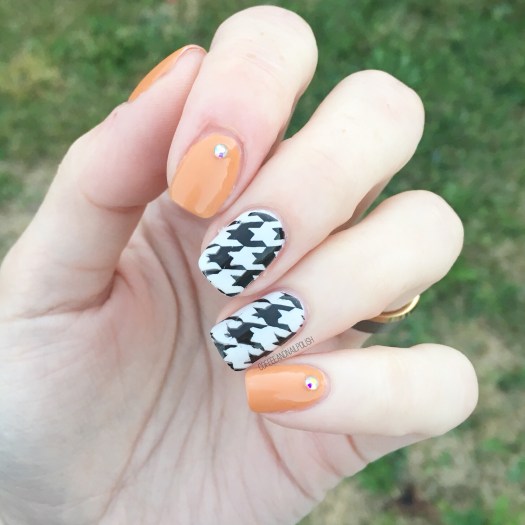
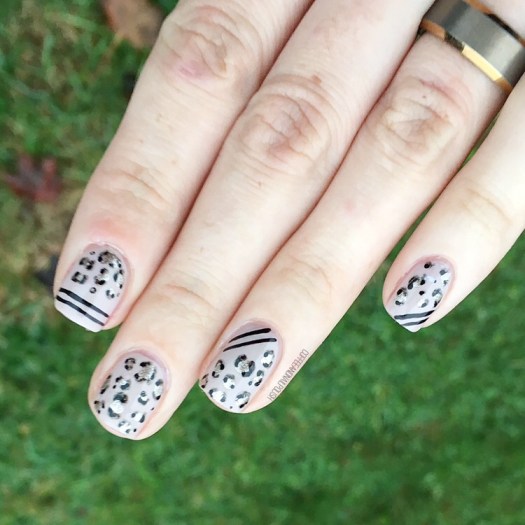
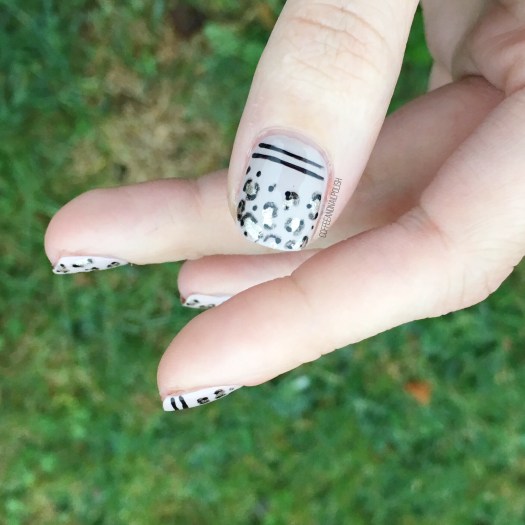
I started off by doing the leopard print, & realized the blank base needed something extra, so I added the stripes. & I really think they completely the look! Kind of reminds me of something that @nailsbyarelisp or @badgirlsnails.

I love the look of leopard print, but I think this is my first time doing one in this colour combination–I’ve done rainbow & neon & pink & grey, but never such a neutral colour scheme. & I’m absolutely in love with this look!

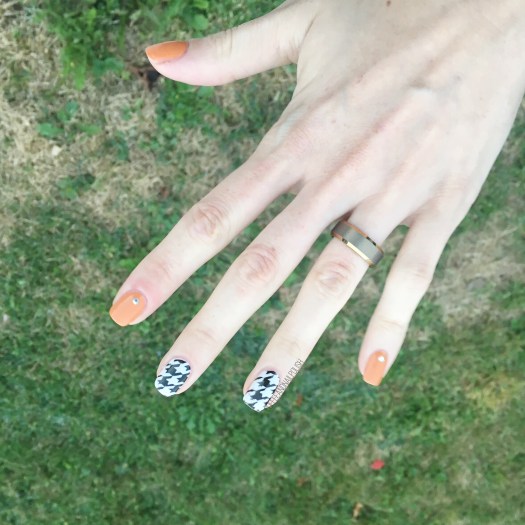
This would be a cute look to wear with a cat costume for Halloween, although it’s not a Halloween look. But if you were going for a more “glam” kitty for Halloween, leopard print are totally appropriate. But in general I feel like this is a fun, not too crazy, look for this time of year. I rocked this design while doing interviews at work , so who says leopard print isn’t work appropriate!

What do you think of this leopard print design? Share your thoughts down in the comments below!

Fall Houndstooth Accent Nails

Happy October 2nd! Can you believe we’re already a day into Halloween month?! Are you as excited as I am? I’m definitely going to need to start planning my Halloween designs soon.

But in the mean time, maybe some Fall themed nails? With the weather shifting quickly, I’m already digging out some of my favourite scarves, so I figured why not some nails inspired by the coziness of Fall.

For this manicure, the polishes I used were:

  • Base Coat: OPI Nail Envy
  • Top Coat: Essie Speed Setter
  • Essie Fall for NYC
  • Sally Hansen Complete Salon Manicure Lets Snow!
  • Essence Black is Back!
  • Born Pretty Store Classic Patterns Stamping Plate BP-L006 (item #17924)
  • Born Pretty Store Color Flame Rhinestones colour #2 (item #41753)

First off, can we talk about this Essie shade from the Fall 2018 collection? It’s absolutely amazing. The second I saw the swatches, I knew it was so different from all the other polishes I own & that meant I had to have it! & since it feels so Fall to me, I knew I had to pair it with this stamping plate from Born Pretty Store (which I haven’t had the chance to use yet!)

Also check out these crystals also from Born Pretty Store (item # 41753). I needed something to jazz up my plain nails, & I love the iridescent shift they have. You can kind of see how the shift of your hand shows different colours, which means these crystals will match with so many different polishes & manicures!

what do you think of this Fall inspired manicure? What Fall shades are you wearing on your nails right now? Let me know in the comments below!

SWATCH SUNDAY — Born Pretty Store Purple Holographic Pigment Powder (item #41436)

Good morning lovelies & happy Sunday. Couldn’t be more excited for the chance to relax & have a day off… & share something special with you! I recently received some gorgeous PR samples from Born Pretty Store for review, & that includes a couple new nail art powders. I’ve been seriously obsessed with nail powders & flakies lately, so I couldn’t wait to jump in & try them all.

The first one I picked, for today’s post, is a dark purple liner holo powder (item #41436).

For application, I took the following steps.

  • Apply base coat.
  • Apply base colour (I picked Essie Under the Twilight) & top coat.
  • Apply Finger Paints Peel Off Base Coat — let dry for about 5 minutes. If it’s not dry enough, you won’t be able to rub on the powder.
  • To minimize clean up, you can apply liquid latex around your cuticles. I forgot this time, which is why you can see a bit of holo scattered.
  • Using the name eyeshadow applicator that comes with the powder, pick up a small amount of powder & rub onto your nail.
  • Brush off excess powder from nail & around cuticle (or peel off latex if you used it)
  • Top with top coat & stare at your nails in wonder.

Look at that holo! Seriously obsessed with the dark holo over the dark base. I’ve been absolutely obsessed with my NailStuff.ca holo, but it’s nice to have a darker, vampy option (especially with Halloween quickly approaching).

Application was super simple & easy using my regular nail polish method. I don’t often use gel on my nails, but I feel like if I can easily apply it using regular polish, gel would be no problem. I’ll definitely have to try using it on my toes soon.

if you’re looking to try this powder for yourself, you can pick it up from the Born Pretty Store here.

Also remember, if you use COFFK31, you can save 10% off any regular priced items!

So what do you think of this dark purple holo powder? Do you have a favourite nail powder that you can’t live without. Share down in the comments below!

Fall Ruffian 🍁🍂

The weather here in Halifax is feeling much more seasonal, & I can’t lie–I’m digging it. A lot. I’ve just been waiting for the moment when I could finally wear tights & dresses, & it’s here. If it could stay this perfect seasonal weather until, oh I don’t know… November, that would be just fantastic.

Today’s look is a super easy design that requires no tools at all–just a tiny bit of patience. I love the simplicity of this design & how well the two colours paired together.

For this design, the polishes I used were:

  • Base Coat: OPI Nail Envy
  • Top Coat: Essie Speed Setter
  • OPI My Chihuahua Bites!
  • Essie After School Boy Blazer

I’m just absolutely love the dark over the bright. It pops so well. Essie After School Boy Blazer is one of my all time favourite blues & I’m still so in love with it all these years later. One of the most perfect navy’s I own.

Gosh, I just love love love the look of a ruffian design–it’s a great alternative to a simple french manicure or half moon design. Also I apologize about the tip wear–I wore this design all day at work before getting a chance to take pictures, but thankfully they weren’t too worse for wear!

what do you think of this ruffian design? What colour combo would you pick for a ruffian look? Let me know down in the comments below.

Born Pretty Store 3D Nail Art Stickers (item #40422) Review

Good morning beauties & happy Tuesday. Today I’m showing off some brand new nail art stickers I recently received in a review package from Born Pretty Store. They were so kind as to send me a few nail art goodies in exchange for my honest thoughts & reviews, & I couldn’t wait to break into the package!

These nail art stickers are item #40422 & come in both gold holo & silver holo. I picked both colours, but since I was feeling a purple base, I figured the gold would pop more over top. The stickers themselves come with a large sheet of different sizes & style, which is perfect when trying to pick what kind of look you want to do. For my nails, I decided to go more simplistic using the larger size stickers.

Application was super simple. All you need to do is paint your base colour (I picked Joe Fresh Gel Gothika Blue) & let dry some. To speed up the drying process, I did apply a quick dry top coat to my base, mostly because if my nails were fully dry, I could be more selective about sticker application. When my nails were dry, I then carefully peeled my stickers off their sheet with tweezers, & applied them onto my nail. I made sure to press them down really well, & flatten any possible air bubbles. Then, when I was happy with my look, I sealed everything in with top coat.

I wore these nails for a full day of work (stock day at that!) & they lasted pretty well. I did find that my nails where the sticker went close to the edge of my nail–like my middle finger & pinky nail–had some issues with the sticker lifting but that could be because I was not as precise with my top coat to fully seal the sticker in. The best bet is to aim to make sure that the stickers are placed more centrally on the nail, or you just make sure your sealing all the edges really well.

As you can see down below, my stickers definitely seemed to stand out a bit from its base–they were for the most part sealed onto my nail, but seemed raised against my base colour. I don’t know if this was because I had used a top coat already but when I use these again I will definitely try it over just the base colour & see if it helps the issue. These stickers are definitely not the first brand I’ve had this issue with, so I’m thinking it’s more an issue with my application.

I’m definitely a fan of these stickers & the easy way you can create a nail art look using them. I even had someone ask me where I got my nails done! As I mentioned above, you can find these guys at the Born Pretty Store website (item #40422) & they come in both silver & gold. I definitely want to try pairing both colours together the next time I use them, so see what kind of look I can create.

Don’t forget, you can use my Born Pretty discount code COFFK31 to save 10% off any regular priced items.