Negative Space Chevron Moons

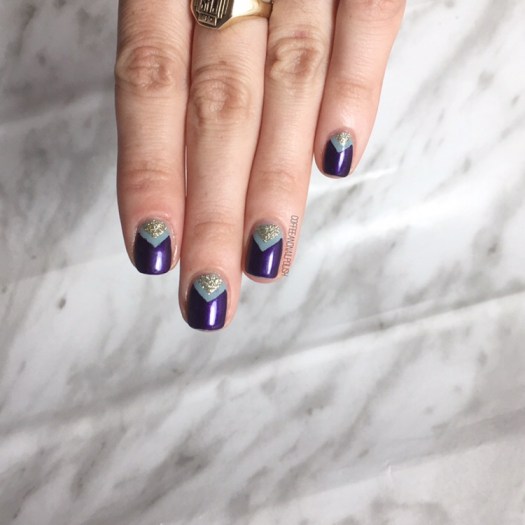
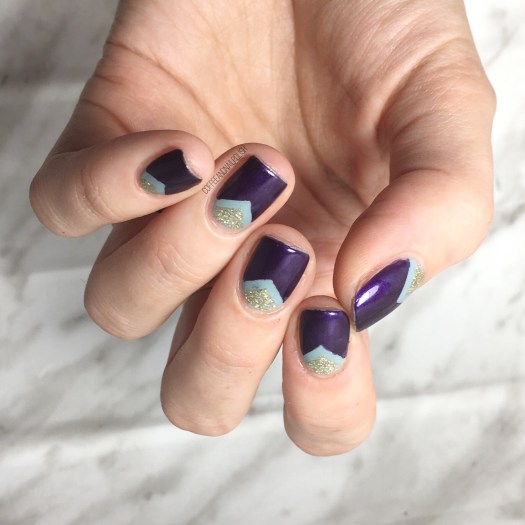
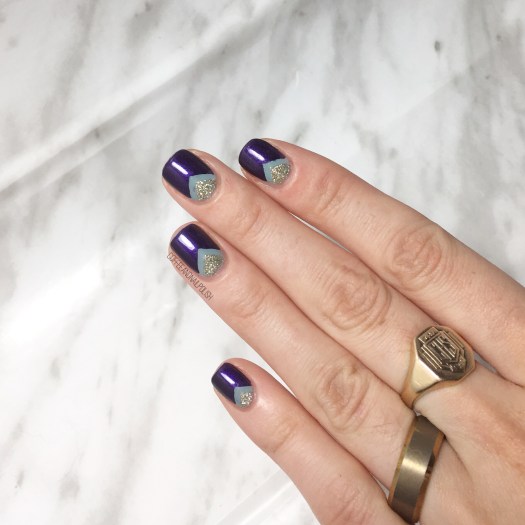
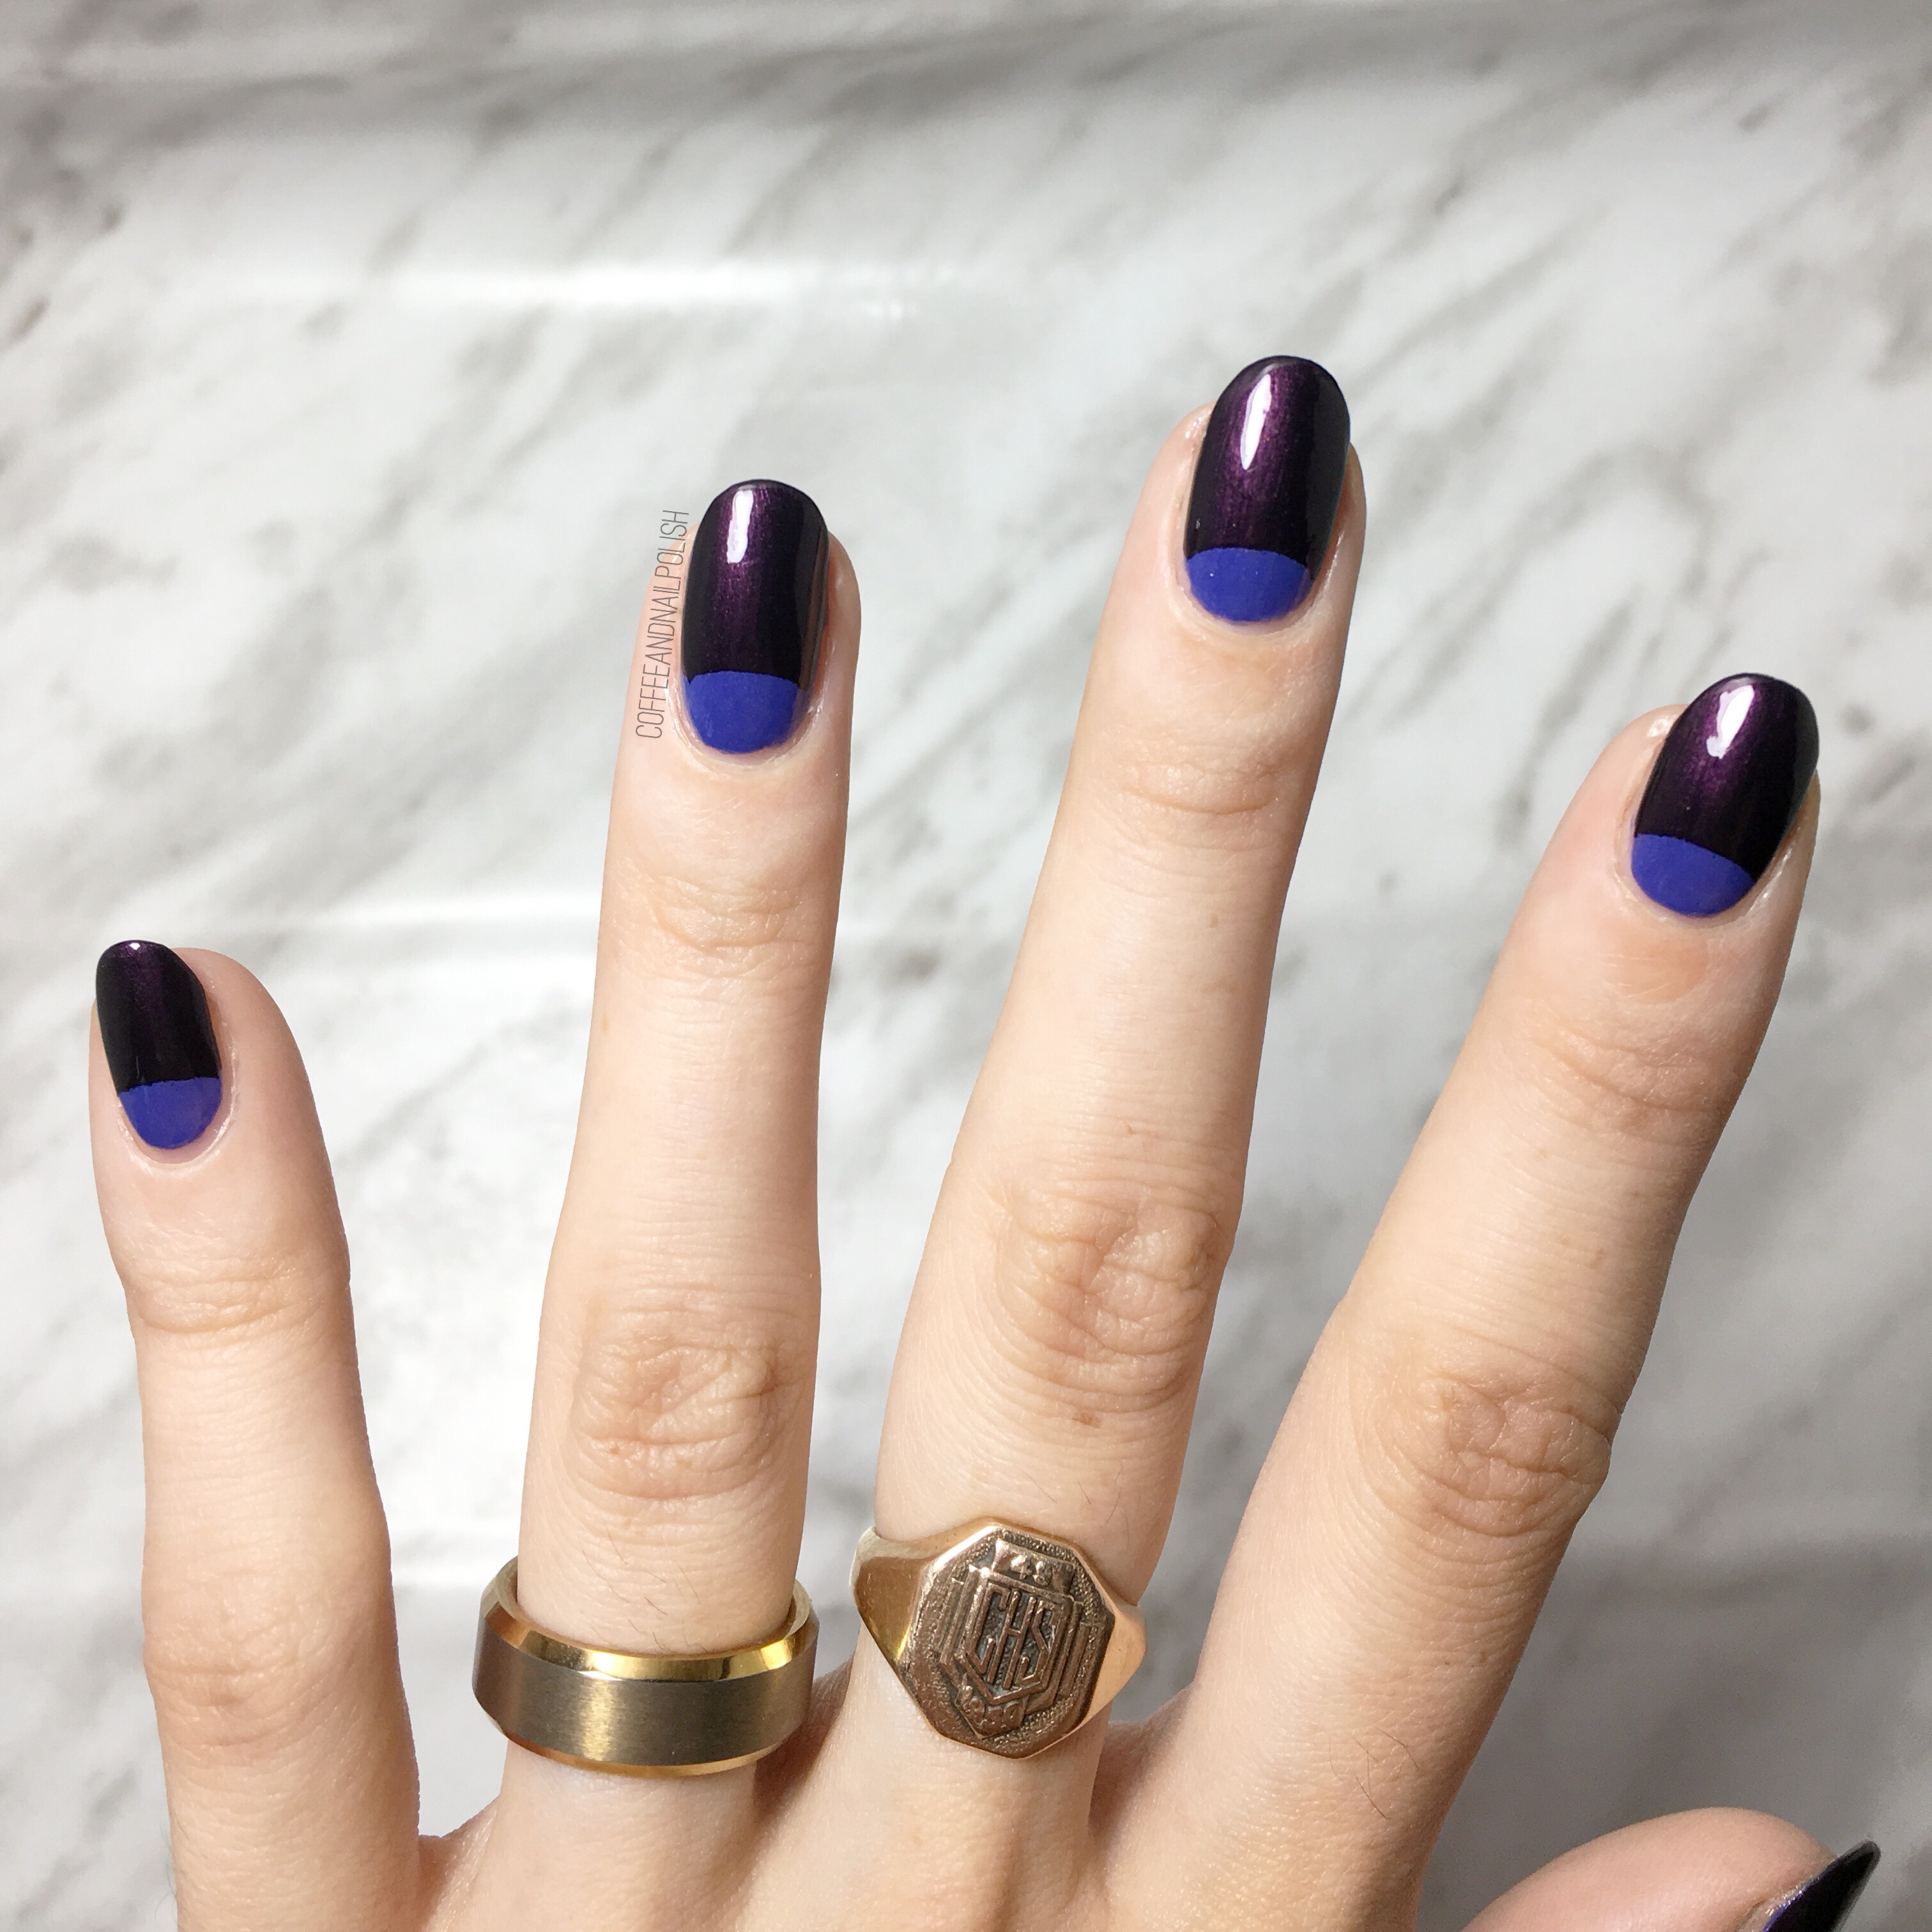
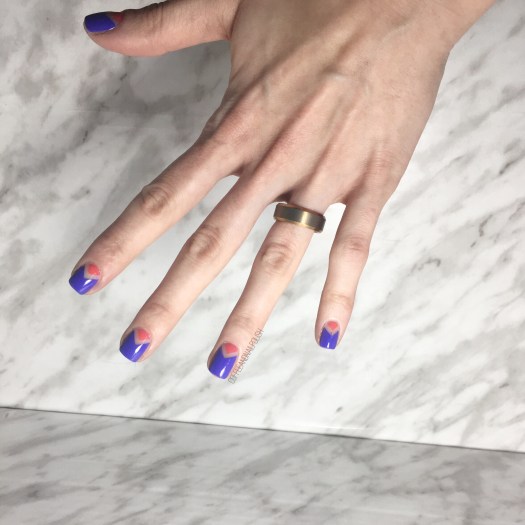
Hello brightness, my old friend. 🕶 Well, bright nails at least. I was feeling some Summer colours, so I decided a colour block chevron moon design was much needed! & what better than some Summery shades to make it perfect.

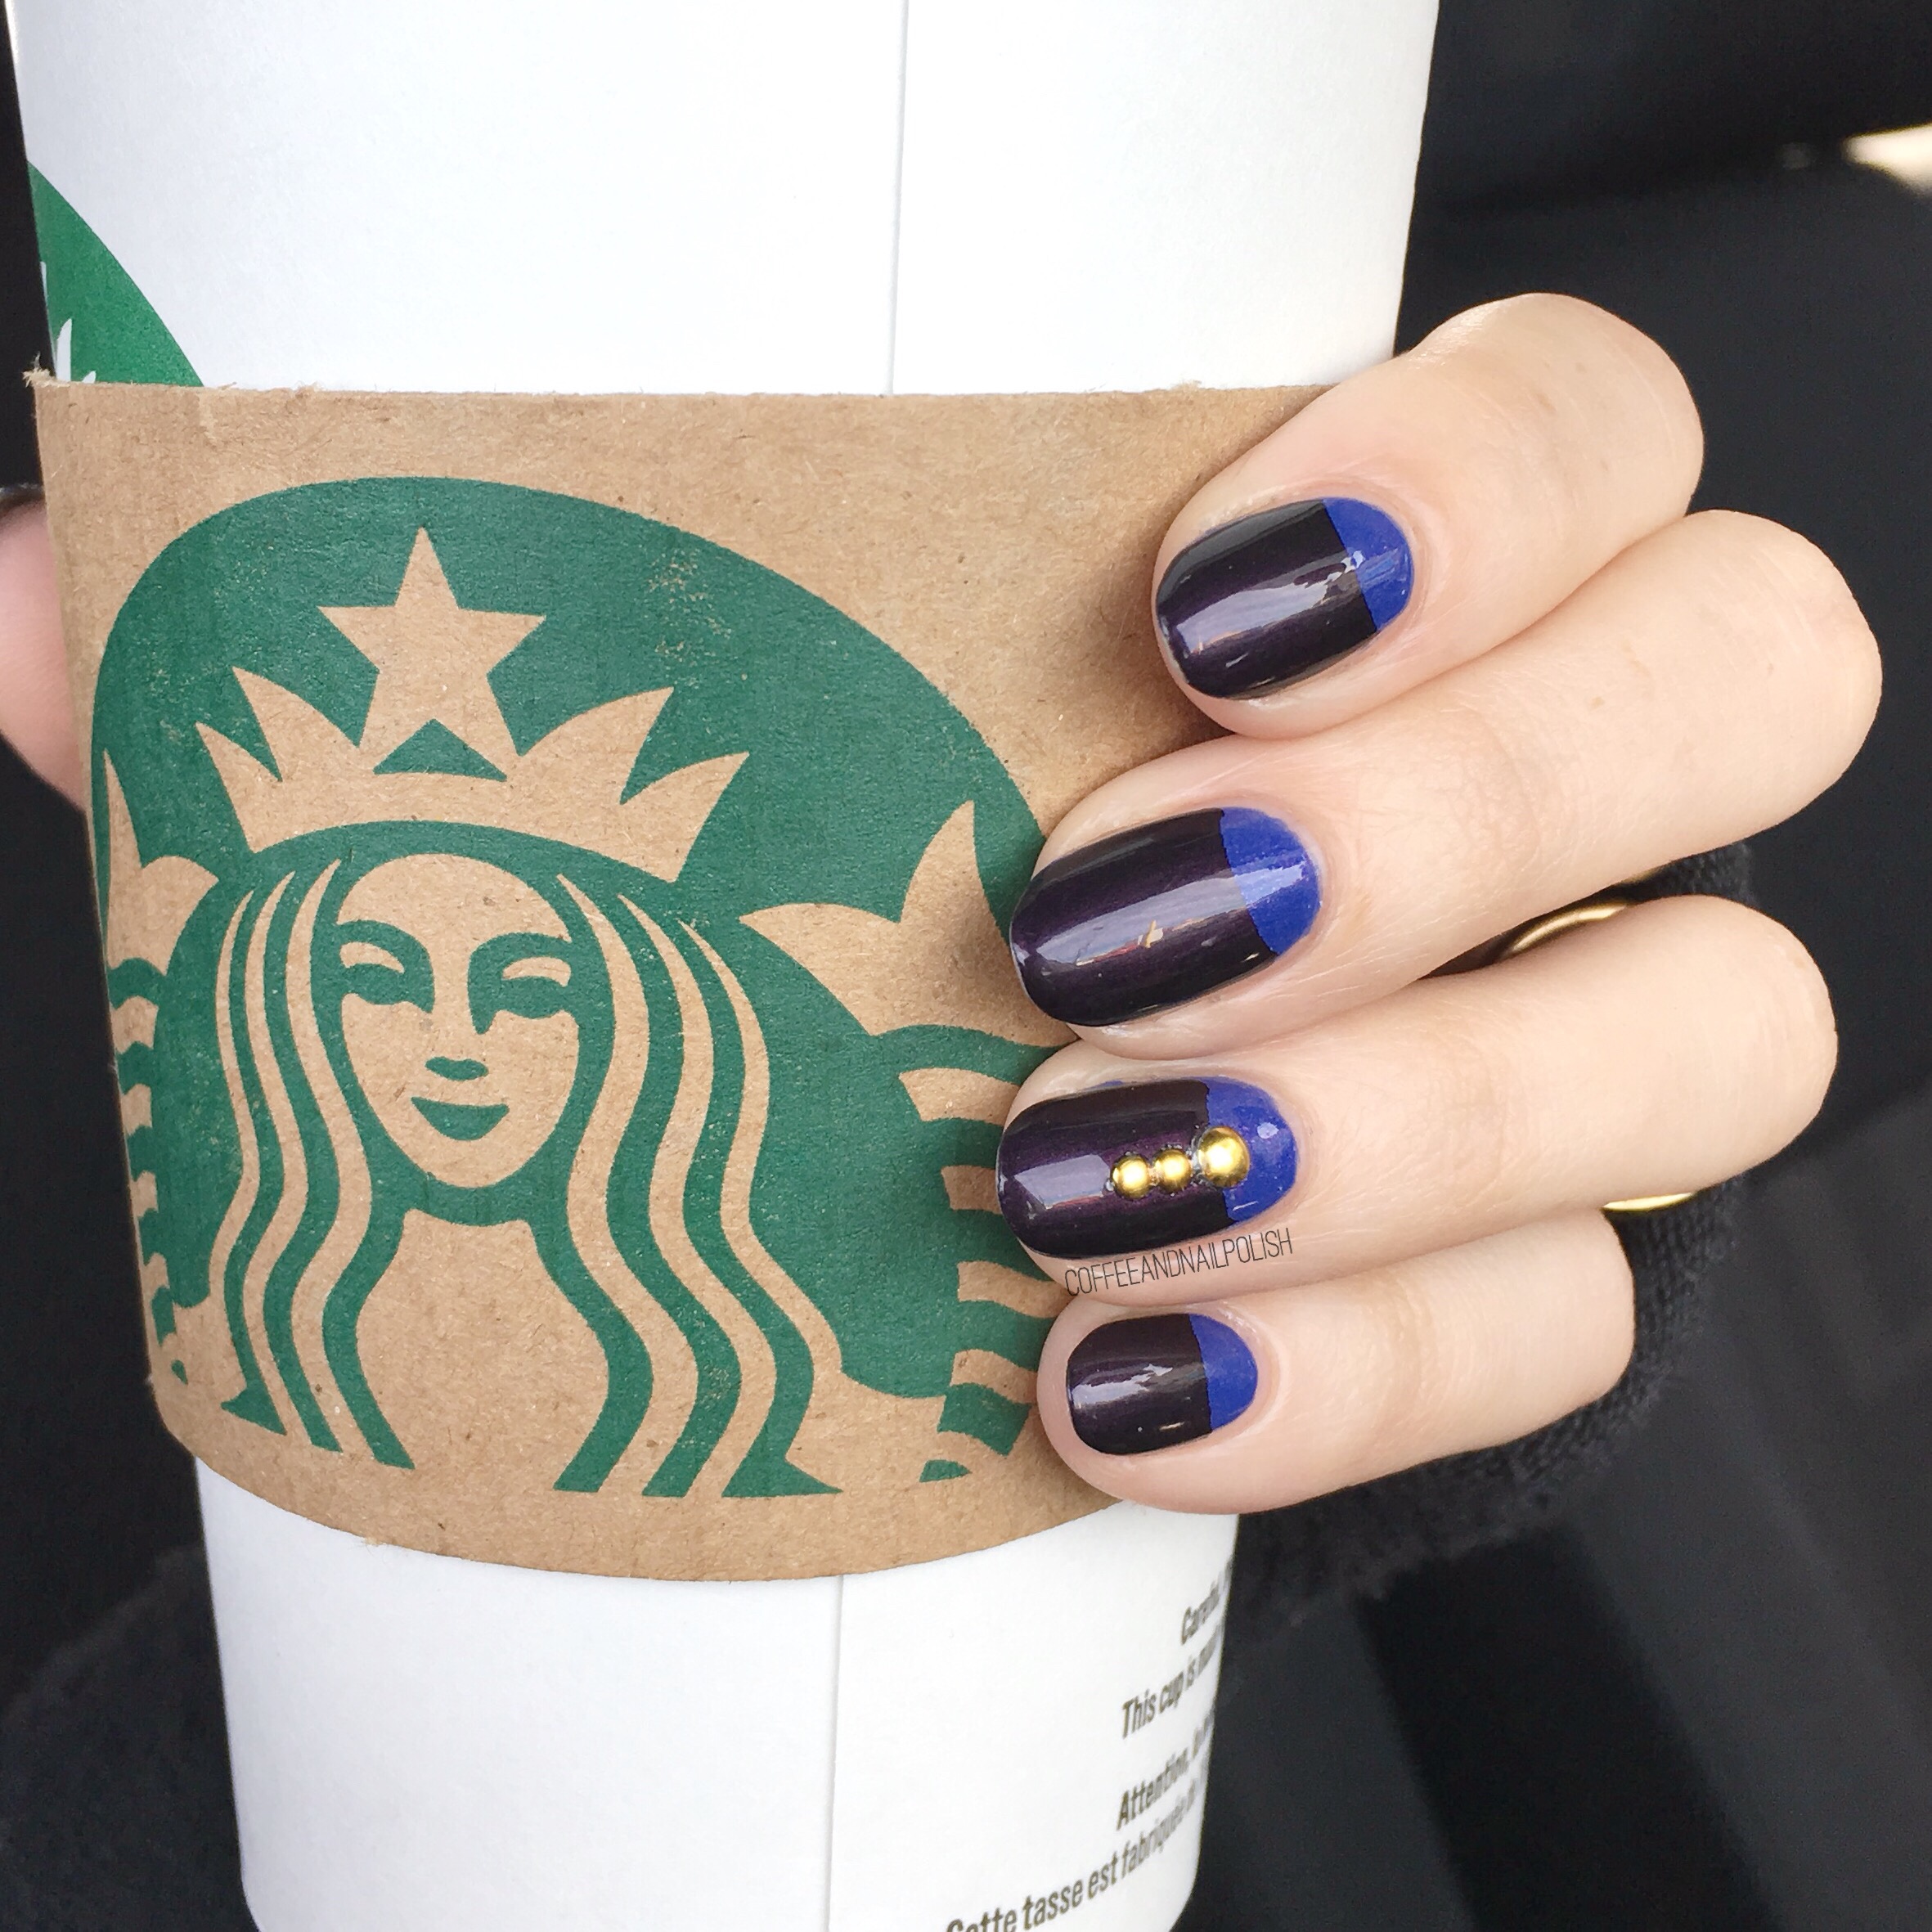
I decided for this design to grab a few favourites from my stash. I feel like I have too many shades in my stash I haven’t worn yet. I have this habit of buying polishes on clearance & then promptly forgetting I bought them in the first place! For example this OPI shade (I Eat Maine-ly Lobster) that I picked up for only $4 at Lawtons. I also have about 4 others sitting untried. I really need to get on that!

For this design, the polishes I used were:

  • Base Coat: Nailtek 2
  • Top Coat: Essie Speed Setter
  • China Glaze I’ve Got A Blue Attitude
  • OPI I Eat Maine-let Lobster
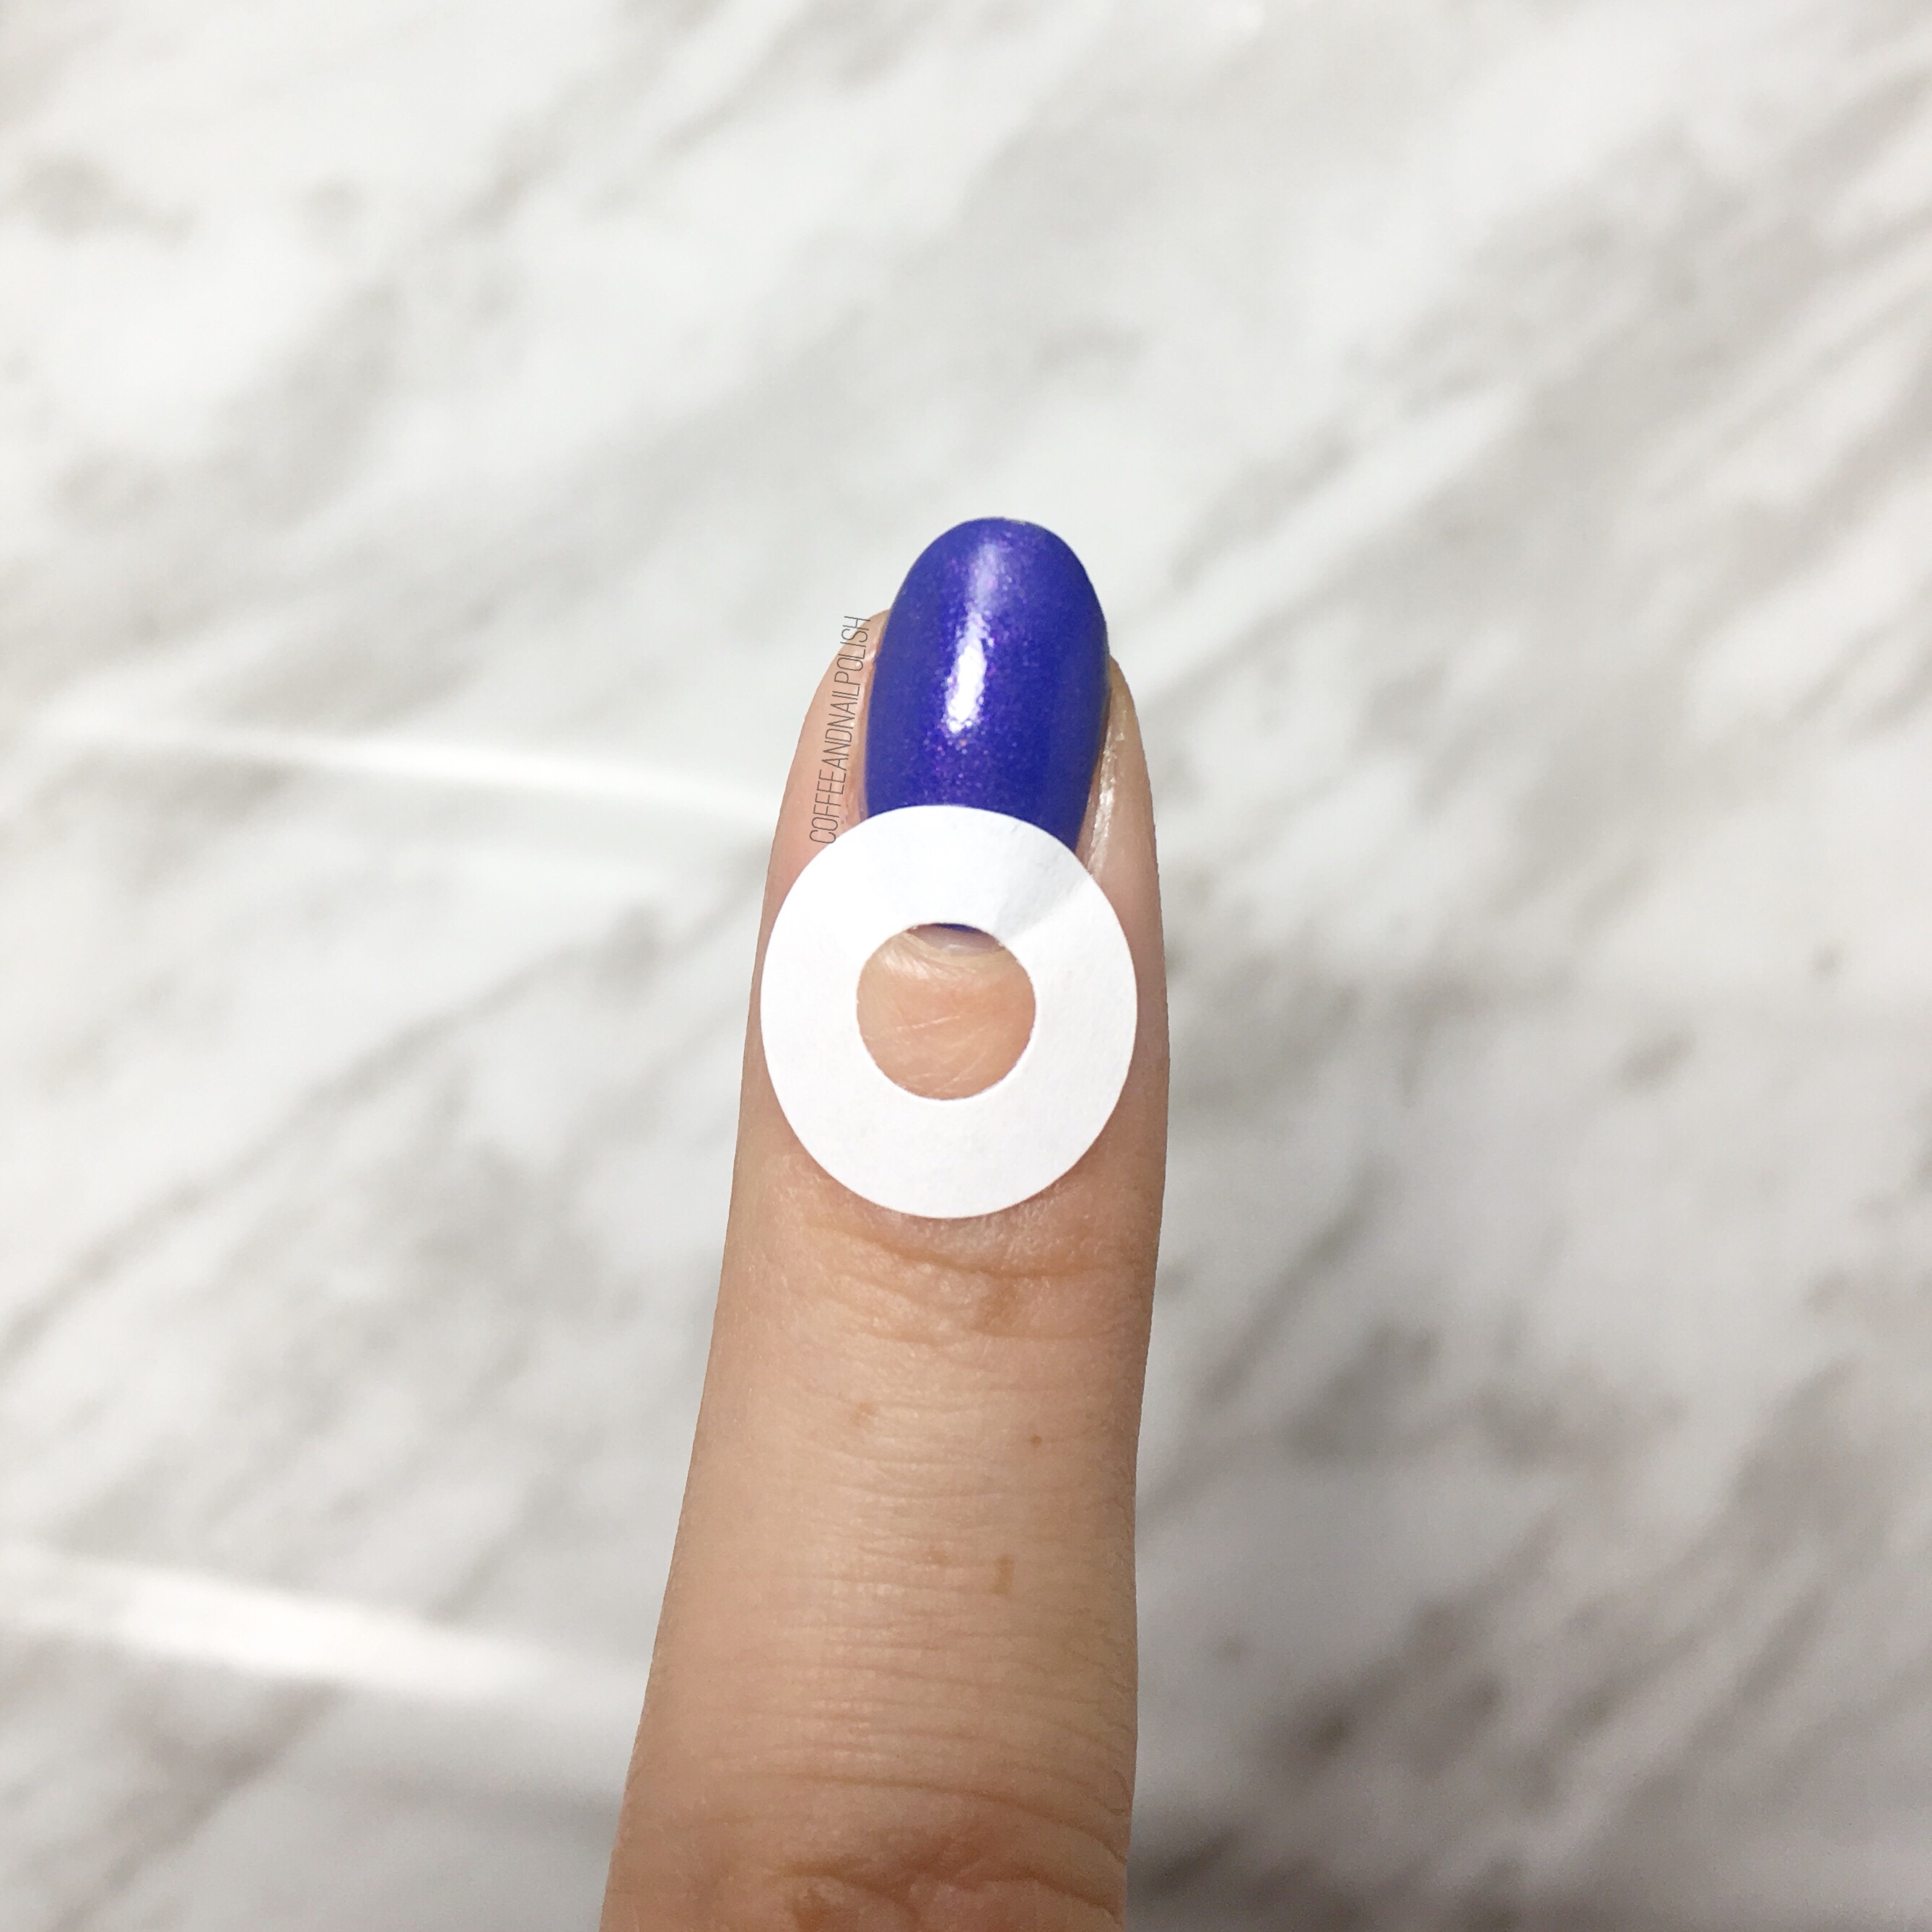
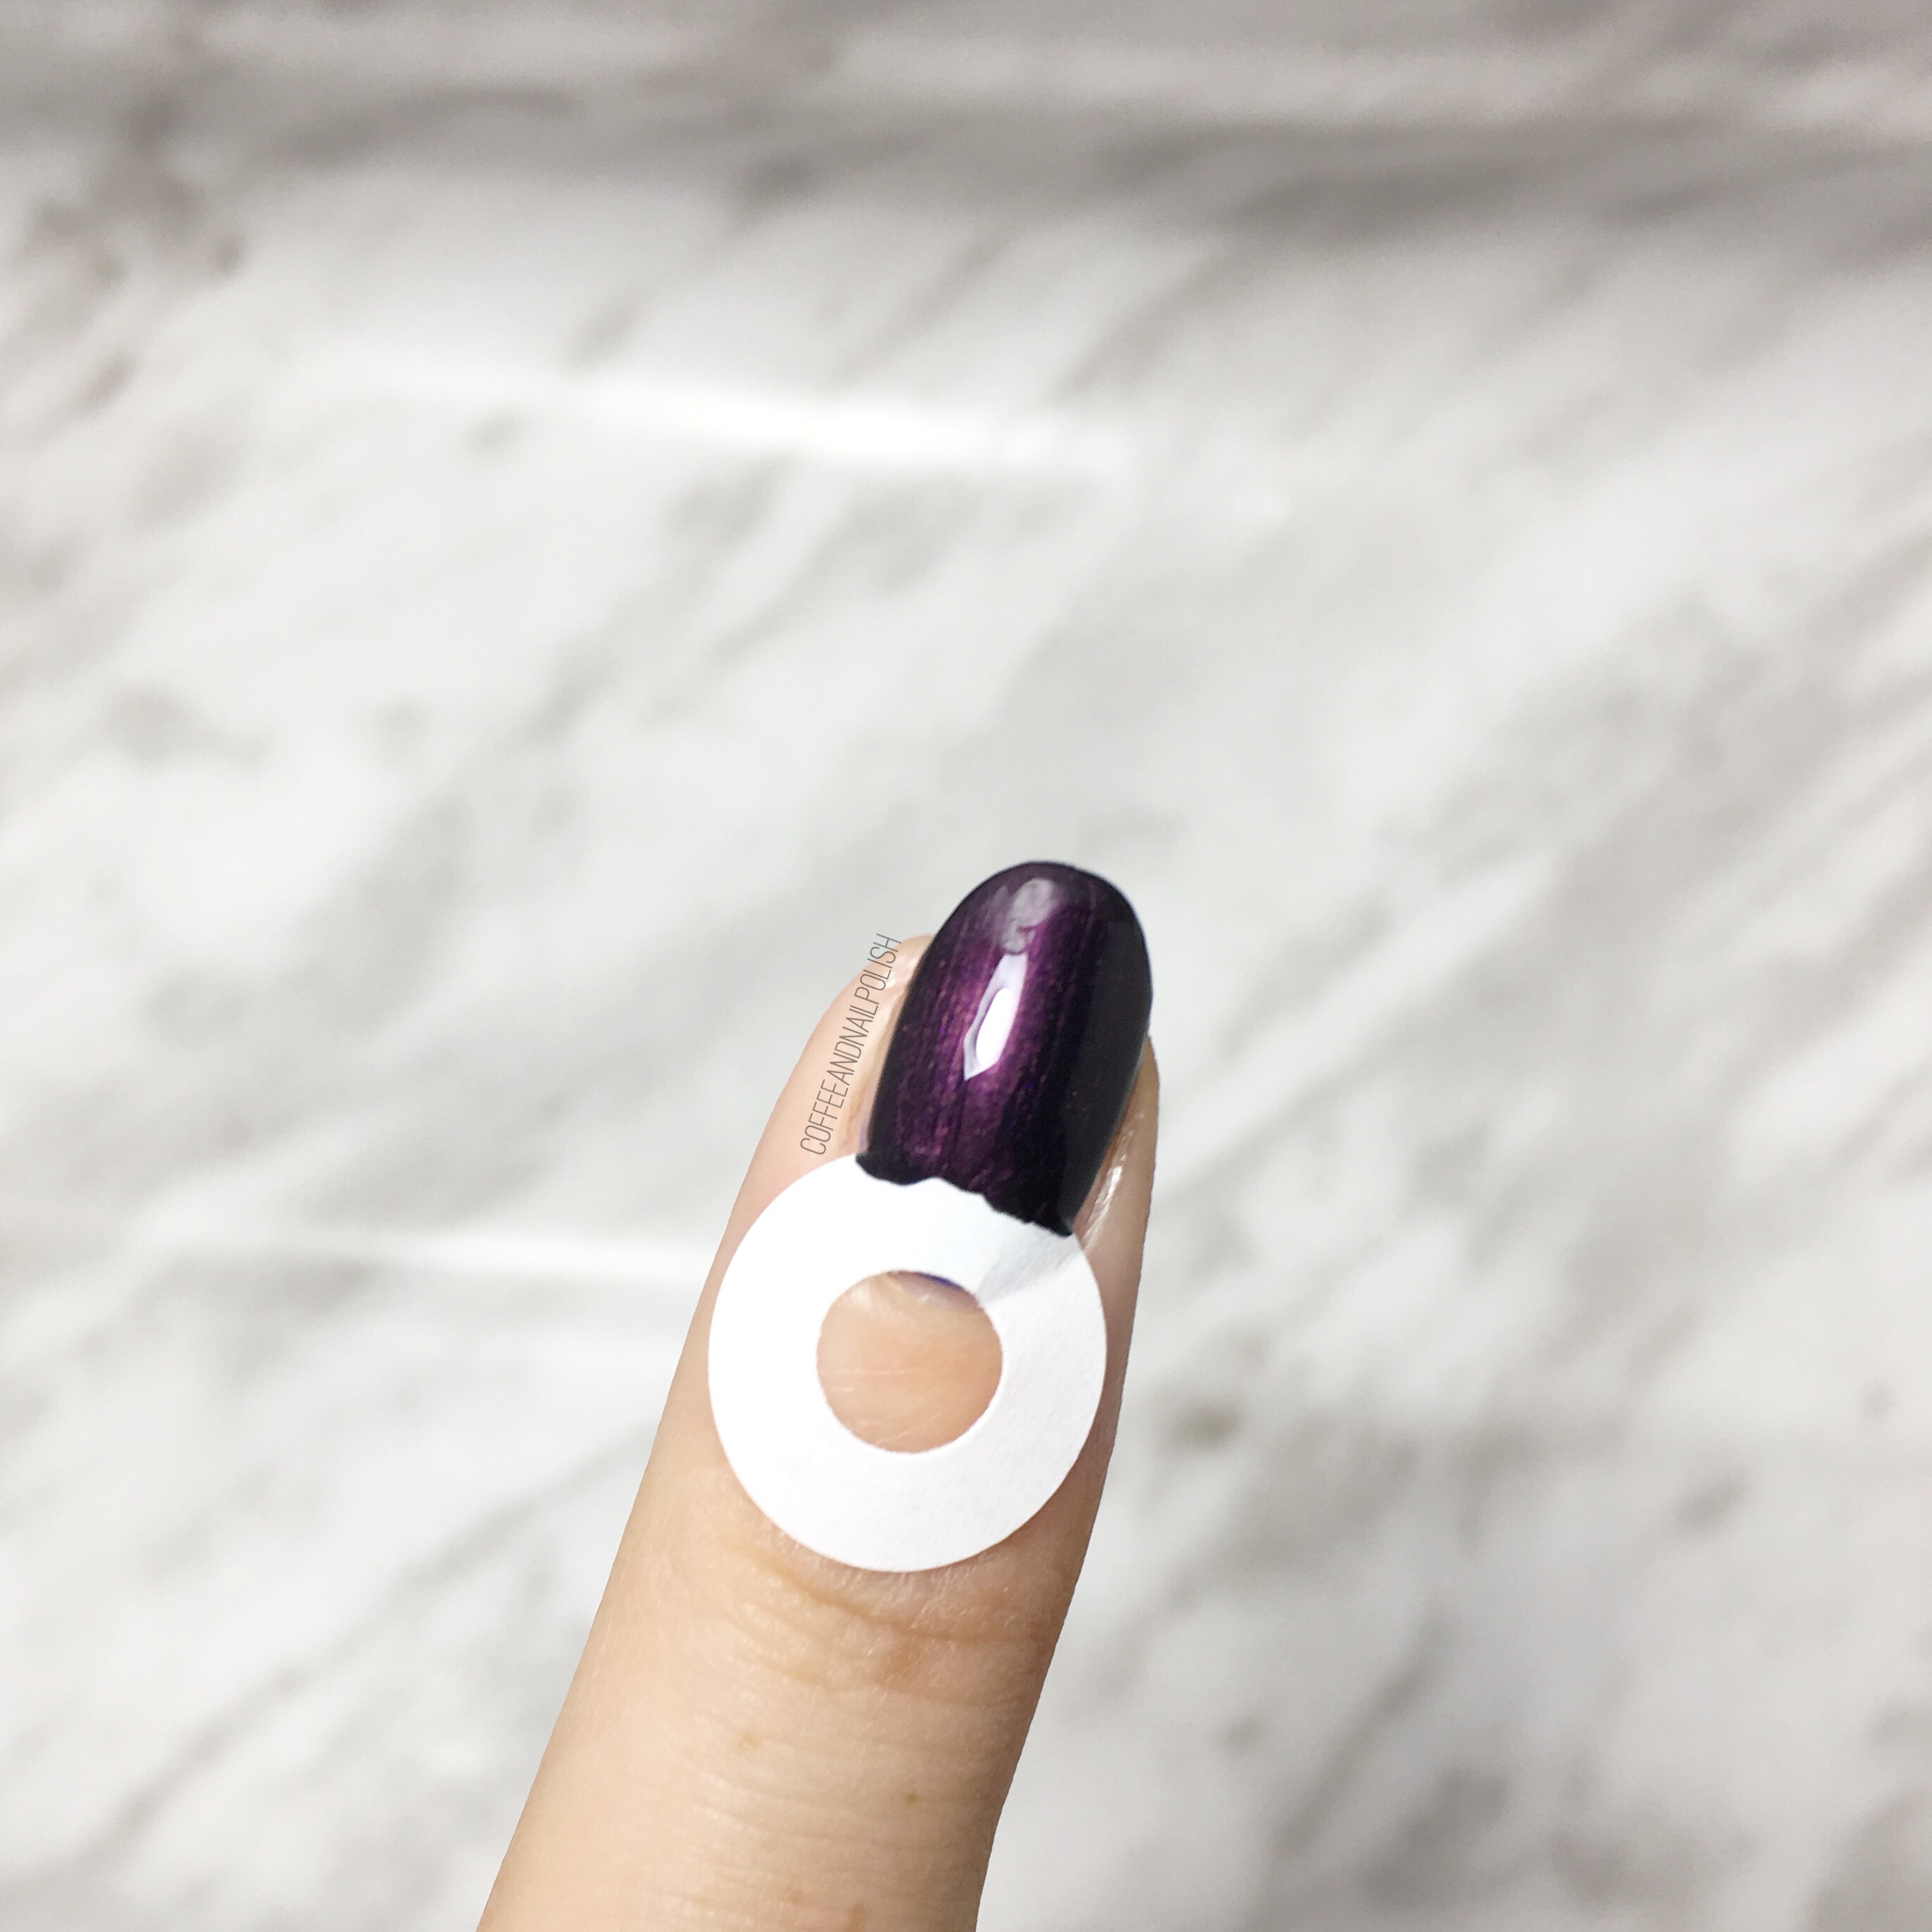
  • The Base Coat Nail Vinyls stacked chevron vinyls

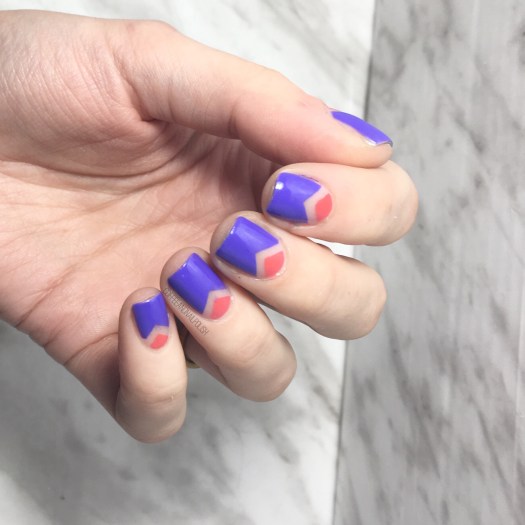
Ooooooooh I love this combination & how bright these are. I wasn’t sure at first how these colours were going to go together, but it turned out perfect! & oh so bright. Like, I need to grab my sunglasses bright. Which is perfect, since Mother Nature threw us a curve ball & had it snow yesterday. Not a lot, & it didn’t stick, but… seriously?! It’s the 21st of April! I should be wearing denim jackets & maxi skirts, not Ugg boots. Thankfully next week is calling for sunshine & warm temperatures the beginning of the week! So my Spring dresses won’t sit untouched in my closet much longer.

Is there anything better than chevron moons & negative space? I’ve been going through old manicures circa 2015 & I’m remember how much I loved doing both… I need to do them more often! Being back to work hasn’t been as easy a transition as I thought it would originally be. I need to take a little more time for doing my nails & having fun again.

what do you think of this design & colour combination? Let me know your thoughts in the comments below!

Winter Chevron Moons

Hello & Happy Tuesday! Sorry for the lack of posts this weekend–it was kind of a rough weekend & my motivation for posting took a hit. (Also I noticed the majority of my last post disappeared & I’ve been too frustrated thinking about having to rewrite it so I’ve been avoiding the blog. My bad.) But today I have a brand new post with something that has been seriously lacking in my life lately: chevron moons!

I’m calling these winter chevron moons because… it sounds cool? The colours just kind of give me that Winter vibe, so I thought it worked. Also I figured everyone might want to see something other than snowflakes.

For this manicure, the polishes I used were:

  • Base Coat: Nailtek 2 Foundations
  • Top Coat: Seche Vive
  • Nubar Queen
  • Essie Parka Perfect
  • OPI My Favourite Ornament
  • URSUGAR Chevron Nail Stencils (I used the inner pieces.)

I love the combination of the pale blue, deep purple & sparkly gold. I thought this colour combo was a nice switch up from all the Christmas-y designs I’ve been doing, & features two of my favourite winter polishes: Essie Parka Perfect & OPI My Favourite Ornament. Every Christmas, this gold has to come out because the sparkle is just so perfect. ✨

For me, Christmas/Winter nails are all about the sparkle. These aren’t your typical holiday nails, but I think they would look fantastic with a pretty dress at a Christmas/New Year’s party, especially if you don’t want to resort to the classic Christmas shades. It’s all about the sparkle that makes it perfect. I’m so obsessed with Christmas party looks right now because I have no Christmas party of my own to go to. I just keep coming up with looks I would wear if I had somewhere to go (& then imagine what fancy dress sitting in my closet I would pair with it.)

What do you think of these chevron moons? Let me know your thoughts in the comments below!

Half Moons & Gold Studs 

Happy Monday! How was everyone else’s weekend? We’ve been starting to pack for moving which is about as much fun as it sounds… I hate packing & I hate moving. (& I haven’t even starting thinking about moving my 1000+ nail polishes yet.) 

So what am I sharing to cheer myself up after a packing haze? One of my favourite go-to designs—the half moon. & thought I’d share a quick pictorial on how easy these actually are to create! & no special vinyls are needed!

The products used for this manicure were:

  • Base Coat: OPI Natural Nail Base Coat
  • Top Coat: Seche Vive
  • China Glaze Fancy Pants
  • China Glaze Glamcore
  • NailStuff.ca gold Mixed Decoration Nail Wheel

Paint your base colour & apply quick dry top coat. Let dry completely, roughly about 20 minutes depending on the top coat you use. 

Once your nails are completely dry, pull out your pack of paper hole reinforcements & apply at the base of your nail. Make sure to press down at each end. 

Repeat on all 5 nails. I always do one hand at a time. 

Press down each side of hole reinforcement (to make sure polish won’t bleed under) & then quickly paint second colour over top. A one coat polish works best, but she make sure base colour is covered. 

Immediately remove your reinforcement. 

Repeat steps on all fingers & then seal in design with top coat. Bam! Almost instant half moons (with a few steps in between). I loved the blue with purple but I wanted to add a little more of a snazzy finish to my nails. I’ve been obsessing about this wheel of nail studs lately adding it to a lot of my manicures lately so I figured it would be the perfect addition to this design. 

For my accent nail, I applied some blobs of coat, then picked up my studs with a wet nail art brush & arranged them. I always make sure to pull my studs out of the wheel ahead of applying them, as it takes less time trying to find them. Also, sometimes you will have to dab on more clear polish/top coat to make sure the studs stick. Also I always seal my studs in with top coat so no edges catch & get pulled off. 

What do you think of this half moon? How do you create your half moon designs? Let me know in the comments below! 🌙