Fall Leaves 🍂 Nail Art Recreation

E8C7A357-B8D6-4ABB-A930-82C28D6396CC

B971C433-7837-4656-B6CB-069566BC4426

Hello lovelies & Happy Friday!

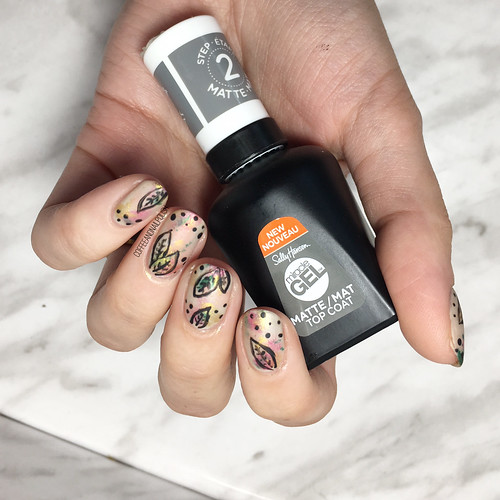
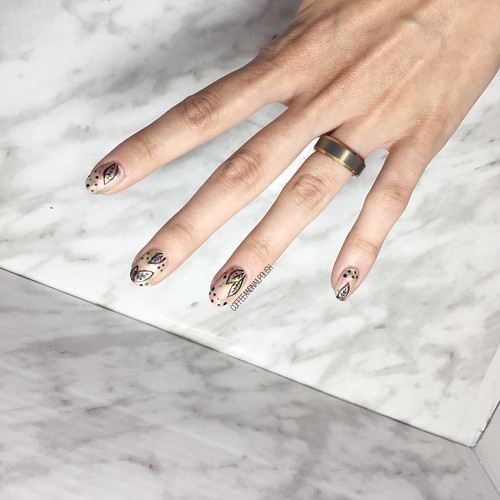
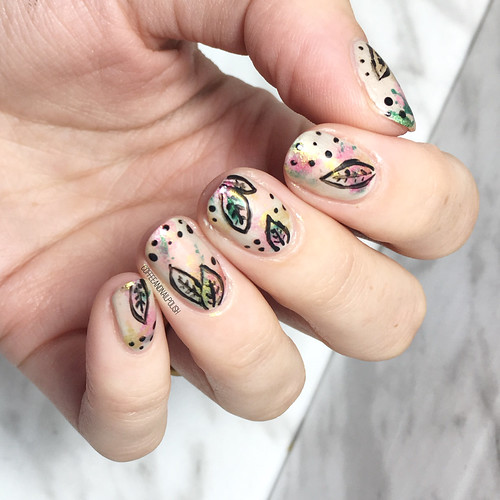
Today I have a fun nail art look to share with you that is a recreation of an old favourite: this Fall leaf design. This design was one of the first designs I ever posted on Instagram that I was the most proud of. So while browsing through my old designs, I decided it was definitely long overdue for me to recreate this design!

28294277-6B43-482E-B5C5-7FC301D46CBC

A3D30523-B31F-4289-AE5B-1365F27AC403

For this manicure, the polishes I used were:

  • Base Coat: Gel overlay
  • Top Coat: Essie Gel Setter
  • Top Coat: Sally Hansen Miracle Gel Matte Top Coat {PR sample}
  • Quo by ORLY Breathable Heaven Sent {PR sample}
  • Sally Hansen Miracle Gel Good Cheer-y {PR sample}
  • Wet N Wild Blazed
  • Rimmel 60 Seconds 830 Camouflage
  • Mariposa Nail Polish gold shimmer (no name)
  • Black Acrylic Paint
  • Nailstuff.ca Dotting Tool Trio

.

1CB0DB52-50FD-4AB3-AF60-E1DE237F0F5B

C2FB8302-EC8D-4DEE-9888-B9A9D49BB01E

So obviously with it being five years since I first painted this design, I wanted to change things up a little bit & play around with the look. Instead of black polish, I used acrylic paint because I knew it would make it easier to start over if there was any mistakes. I also used my 11mm mermaid tail brush from NailStuff.ca, but looking back I should probably should have went with a small size for thinner lines.

Also this time I decided to add some matte top coat over my design, & it really made the design & colours pop! I’ve been absolutely loving the Sally Hansen Miracle Gel matte top coat.

F9EE6409-C6A5-4715-AF2C-278ADDB1018B

857606B3-7283-43DD-942F-5358C79B6065

Just for fun, a couple shots of this design before I added my matte top coat.

Obviously I think both versions of this design are fabulous, but I’m just slightly more in love with the matte version. Something about this time of year just has me craving matte-ified nails more often, & honestly I feel like metallic nails (which I also craved more often during Autumn) pop so much more when they are matte.

53C032A2-95B1-49F6-9A59-1052AB010FD3

6180732B-733C-40E3-AAA6-2818016FF6F5

So what do you think about my updated version of this design? Which do you prefer: matte or glossy? Share your thoughts down in the comments below & let me know which version is your favourite!
Mini Egg inspired Easter Nails (yep… again!)

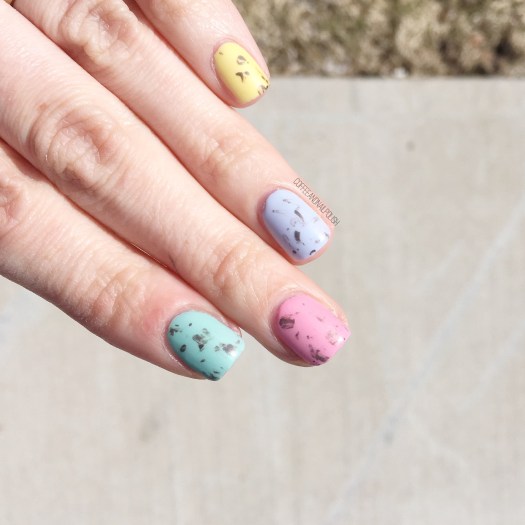
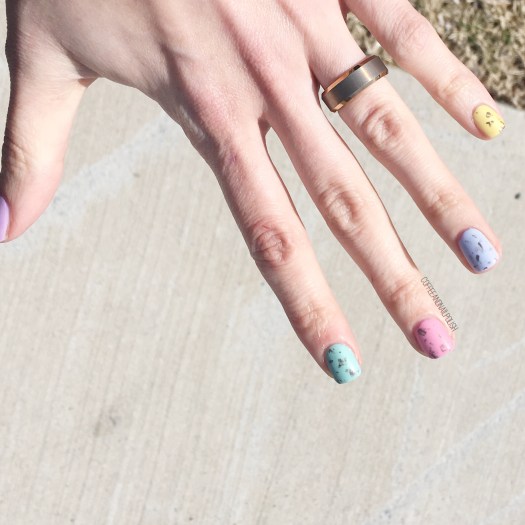
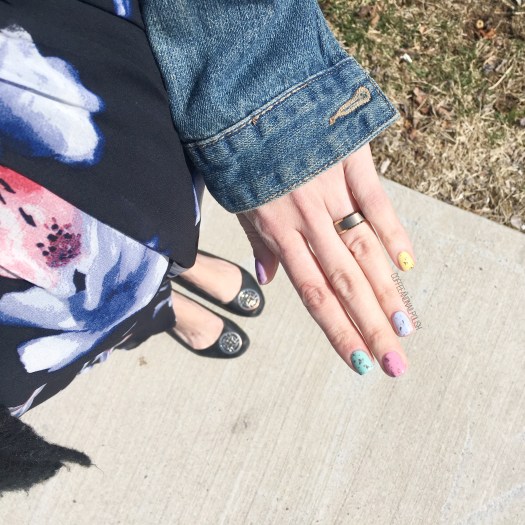
Good morning lovelies, & happy Friday. Today I’m prepping for Easter festivities with a brand new Easter design… & showing off this Mini Egg inspired look. This is definitely not the first time I’ve created this design, & I seem to return to it every couple of years because it’s a fairly easy “design” to create but it gets the point across!

Also who doesn’t love chocolate?

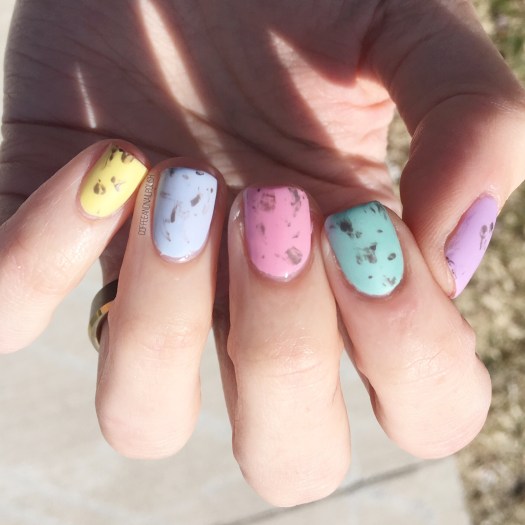
This look is super simple to do–all you need are your egg colours, the spots (I used a brown polish & Saran Wrap–I’ve seen others create this look using a black & white glitter topper which was awesome) & some matte top coat.

Easy Peasy. & awesome nails to rock for your Easter festivities which won’t cut into any family (or chocolate) time.

For this design, the polishes I used were:

  • Base Coat: OPI Nail Envy
  • Top Coat: Seche Vive
  • Matte Top Coat: Sally Hansen Miracle Gel Matte Top Coat -{PR sample}
  • China Glaze Sun Upon My Skin
  • Claire’s Matte Sorbet Blue
  • Claire’s Matte Sorbet Pink
  • Claire’s Matte Sorbet Mint
  • Claire’s Matte Sorbet Purple
  • OPI How Great is Your Dane?

Is the trick for me to get the spots right in the eggs is a light touch & minimal polish on the Saran Wrap. I crinkle it up extra & then don’t apply too much polish to the plastic so when I dab it down, you don’t apply too much polish to the area. You want just a few dots as opposed to a big splat.

Every time I do & redo this look, I think I love it even more. It’s just such an easy way to do festive nails, & the only downside is you have to fight the urge to eat your nails!

So what are you planning on wearing on your nails this weeekend? Share down below!

SWATCH SUNDAY — China Glaze Turned Up Turquoise

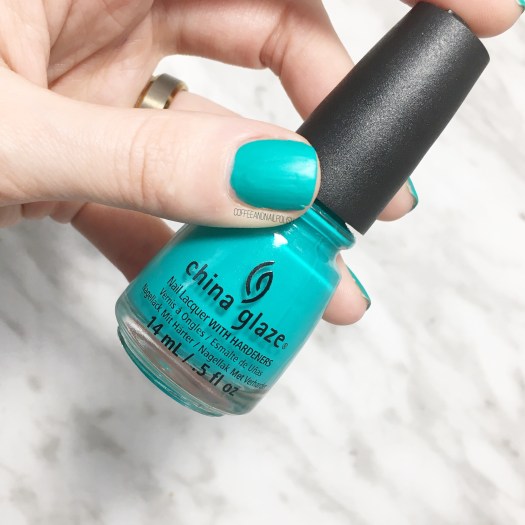
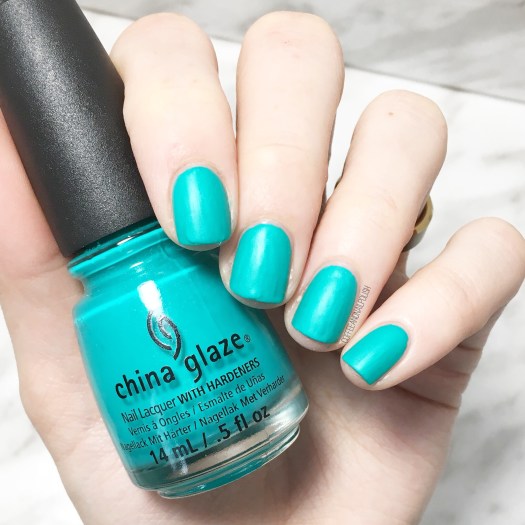
Good morning lovelies & welcome to another rendition of Swatch Sunday. Today’s polish is brought to you by my 2 year old who decides what colour I needed to wear. & his pick? China Glaze Turned Up Turquoise!

Turned Up Turquoise is a neon shade that dries to a very matte finish. For my swatches, I applied 2 coats over my base. The coverage was perfect but like any matte shade, it gets a little goopy the older it gets because matte polishes do dry faster than regular (in my experience) & my bottle is going on 5 years old.

Usually I apply a glossy top coat to my matte shades & then finish with a coat of matte top coat, but I really wanted to show off the true finish of this shade. As you can see, it dries down pretty well on its own, although it doesn’t hide the rough state of my current nails. If I was wearing this for a while, I would definitely top coat it & then either add my matte top coat or leave it glossy.

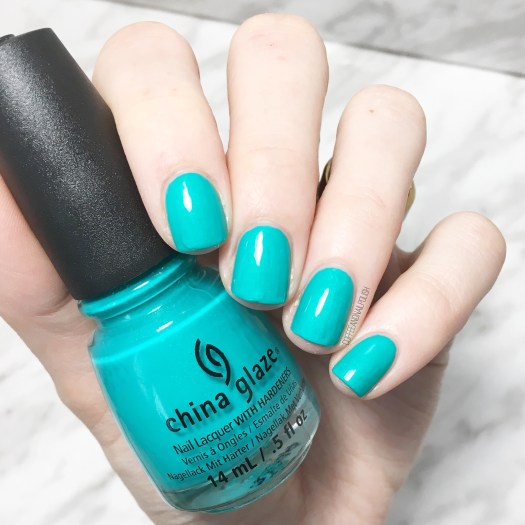
& speaking of glossy, I had to add some top coat to show off how gorgeous Turned Up Turquoise looks with Essie Speed Setter added.

As you can see, glossy top coat really adds to the shine of this shade. It also shows off the shimmer that gets kind of hidden when it’s matte. But honestly–I love this polish either way! It’s so pretty while left matte & it’s gorgeous when glossy.

My only complaint about this shade? It’s just so hard to photograph the true colour! It’s slightly more green-ish than you see in my photos, but from browsing the Internet I don’t think anyone can capture the shade truly. I think that just comes with it being a neon, as neon polishes can be difficult to photograph.

So what do you think of this shade? Do you have it in your polish collection? Which do you prefer — glossy or left matte? Let me know your thoughts down in the comments below!

Pantone Nails with Sally Hansen Miracle Gel in Malibu Peach(& a new matte top coat!)

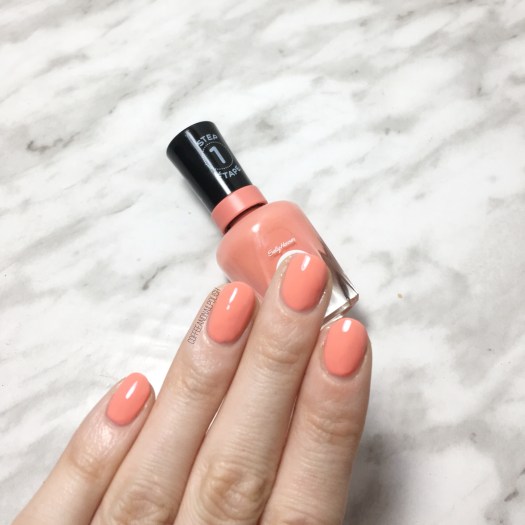
Hello lovelies & happy 2019! I hope everyone had a fantastic start to the new year… I certainly enjoyed having two days off in a row! Today I’m starting off the new year not only by blogging (oh how I’ve missed you) but with a post featuring a shade inspired by the Pantone 2019 shade of the year Living Coral — Sally Hansen Miracle Gel in Malibu Peach.

I have to be honest, I’m not always drawn to these specially selected shades, but I am seriously in love with everything about this shade. It’s such a bright, happy shade, & I want to pain my house in in.

For my swatches, I did three coats of Malibu Peach followed by the Sally Hansen Miracle Gel Top Coat to seal it in. The formula was a little bit tricky on this guy, which is why it took so many coats to have the polish not look streaky, but the end result was definitely worth it. & the top coat left the polish looking shiny & fabulous.

However, this time of year always leaves me craving matte nails, & Sally Hansen is releasing a BRAND NEW matte top coat, this time in their Miracle Gel formula! I am always impressed with how long I can get the Miracle Gel shades to last on my nails (especially when I’m so hard on my nails… that’s retail life for you!) So to say I was excited to see how well this matte top coat would last was an understatement.

Matte perfection.

In my original test run of this combo, I had my manicure last 5 days during Christmas craziness before any major chipping happened, which for a matte manicure is pretty impressive. There was the unavoidable tip wear, but as far as the whole nail it remained relatively intact. The only thing I did notice was that I seemed to have some cracks on the nail when I looked closely, but other than that it held up really well!

If you want to check out this new topcoat, Sally Hansen will be releasing this Miracle Gel Matte Top Coat in Canada stores this month & should retail for the same price as the other Miracle Gel shades.

Are you a fan of matte nails–are you excited to try out this new Matte Top Coat? Share your thoughts down in the comments below!

SWATCH SUNDAY — Zoya Yves

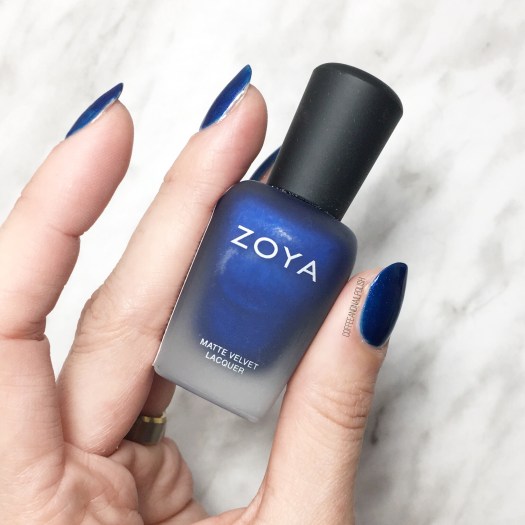
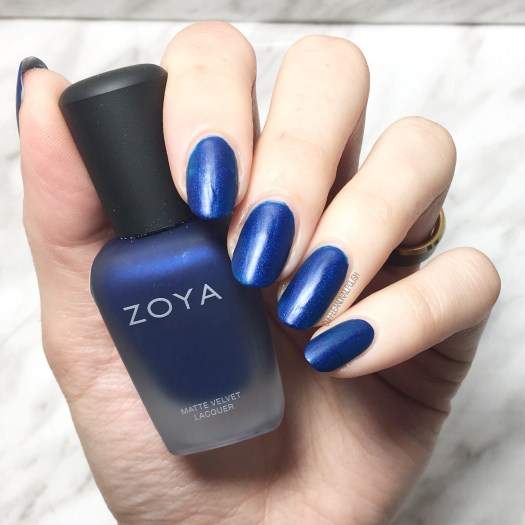
Happy Sunday my lovelies! Today’s post is a goodie–something perfect for these cooler Fall days. 🍁 Today I’m sharing a polish from the Zoya Winter 2015 collection called Yves. This beauty was found last Summer at my local Winners & has been sitting untouched in my Melmer, just waiting for the perfect opportunity to be worn. & what is more perfect that the beginning of Fall.

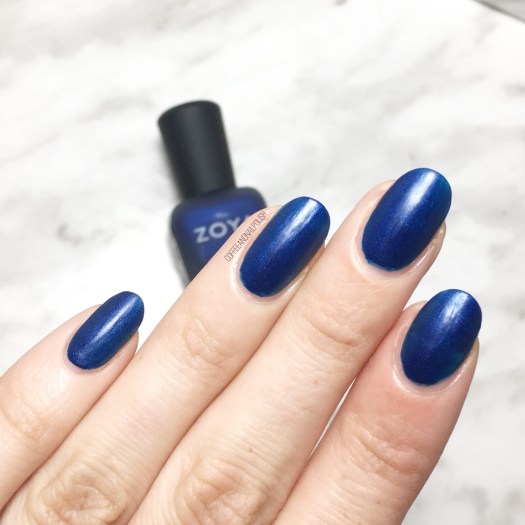
Yves is a sapphire blue matte polish with a scattered blue shimmer. For my swatches, I used two tricky coats, but I could have definitely gone with 3 as I had some bald spots that could have benefited from an extra coat. I also used 2 coats of thick base coat under my swatches as this is definitely a stainer. & nobody wants their nails permanently stained blue. (I’m already dealing with blue hair dye that doesn’t want to fade for me.)

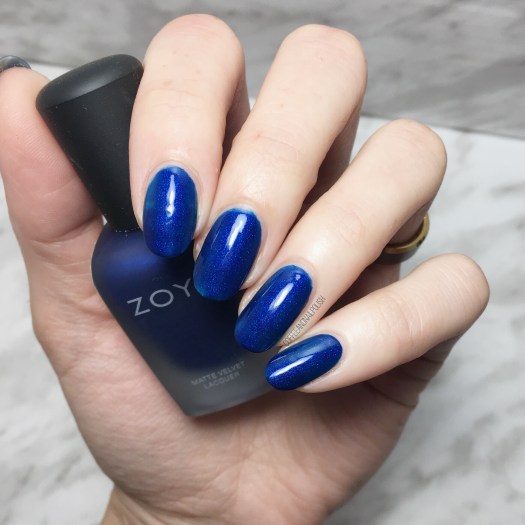
This polish is definitely gorgeous. & it’s been way too long since I wore just blue on my nails. I was quite impressed with how the polish dried down (to its satin matte finish) but I think I love it even more with top coat over top–you can really see that blue shimmer & it feels much more jewel like. Down below you can really see just how stunning it is with top coat (& just ignore those spots where I could have benefited from an extra coat of polish.)

& a close up to see those blue shimmers!

Zoya Yves is definitely a stunner, & I’m living for these jewel tones right now. 💎 Fall has me feeling all these dark shades I’ve been ignoring during Summer months & I’ve ESPECIALLY missing my darker shades. They’re just so good!

I found this shade at my local Winners, but if you need this polish in your life, you can pick up the beauty at NailPolishCanada.com as well as the Zoya Website. After googling the rest of the shades in the collection, I’m definitely going to need to pick up a few of the others. You can never have too many jewel toned polishes in your collection for Fall.

What do you think of Zoya Yves? What Fall Polish are you currently wearing? Let me know down in the comments below!