
Hello & Happy Tuesday! Sorry for the lack of posts this weekend–it was kind of a rough weekend & my motivation for posting took a hit. (Also I noticed the majority of my last post disappeared & I’ve been too frustrated thinking about having to rewrite it so I’ve been avoiding the blog. My bad.) But today I have a brand new post with something that has been seriously lacking in my life lately: chevron moons!
I’m calling these winter chevron moons because… it sounds cool? The colours just kind of give me that Winter vibe, so I thought it worked. Also I figured everyone might want to see something other than snowflakes.

 For this manicure, the polishes I used were:
- Base Coat: Nailtek 2 Foundations
- Top Coat: Seche Vive
- Nubar Queen
- Essie Parka Perfect
- OPI My Favourite Ornament
- URSUGAR Chevron Nail Stencils (I used the inner pieces.)
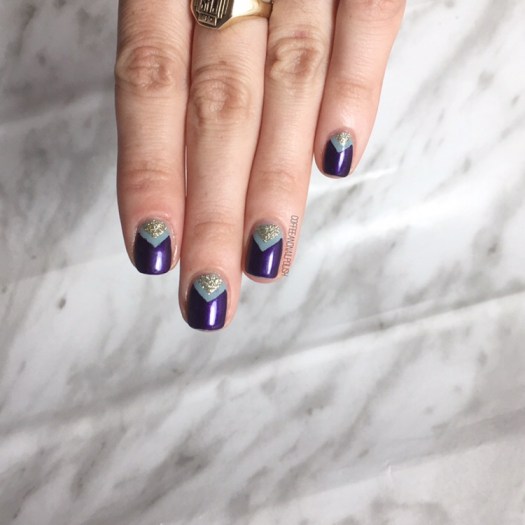
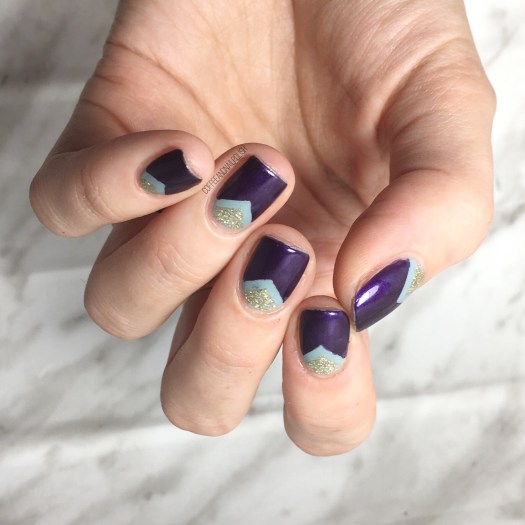
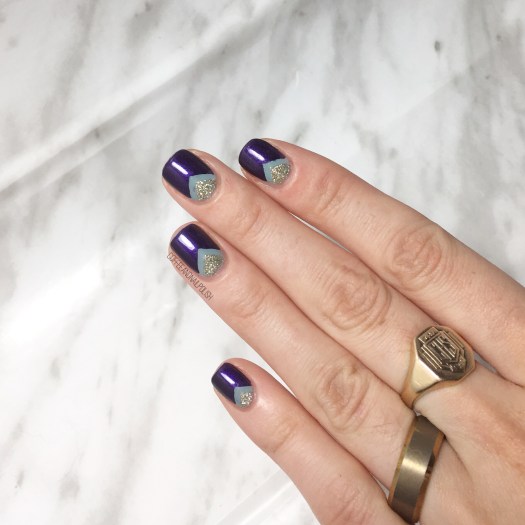
I love the combination of the pale blue, deep purple & sparkly gold. I thought this colour combo was a nice switch up from all the Christmas-y designs I’ve been doing, & features two of my favourite winter polishes: Essie Parka Perfect & OPI My Favourite Ornament. Every Christmas, this gold has to come out because the sparkle is just so perfect. ✨

For me, Christmas/Winter nails are all about the sparkle. These aren’t your typical holiday nails, but I think they would look fantastic with a pretty dress at a Christmas/New Year’s party, especially if you don’t want to resort to the classic Christmas shades. It’s all about the sparkle that makes it perfect. I’m so obsessed with Christmas party looks right now because I have no Christmas party of my own to go to. I just keep coming up with looks I would wear if I had somewhere to go (& then imagine what fancy dress sitting in my closet I would pair with it.)

What do you think of these chevron moons? Let me know your thoughts in the comments below!


 <<<<<<<<<<<>
 Sometimes I get really excited about how a manicure turns out & this is one of those times. This isn’t the first Christmas Tree/Tree Branch manicure I’ve attempted, but it’s definitely the best I’ve ever done. I’m just so beyond in love with how it turned out.
 I love that you can see the individual needles on my “branches”. It reminds me of our own sparse little artificial Christmas tree. True story: it’s the same tree my parents used when I was a kid, & the box still has the K-mart sticker on it from when it was purchased. & K-mart left Canada in 1998 I believe, so this tree is at least 20 years old. Haha. But it’s okay because it’s well loved, full of memories & is still going strong all these years later.
 What do you think of this Christmas tree design? Do you have your tree up yet? Let me know your thoughts in the comments below!
