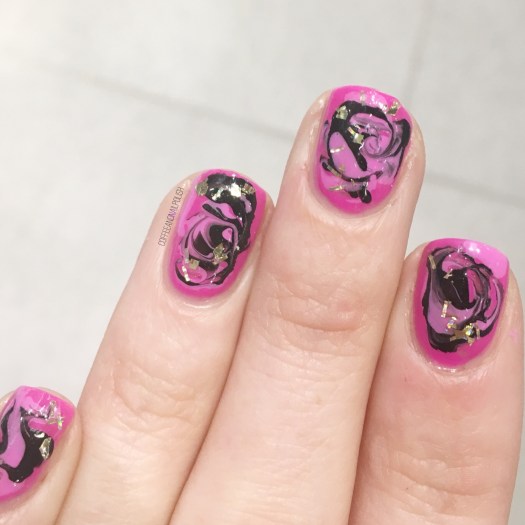
Good morning & happy Wednesday. Although we had a freak snowstorm Monday night, so my April is feeling more like a blah January. Never less, I decided that I needed to brighten up my day (& my nails!) & some neon coral chevron claws felt like a good start.
Anything to shake these snow day blahs. Seriously, it’s April. I need to be able to wear dresses on a daily basis.


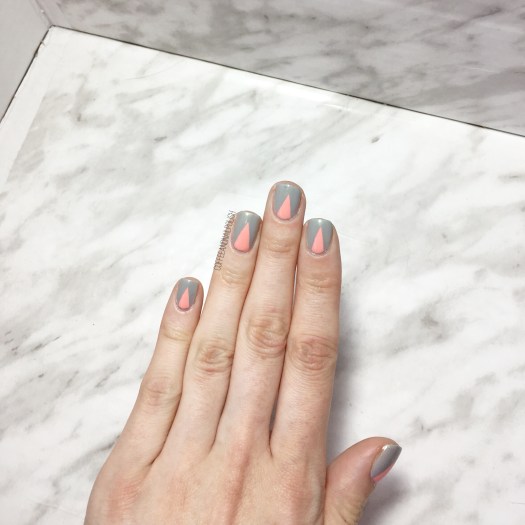
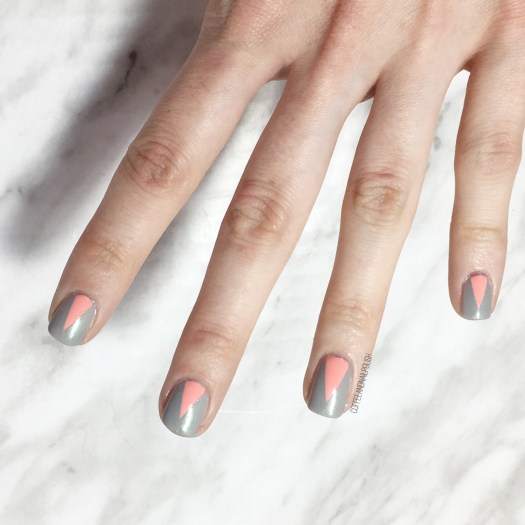
For this manicure, the polishes I used were:
- Base Coat: Nailtek 2
- Top Coat: Seche Vive
- Quo by ORLY Breathable Aloe, Goodbye
- Claire’s Nail Polish Sorbet Coral
- Snailvinyls Deep Chevron Vinyls (discontinued)
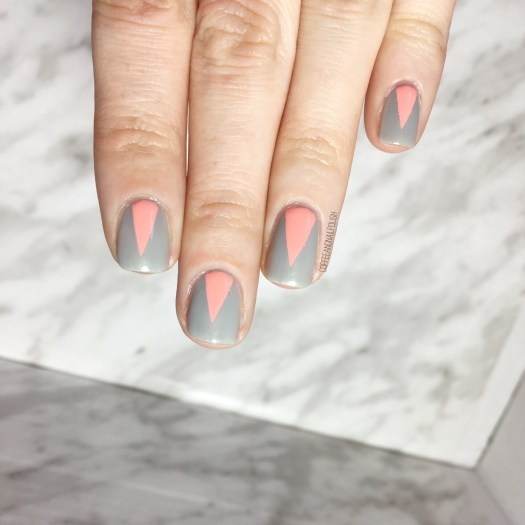
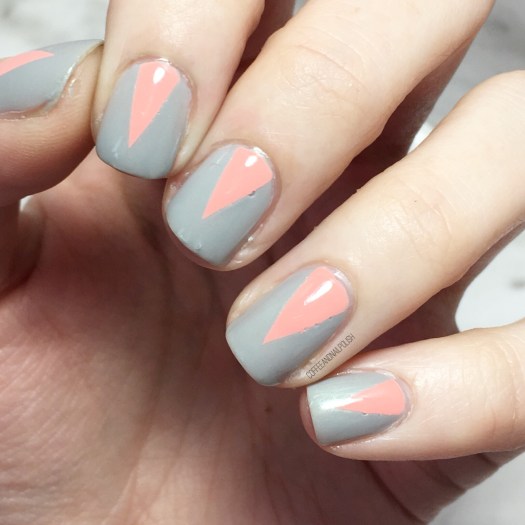
As you can see, there are a few bubbles around my coral chevrons, but that’s a result of the matte polish drying before I had a chance to remove the vinyls which left the polish lifted slightly, hence the bubbles. But oh well! I just love how these turned out! The pop of coral over the grey base really makes them stand out.

I seriously love this look & I love how easy it was. I used to use straight vinyls & line them up on my nails in order to make my claws, but these deep chevrons are so much easier & faster! Sad that SnailVinyls has moved on, but I do know What’s Up Nails & TwinkledT also have some deep V vinyls to make this look super simple.
what’s the weather like where you are? Is it feeling like Spring? What are you wearing on your nails right now? Share in the comments below!