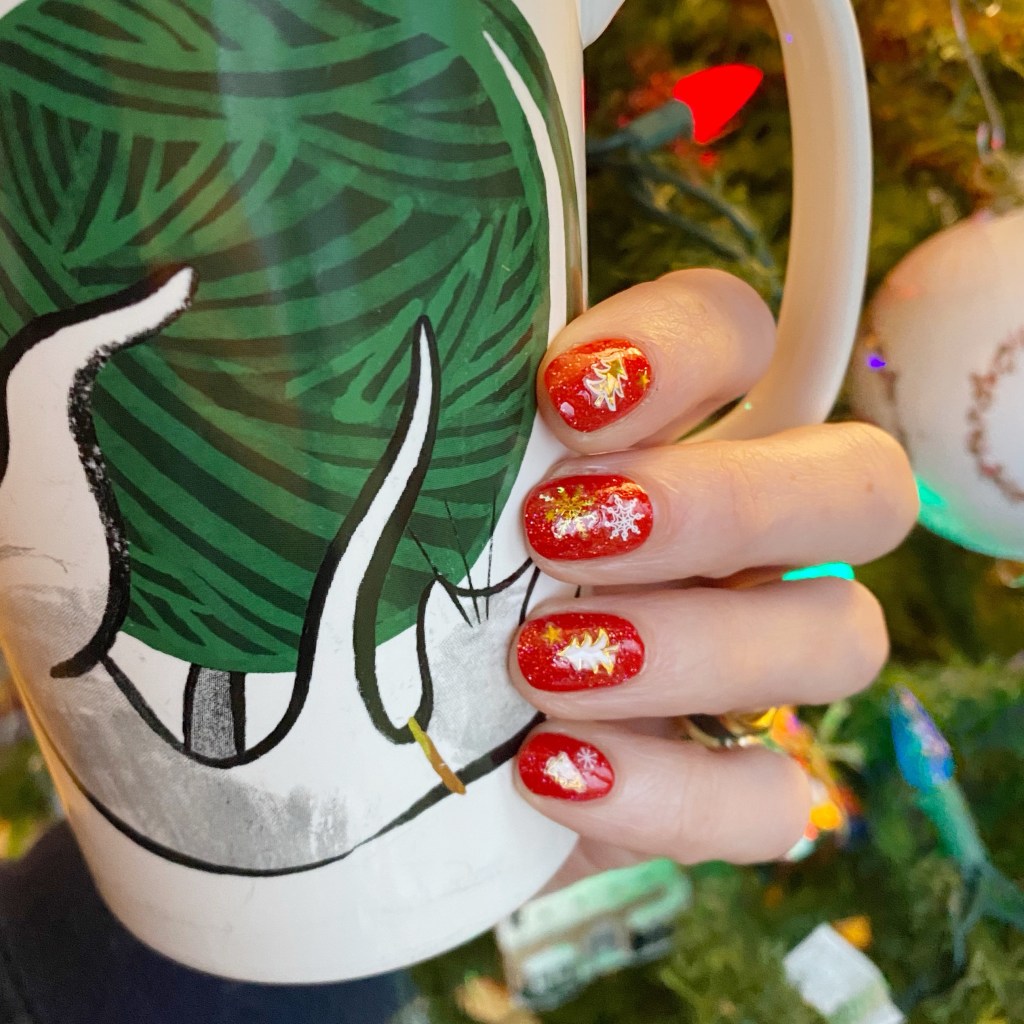
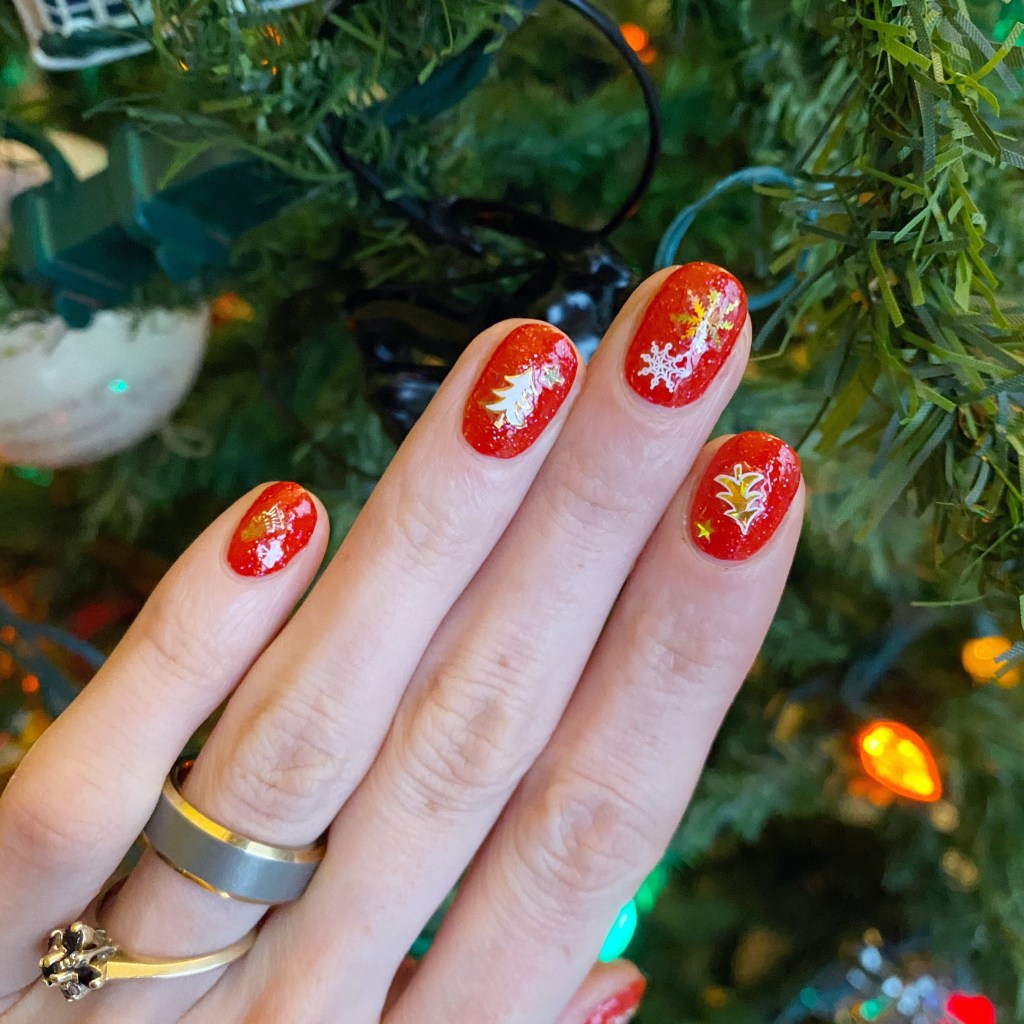
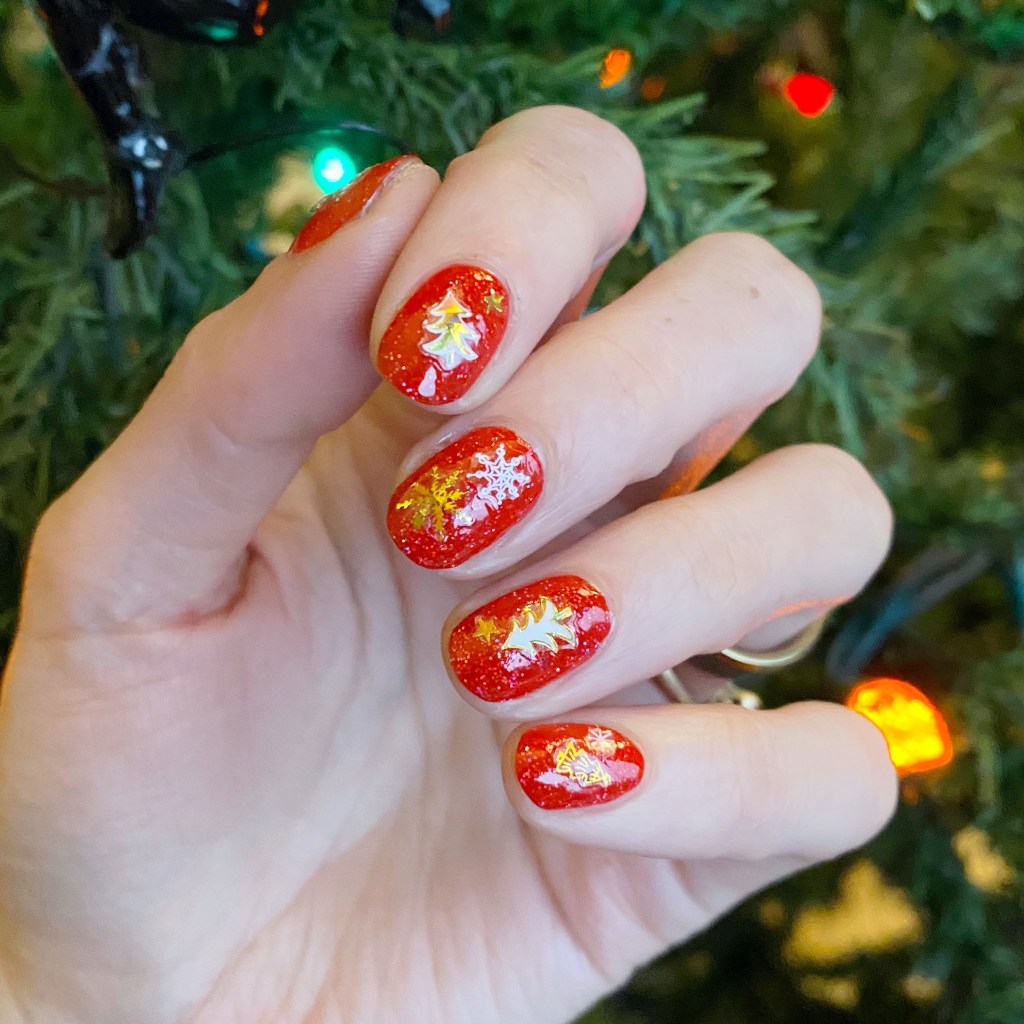
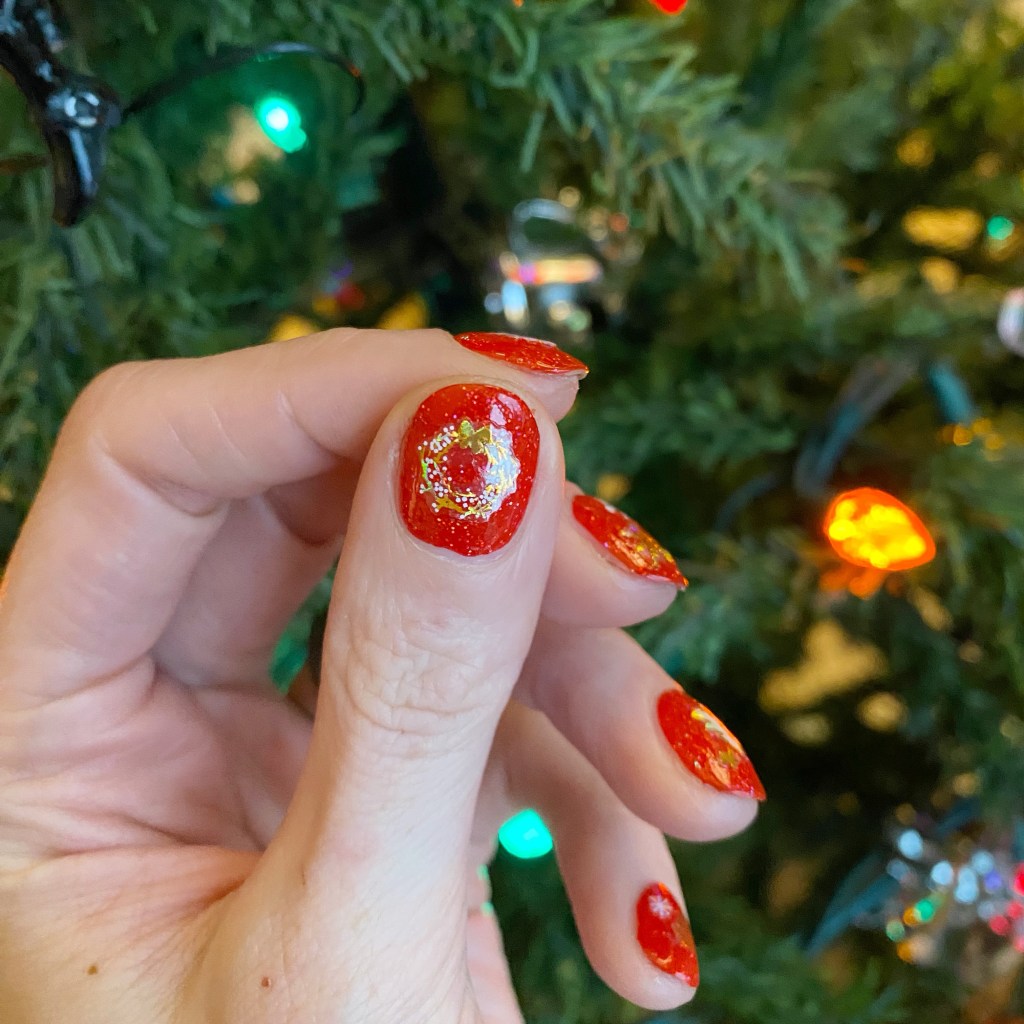
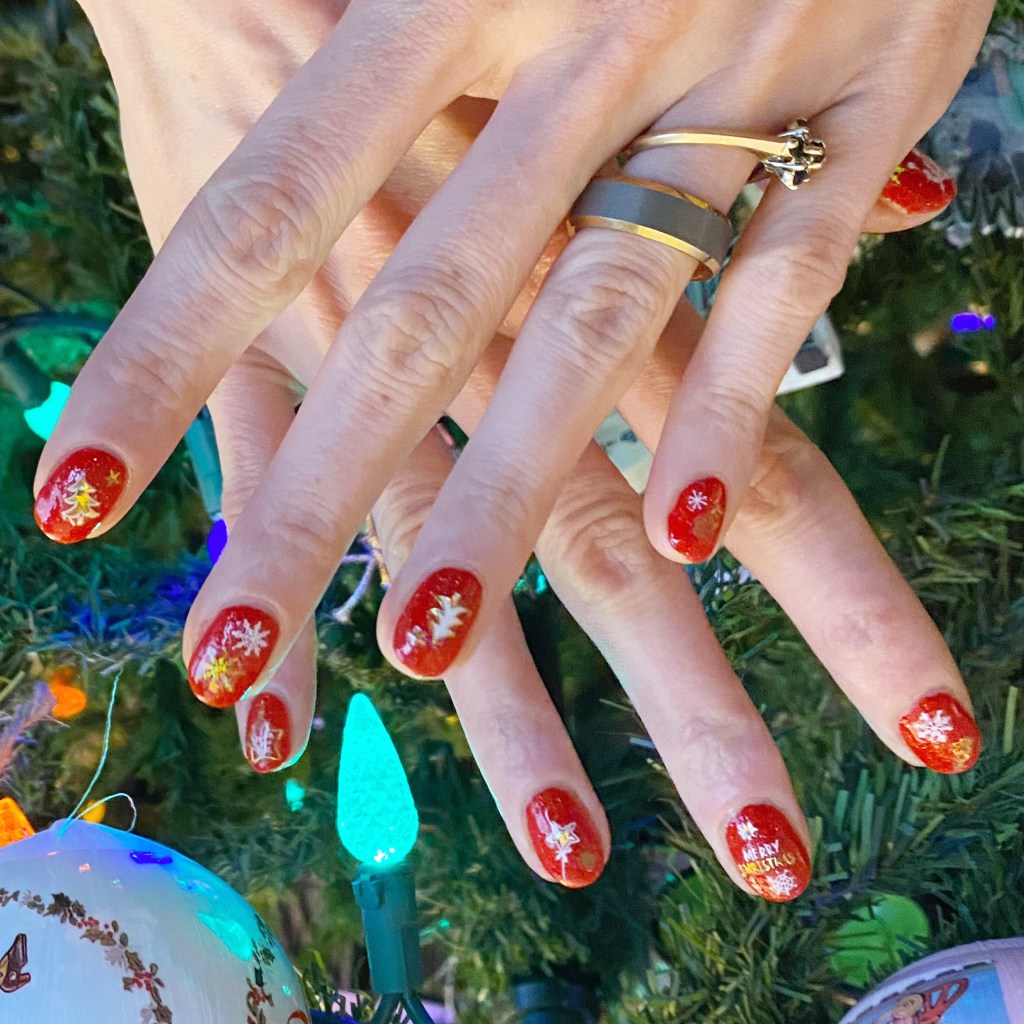
Good morning & happy New Year! 🍾🎆 It’s officially 2024 & I hope everyone had a safe New Years Eve. I’m very excited for things to come, but before we focus on a brand new year, I still have one more manicure from Glam Nails Challenge December to share!
The last prompt is New Year Celebration.


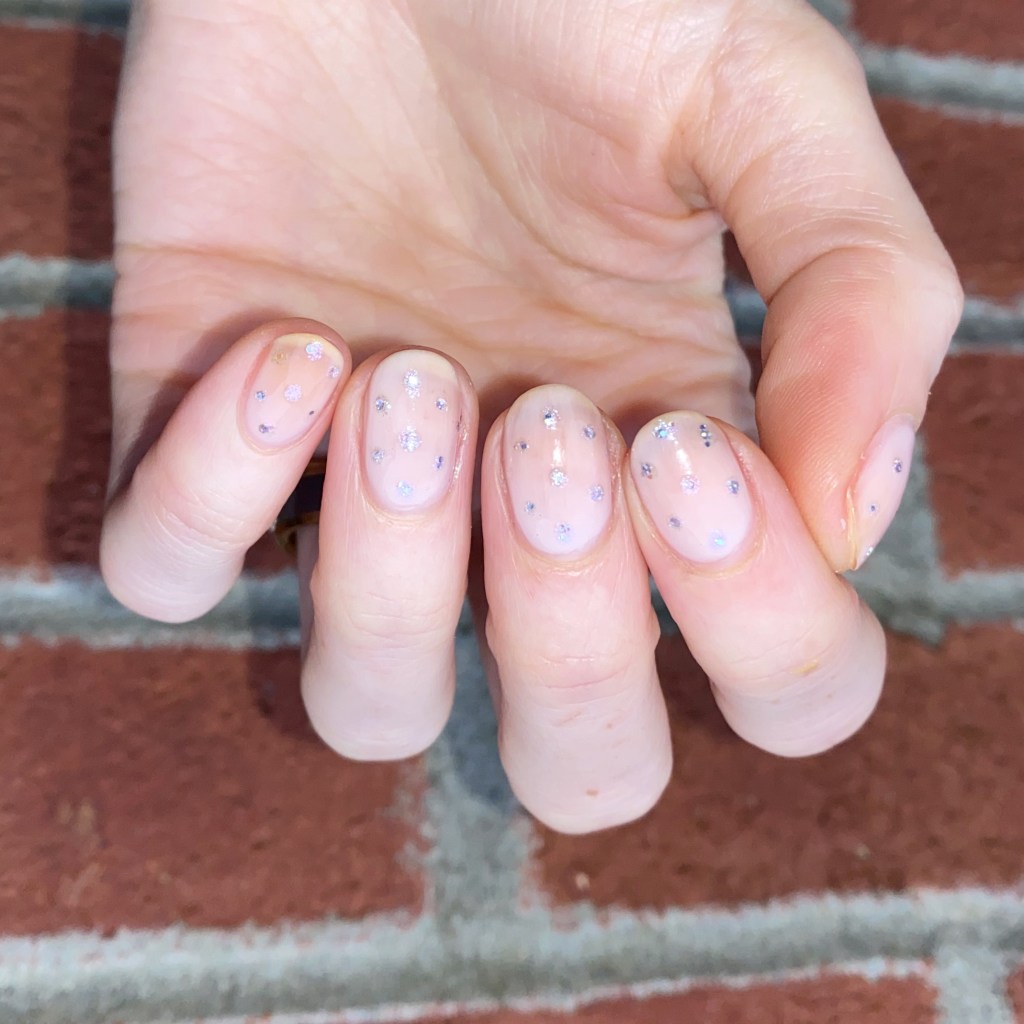
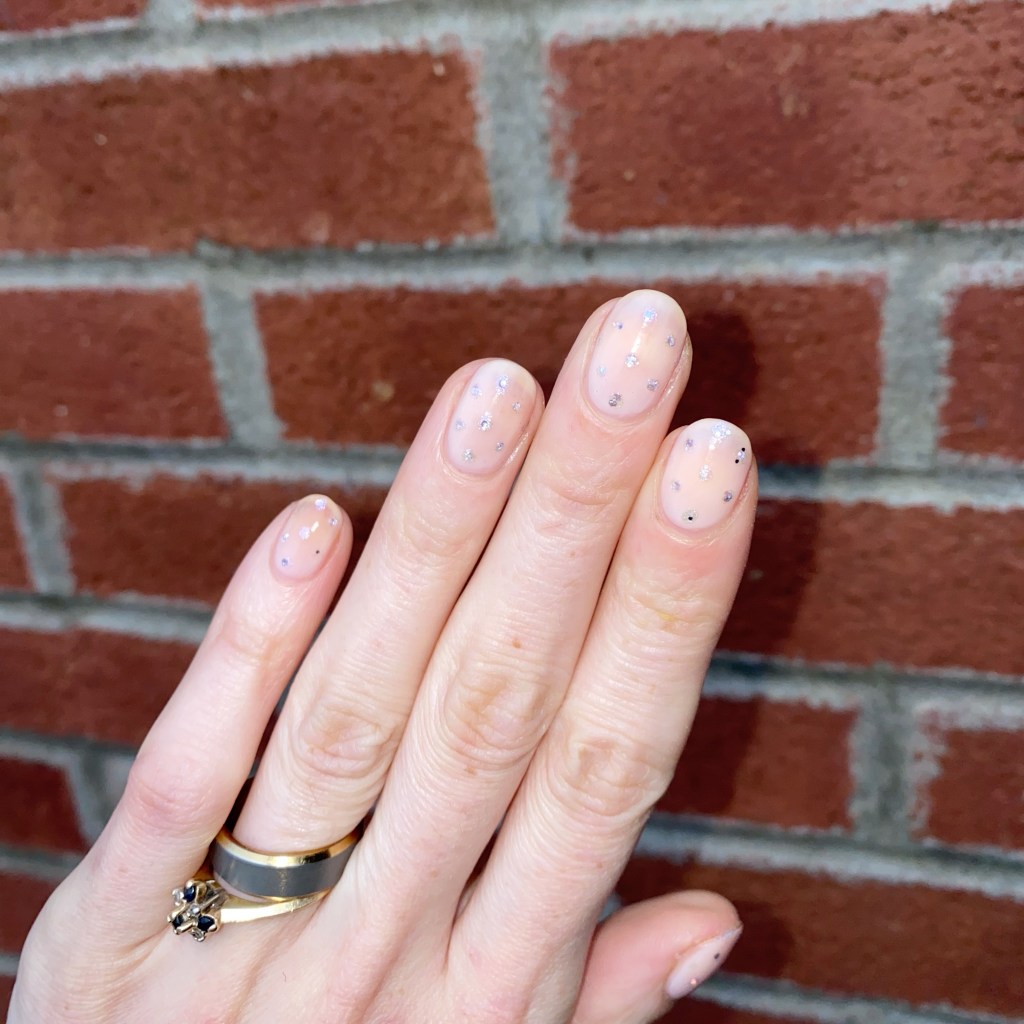
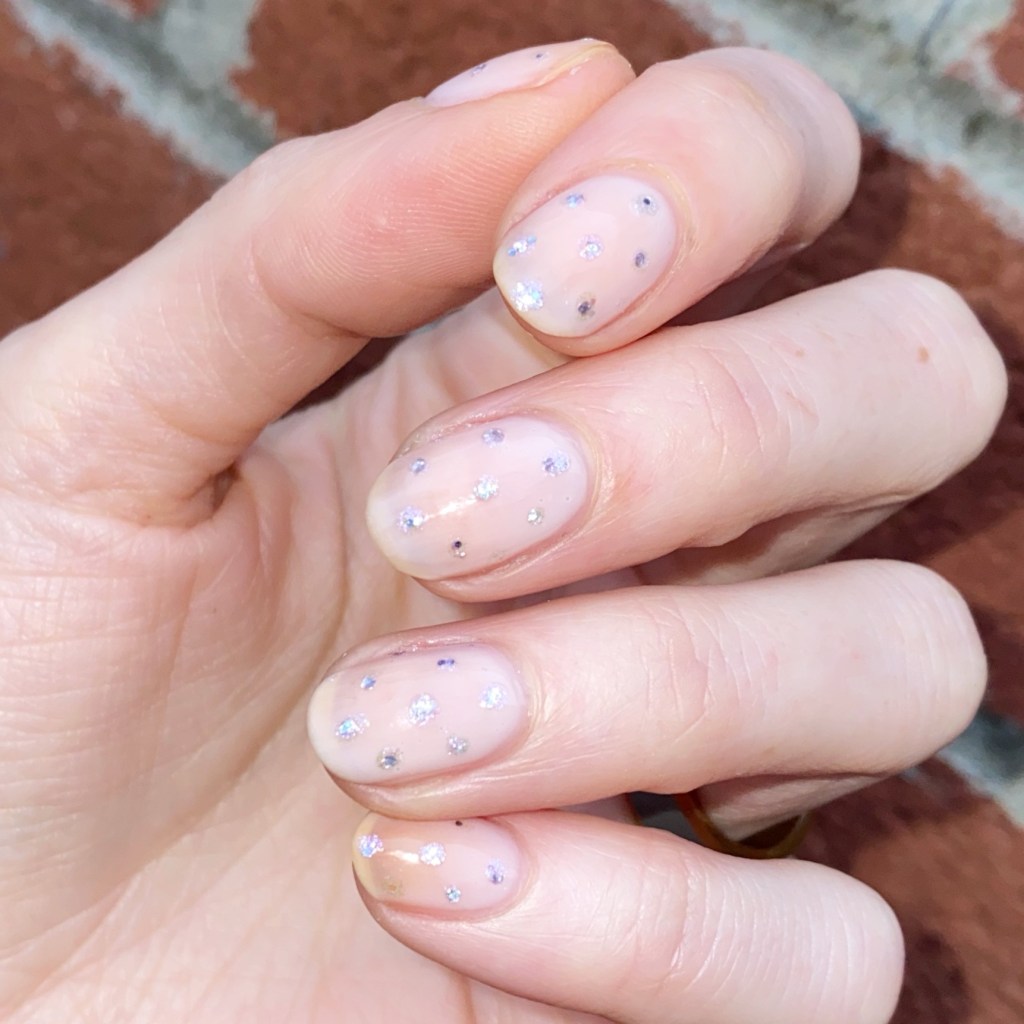
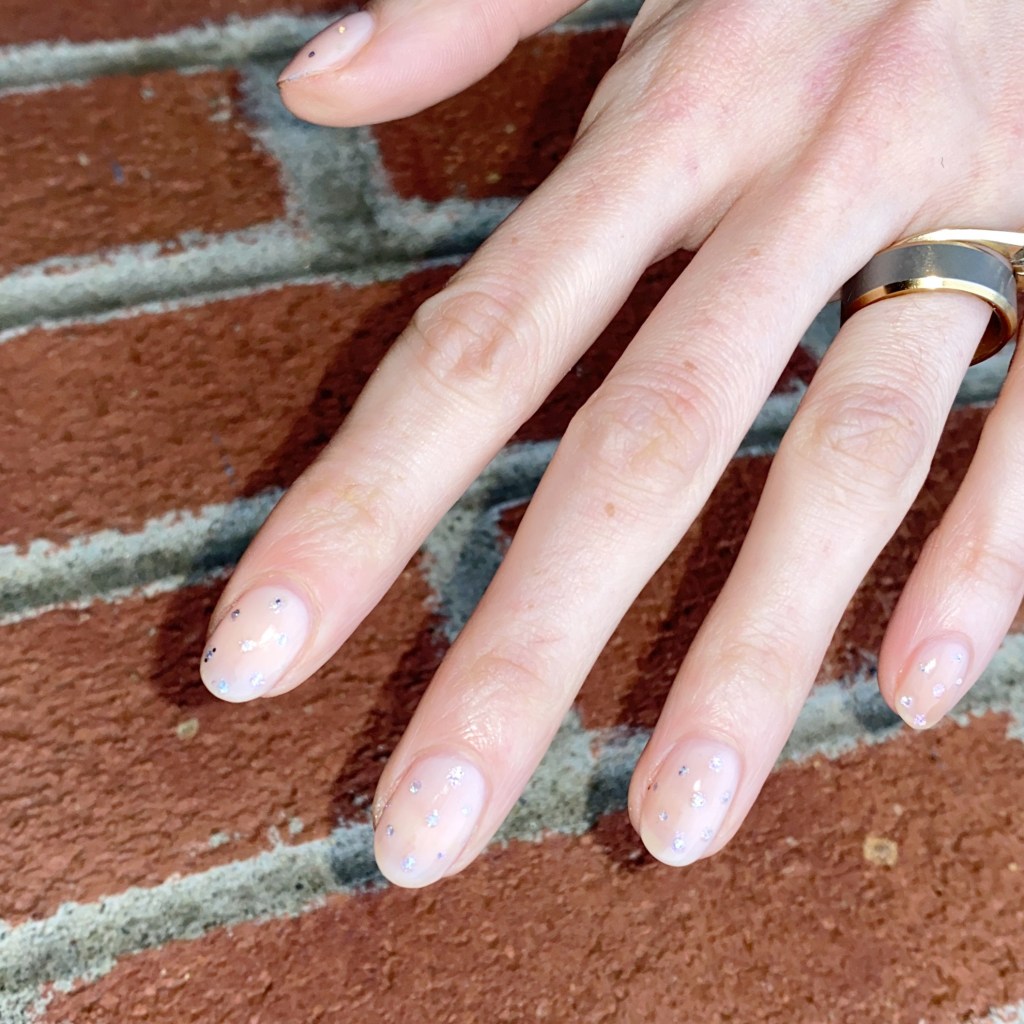
The polishes I used for this manicure are:
- Base Coat: China Glaze Calcium Gel Fortifer
- Top Coat: Essie Speed Setter
- Essie Make Spirits Bright
- Ardene Style Icon
- Sally Hansen InstaDri Ghouls Night Out
- Sally Hansen Miracle Gel Goldie Rocks
- Sally Hansen Complete Salon Manicure Let’s Snow
- Mermaid Tail 7mm liner brush
- NailStuff.ca Dotting Tool Trio


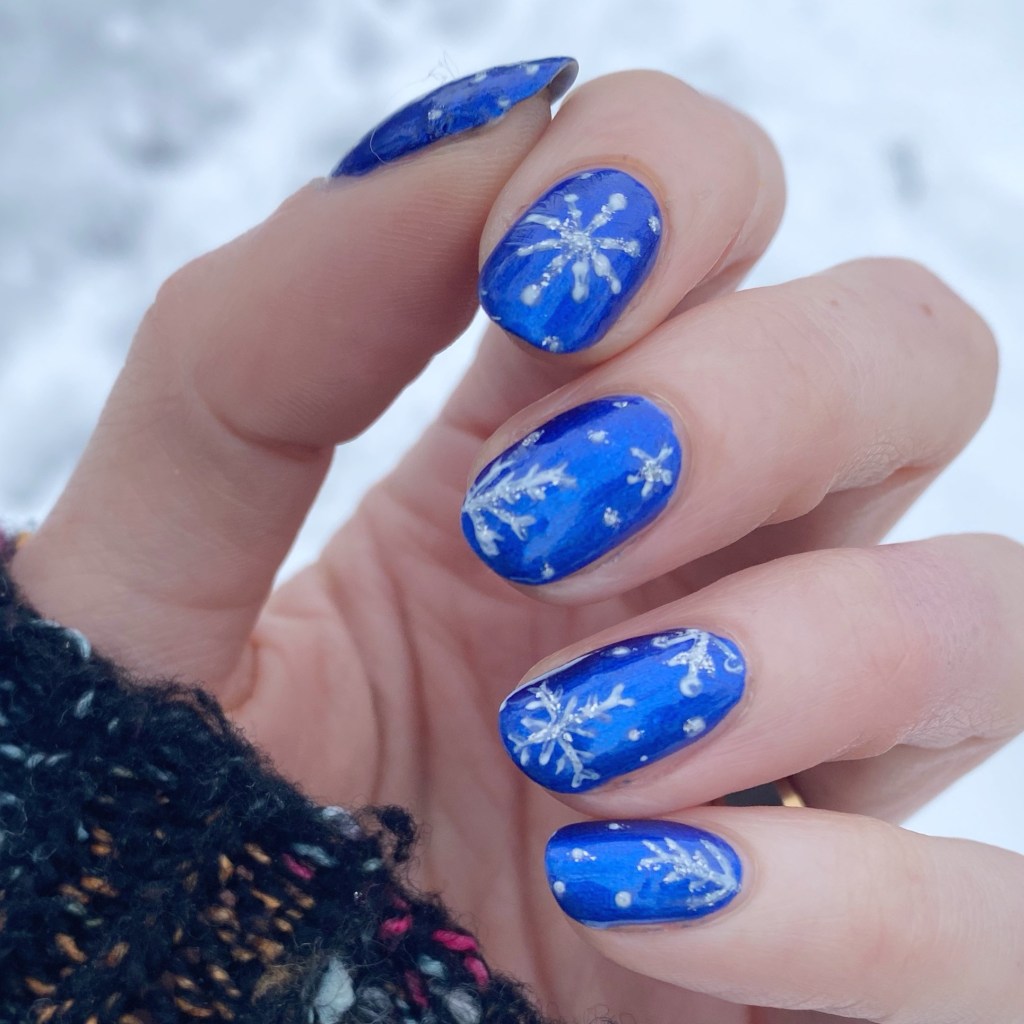
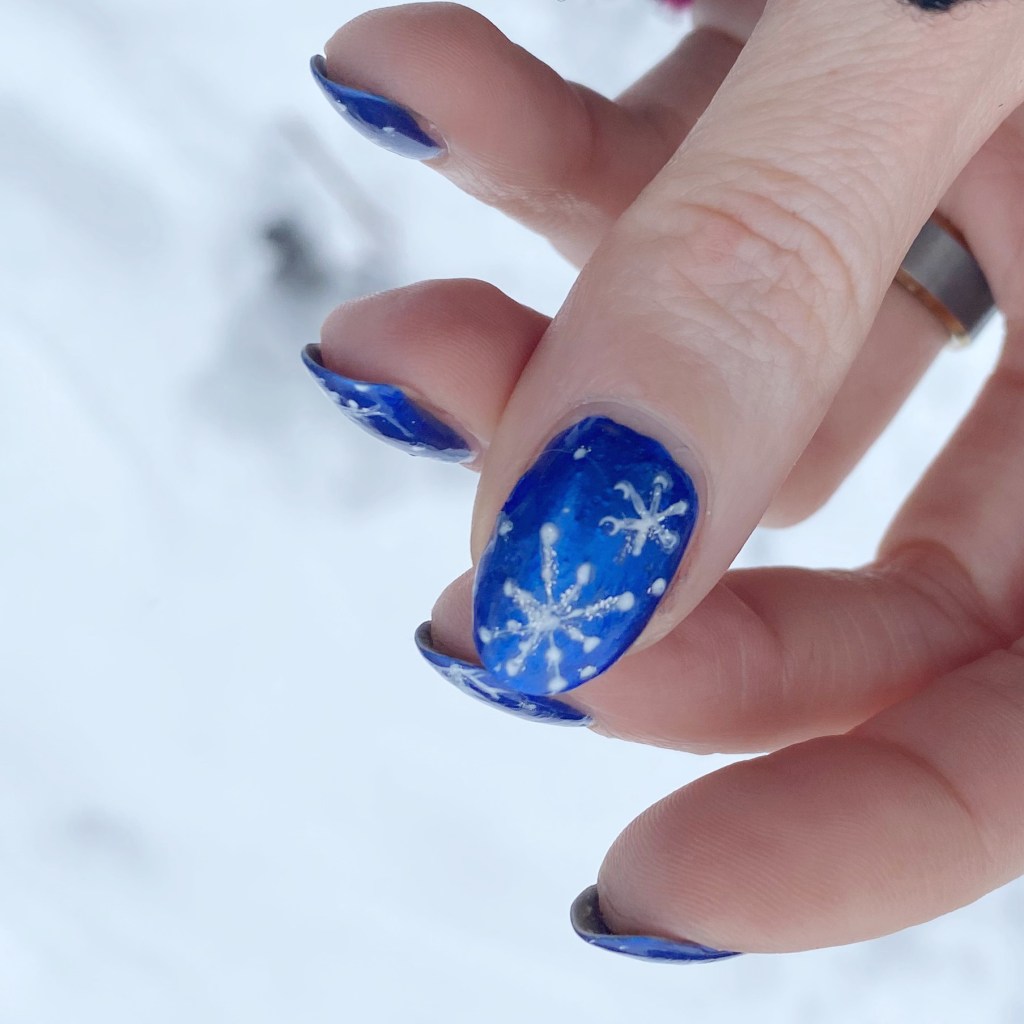
I really wanted to do a fun year inspired design, especially because 10 years ago I did a similar design for New Year’s Eve. Plus, I’m really hopeful for 2024. Last year had some rough moments for me personally, so I’m hoping that 2024 holds better things.
Obviously, I needed a lot of sparkle. & I added a little dotticure on my thumb to look like confetti.

What do you think of my New Year’s Eve design? Did you wear something sparkly to ring in 2024? ✨🍾
Let me know in the comments below!