GLAM NAILS CHALLENGE APRIL — Butterfly 🦋

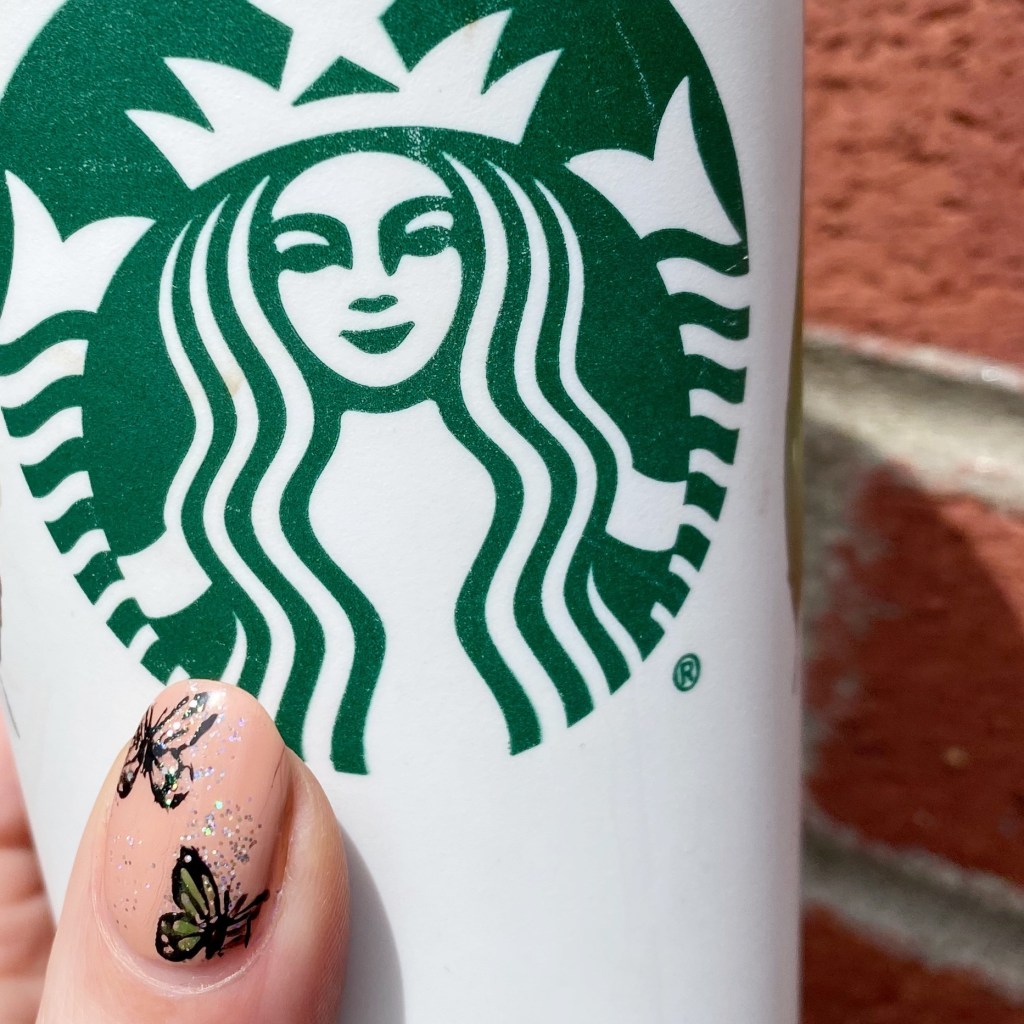
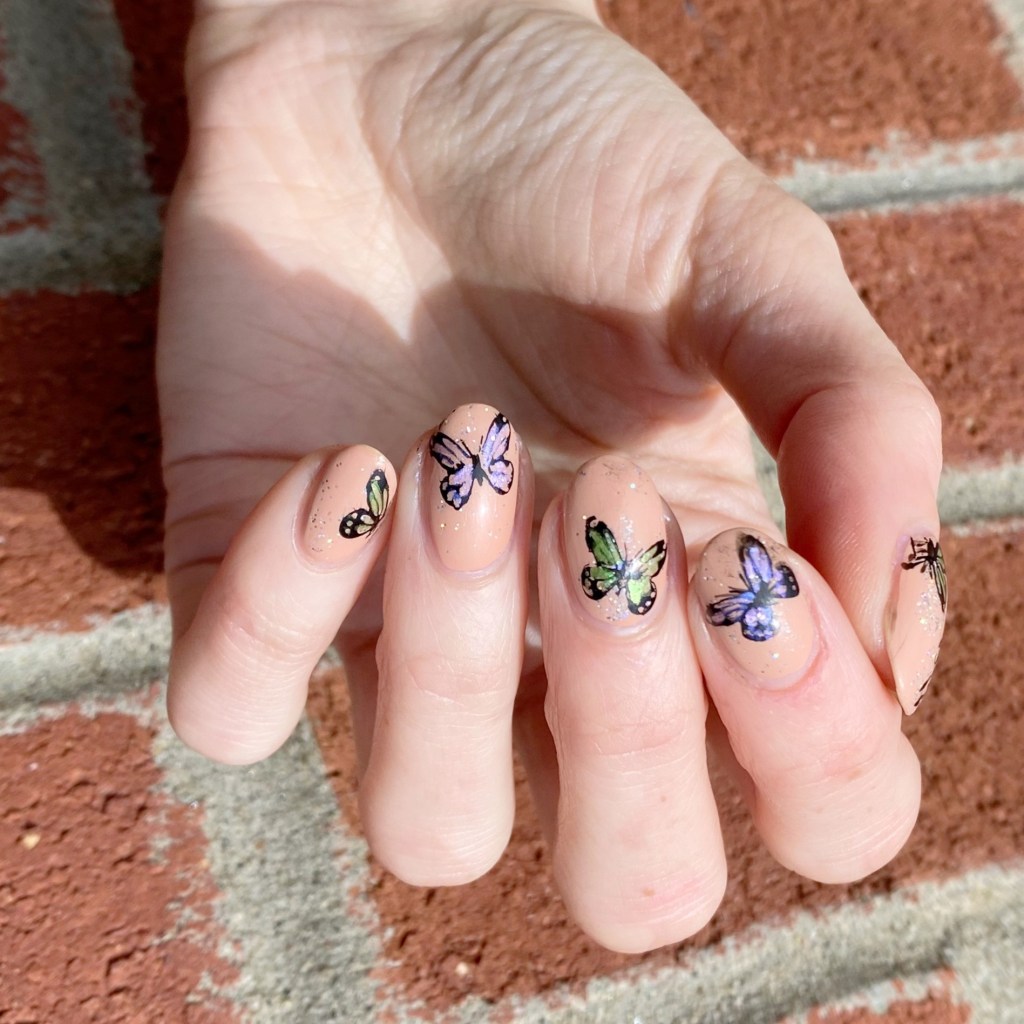
Hello lovelies & happy May 1st! Can you believe we’re almost half way into this year? It’s crazy. But before I jump head first into a new month, I want to finish off Glam Nails Challenge April with the last prompt — Butterfly.

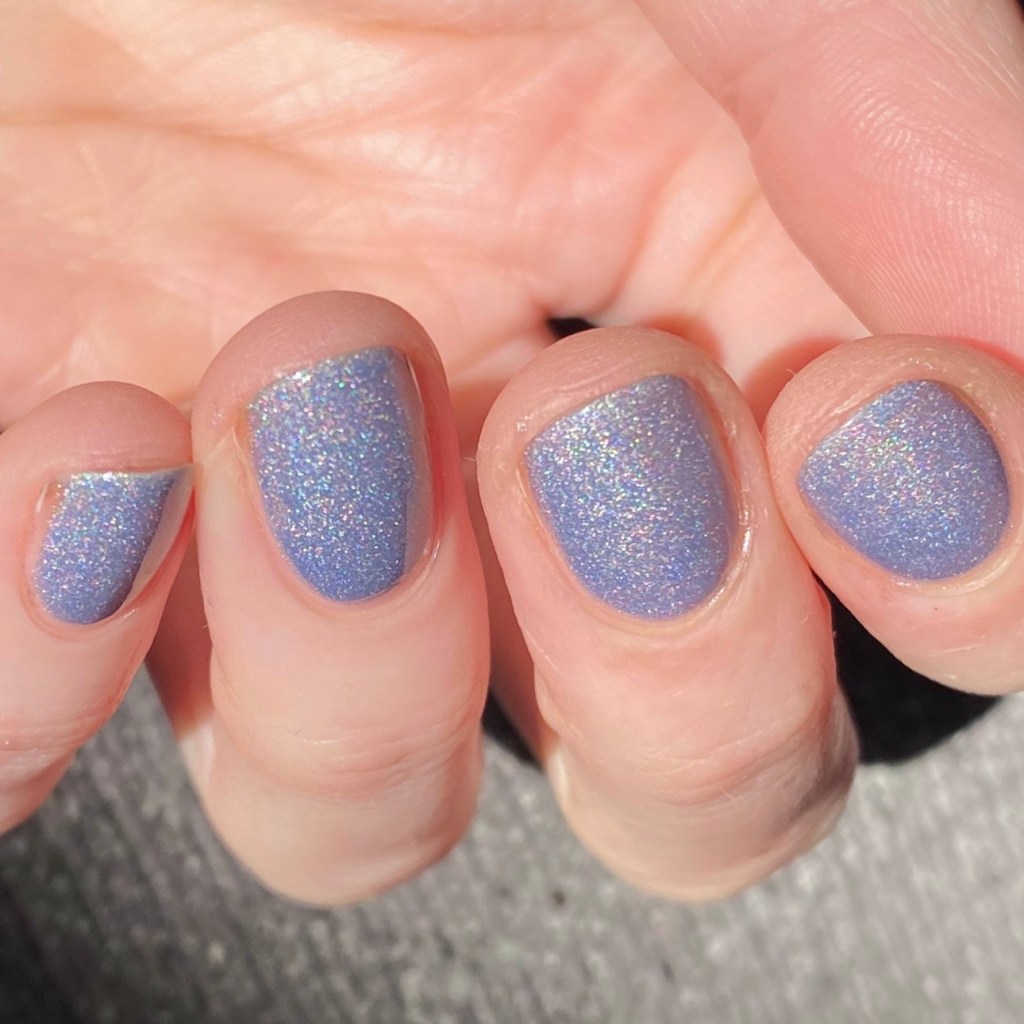
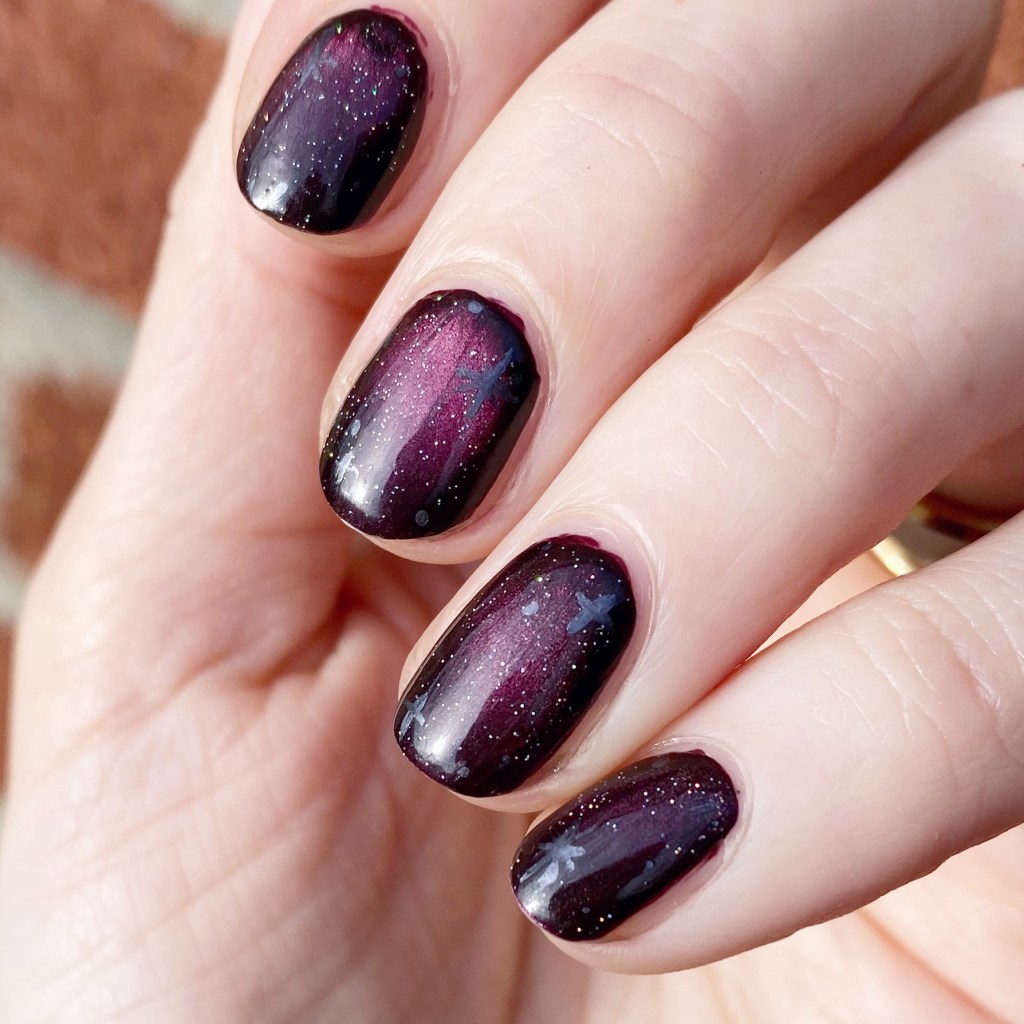
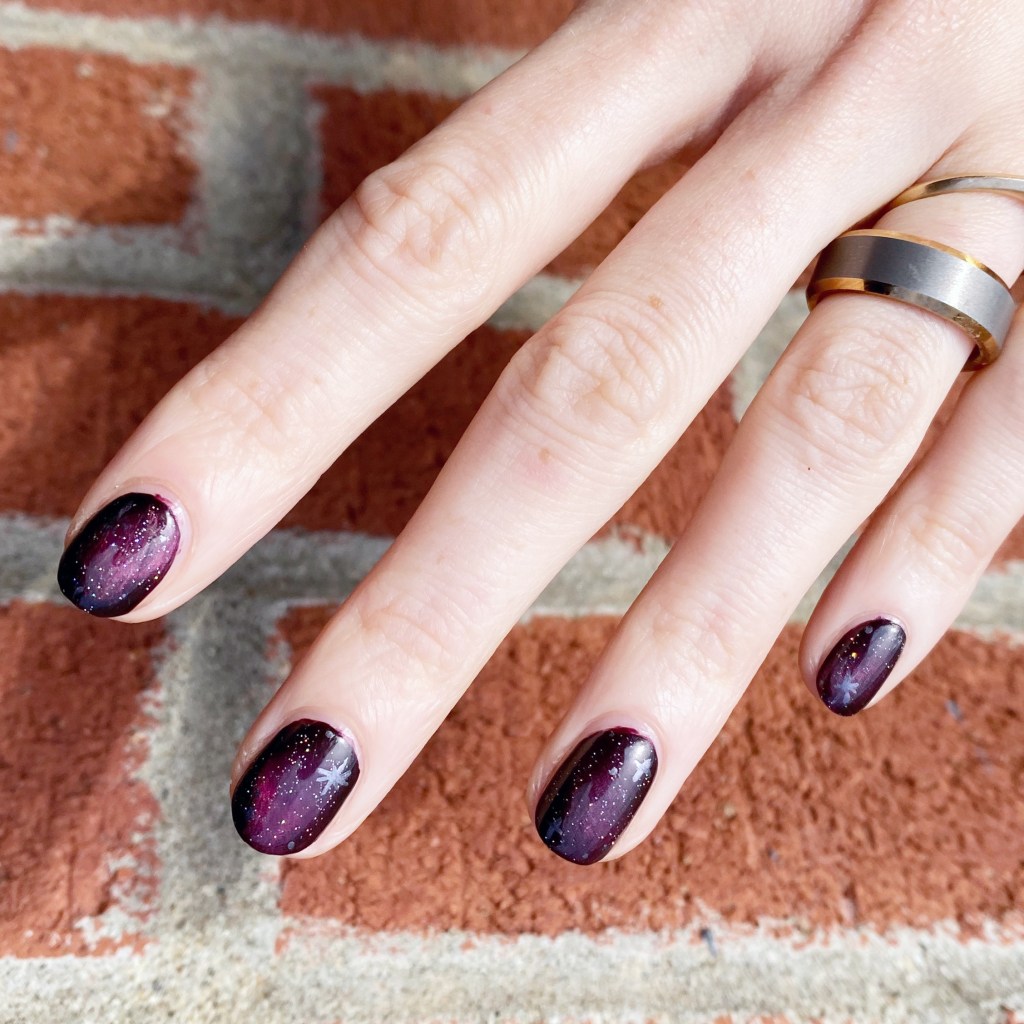
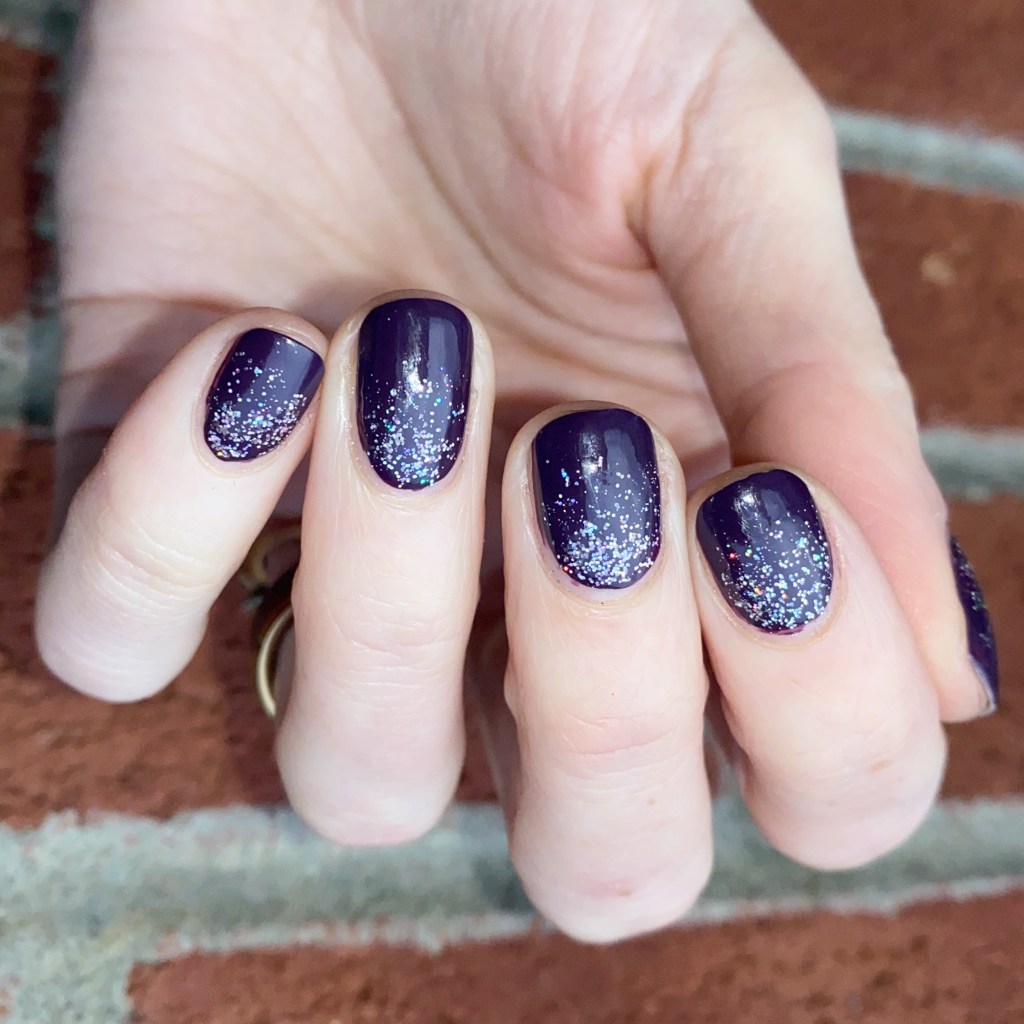
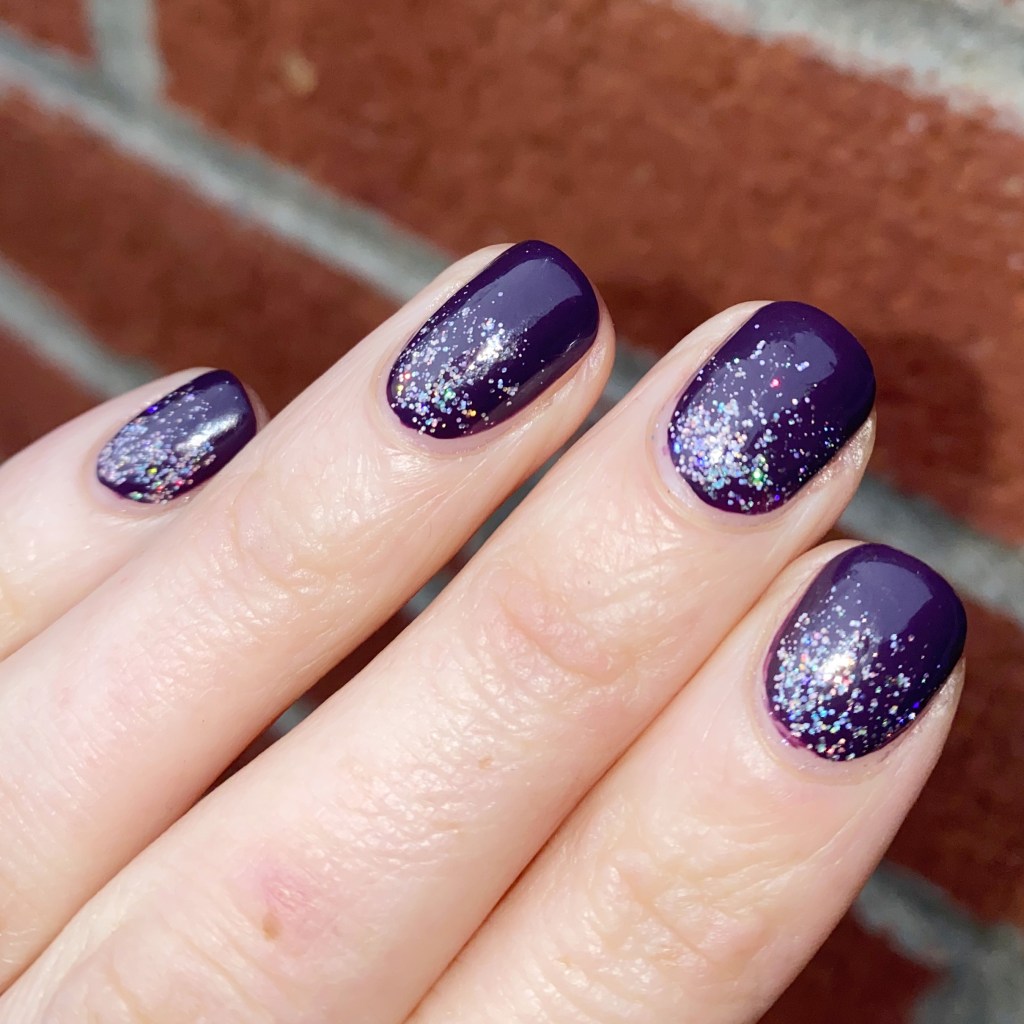
There were so many ideas that popped into my head with this prompt, but in the end I decided I wanted to do a neutral, almost naked, base with a little sparkle & shimmery butterflies. & I’m so beyond happy with the end result.

The polishes I used for this manicure are: 

  • Base Coat: Essie Hard To Resist Glow & Shine 
  • Top Coat: Seche Vive Fast Dry Top
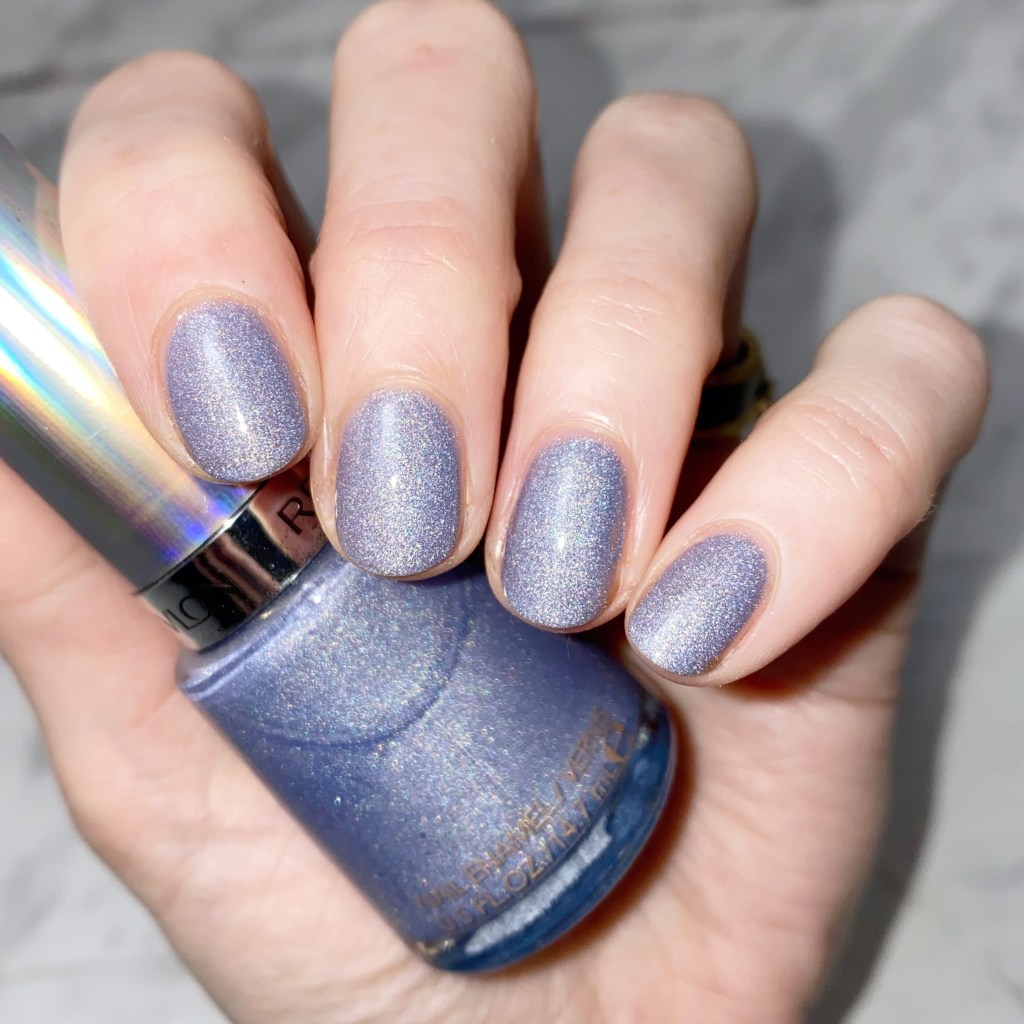
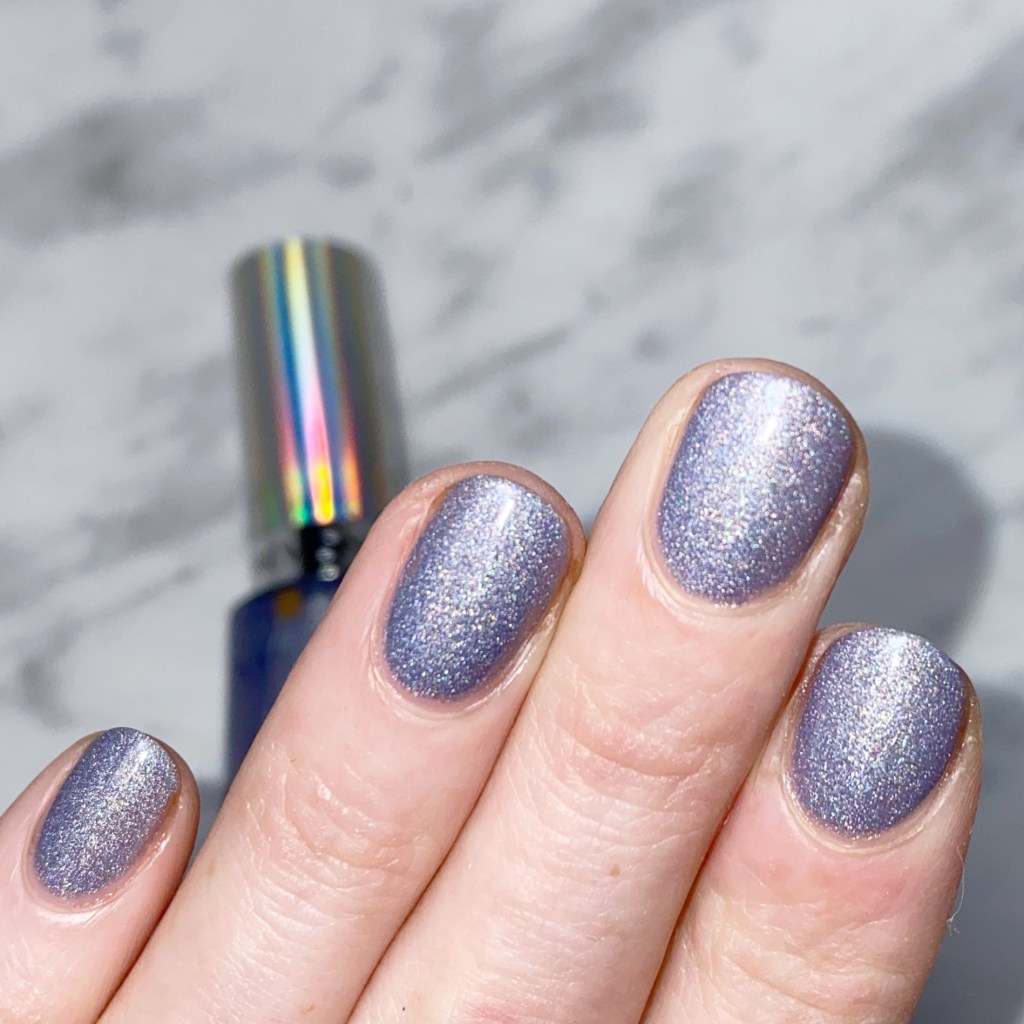
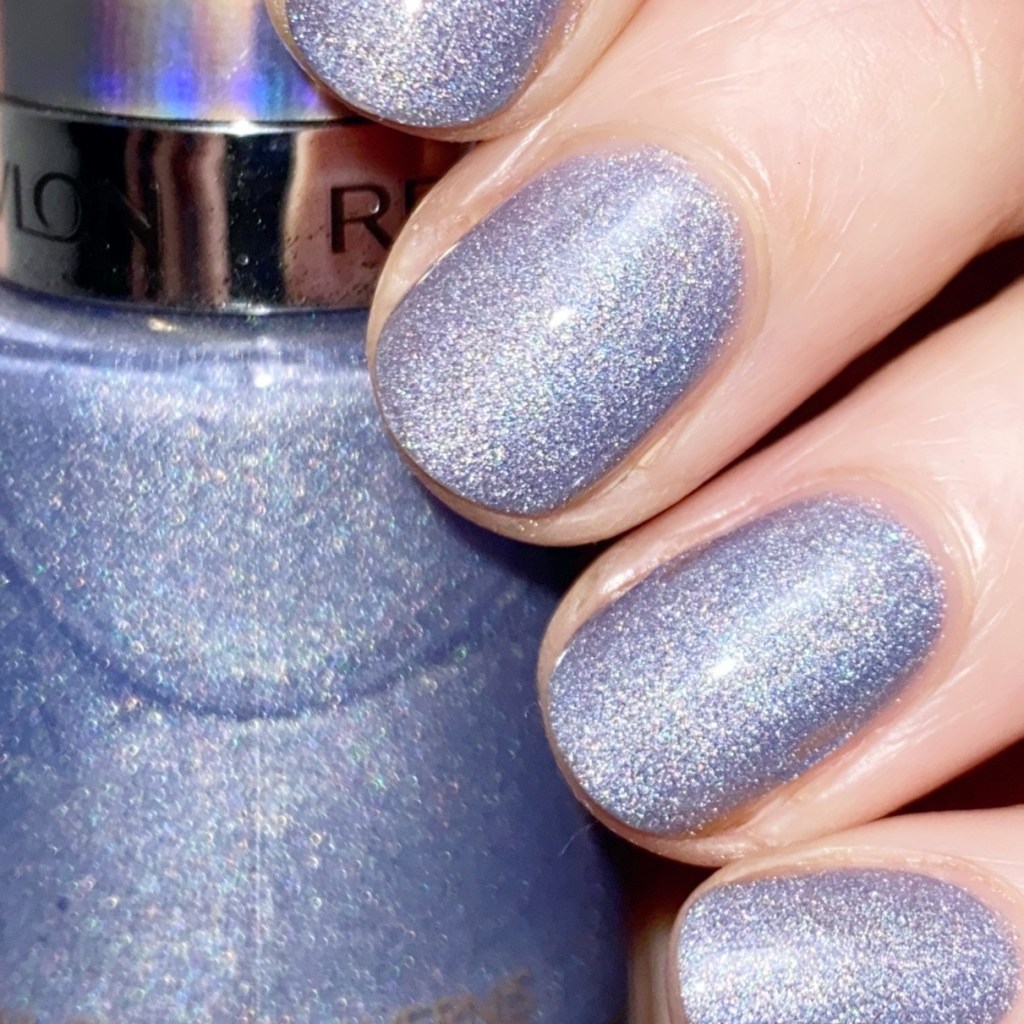
  • Sally Hansen Miracle Gel Frill Seeker
  • Color Club On The List
  • Starrily Vantablack
  • Essence Violet Voltage
  • OPI My Gecko Does Tricks
  • Nailstuff.ca clear stamper & scraper set
  • Unknown stamping plate (which I bought as part of a set at Dollarama years ago.)

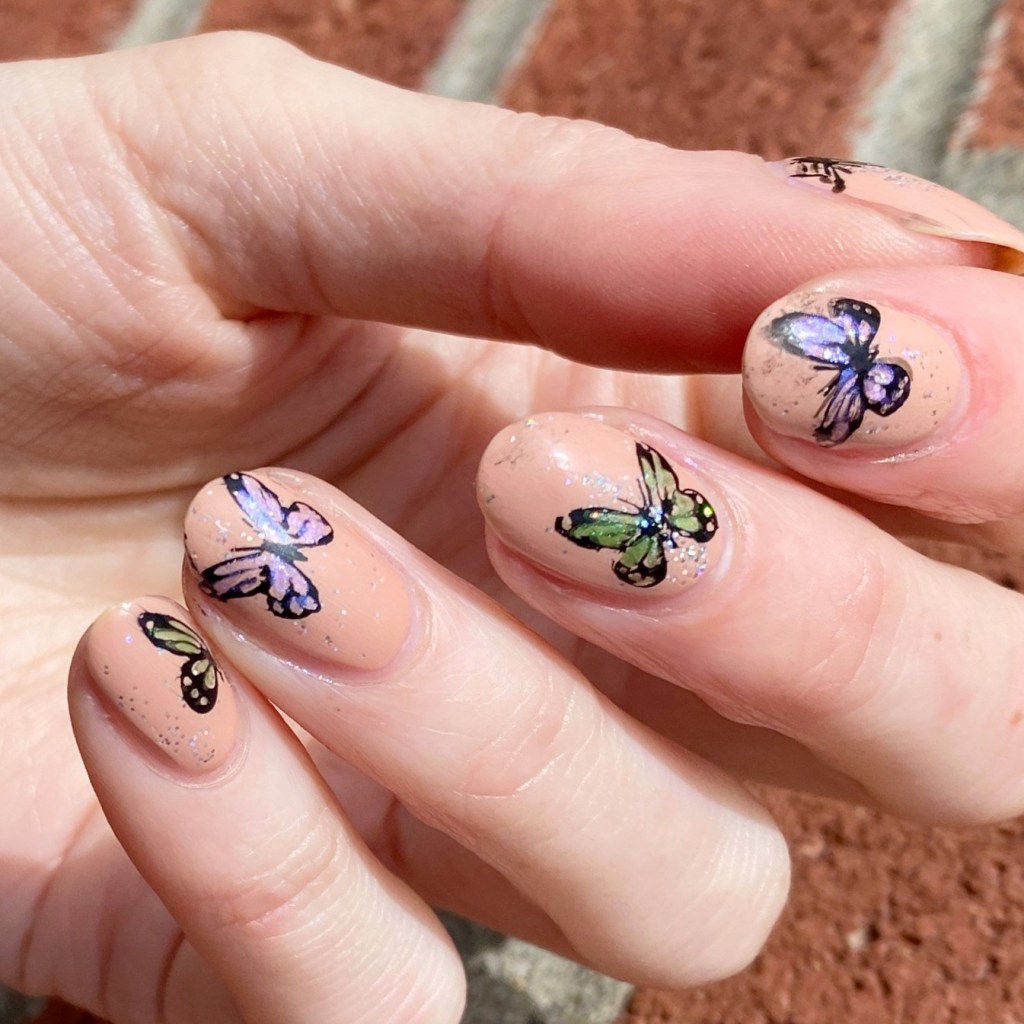
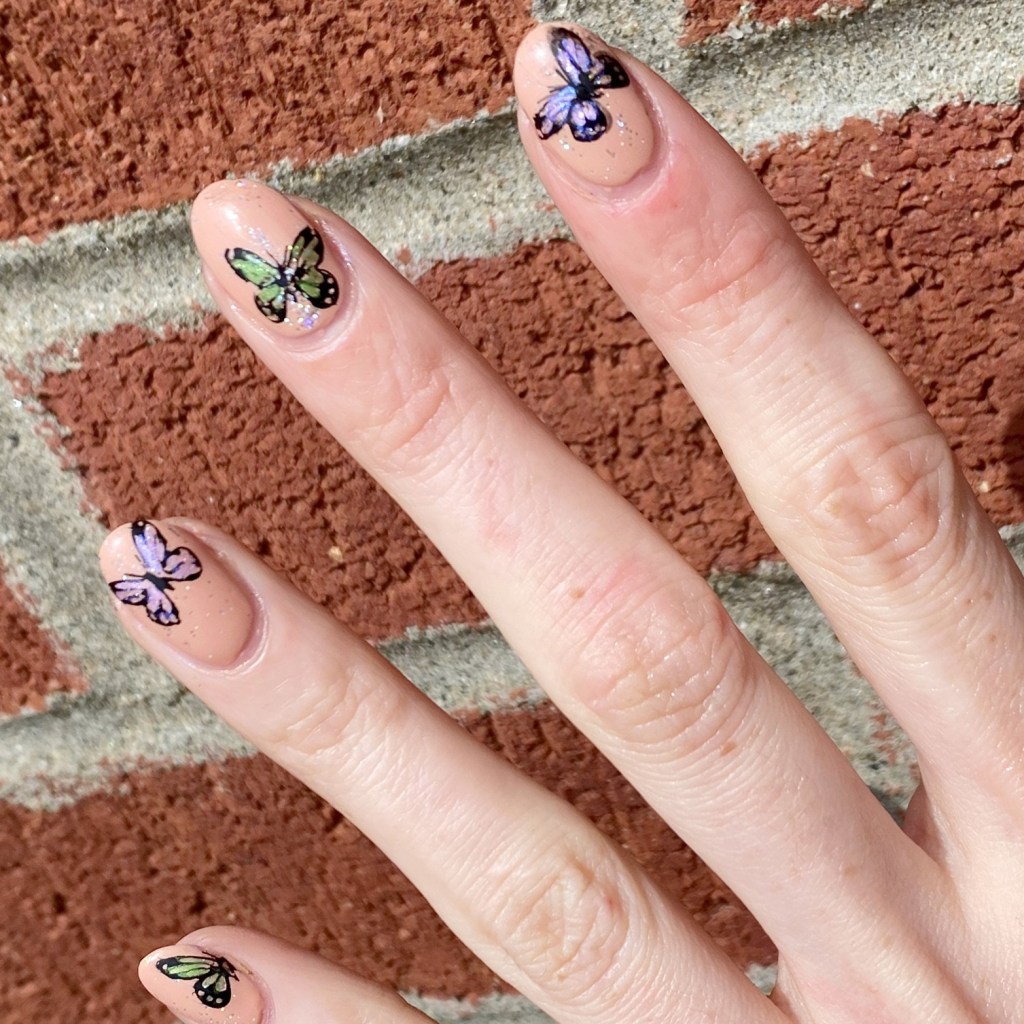
How pretty did these turn out. I just knew I wanted my butterflies to have a little bit of colour & I adore the shimmery purple & green together. It’s a very pretty combination. Works very well with the little bit of holographic glitter on the base shade. It’s subtle but also eye catching at the same time.

I’m kind of obsessed!

I can’t believe another month is behind us! Kind of crazy. I had so much fun with the challenge this month, & I hope you enjoyed all the manicures too!

Did you have a favourite design? Let me know in the comments below.

Happy Monday!

GLAM NAILS CHALLENGE APRIL — Rainbow 🌈

Hello lovelies & happy Monday! I hope your day is starting off beautifully. Today I’m in a great mood because I’m sharing another beautiful manicure for Glam Nails Challenge April.

& what is the next prompt? Rainbow 🌈

The polishes I used for this manicure are: 

  • Base Coat: Essie Hard To Resist Glow & Shine 
  • Top Coat: Seche Vive Fast Dry Top
  • Holographic Top Coat: Starrily Eclipse
  • Sally Hansen InstaDri Cerulean (pinky)
  • Sinful Colours Fitspo
  • OPI Nature Strong Make my Daisy (middle)
  • Sally Hansen Complete Salon Manicure Fiery Island (pointer)
  • Essie Too Too Hot (thumb)

How pretty is this rainbow? I thought about hand painting a rainbow, but there is just something about a skittle design. I totally could have freehanded little white ‘s’ in the middle of each nails, & they would have been legit skittles! Simple, but effective.

Also the kiddos loved the look so much, they asked me to give them both rainbow nails! So here is a bonus shot of their fun rainbow nails. Even though I sometimes get a little on edge painting their nails — mostly because they hate sitting still — I do adore anytime they ask for me to paint their nails!

What do you think of these rainbow nails? Are you a fan of a rainbow skittle look? Let me know down in the comments below!

& just for fun: what is your favourite skittle flavour. I’m controversial because I will die on the hill that the green apple skittle was the best, especially in sour, but I know not everyone shares that opinion.

Have a lovely Monday!

SWATCH SUNDAY— Revlon Unicornicopia

Hello lovelies & happy Sunday! It’s a beautiful sunny Sunday here which only means one thing — let’s wear some holo. I was digging through my nail polish stash for this week’s Swatch Sunday, & decided to take a peek into my Revlon stash. There was a few polishes in there I’ve realized I bought, but never worn, but the one that really caught my eye was Revlon Unicornicopia.

3 coats, no top coat.

Revlon Unicornicopia is a beautiful liner holographic lavender that was originally released in 2017. The formula is a bit thin — I needed 3 coats for full coverage — but I found it dries quickly. I had no issues with the coats pulling when you apply another, something which I’ve found with other holographic shades.

The sparkle is quite pretty, & I like the pale lavender shade it has. It’s almost pastel, which obviously makes me feel Spring vibes (yes… still). We still be digging out from a big snowstorm on Friday, but that doesn’t mean I can’t still be dreaming of Spring.

& obviously I needed to show off a sun shot of this holo. The liner holo definitely shows up better in the sunshine than under my daylight bulb with camera flash. Both are gorgeous though! & I’m really glad I finally pulled this shade out. It deserves its day in the sun.

What do you think about Revlon Unicornicopia? Do you love this beautiful lavender holo as much as I do? Do you have any of the Revlon Holochromes in your stash? Let me know in the comments below!

Have a lovely Sunday!

Easy Galaxy Nails ( With Magnetic Polish)

Hello beauties & happy Thursday! We’re almost one full week into 2023 & its kind go crazy to think about. & it actually looks like Winter today, which I think is the first real snowfall we’ve had so far that wasn’t more than a dusting. Now if only it could have come like 2 weeks ago before Christmas, haha.

Today we’ve got our second nail art look of the year.

I’ve recently been going through my stash, looking at old shades I haven’t touched in a while. We all know magnetic polishes are having a serious moment right now on Instagram, so I decided to pull out one of my old school magnetic shades from China Glaze to test it out with the Starrily magnetic I got from NailStuff.ca & see what kind of effect it would have on it. & from that, I realized how perfectly it would be as a base for a galaxy design! So here are my super easy magnetic galaxy nails!

The polishes I used for this manicure are: 

  • Base Coat: Essie Hard To Resist Glow & Shine 
  • Top Coat: Seche Vite Fast Dry Top Coat
  • China Glaze Magnetix Instant Chemsitry
  • China Glaze Fairy Dust
  • China Glaze Public Relations
  • Starrily Magnet (C/o: Nailstuff.ca)
  • NailStuff.ca Mermaid Tail Nail Brush Trio (11mm Liner Brush)

Originally my plan was just to wear the shade on its own, as I loved the effect the magnet had on it. But then I was like “I wonder what Fairy Dust would look over this?” From there I realized how much it looked like a galaxy, so I added a few dark silver stars.

Instant galaxy.

These are definitely the easiest galaxy nails I’ve ever created, & definitely the least time consuming. This is definitely making me want to go through all the magnetic polishes I’ve collected over the years & test them out with the Starrily magnet to see what it creates. The old magnets that came with these shades usually created patterns, but I’m much more fond of this like way.

What do you think about this easy galaxy design? Is this a look you could see yourself recreating? Let me know if this look is one making you want to dig out your own magnetic polishes, or any other thoughts you have down in the comments below!

New Years Eve Glitter Gradient

Hello lovelies & happy New Years Eve… Eve. Only 2 more days of this year left, & I can barely believe it. It really feels like the last few months, & especially the last few weeks, have absolutely flown by. With less than 48 hours left of this year, I figured why not sneak in one or two more manicures.

& naturally, with New Years Eve so close, I have to be all about the glitter. What better excuse than wearing all the glitter than counting down to a new year? I’m not much for getting dressed up, & going out on NYE… but you know I’m always going to have my nails ready for a night of snacks on the couch & sparkling kombucha.

The polishes I used for this manicure are: 

  • Base Coat: Essie Hard To Resist Glow & Shine 
  • Top Coat: Seche Vite Fast Dry Top Coat
  • Essie Kimono Over
  • Color Club On the List
  • Color Club Take Me to VIP
  • China Glaze Fairy Dust

Ooooooh look at the sparkle. I made sure to take pictures with my flash on, because I really wanted to be able to properly capture the sparkle. Like how much fun is this to wear for New Years Eve? I did this look completely without any tools, just layering of glitter, & it turned out so perfectly, & glittery. It almost makes me wish I had something exciting planned for New Years Eve.

This is super simple to do though! You just need to gently apply the glitter at the base of your nails, & brush up gently. It gives you a thicker glitter near your cuticle, & gives a lighter effect as you go up. I ended up using 3 different glitters because layering also gives it a beautiful effect. I just love glitter so much.

Do you have you plans for New Years Eve solidified yet? I think we’re going to do some sparklers & snacks with our kids, & neighbours, & then some snacks on the couch leading up to the end of the night.

I’m also going to see if I can sneak in one more New Years Eve manicure before the end of the year, so I will see you tomorrow for one more look.

♥︎