Autumn Colour Blocking

Hello lovelies & happy Thursday! Switching up my posting schedule a smidge this week, just as I get back into regularly doing my nails. I’m still feeling the post-covid fatigue, so nail art is a little bit more difficult.

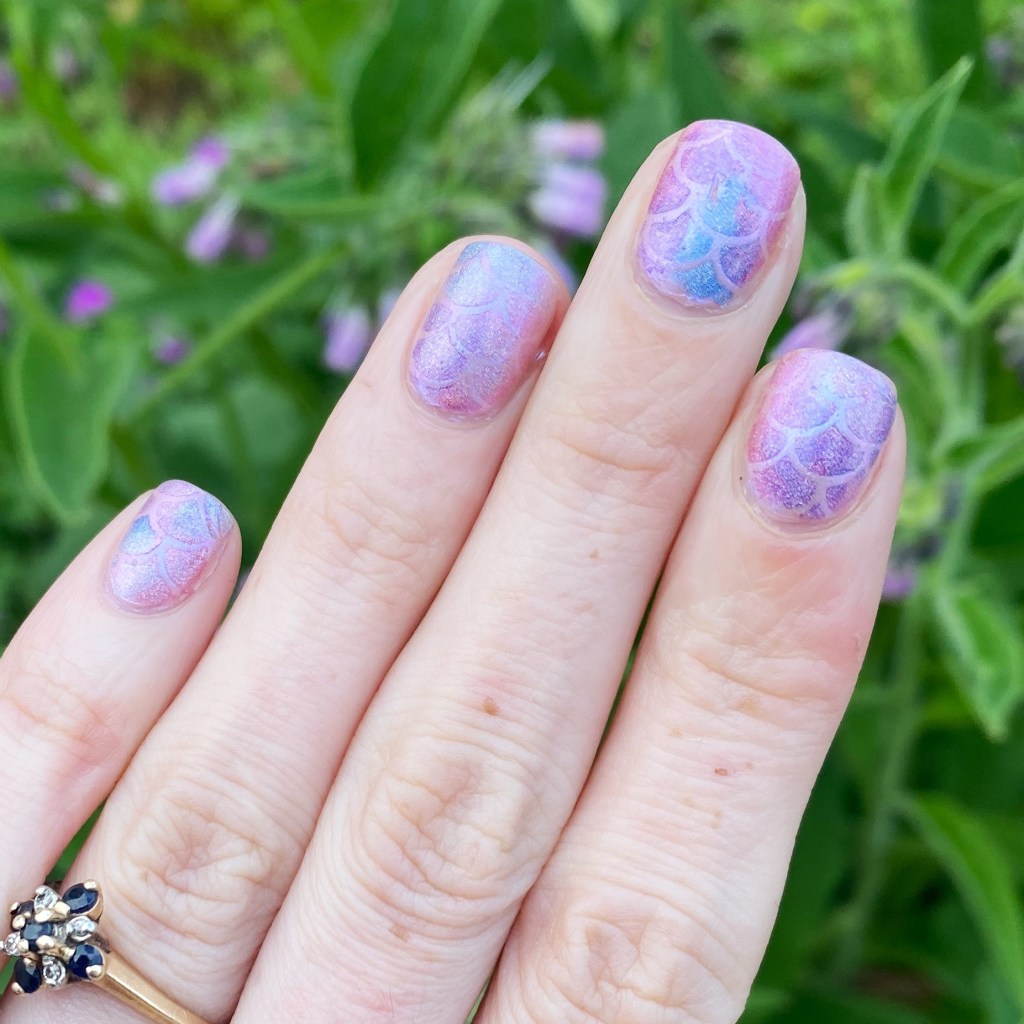
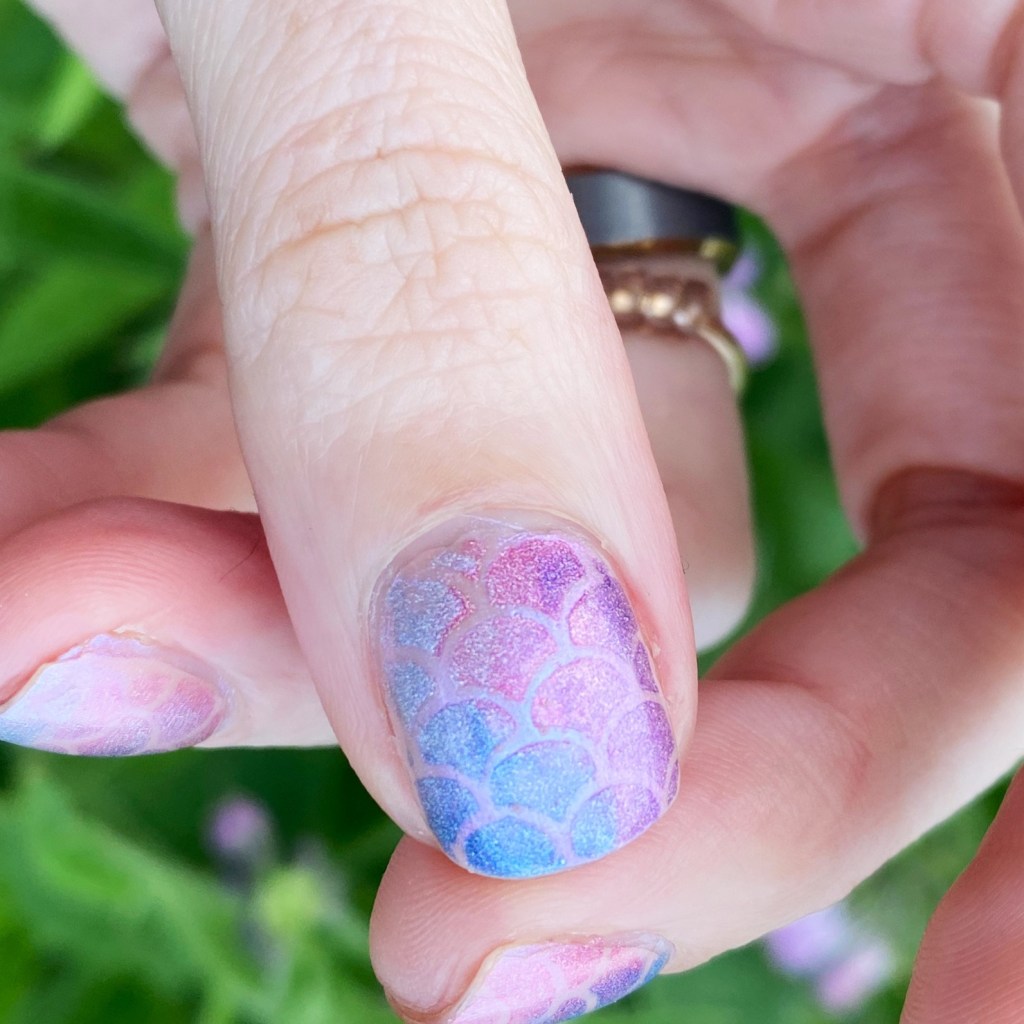
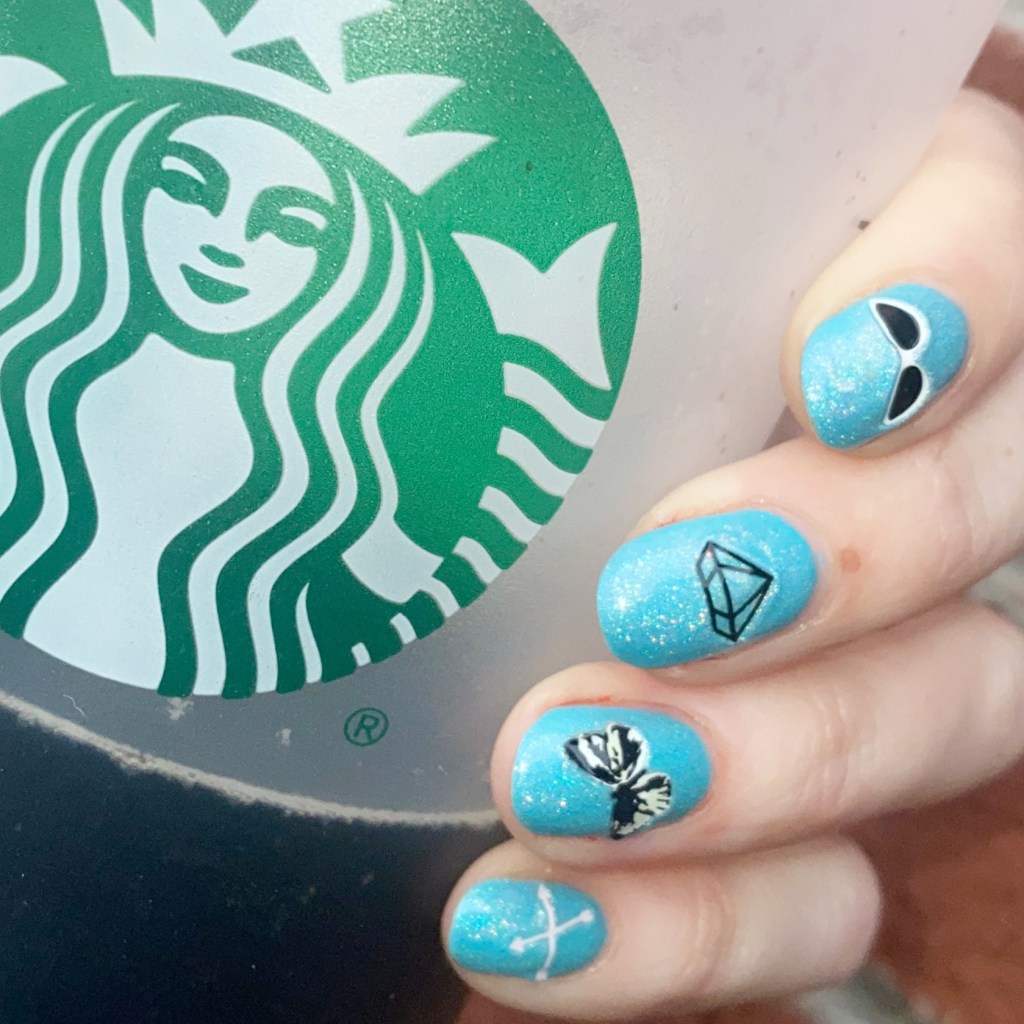
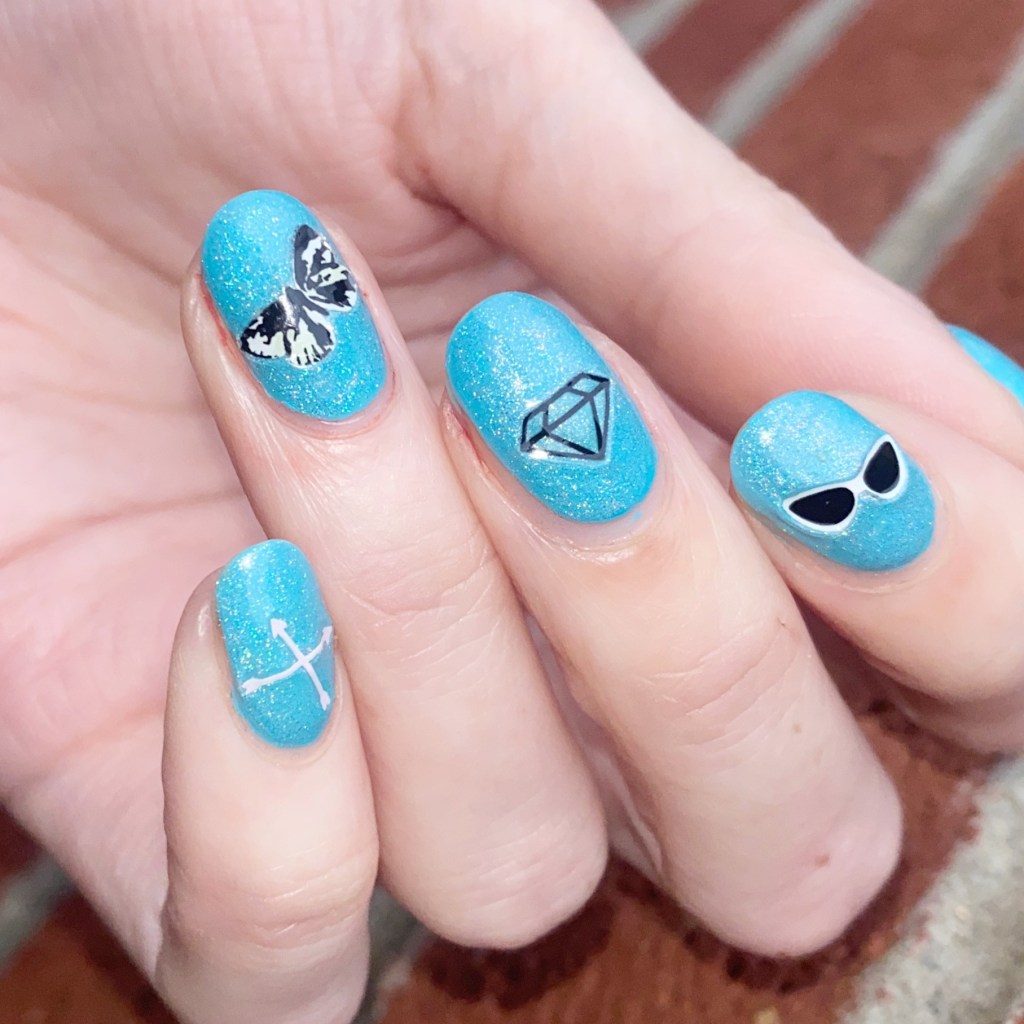
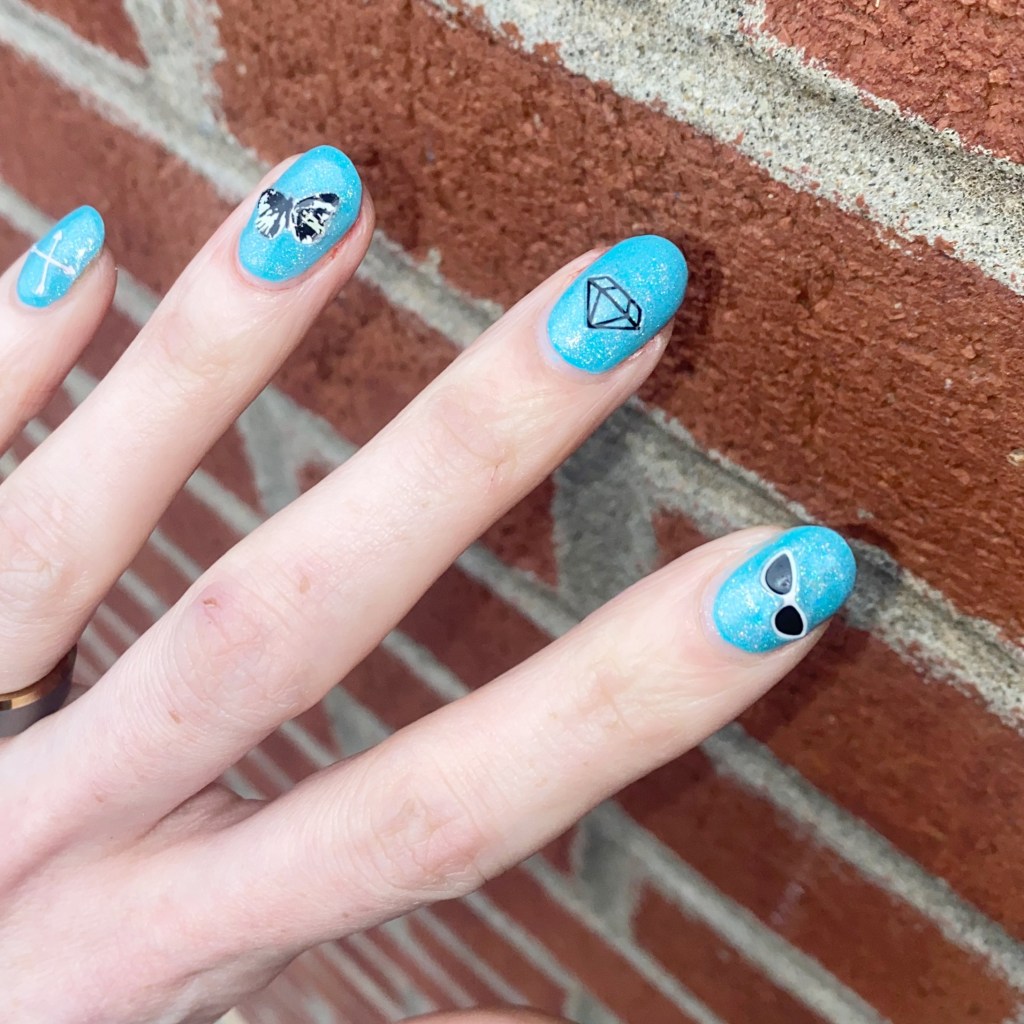
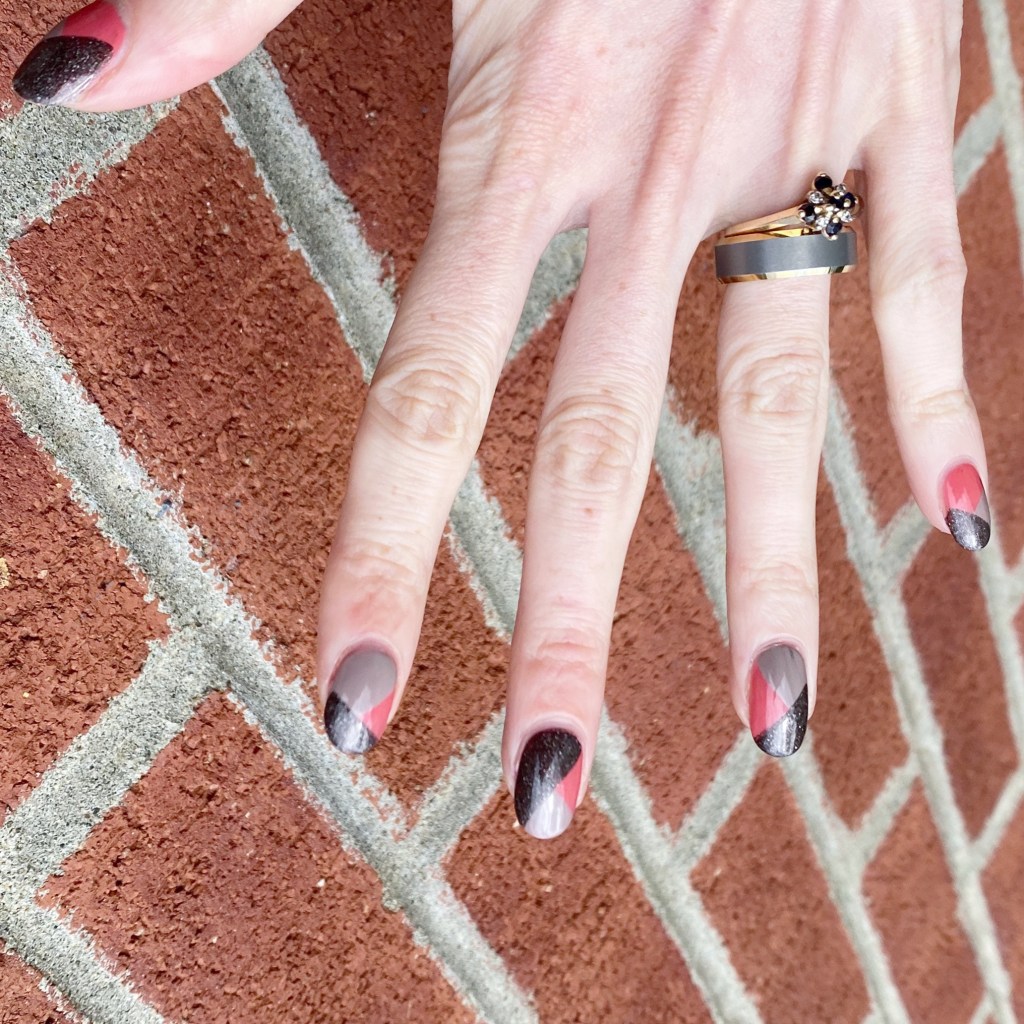
But I’m really excited to share today’s nail art look, because I really, really love the colour combination for this one! While I’m still sticking to easier nail designs, like this colour block design, I think this one turned out absolutely perfect! It was also done completely freehand, without any other nail art brushes or tools.

The polishes I used for this manicure are: 

  • Base Coat: Sally Hansen Miracle Gel Colour Grip Primer Base Coat 
  • Top Coat: Quo by ORLY Color Amp’d Top Coat
  • OPI My Address is Hollywood
  • OPI My Private Jet
  • OPI Icelanded A Bottle of OPI

I wish it had been a bit sunnier so I could have captured the scattered holographic glitter of My Private Jet, but I think these three colours compliment each other really well. & give off all the Fall vibes, to match the cooler Fall days we’ve been having. I’m really hoping I’ll be feeling a bit more like getting back into more complicated nail art soon, but in the meantime I’m okay with this simpler design.

So if you have any simple nail art suggestions, send them my way! I could use all the inspiration I can get.

What do you think of this nail art design? Do you love this colour combination as much as I do? Let me know all your thoughts down in the comments below!

SWATCH SUNDAY — Icing Stores Starlight

Hello lovelies & happy Sunday. It’s a rainy, grey, & extremely blah day here on the East Coast — & it’s starting to feel like we’ll never see the sun.

I needed some cheering up after this blah, blah week so I started digging through my Claire’s/Icing drawer & found this old school beauty! & I just knew that I had to pick it for this week’s Swatch Sunday.

This is Icing Starlight.

3 coats + top coat

The formula on this beautiful jelly glitter is thin thin thin, but it builds to nice coverage. & because the formula is so thin, each coats dries down quickly before you apply the next one. It also means you can see each & every silver & holo glitter suspended in the base, which I love.

Truthfully, I could have applied a forth coat for a bit more opacity, but with the exception of my tips (where it shows of a bit of my natural yellowing from my nail polish obsession) I really love how this looks. & that could easily be corrected with a colour correcting base coat. Or, by using it as a topper over another blue polish.

In the bottle it reminds me a bit of China Glaze Dorothy Who? but the base is much thinner leaving the colour on the nail much, much lighter. However, it has those beautiful holographic glitters that really show up, so I can’t be mad about it. It’s a beautiful shade all on its own.

Sadly, this colour is long long out of circulation. If I had to hazard a guess, based just on the bottle shape, I would say I purchased this bottle somewhere between 2009-2011. The brand has gone through quite a few bottle changes since then, but I’m happy to see even a decade later, this shade applies & wears beautifully.

& sometimes it’s just fun to take a walk down nail polish memory lane with a shade you haven’t seen in a while.

What do you think about Icing Starlight? Do you have any oldies in your stash you haven’t pulled out in a while? This Sunday is a great day to find a shade you haven’t worn in a while, & pull it out!

Have a lovely day! 🖤

Holo Mermaid Vibes 🧜🏼‍♀️

Hello lovelies & happy Monday!

I hope you had a fantastic weekend — the last full weekend of June. This means we are almost officially half way through this year, & I just need to slow down a smidge. But I thought we could, & should, start this week off on a sparkly vibe with the nails I wore this past weekend to celebrate my daughter’s 4th birthday. She decided on a Mermaid Princess party, & naturally that means I needed my nails to match.

The polishes I used for this manicure are: 

  • Base Coat: Londontown KUR Nail Hardener & Base Coat 
  • Top Coat: Seche Vive Fast Dry
  • Essie Gel Couture Princess Charming
  • Essie Expressie FX Iced Out
  • Color Club Bewitched
  • Color Club Crystal Baller
  • Color Club Eternal Beauty
  • Color Club Trick of the Trade
  • Beyond the Nail Mermaid Vinyls

I think these turned out absolutely magical & they were perfect for the theme of the party & the whole day. It was a beautiful sunny day, so the sparkle really came out — which I was hoping for! Originally I was thinking you couldn’t really see the scale pattern, but they got noticed for sure. & my little girl was excited about them!

I don’t have pictures, but she rocked a fun combo of Essie Bikini So Teeny & Birthday Girl for her birthday manicure, with a few nautical themed stickers as accents. The perfect look for my birthday princess.

\

& a quick pic of my with my birthday princess. My nails almost matched her new special bathing suit!

What do you think of my special mermaid nails? Do you like to match your nails to special occasions? Let me know all your thoughts down in the comments below!

Have a fantastic Monday loves. ♥︎

Easy Holo Ocean Themed Nails

Hello lovelies & happy Monday! It’s the beginning of a brand new week, & I’m sharing a super easy look with you.

This was a super quick & easy look I did the end of last week, inspired by a request by my little girl. I had these cute ocean themed nail art stickers I picked up from Icing circa 2014-2015, though I thought they would be super cute paired with an ocean-y blue nail polish for some easy nail art.

The polishes I used for this manicure are: 

  • Base Coat: Londontown KUR Nail Hardener & Base Coat 
  • Top Coat: Seche Vive Fast Dry Top
  • Superchic Lacquer Throwing Shade
  • Icing Nail Art Stickers — can find similar styles on Etsy.

I’ve raved before about my love for nail art stickers for easy nail art, especially when time is an issue. You can use a whole bunch on the nail, or one on each nail for a simple look. I have quite the collection myself, so they’re fun to grab when I’m lacking time (or inspiration).

& there are some great brands out there to choose from.

What do you think about these simple holographic ocean nails? Are you a fan of simple nail art like this? Have you ever tried any nail art sticker brands that you absolutely love? Let me know your favourites down in the comments below!

Have a fantastic Monday!

Easy Pop Art Nail Art with Stickers

Hello lovelies! I hope everyone is having a lovely week so far. Today I’m feeling Summer vibes, so I wanted to share a fun pop art inspired nail art I recently did that were super easy to do — especially since they basically involve no actual talent what-so-ever! & isn’t that the best kind of nail art?

The polishes I used for this manicure are: 

  • Base Coat: Essie Hard To Resist Glow & Shine 
  • Top Coat: Seche Vive Fast Dry Top
  • Holographic Top Coat: Starrily Eclipse
  • Essie In The Cabana
  • Olive & June Nail Art Stickers (discontinued sheet)

I recently picked up (well… last Summer) a new bottle of Essie In the Cab-ana which is one of my favourite Summer shades. But adding Starrily Eclipse over top brought it to a whole other level! & I’m definitely obsessed.

I also thought these Olive & June nail art stickers were so cute over top. The black & white stickers feel very pop art to me. This sticker line is long discontinued (I think it’s about 5 years ago I was gifted them) but they do have lots of other cute nail art stickers on their site. You can also find cute nail art stickers through my go to, NailStuff.ca, Deco Miami — although I’ve never tried them — & Amazon, obviously!

What do you think about these fun nail art looks? Do you like easy nail art looks like this?

Let me know all your thoughts down in the comments below.