Happy December 1st! Can you believe we’re officially in the last month of 2023? That’s kind of insane. & it’s time to go hard on all the Christmas designs I can paint!
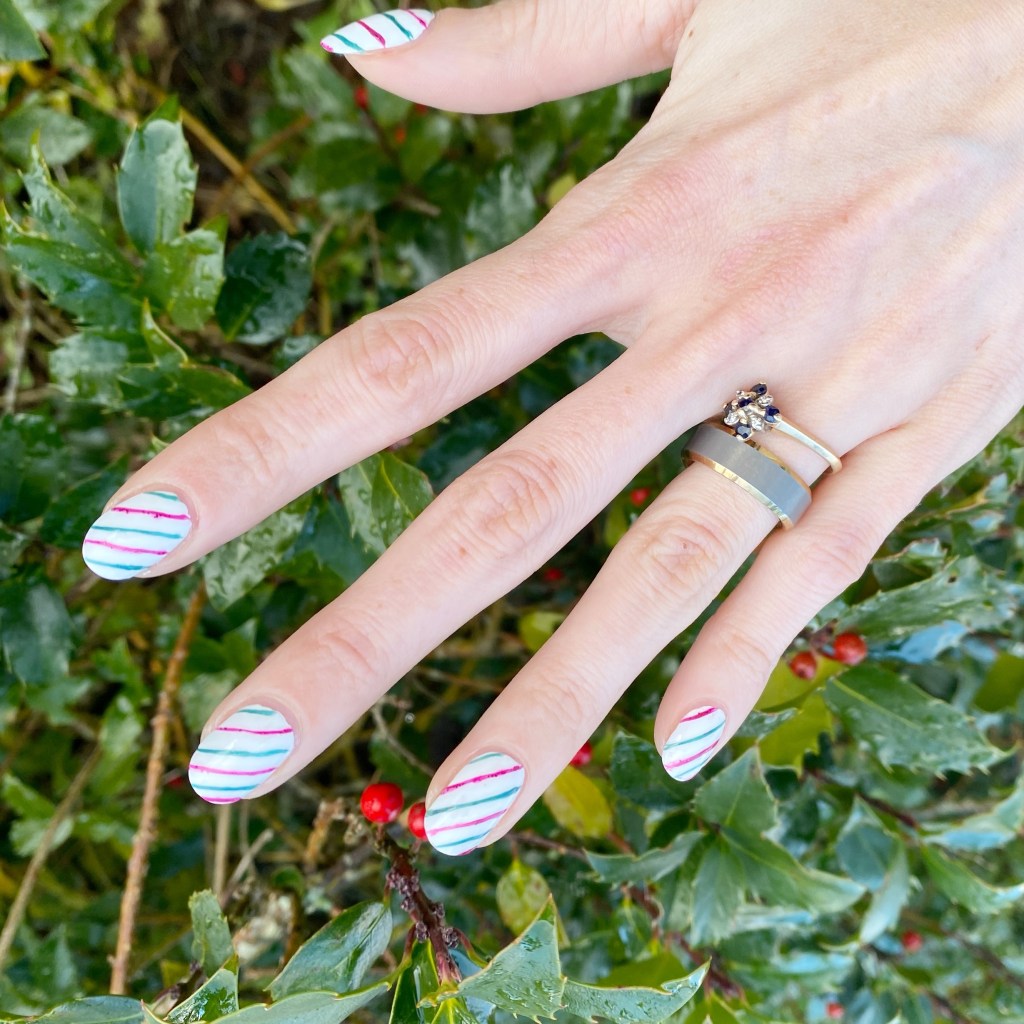
Today’s look is simple but festive. I wanted to create some candy cane inspired nails, as I haven’t done any in a while.
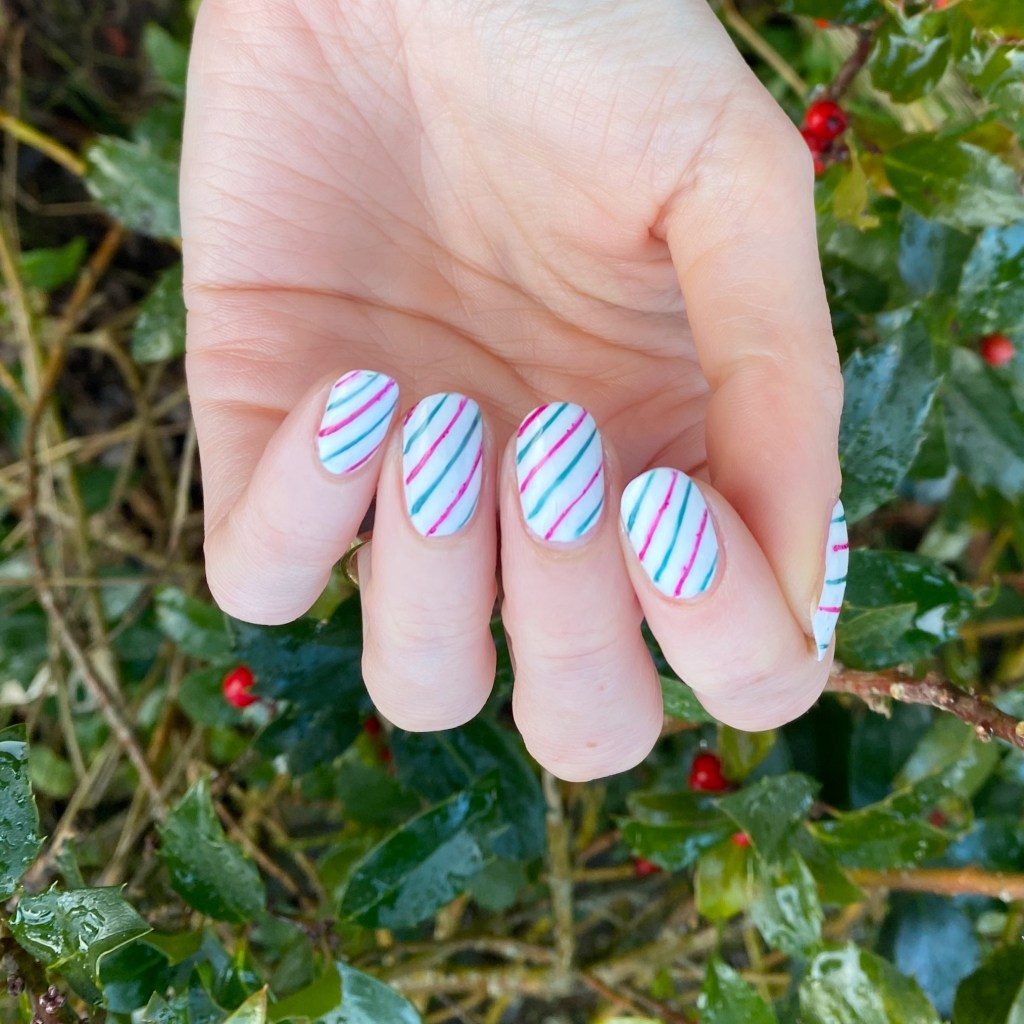

The polishes I used for this manicure are:
- Base Coat: Sally Hansen Miracle Gel Colour Grip Primer Base Coat
- Top Coat: Seche Vive
- Essie Blanc
- Quo Beauty Green With Envy
- Quo Beauty Velveteen
- ACO by Ardene Dancing Queen
- 16mm Striper (from NailStuff.ca)
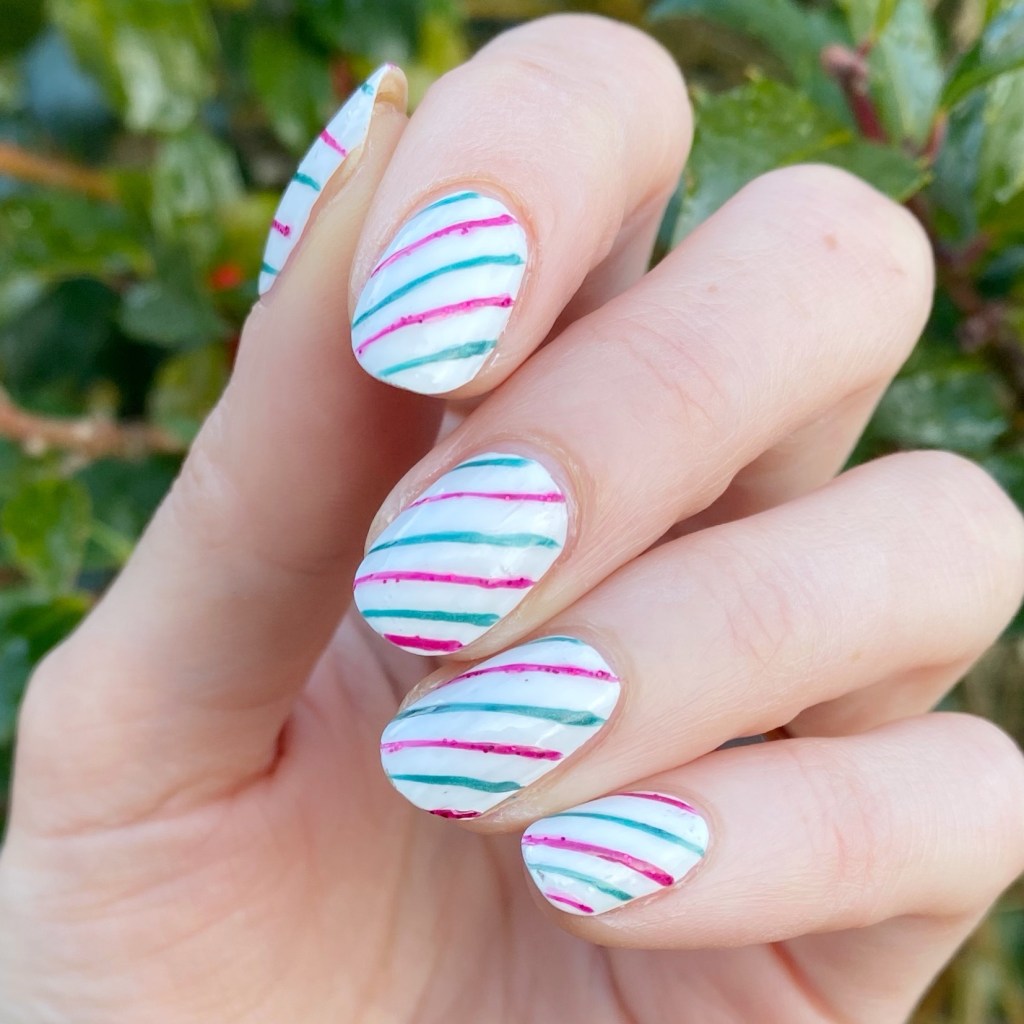

Do you love candy canes? I really like those fun flavour ones (like Nerds, Warheads or Trolli) but less keen on the classic peppermint flavour ones. Maybe I ate too many as a kid? My nails are definitely calling back to those classic candy canes though.
You could definitely use striping tape or vinyls to achieve this look, but for some reason I prefer using my striper brush. With a look like this, I feel like you don’t need to have as clean lines (since candy canes don’t always have the smoothest lines). But these ones definitely turned out better than I could have hoped!
What do you think of these candy cane stripe nails? Are you ready for December & all the holiday nail art content to come? Let me know down in the comments below!