SWATCH SUNDAY — Sally Hansen InstaDri Holo-Glow Euphoric

Hello lovelies & happy Sunday. It’s a very rainy Sunday here which seems to be the trend for this April so far. But at least it’s not snow!

Today I’m sharing a new nail polish I recently picked up from my local Shoppers Drug Mart — Sally Hansen InstaDri Euphoric from their Holo-Glow line.
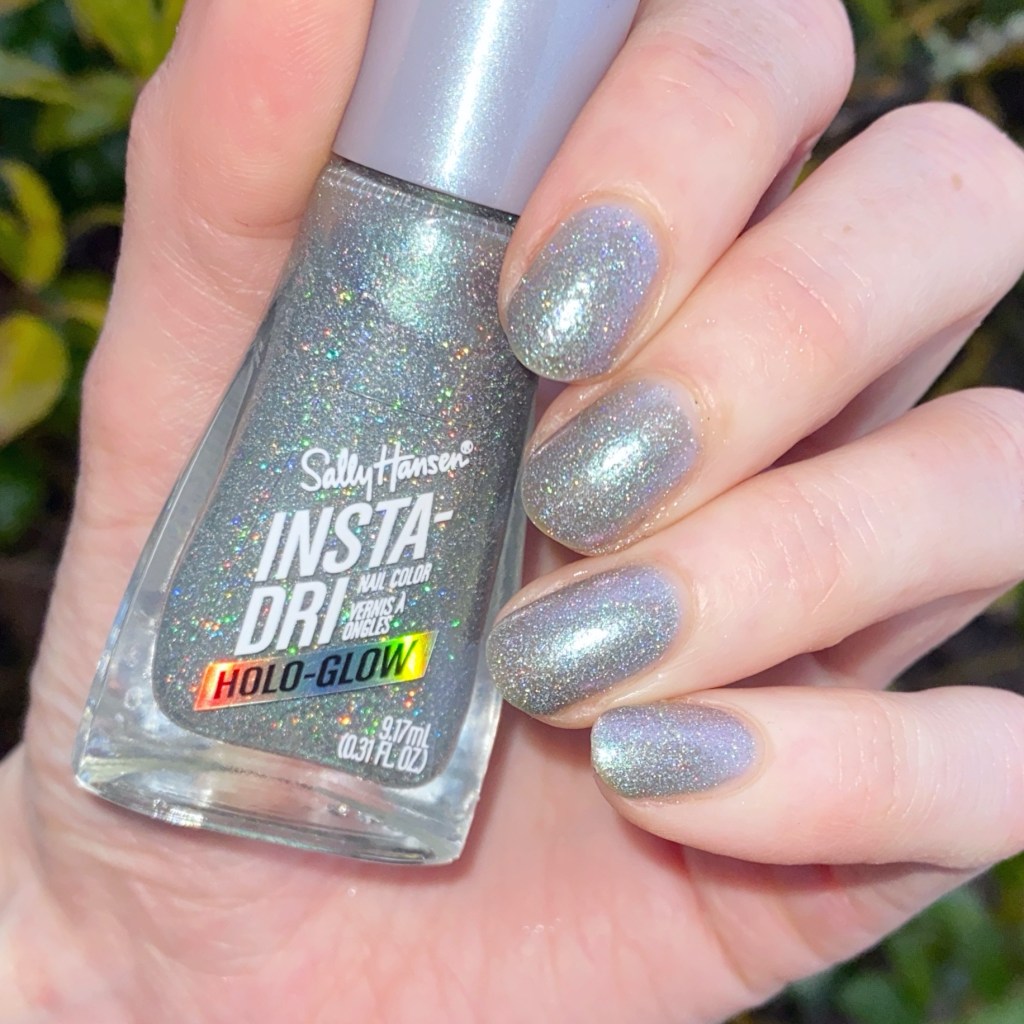
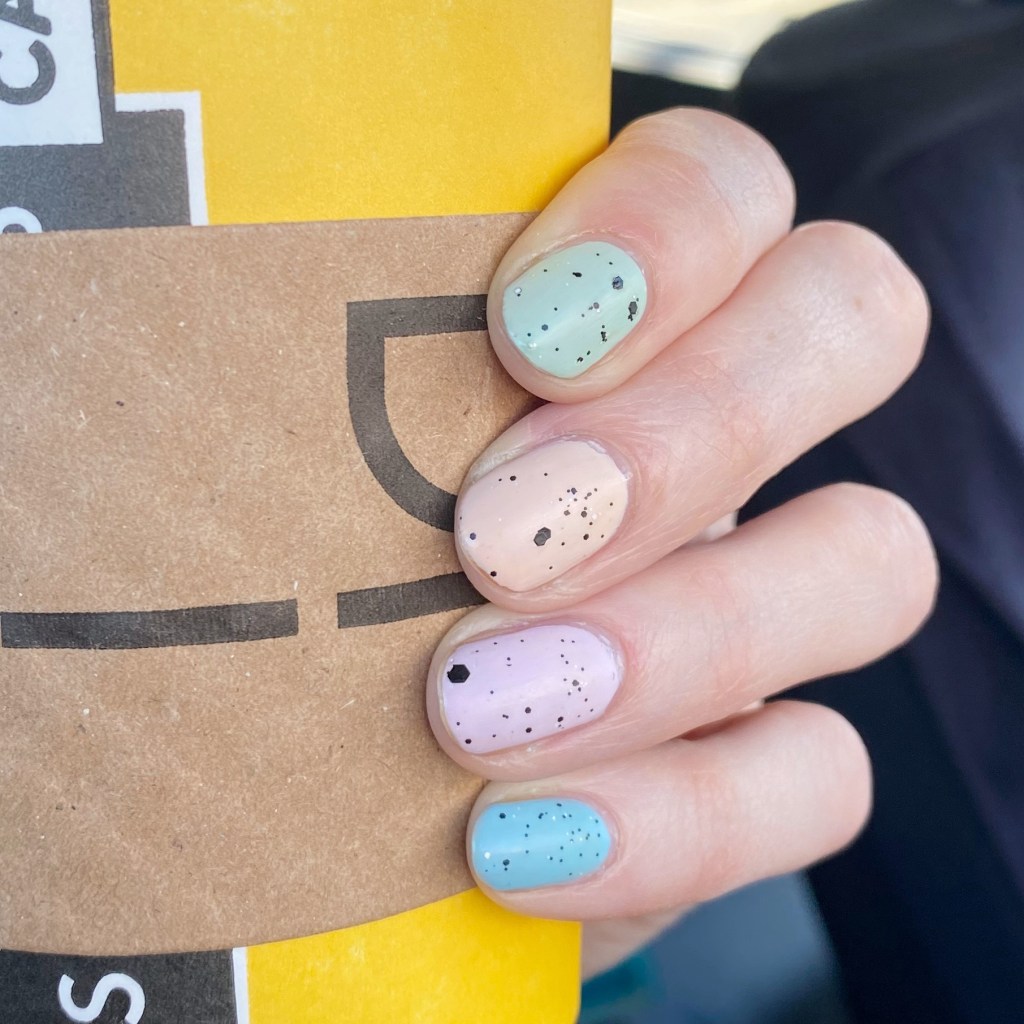
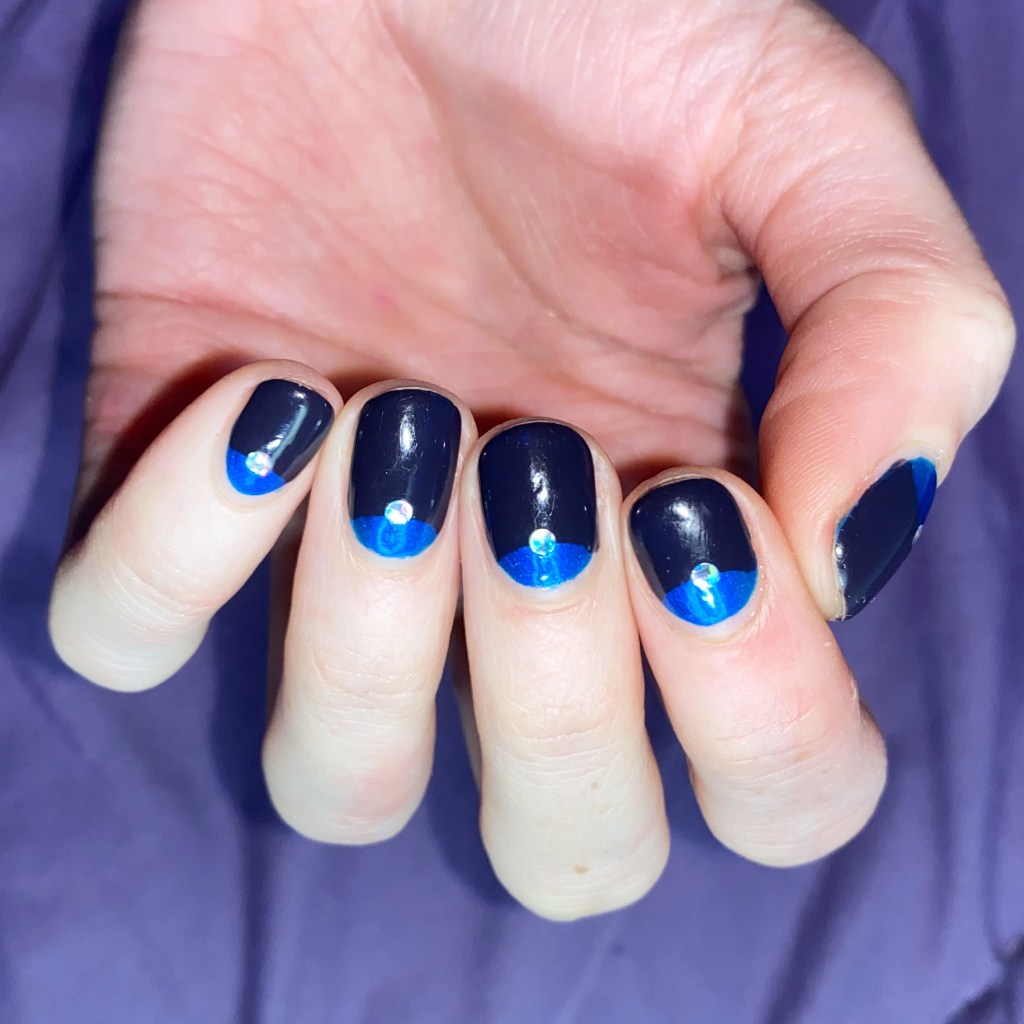
2 coats + top coat

You might remember I shared another one of these Holo-Glow shades back in September. The InstaDri line is one of my favourite to shop because they always have a fun selection of different shades & finishes to choose from. They also boast a 60 second dry time, although I find it a bit longer than that.

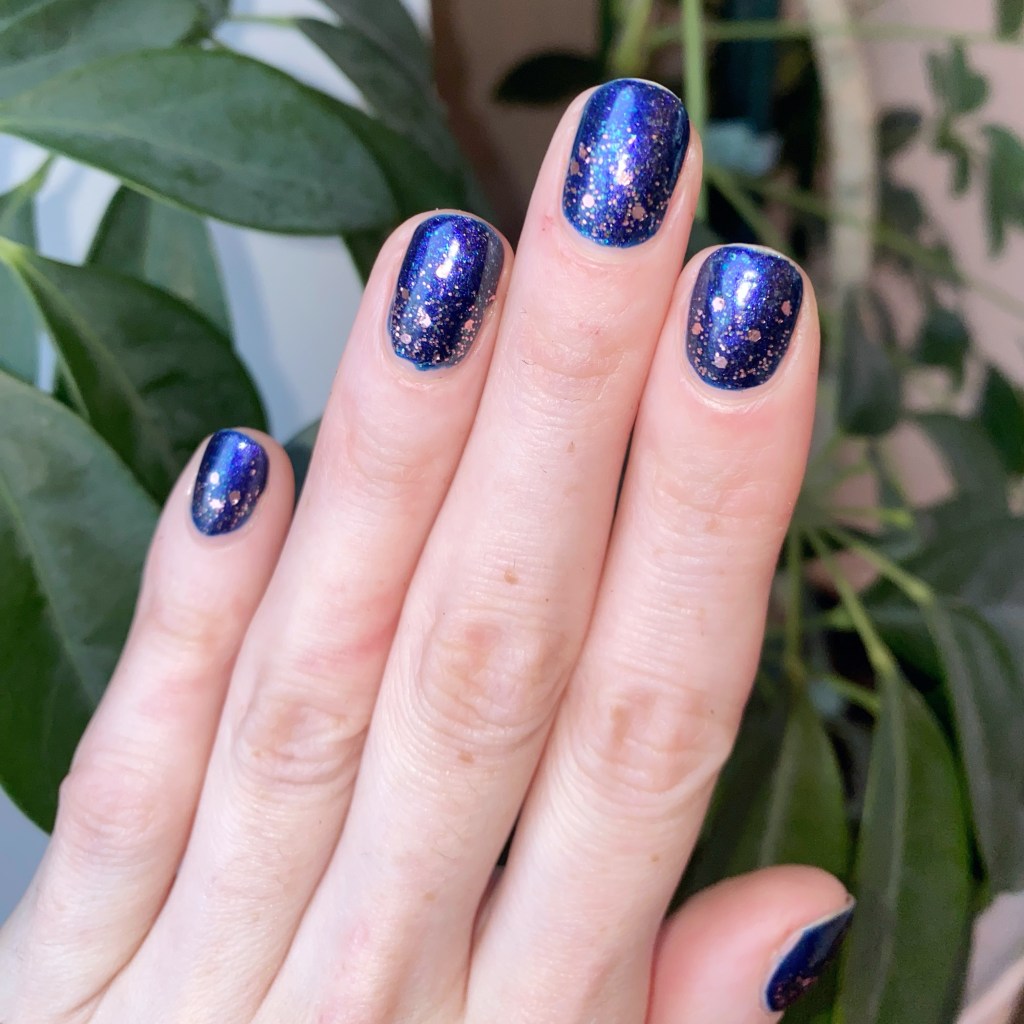
Lately I’ve been obsessed with perusing the Holo-Glow line, because holo makes everything better. I ended up purchasing two new shades: Euphoric & a purple from the Galactic Line called Planet Purple.

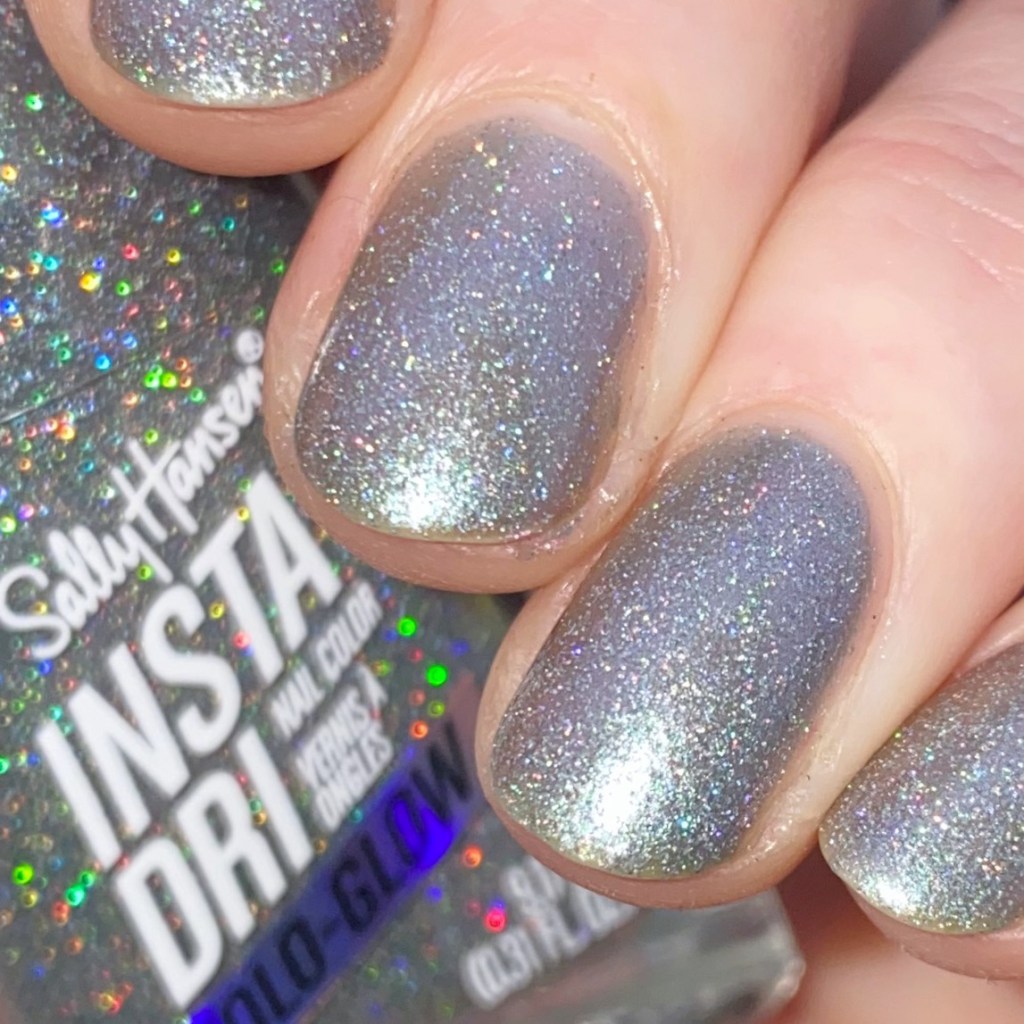
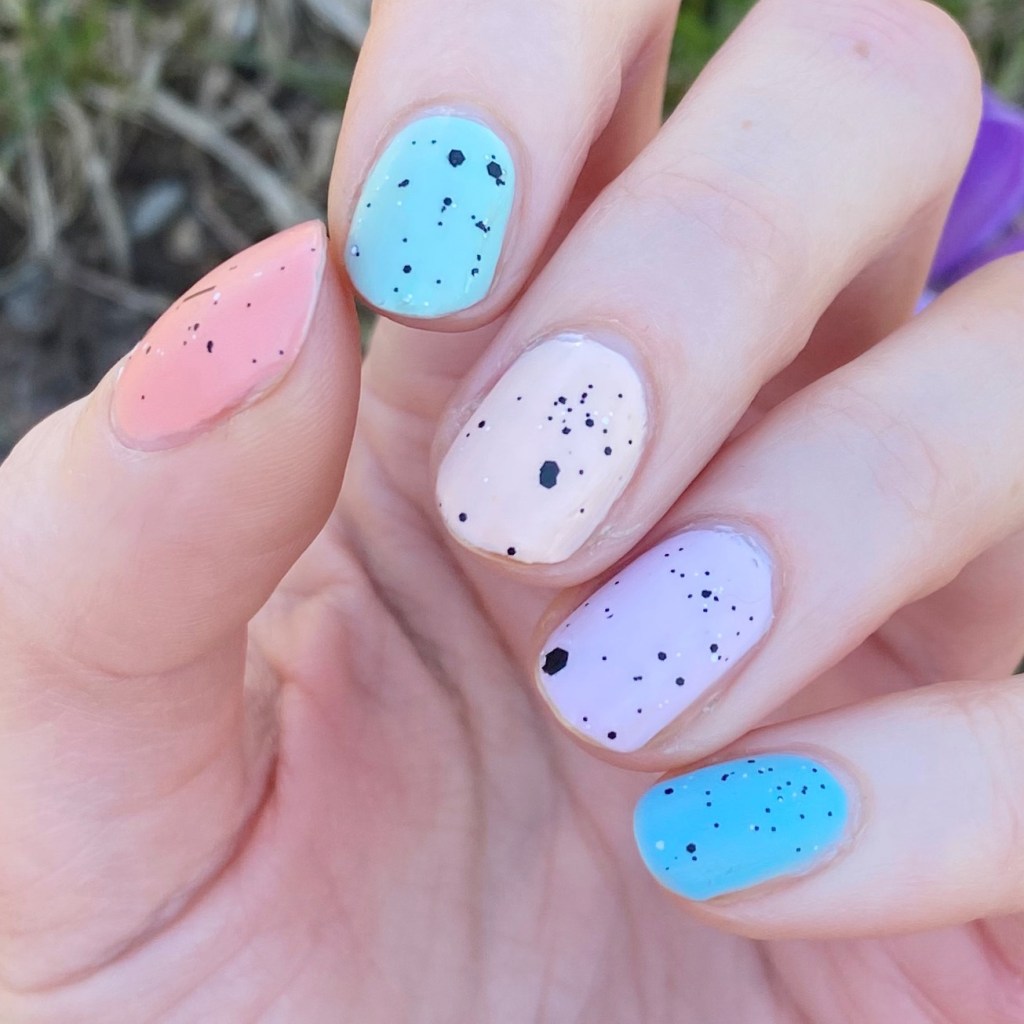
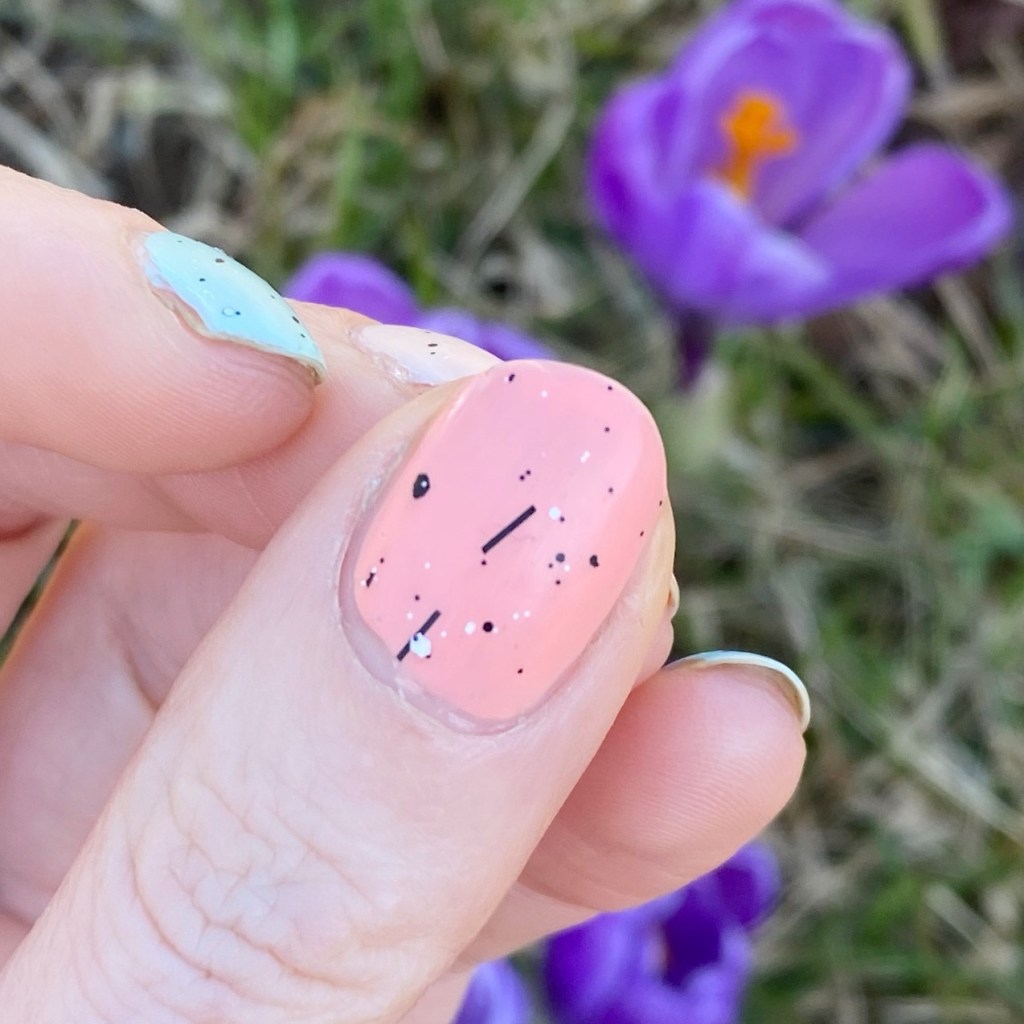
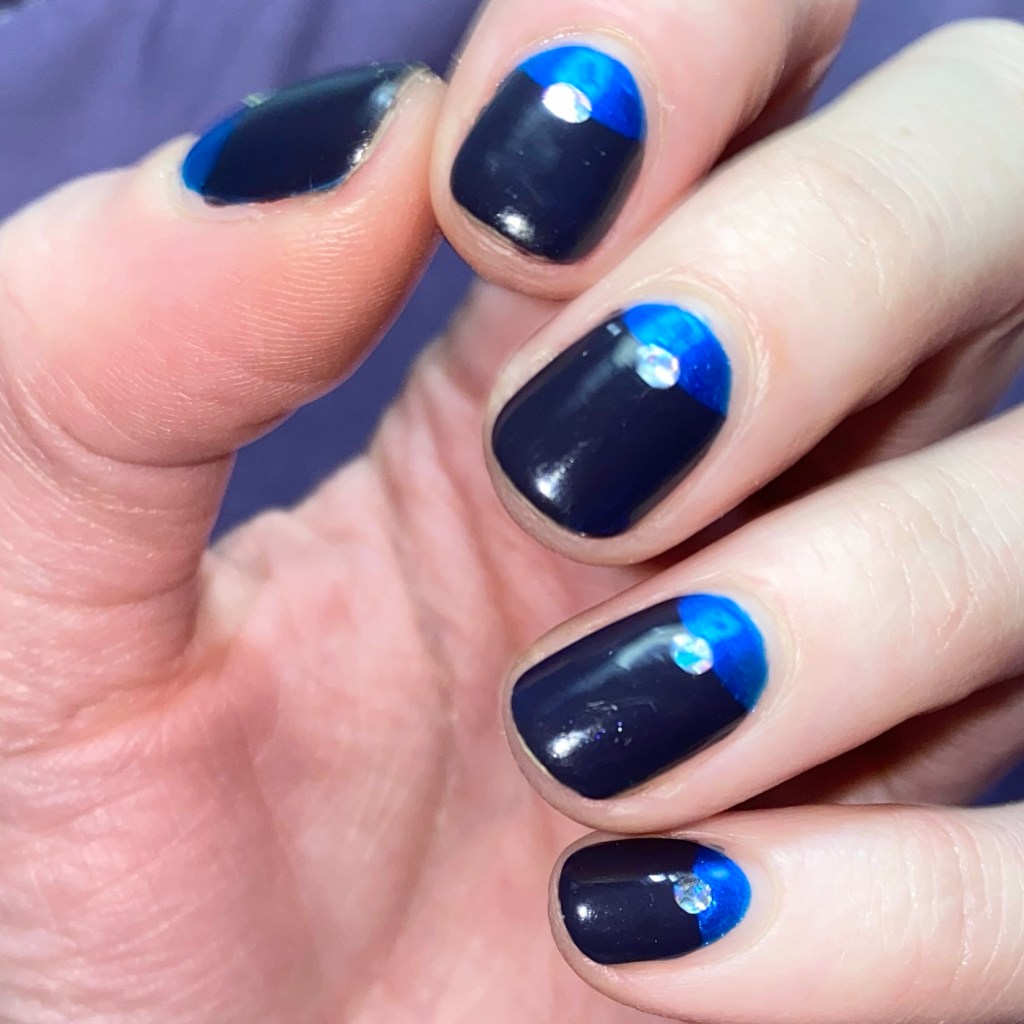
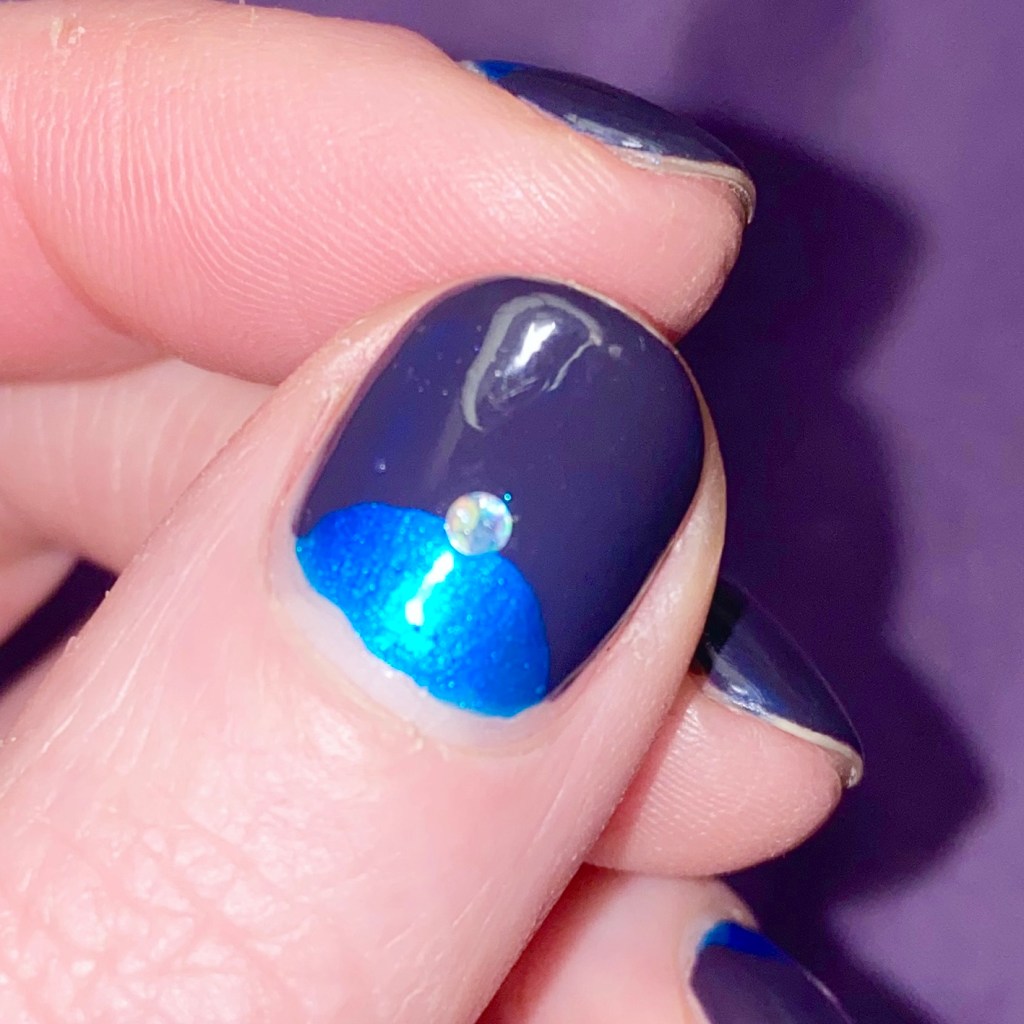
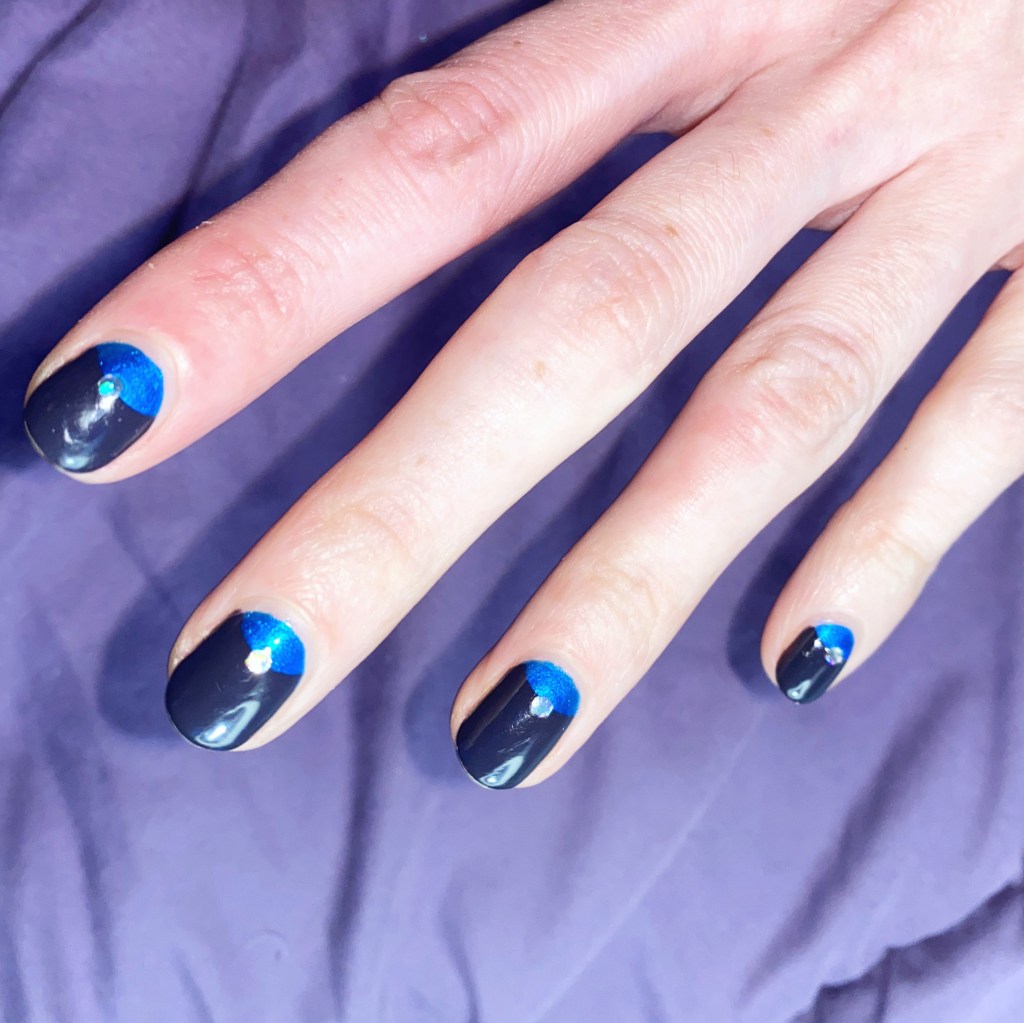
Check out that scattered glitter. The interesting base colour was what initially caught my eye: is it silver, is it lilac, is it a pale mint? It’s so shifty & pretty, & different from other holographic polishes in my collection. & when you own as many nail polishes as I do, that’s what you want: something different.

Formula was also very nice. On top of being a quicker dry, it was opaque in two coats. The glitter is scattered, but also very dense which I like. Will it suck for removal? Maybe. But the glitter pay off is worth it!

What do you think of Sally Hansen InstaDri Euphoric? Have you tried any of the Sally Hansen InstaDri Holo-Glow shades yet? What do you think? Let me know all your thoughts in the comments below.

🖤

Easter Mini Egg Nails 🐰🪺(Happy 11th Birthday Coffee & Nail Polish)

Contains PR

Hello lovelies & happy Saturday! I know what you’re thinking — I never do Saturday posts. But this is not just any Saturday… today is Coffee & Nail Polish’s 11th birthday!

Hard to believe it, but this blog has been around for 11 years already. 🥹 It’s seen me through so much life experiences & we’re still going! So thank you so much for joining me on this journey & I hope you’ll stick along with me for whatever is to come!

The polishes I used for this manicure are: 

  • Top Coat: Essie Gel Couture Top Coat 
  • Base Coat: Essie Hard to Resist Advanced
  • Matte Top Coat: NailStuff Essentials Matte Top Coat *
  • Madam Glam Birds Fairy *
  • Madam Glam Purple Rain *
  • Madam Glam Sweet Sunshine *
  • Madam Glam Minty Green *
  • Madam Glam Warm Up *
  • Sephora Formula X Nail Polish Chaotic

How cute did these Mini Egg inspired nails turn out? Using a very thin brush of that Sephora glitter worked perfectly for the specks!

I also thought it would be the perfect look to celebrate this big blog birthday! Plus you can never go wrong with Mini Eggs — they’re the best part of Easter! (Now if only they would come out with a dairy free version…)

What do you think of my mini egg nails? What is your favourite Easter nail art look? Let me know all your thoughts in the comments below! & thank you again so much for all the support over these years. This blog has keep going because of all the love & support & comments you have sent my way — so thank you!

Enjoy your Saturday!

💗

Dark Blue & Pink Glitter Gradient ✨

Good morning loves & happy Tuesday. A chilly, cold, wet January Tuesday. But crazily enough, this month is almost over! So hard to believe that February is almost here, & in turn, lots of Valentine’s Day looks. Well, at least a few.

Today though, I’m keeping with the bit of a blue trend I’ve been feeling this month with a quick & easy glitter gradient. Working two jobs has meant less time for fun nail art, & I’m still working on finding a good balance so I have “Me time” for nail art! (I’m desperately craving some floral on my nails, I just need the time & energy.)

The polishes I used for this manicure are: 

  • Base Coat: NailStuff Essentials Base Coat *
  • Top Coat: Essence Colour Shield Top Coat 
  • Finger Paints Queen for a Night
  • Revlon Nail Art Duo 350 Ulterior Motif  (just the side with the pink glitter)

I really forgot how pretty Finger Paints Queen for a Night was. I just love a beautiful jewel toned blue on my nails. While purple is my favourite colour in regular life, & red is my go to I-Don’t-Know-What-to -Wear nail polish colour, blue has always been one of my favourite colour to grab in general. Next to red, it’s probably the colour I own the most shades of! & I always love how it looks on my nails.

Also I swear that I used to buy Finger Paints polishes every time I went to Sally Beauty. Does Sally’s still sell Finger Paints? I’ll have to go check.

What do you think of these glitter gradient nails? I feel like we all need a little extra glitter in our lives during these dark winter months — jazz up the moody days. It may not solve all of the problems in the world, but it certainly makes me feel better!

Happy Tuesday

🖤

Valentine’s Day Heart Glitter Placement 🤍💜🩷💙

Hello beauties & happy Tuesday. What a Tuesday it is… it’s getting so chilly here. Ugh. Have I mentioned I’m really, really not a winter person? So why not brighten things up a little bit, & maybe start early on the Valentine’s Day looks!

I picked up a Nails INC gift pack at my local Shoppers Drug Mart on clearance for $10 recently, that I thought would be perfect for Valentine’s Day! While the gift pack was meant for Christmas, the colours just scream V-Day to me — especially this heart glitter topper.

The polishes I used for this manicure are: 

  • Base Coat: NailStuff Essentials Base Coat *
  • Top Coat: Essence Colour Shield Top Coat (I ran out of my NailStuff one & need to make an order!)
  • Nails INC Nutcracker Nouveau
  • Nails INC Heartfelt Holidays
  • Small dotting tool for glitter placement (I use the NailStuff.ca dotting tool from Dotting Tool Trio)
    **PR/gifted 

Firstly, this light pink shade, Nutcracker Nouveau, is absolutely stunning & a great pre-spring shade. I love a good pastel. Secondly, these heart glitters are too freaking cute.

I will be honest, they were not the easiest to fish from the bottle — there are lots in there, but it took me a few tries to pull some out on my brush. That is part of the reason why I went with placing my glitters individually, rather than brushing them up. The other was wanting to make sure I got a different variety of colours on each nails. & I think the end result is adorable.

I’m such a sucker for glitter toppers, especially in unique shapes like these hearts!

What do you think of these easy & adorable Valentine’s Day nails? These are honestly something so quick easy & fun you can rock for the occasion. & you know I just love a festive manicure with a theme!

Let me know what you think of this design! & Enjoy the rest of your day loves.

🖤

Icy Blue Half Moons (With Holo Diamond Accents 💎)

Hello loves & happy Friday!

This has been a very busy week for me, so I apologize for the (still) sporadic posting schedule. Eventually I’ll figure it out, but it might not be until next month. Haha. However, I have some cute nails to share with you!

Today’s look is an easy but striking one. I love a good half moon, as we all know, but I decided to jazz it up with a little holo diamond(ish) accents.

The polishes I used for this manicure are: 

  • Base Coat: NailStuff Essentials Base Coat *
  • Top Coat: Essence Colour Shield Top Coat (I ran out of my NailStuff one & need to make an order!)
  • OPI Y2Slay
  • OPI Suzy & the Arctic Fox
  • OPI I Snow You Love Me
  • Paper Hole Reinforcements
  • Dotting tool (I use the NailStuff.ca dotting tool from Dotting Tool Trio)

**PR/gifted

How freaking beautiful is this combination? I love the little holo Diamond accent over these two very cool blues. Y2Slay was another clearance find at my local Shoppers Drug Mart. I’ve been having very good luck their lately — in fact I just found a NailsInc Holiday pack there for only $10 which has some pretty polishes perfect for Valentine’s Day Nail Art!

What do you think about my half moons? Is this colour combination perfect for these cool January days (& nights!) Let me know everything you think down in the comments below!

Happy Friday

🖤