Bestie Twin Baby Boy Birthday Nails with @hjs_nails

Happy Tuesday lovelies! Today I have a very special nail collab to share with you. One of the most amazing things about the nail community is the way it brings people together. Last August I did a mani swap with Hannah from @hjs_nails & we bonded over the fact we both had baby boys in February. Since our beautiful little guys share a birthday month we decided to team up & do some Bestie Twin Baby Boy Birthday Nails in their honour.

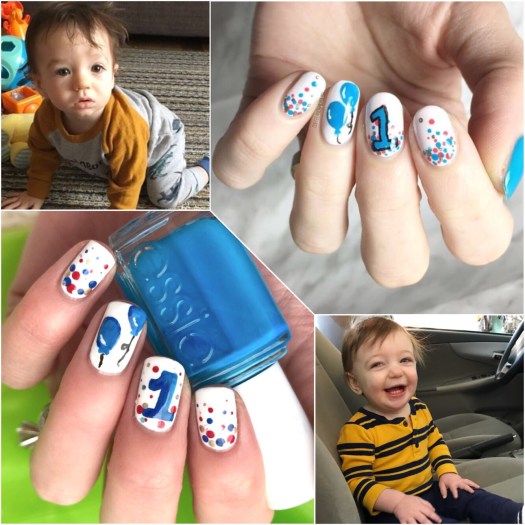
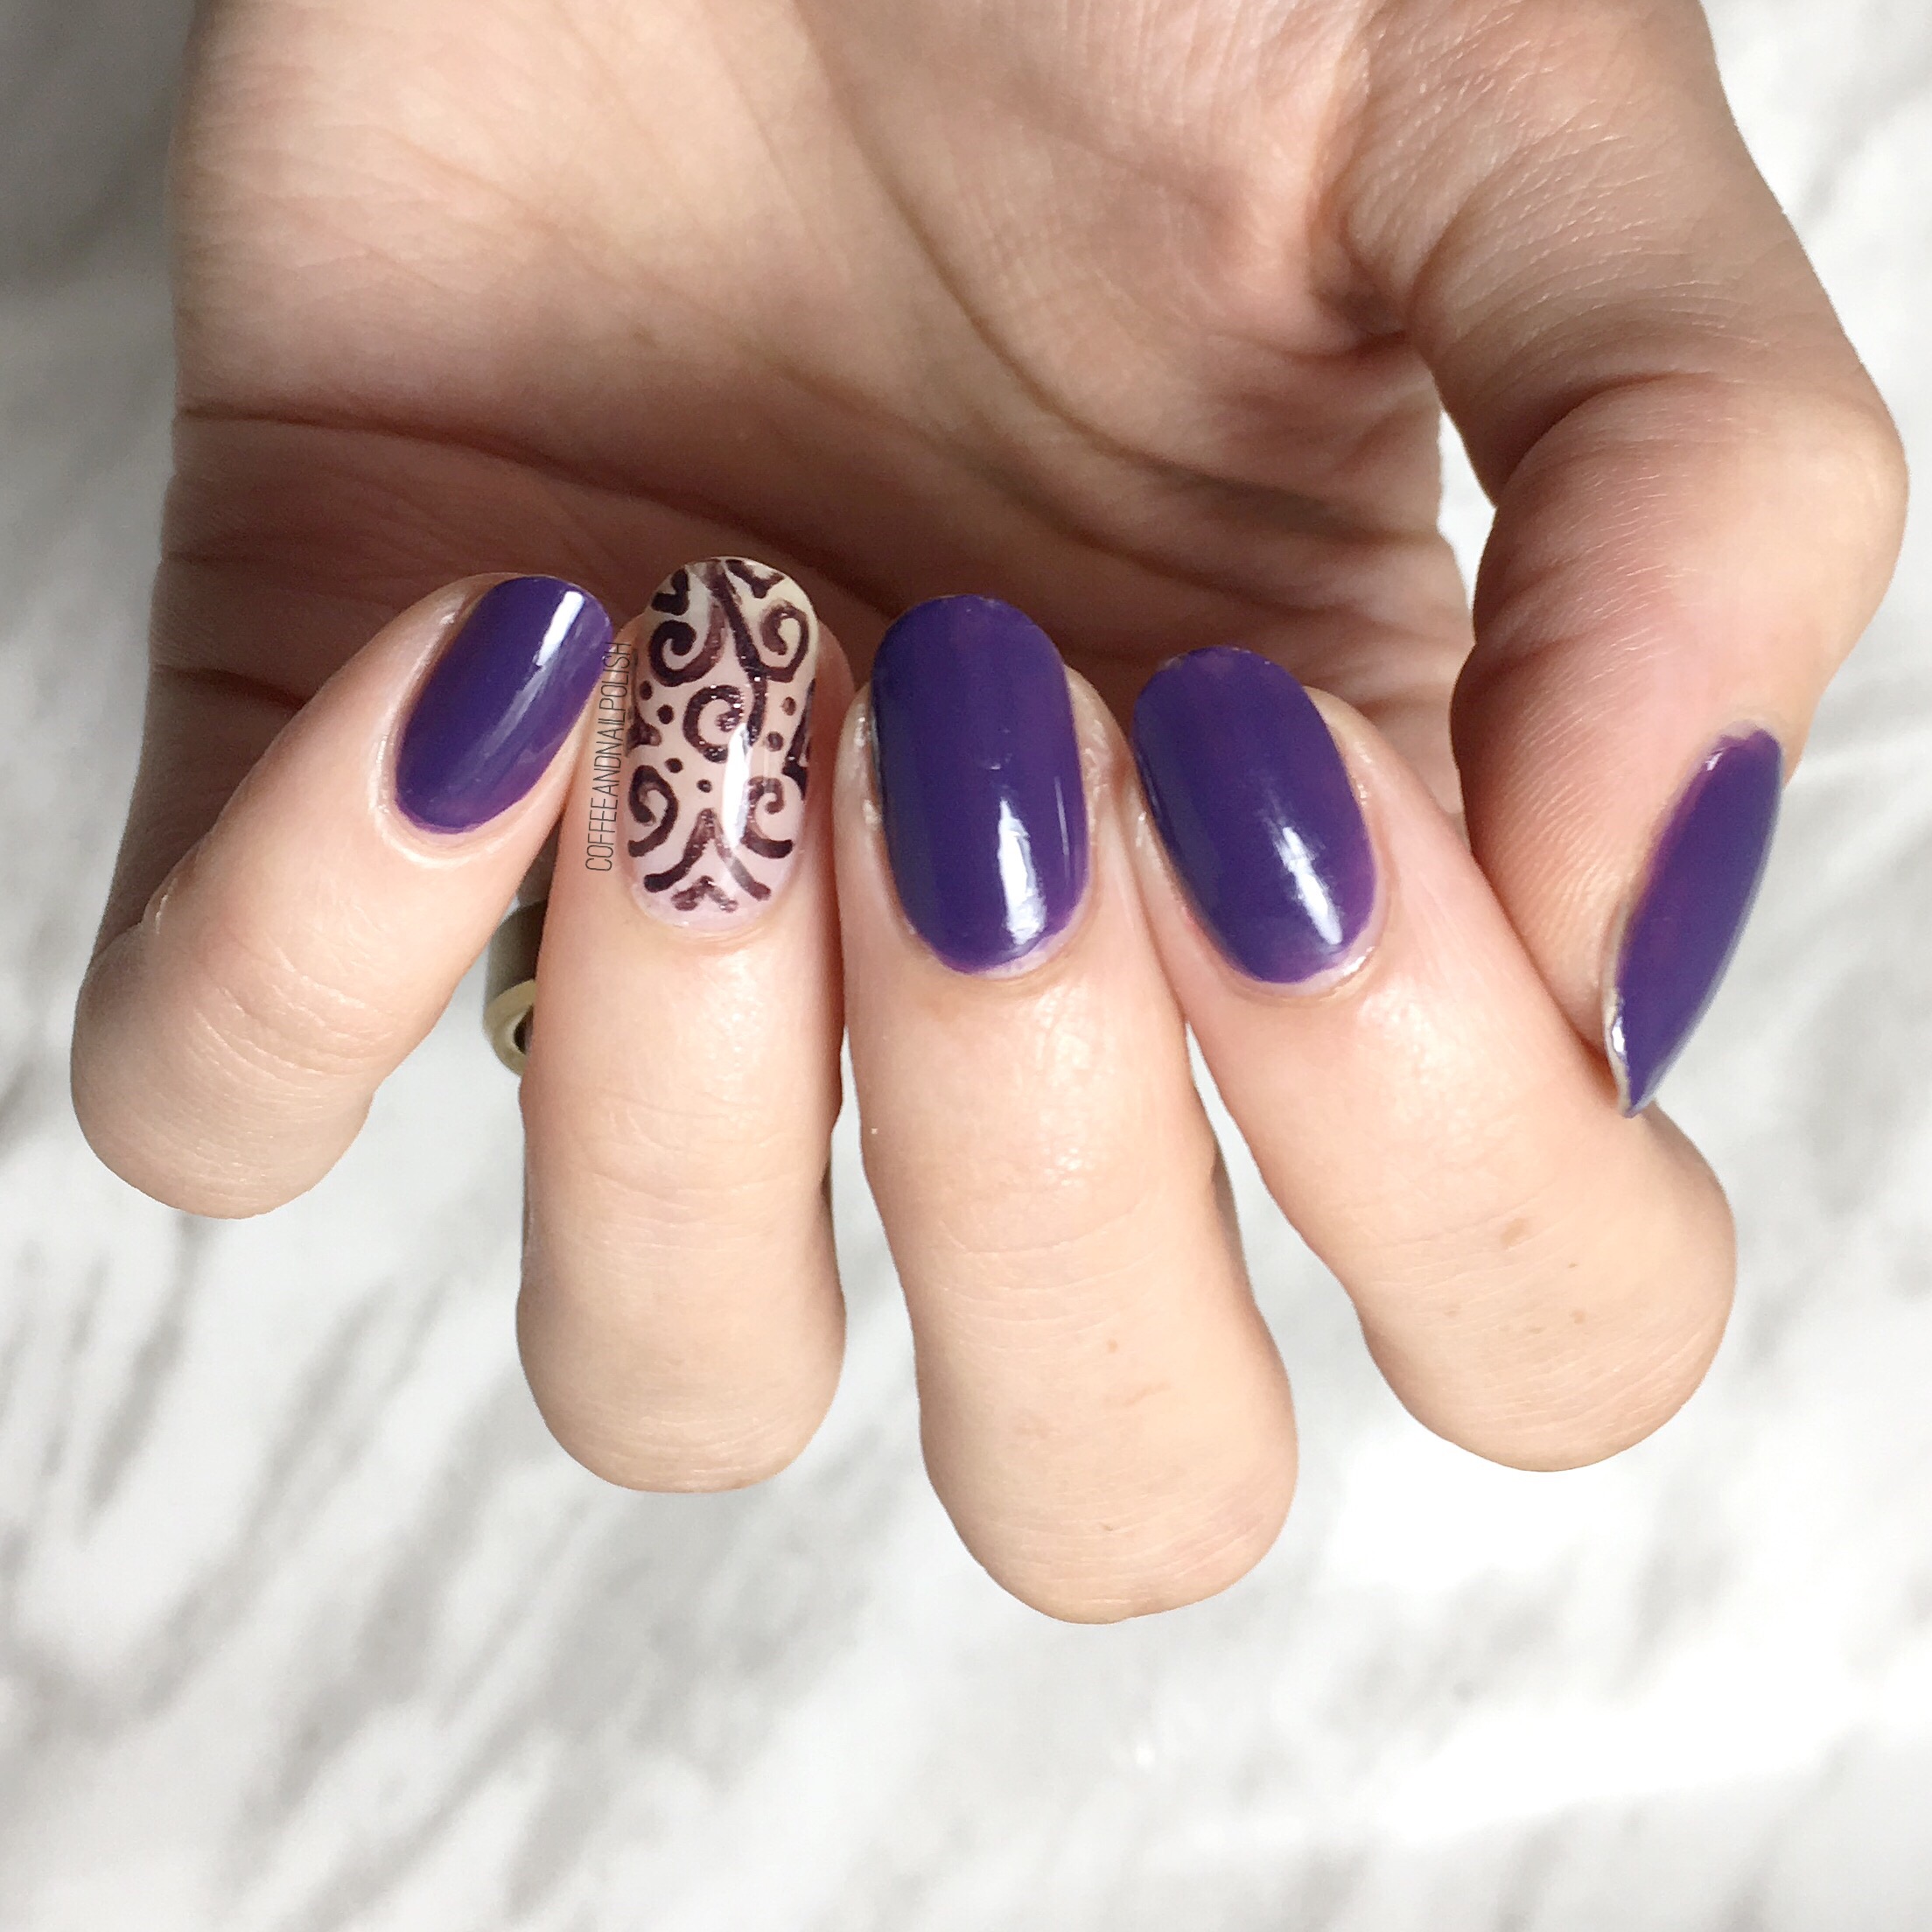
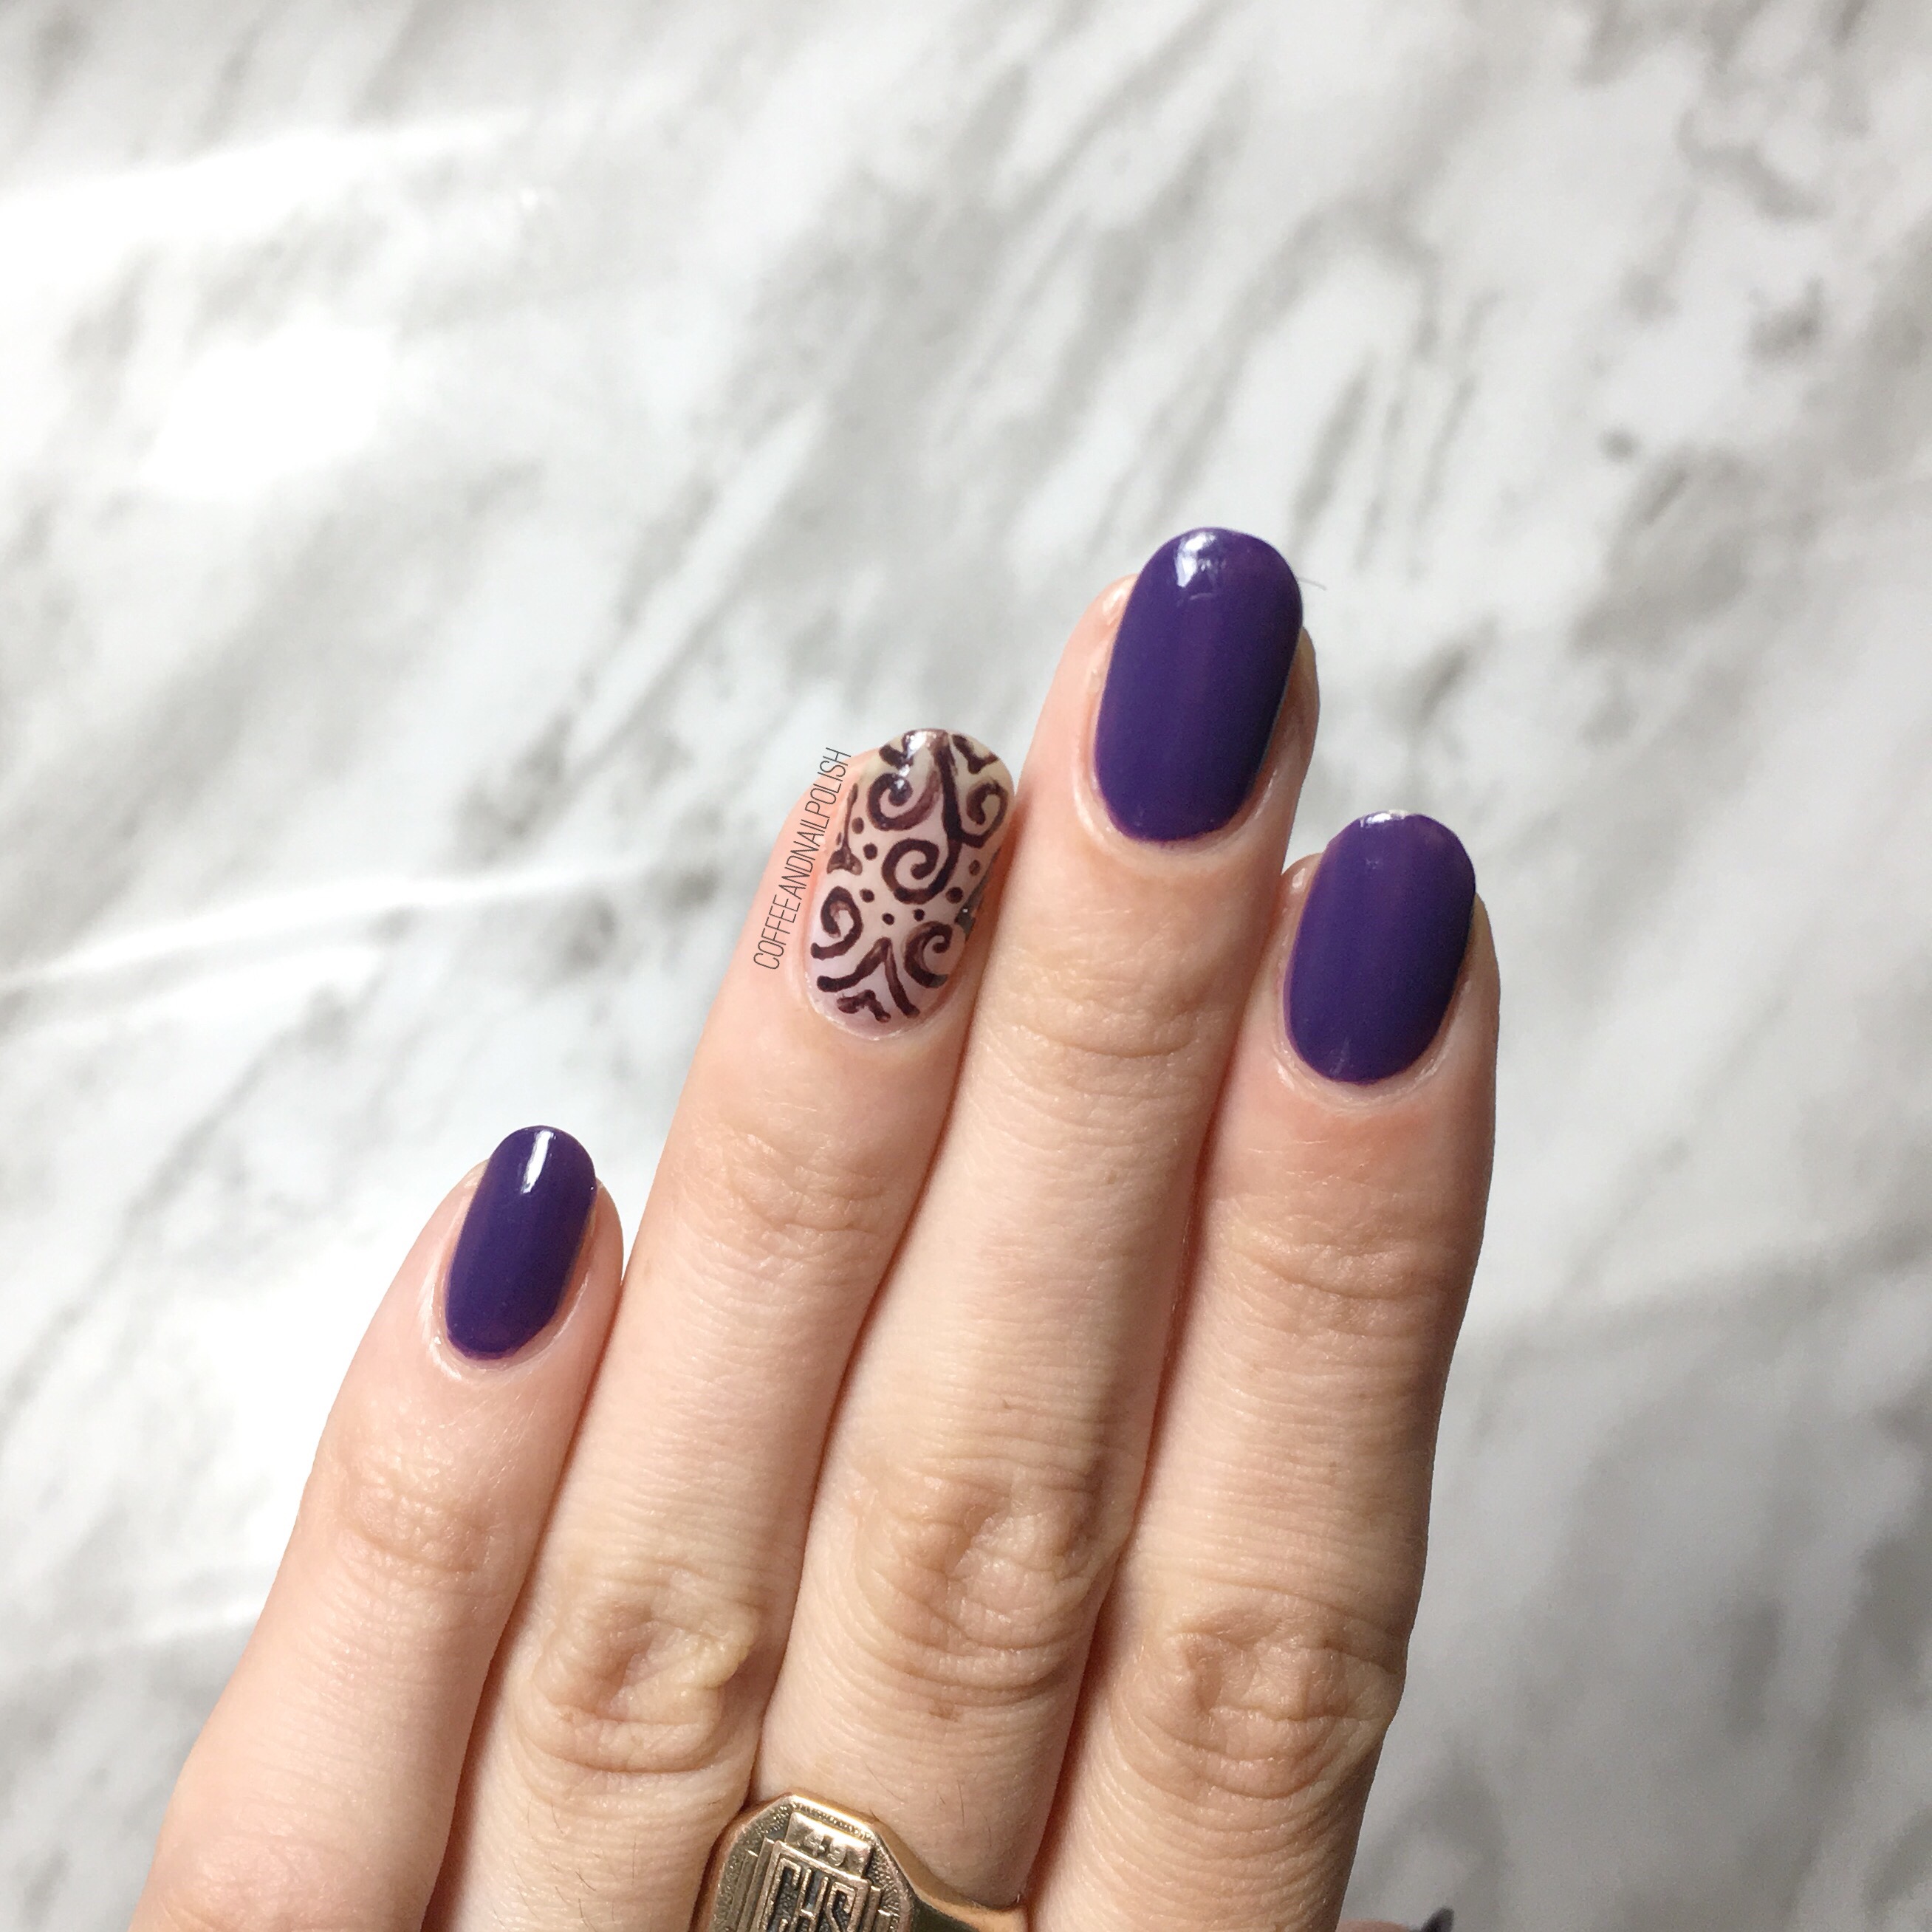
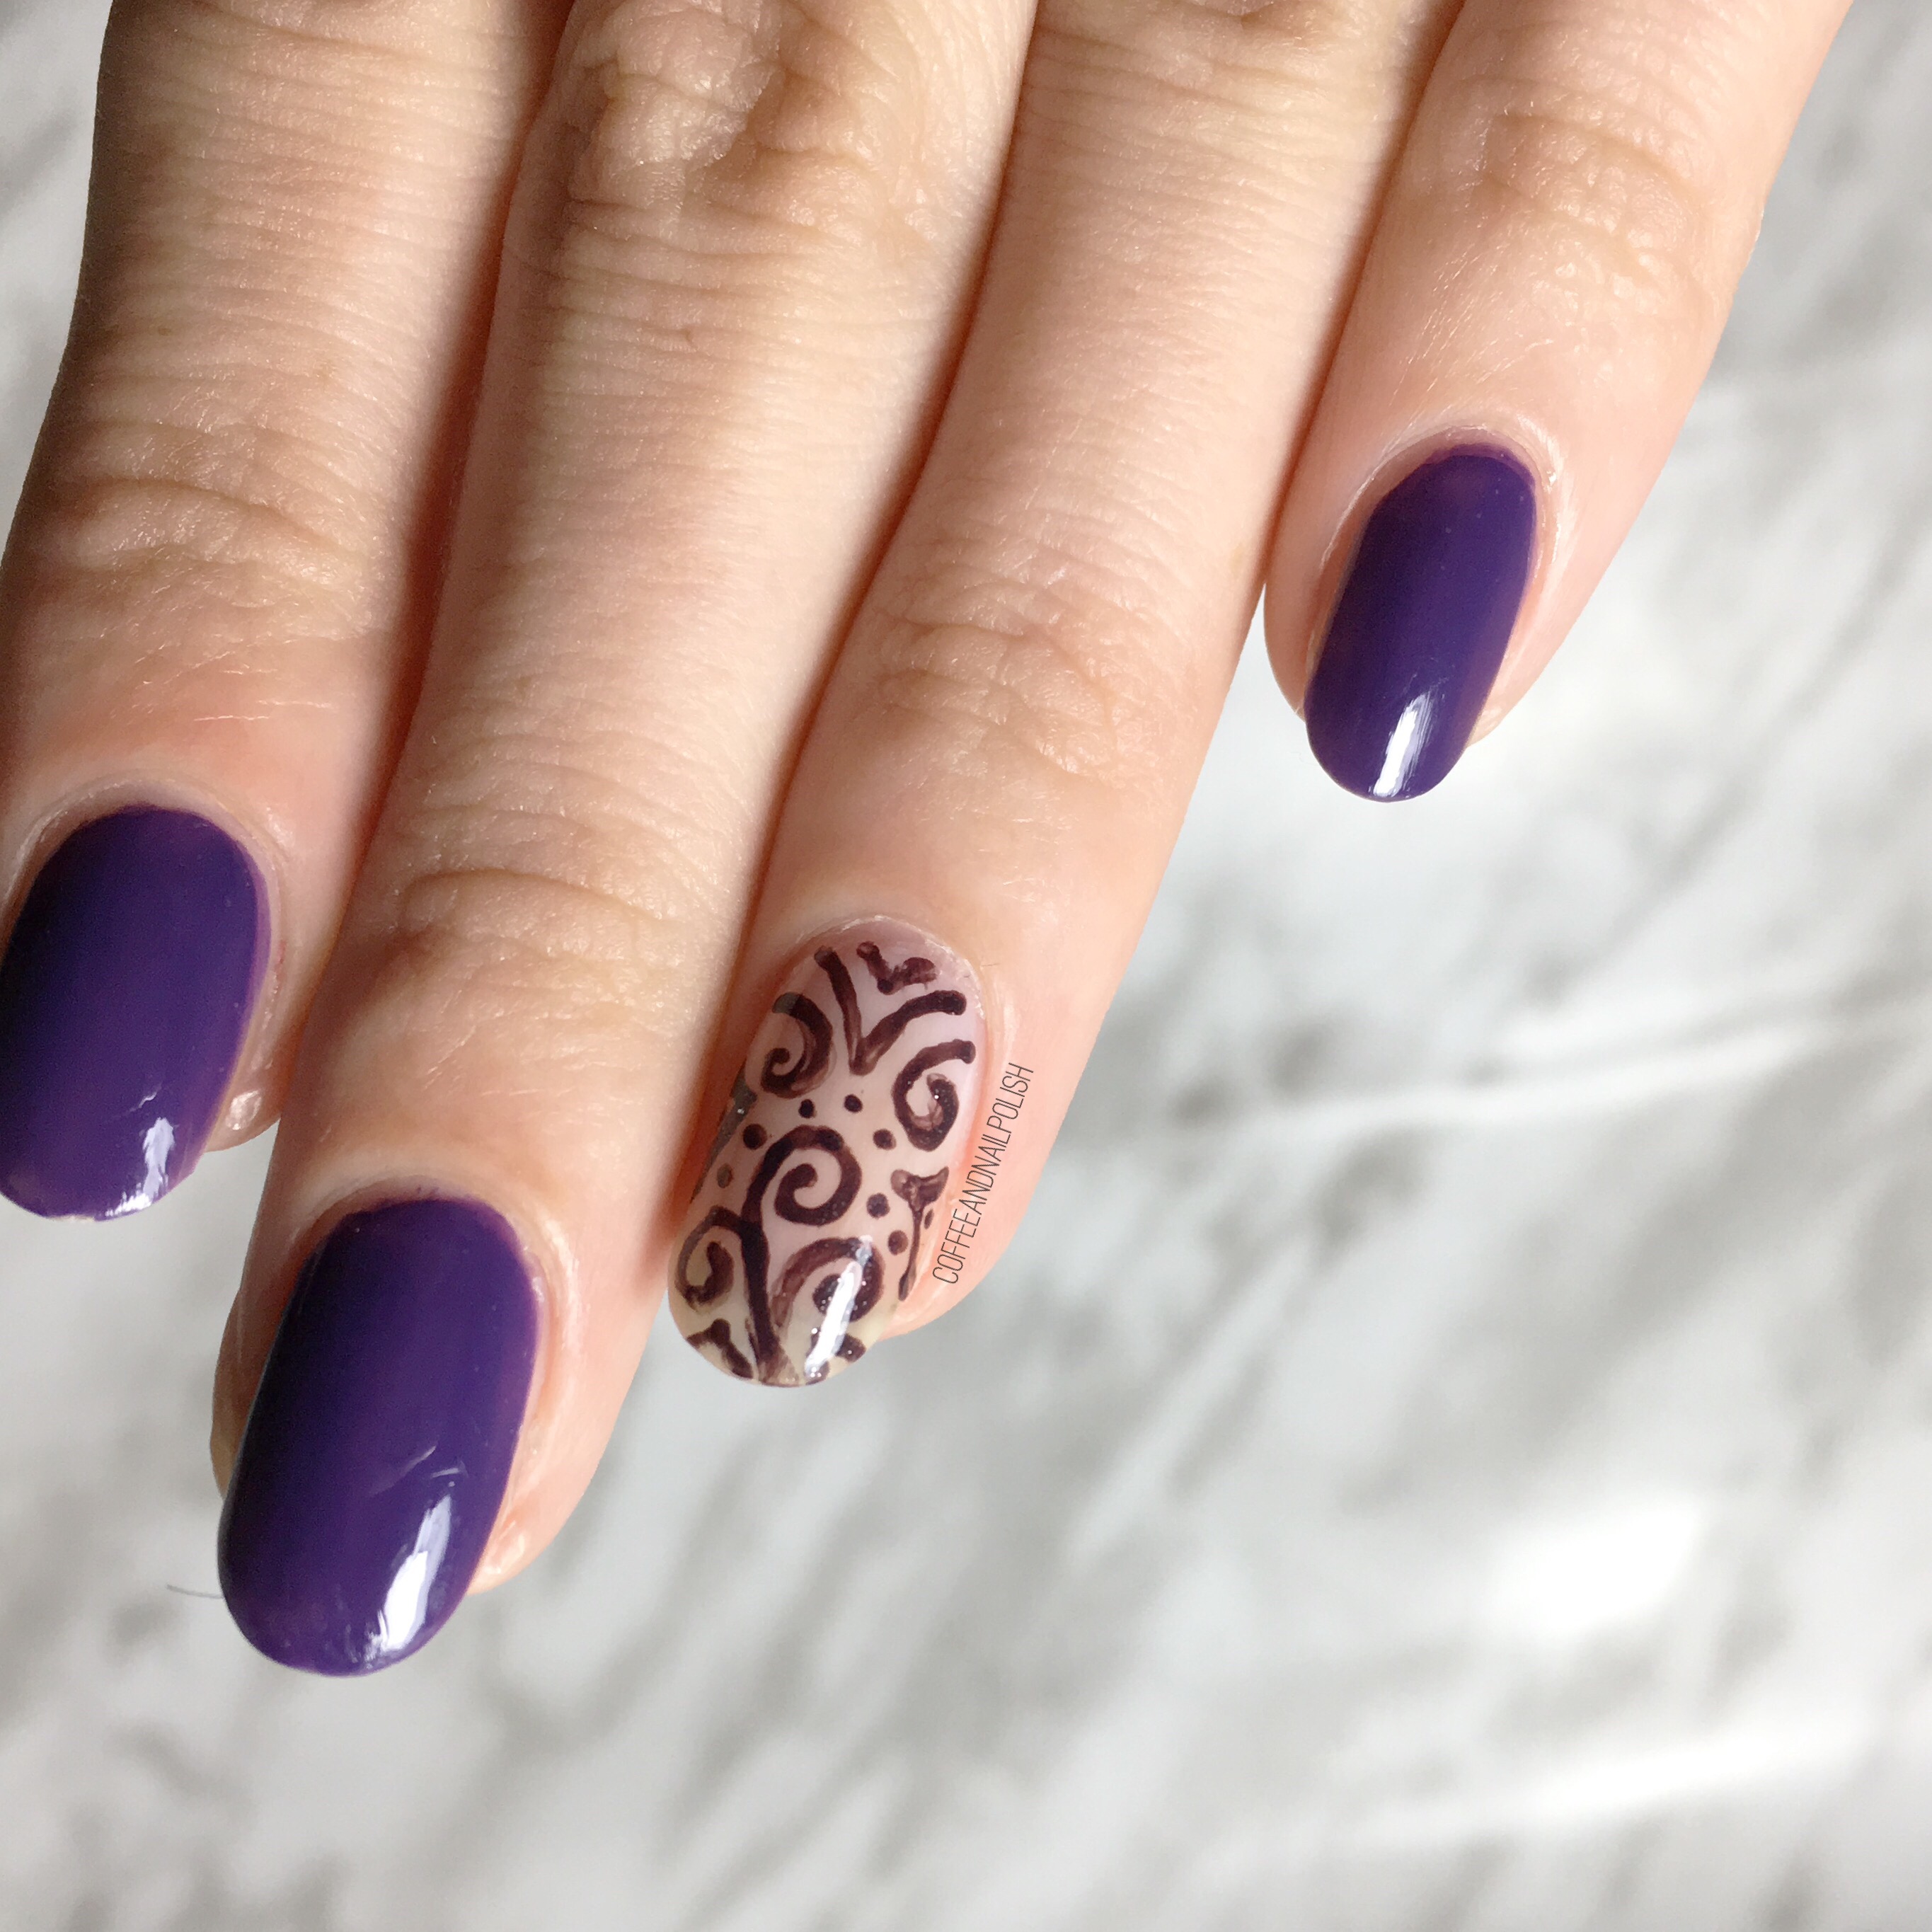
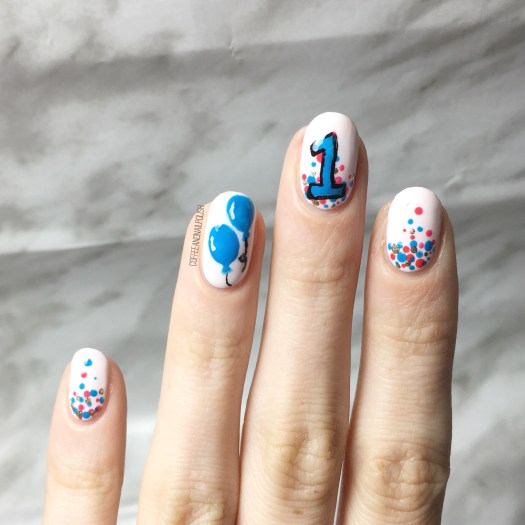
How handsome do our little guys look hanging out beside their special birthday manicures! For our designs, Hannah & I created a fun celebratory design featuring a gradient dotticure (to represent confetti), some balloons & the number one. Hannah had painted her nail design first, so I followed her polish picks to match the best I could.

For this manicure, the polishes I used were:

  • Base Coat: Quo by ORLY Breathable Kiss Me, I’m Kind
  • Top Coat: Seche Vive
  • ORLY Decades of Dysfunction
  • Essie Strut Your Stuff
  • Essie Too Too Hot
  • L’Oreal Feeling Kilty
  • Sally Hansen Hard As Nails Black Heart
  • Small detail brush from Bundle Monster
  • Small dotting tool from Bundle Monster

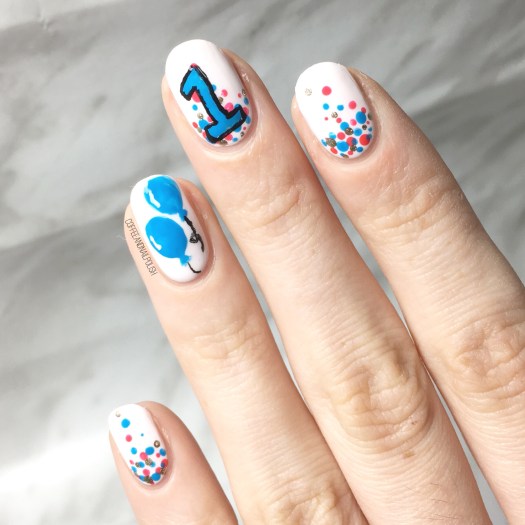
How cute did this design turn out?! The colour combination reminds me of a race car, which is perfection when celebrating baby boys. My little guys birthday isn’t until Thursday, but it still works because on this day last year I was on day 2 of my 54 hour labour! It’s kind of crazy to believe that I am almost the Mom of a one year old. This year has certainly been a whirl wind, & it definitely hasn’t been easy to balance Mom-life with non-Mom life (like blogging & doing my nails) but I wouldn’t trade it. It’s been a very interesting adventure.

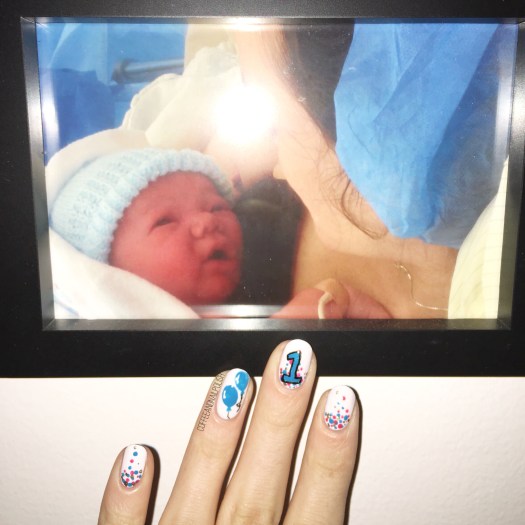
My nails & my 9 pound baby boy.

Hope you liked this design! & don’t forget to pop over to Hannah’s instagram (@hjs_nails) & give her mani some love too!

Have a happy Tuesday! 🎈🎉🎁

Pink Rose Accent Nails (& bonus video tutorial!) or

Happy Wednesday!

Today I’m excited to share some pretty rose nails. We’ve kind of hit mid-Winter grossness so I felt like something pretty was in order to cheer me up. Plus, I don’t know about you but I’m already starting to think about Valentine’s Day nail art & roses are pretty much a Valentine’s Day must!

The products I used for the design are:

  • Base Coat: Nailtek 2
  • Top Coat: Seche Vive
  • Sally Hansen Complete Salon Manicure Ruby Do
  • Essence Dream On
  • Essence Perfect Match
  • Essence Sweet As Candy
  • China Glaze Dune Our Thing
  • Sally Hansen I ♥️ Nail Art Pen in green
  • Essence The Green & the Grunge
  • Quo by ORLY Diva
  • Dotting Tool
  • Small detail brush (mine is from Born Pretty Store I believe)

Music: bensound.com

You know how much I love my floral, & I thought it would be fun to include a tutorial of how I create my roses. I know everyone has there own way, & this is just the way I’ve found is best for me to freehand them (after a ton of experimenting over the years.)

Also it was SUPER difficult to try & paint roses which filming. My usual nail art is done on the couch, with the bottle between my knees so it’s been interesting learning to paint on a table while simultaneously recording haha! I’m also still trying to figure out the best angle for filming that shows off how to do the design best.

What do you think of this floral design? How do you paint your roses/ other florals? Let me know in the comments below!

Christmas Tree Branch Nails 🎄

December is speeding by & I’m seriously attempting to fully embrace everything about the Christmas season.Have you put up your tree yet? We’ve been meaning to the last couple days, but still haven’t managed to… sadly I’m allergic to pretty much all trees so we have to stick to an artificial tree. But I did go out & buy a Christmas tree scented candle so the house would smell somewhat seasonal. 🎄 I also decided to create some Christmas tree inspired nails & oh my I’m so in love with how they turned out!

<<<<<<<<<<<>
For this manicure, the polishes I used were:

  • Base Coat: Nailtek Foundation 2
  • Top Coat: Seche Vive
  • Essence Give Me Nude, Baby!
  • Sally Hansen I ♥️ Nail Art Pen in Green
  • Essence The Green & The Grunge
  • Essie Stylenomics
  • Essie Butler Please
  • L’Oréal Carmin Parisien
  • China Glaze Metro Pollen-tin
  • Sally Hansen Hard As Nails Hard To Get
  • Sally Hansen Hard As Nails Black Heart
  • Bundle Monster Detail Nail Art Brush

Sometimes I get really excited about how a manicure turns out & this is one of those times. This isn’t the first Christmas Tree/Tree Branch manicure I’ve attempted, but it’s definitely the best I’ve ever done. I’m just so beyond in love with how it turned out.

I love that you can see the individual needles on my “branches”. It reminds me of our own sparse little artificial Christmas tree. True story: it’s the same tree my parents used when I was a kid, & the box still has the K-mart sticker on it from when it was purchased. & K-mart left Canada in 1998 I believe, so this tree is at least 20 years old. Haha. But it’s okay because it’s well loved, full of memories & is still going strong all these years later.

What do you think of this Christmas tree design? Do you have your tree up yet? Let me know your thoughts in the comments below!

My New Favourite Purple & Swirly Accent Nails 

Happy Friday everyone! Today I’ve got a quick mani I did recently when I was feeling some nail art, but didn’t want to do anything too complicated. This mani was actually inspired by a design I did back in September 2016 as part of my failed attempt at the 31 Day Challenge. I loved the look of the design over a super sheer polish, so I decided that it would make for the perfect accent nail. 

For this manicure, the polishes I used were:

  • Base Coat: Essie Grow Stronger
  • Top Coat: Seche Vive
  • L’Oréal Elusive
  • Ardene Ice Mist
  • Essie Frock N’ Roll
  • Small detail brush from Bundle Monster 

Okay can we talk about L’Oréal Elusive for a second? I found this bottle at my local Lawtons in the clearance section (my favourite place for polish finds) & I had to buy it! It’s just such a good shade of purple, & I’ve been wearing it a lot lately. Also I totally apologize for the chipping at the tip of my nails—I took these shots after 2 full days of wear so they were looking tougher than they should. But this purple…. it’s just such a good purple! 💜 I don’t know if you’ve noticed, but I’ve been on a huge purple kick lately. 

What do you think of this accent nail? Let me know your thoughts in the comments below. & leave some suggestions for any nail art you’d love to see! 

Halloween Skull Nails 💀 

We are only FOUR days away from Halloween which means I only have a couple more days to get in a few more spooky designs. My next Halloween design is one that is quite popular on Instagram—Jack Skeleton’s face (or just a skull since I don’t want any Disney copyright person coming after me!) 

For this design, I wanted to do something quick & easy for those who may be looking for a last minute Halloween nail design that isn’t too complicated to do. 

  • Base Coat: OPI Natural Nail Base Coat
  • Top Coat: Cutex Quick Dry Top Coat
  • Revlon Elusive
  • Ardene Ice Mist
  • Sally Hansen Hard To Get 
  • Kiss Products Nail Art Striper in Black 
  • Bundle Monster small nail art brush
  • Bundle Monster dotting tool 

This design was super simple to do! I decided to freehand my stripes because I wanted my stripes to look somewhat imperfect. I also like that they’re over such a sheer base colour. These really are super simple to do & I feel like you can accomplish them at any nail art level. My eyes/nose were the hardest to get right but even though they’re not perfectly symmetrical, they still turned out fun & Halloween-y. 🎃 For the eyes, I just created blobs using my larger size dotting tool & the mouth length using my striper. I then went in with my smaller brush & created the teeth & nose. 

What are you wearing on your nails for Halloween? Do you have any Halloween designs you’d like to see me take a stab at before Tuesday? Leave your suggestions here or on Instagram & I’ll try my best! 🖤