Hello lovelies & happy Monday! Another week is upon us, although this one isn’t looking nearly as Summer-y as the last. Today, though, I’m sharing the next prompt for Glam Nails Challenge April — tulips.
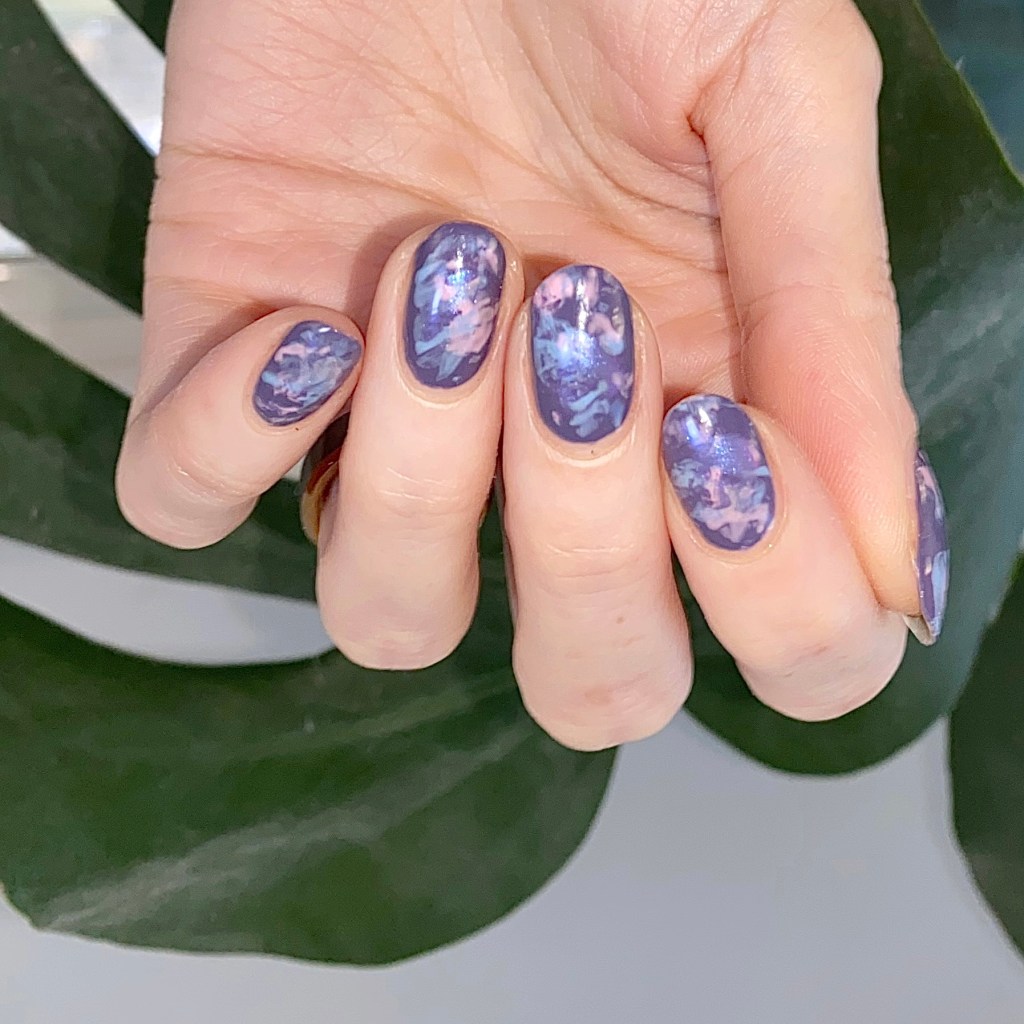
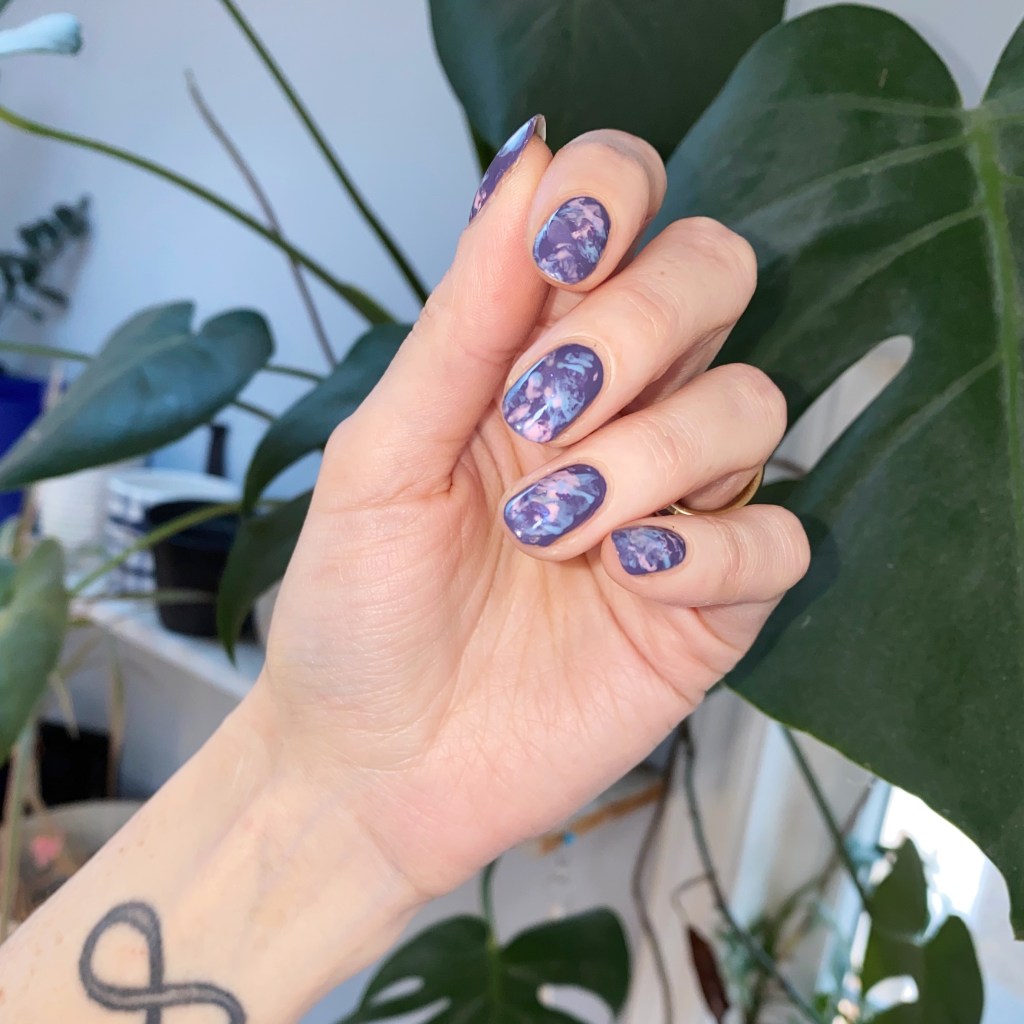
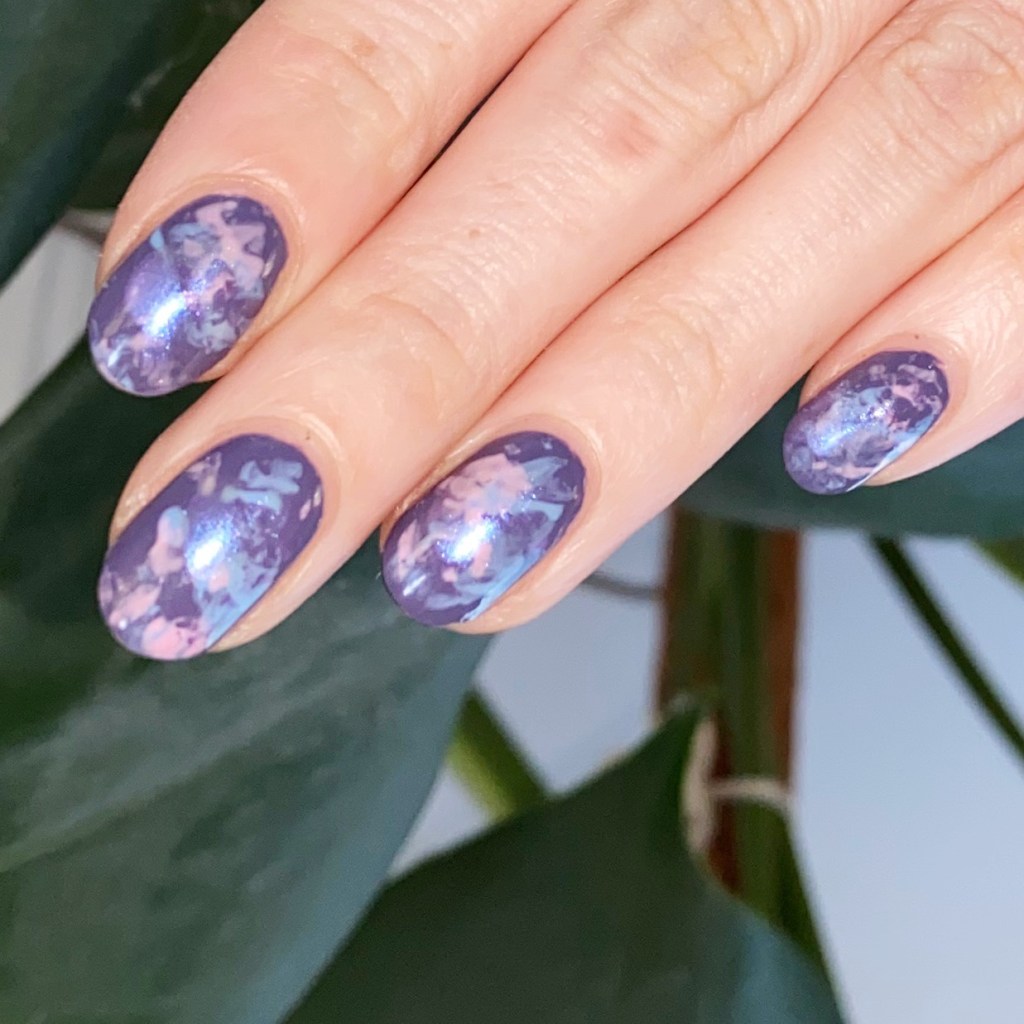
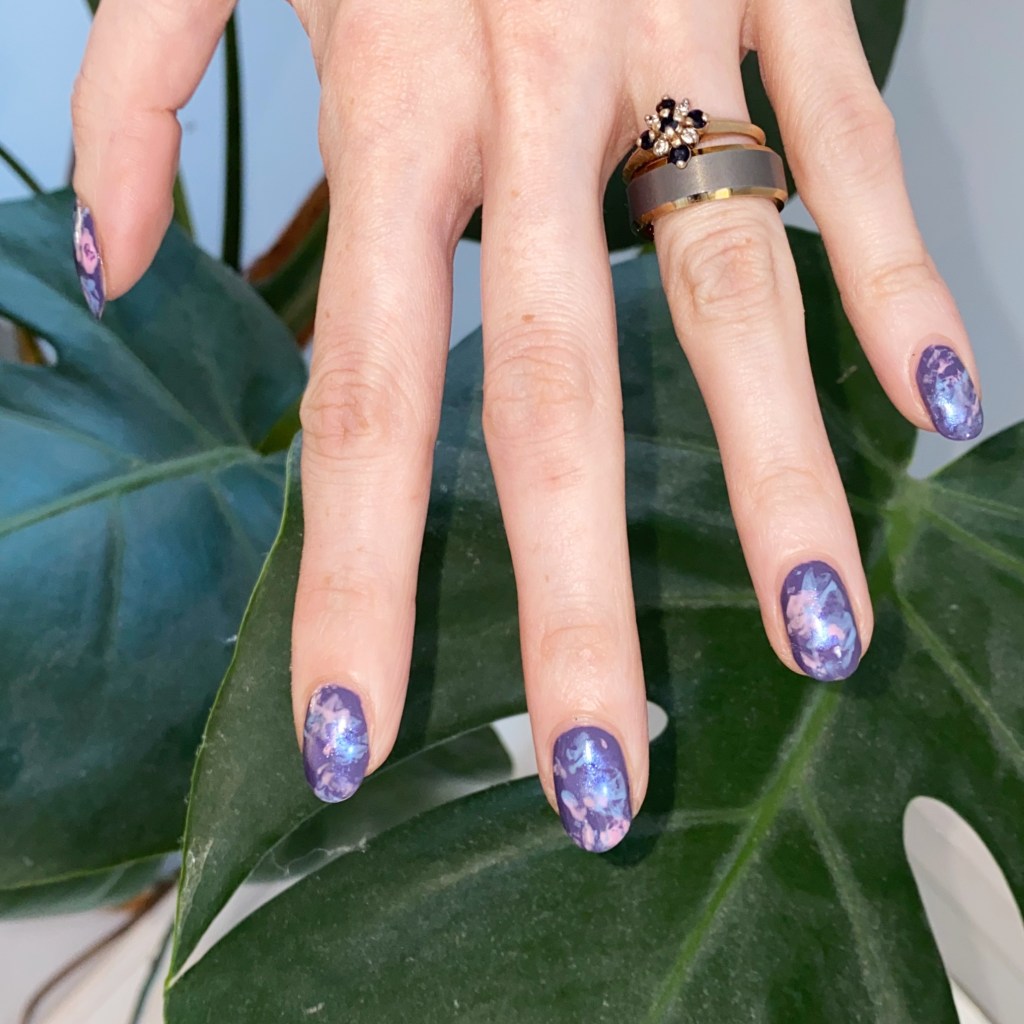
It’s kind of funny — in all the time I’ve been doing floral, I don’t think I’ve ever done a tulip design. So this was definitely a bit of a challenge for me. While it’s not my most perfect floral ever, I’m super happy with how adorable they turned out.
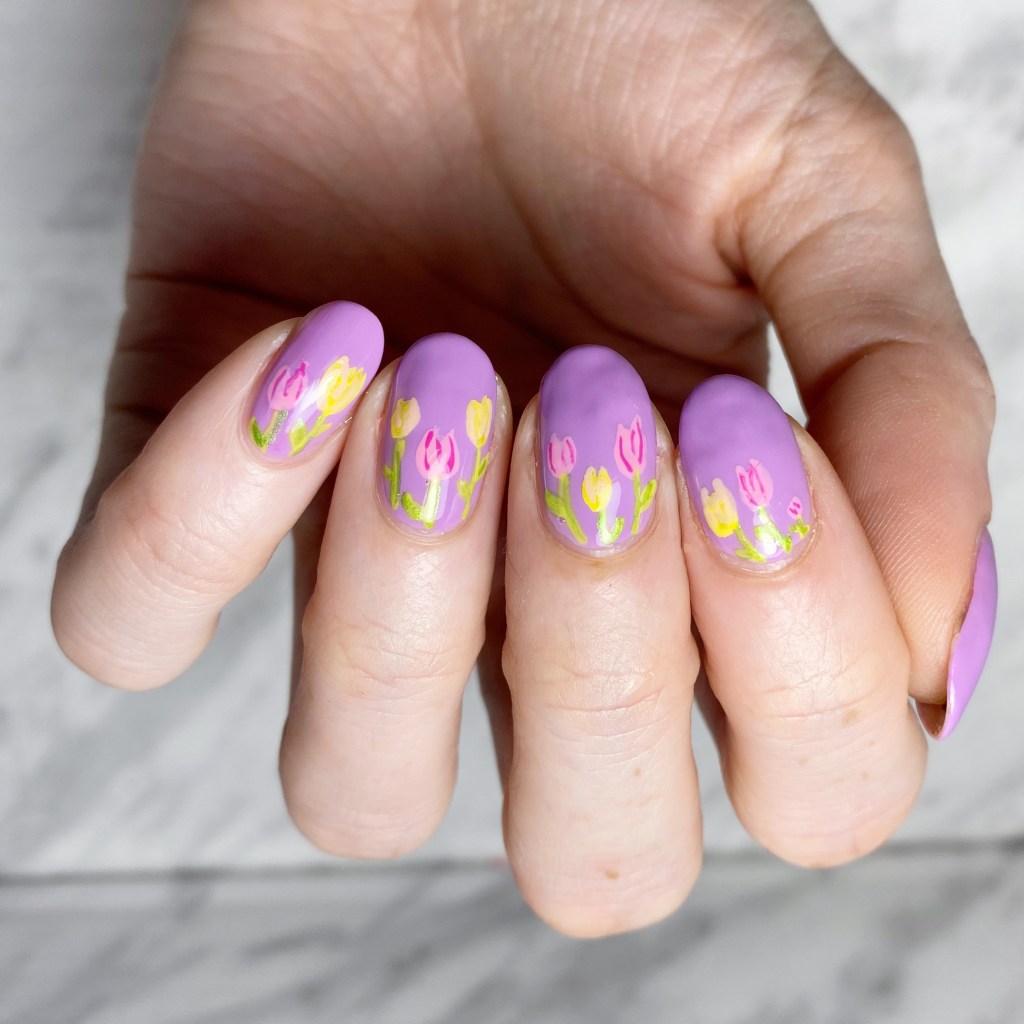
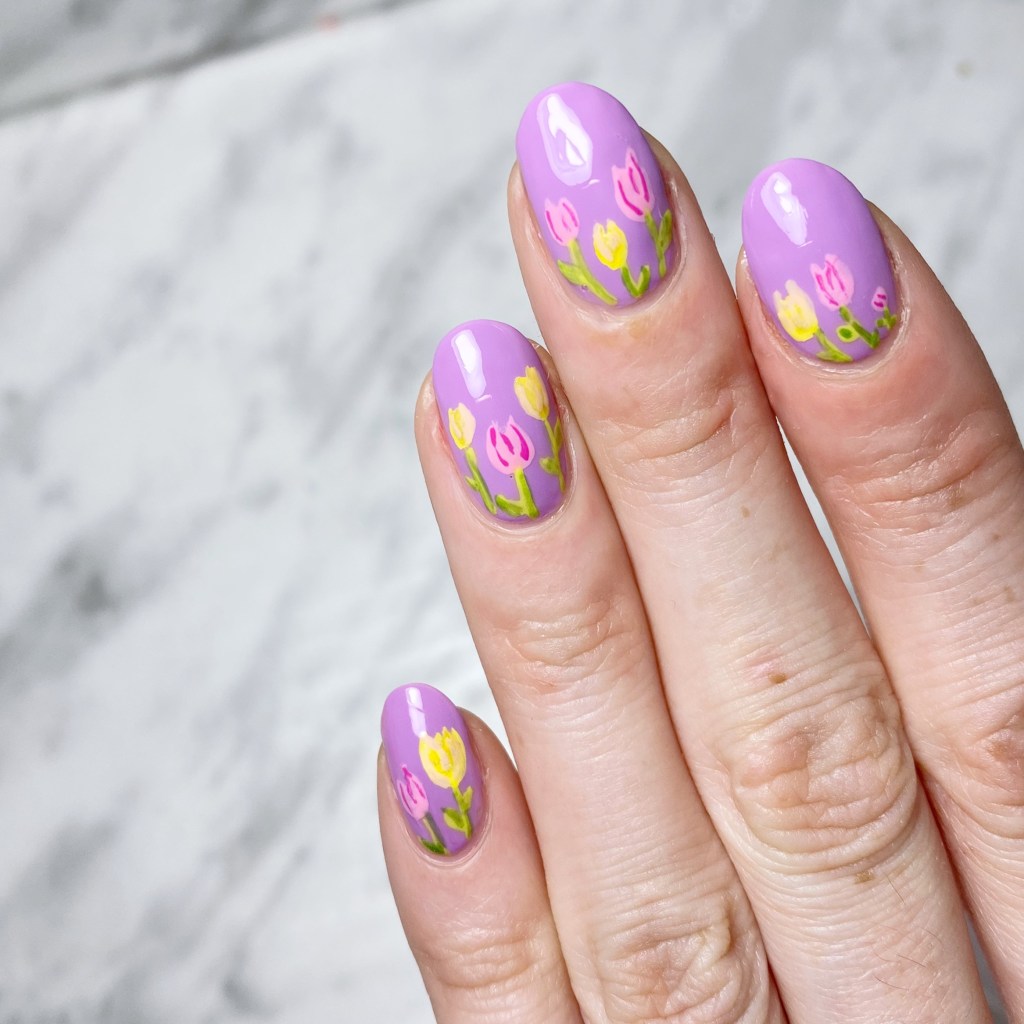
The polishes I used for this manicure are:
- Base Coat: Essie Hard To Resist Glow & Shine
- Top Coat: Seche Vive Fast Dry Top Coat
- Essie Play Date
- Sally Hansen InstaDri Jelly Belly Cotton Candy
- Sally Hansen Good. Kind. Pure. Peony Origins
- Sinful Colours Yolo Yellow
- Essie First Class Affair
- OPI Life Gave Me Lemons
- OPI My Gecko Does Tricks
- NailStuff.ca Mermaid Tail Brush Trio


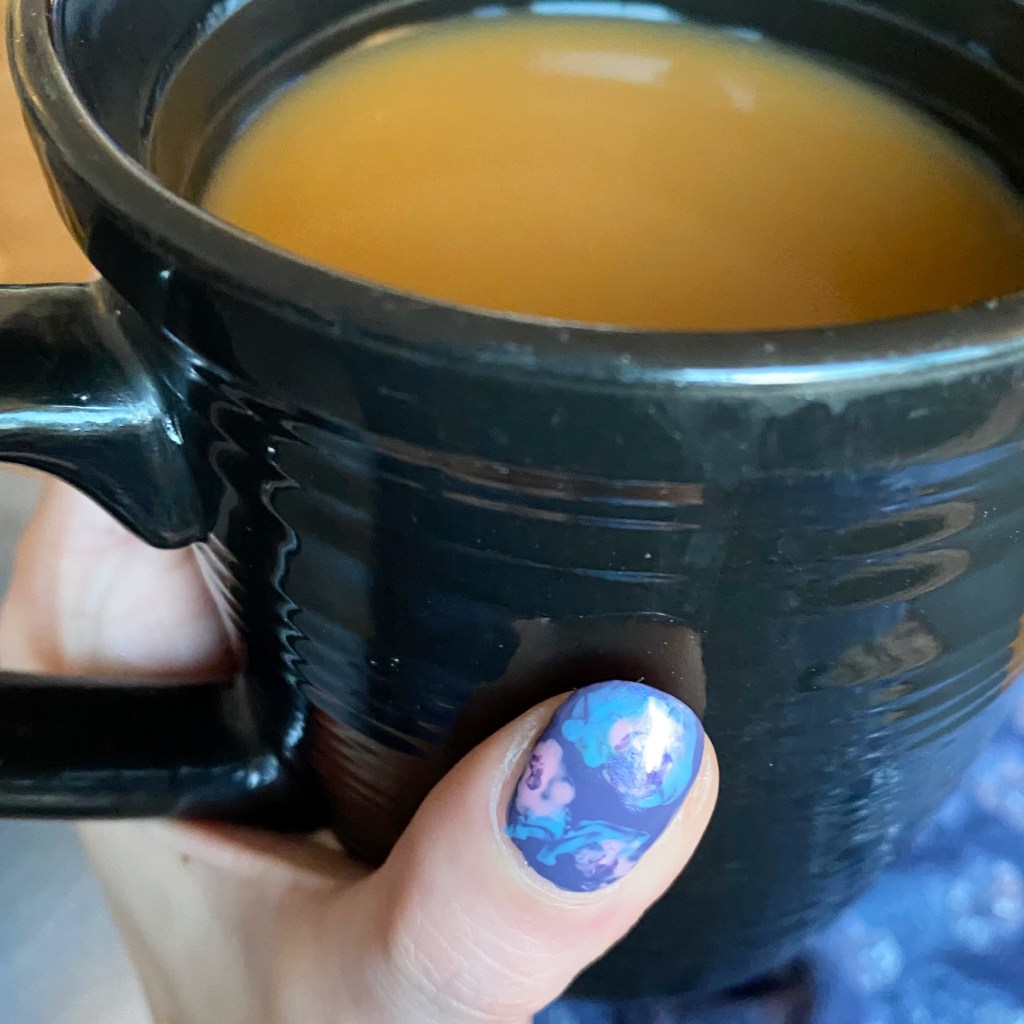
How cute do these flowers look? I would have loved to have taken a picture of them in front of my own garden, but no tulips quite yet. A few more weeks. I think this is such a perfect Springtime look. I love how colourful these are with the purple base & the yellow & pink tulips. Yes yes yes.

What do you think about this tulip design? Do you love a good bright & vibrant Spring-y design, or do you prefer things more subtle?
Let me know all your thoughts in the comments below & what you’re wearing on your nails this week.
Have a great Monday! 🌷