Halloween Patchwork Nails (recreated from @thelittlecanvas!)

8A565967-9C12-442C-8608-6102A0C3AF0E

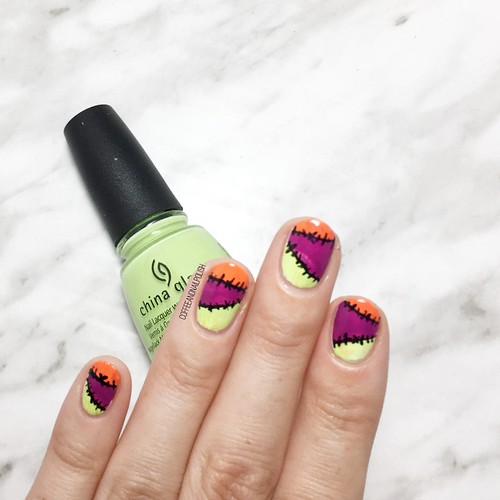
Hello lovelies & happy Tuesday! Today I have some more Halloween nails to share with you, this time a recreation of a design by Alaina aka @thelittlecanvas! If you follow her, you might have seen she recently recreated my ghost design, as well as my candy corn dotticure , so I really wanted to recreate one of her past Halloween nail art designs! & I found the perfect look in this patchwork design from 2 years ago!

FEE657FF-3511-4CDE-80F9-FC22CE286DD3

468F4136-06BD-423B-99F6-E203CBFAC9DA

For this manicure, the polishes I used were:

  • Base Coat: Sally Hansen Green Tea & Bamboo Strengthener
  • Base Coat: Duri Rejuvocate
  • Top Coat: YSL Beauty Quick Dry Top Coat
  • Sally Hansen Miracle Gel Get Mod
  • China Glaze Be More Pacific
  • Essie Flowerista
  • Sally Hansen CSM Fiery Island
  • Black Acrylic Paint
  • NailStuff.ca 11mm Liner Brush

.

10AEB632-DFC5-4AA0-9EEA-048E1241E328

8C1C0877-2A94-430A-852C-C4C81D5E52DD

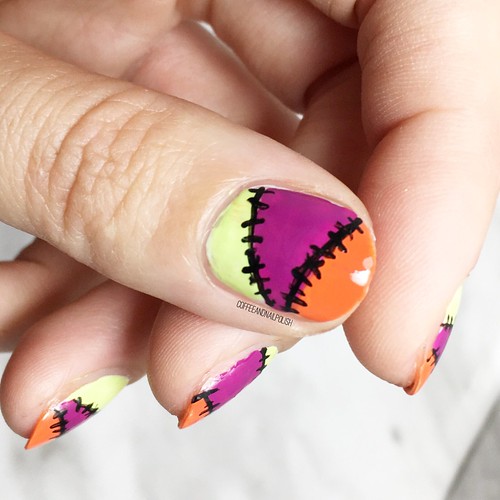
Oh my gosh you guys, this look is so fun & so easy! I started with a base of white, because it was easiest to make colours pop, & then created my blocks of colour. I did my green & orange first, & then filled in the middle with my purple. You don’t have to be too concerned with perfectly straight edges because you’ll be adding the black stitching, so I didn’t see the point in using tape. Then to finish my design, I took black acrylic paint & one of my NailStuff stripers, & added the black stitching along the edges. Finish off with top coat, & your nails are all ready for Halloween!

704962CA-71CA-465C-99C0-00A19C27B2FC

648C057D-0BA3-448F-9A0B-966E0F5FD209

This patchwork look is perfect for a variety of different Halloween costume ideas, & you can definitely change up your colours depending on needs–this would be perfect for a Bride of Frankenstein, Zombie, Scarecrow, etc. Lots of fun ideas, but super easy to do, even for a nail art beginner. & using acrylic paint for your lines vs nail polish also makes things a little easier, because if you mess up you can erase the lines without wrecking your whole nail.

840C102B-7CA0-490E-8302-3160049737D0

5DFB116B-E28A-4ED0-955F-ACC708F0A20F

What do you think about this nail art look, recreated from @thelittlecanvas? Did I live up to the original? & hop over to Alaina’s blog today to see her version of another one of my nail art looks!

GlamnailschallengeOct—Skeletons 💀

3C23D45B-1949-42AD-B0B2-056244275611

07A90D34-AA19-404F-BEF8-3D87E72BA16F

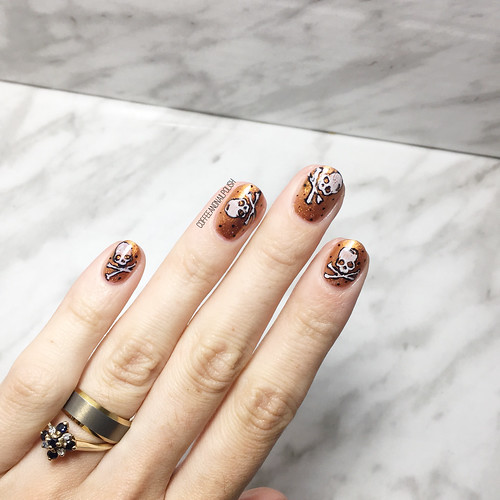
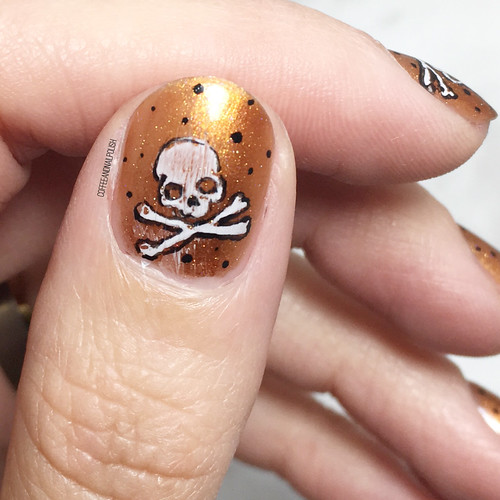
Hello lovelies & Happy Monday! The Halloween countdown is officially on, & I have another spooky design created for GlamnailschallengeOct! The next prompt on our list is skeletons, which is not an image I’ve ever attempted on my nails before, so I was really excited to give it a shot! & honestly, I think this is my favourite manicure of the challenge so far!

4BCD3F7B-E43C-4788-8B5D-9F9004289667

73ED538D-3350-4D24-9500-19E3046F2944

For this manicure, the polishes I used were:

  • Base Coat: Duri Rejuvocate
  • Top Coat: YSL Beauty Quick Dry Top Coat
  • Essie Leggy Legend
  • China Glaze Pathological Liar Liar
  • Sally Hansen Miracle Gel Get Mod
  • Black Acrylic Paint
  • NailStuff.ca 7mm liner brush (from Mermaid Brush Trio)
  • Born Pretty Store Classic Patterns stamping plate BP-L006 (item #17924)

.

F4B008B7-52FE-4698-A1FB-D04F6DBFAD81

DC6AAB54-3553-4271-AD65-AC96387A5B2C

This nail art look was built in layers. First I started off with my base, which is Pathological Liar Liar layered over Leggy Legend — I definitely need to do two coats of PLL next time, but I definitely love it a lot more when it has some undies.

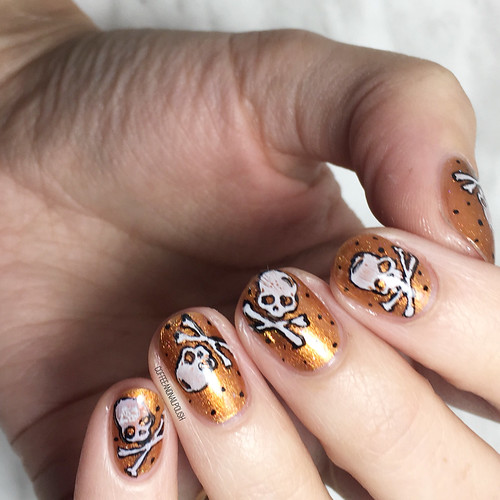
Next I decided to use this skull & cross bones image from my classic patterns stamping plate from Born Pretty Store, mostly because I was unsure about free handing skeletons. On its own, the image was a little meh, so I took a risk & outlined the stamp with black acrylic paint & my mermaid tail brush from NailStuff. & that’s when this mani came to life! The outlining made the image pop on my nail & I am absolutely OBSESSED with it. I also did a few polka dots around it to fill in the space. It almost looks like nail art stickers, which is super cool. I literally didn’t even want to take these off after I put them on.

8D66BC93-B1AB-4344-90CC-13694BD29928

178C7866-7FF7-4CB6-8CDF-9C5B0F311D60

I really like how the stamping & outlining almost looks slightly cartoon-y. Going with black & white over the coppery orange base was definitely the way to go.

I feel like if 17 year old me was into nail art like this back in the day, this is a design I would have rocked in a variety of background colours… while listening to the Ataris on repeat & writing angsty journal entries. Works for Halloween & non-Halloween alike.

9FE3B814-FB50-47EA-A715-006F445ECAAB

What do you think about my skeleton nails? Would you wear this design? What do you think about combining freehanding & stamping in the same manicure? Let me know all your thoughts down in the comments below! & don’t forget to keep following along with  #glamnailschallengeOct on Instagram for all the nail art looks!

Birthday Nails with Essie Birthday Girl 🎉

F516455D-4537-4A98-AB92-7F0C2C493092

Hello lovelies & Happy Tuesday! Hope everyone is having a beautiful start to their week. Today I’m breaking up my usual posting schedule because TODAY IS MY BIRTHDAY! That’s right, today marks 33 years around the sun. So obviously I needed to do something fun on my nails to mark the occasion.

In years past I’ve done some obvious birthday nails, but this year I decided to let the polish do the talking. When I saw that Essie had released a polish called Birthday Girl, I knew that I was going to need to own it & incorporate it into my birthday mani this year! I also wanted to do something fun, as I snapped a nail just in time for my birthday, so I am back to some serious shorties.

B6F4411E-B3BE-4022-A8E6-B491C3881773

D5BA04A3-77C1-4A8D-97B2-F6EDDF238362

For this manicure, the polishes I used were:

  • Base Coat: Duri Rejuvocate
  • Top Coat: YSL Beauty Quick Dry Top Coat
  • Essie The A-bliss {PR sample}
  • Essie Birthday Girl
  • Color Club Pucci-licious
  • Color Club Eternal Beauty
  • Essie Play Date
  • Sally Hansen Pat on the Black
  • Nailstuff.ca 11mm Liner Brush {PR sample}

.

6B65E022-F47A-402E-A001-10F99CDAA9E7

01B4F731-8F0D-445D-AAF9-C1103719365E

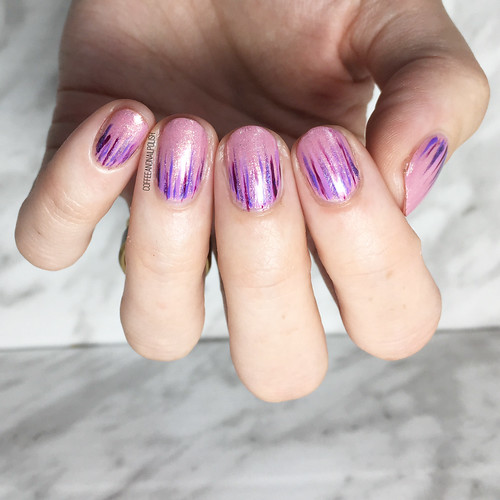
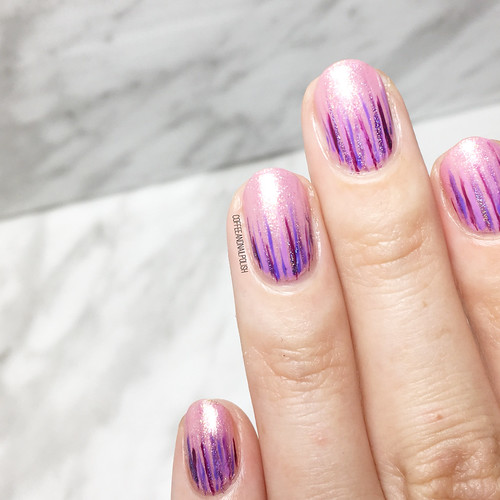
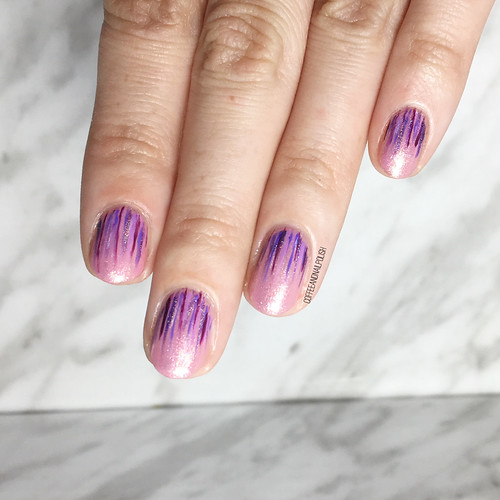
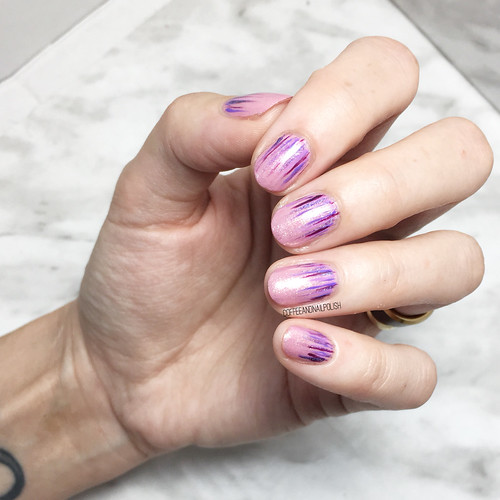
For my base, I applied two coats of Birthday Girl over one coat of The A-bliss. I then did a whole bunch of Pinterest stalking to see what kind of design I wanted to do overtop my base of Birthday Girl & in the end I decided a Waterfall look was the way to go! Do you remember when Waterfall designs were all the rage? I feel like this design needs to make a comeback!

3C197715-613B-4B6C-8739-90325123C31A

DF26AE0C-B843-43C7-B7C3-D9FD5043AFED

For this look I decided to pick a few purples that I thought would compliment my pink base. Then o used my liner brush from NailStuff to brush thin streaks of polish at my cuticle line, & bam! An low effort design that looks super fancy & fun. Kind of reminds me of sparkling fireworks at the base of my nails which is perfect for celebrating, even if my idea of celebrating is drinking my free birthday drink from Starbucks & playing with the new stamping plates my Mum bought me for my birthday! I can’t think of a more perfect day. ☕️💅🏻

06924BF0-00CA-4581-8459-66D69BCD6AE0

59F2C682-46CF-43FC-8C89-1023165DE1EC

Hope everyone has an amazing day! Let me know what you think about this look & what colour combination you’d love to see me do in a Waterfall look next! 💙

SWATCH SUNDAY — (part of) the Essie Rocky Rose collection

3FE18565-55A9-44B7-B8C6-1FF27C9EE5A6
{PR SAMPLE}

Hello lovelies & Happy Sunday! & Happy Thanksgiving weekend to my fellow Canadians–I hope you’re enjoying a lovely feast with friends & family. Today I’m very thankful for everyone who takes the time to sit & read the blog, & comment & like. I wouldn’t be where I am if it wasn’t for you guys. & I wouldn’t have the opportunities I have if it wasn’t for you guys.

Like being sent PR packages from Essie!

Today I have a couple of polishes that we’re so kindly gifted to me from Essie themselves! They sent me 4 shades from the Rocky Rose collection from this past Summer. The collection itself features 9 neutral toned shades & is described in the PR materials as “a collection that harnesses the sun-saturated grandeur of the iconic desert landscape.”

Can’t get more awesome than that!

C07659A7-1A52-4B66-BB02-8B988B476AB7

For my swatches, I received the shades The A-bliss, Cliff Hanger, Set in Sandstone & No Shade Here. I will add, only two of the bottles came with the actual polish names on the bottom so I’m guessing based on the other swatches I’ve seen.

Now let’s get to the swatches.

Continue reading “SWATCH SUNDAY — (part of) the Essie Rocky Rose collection”

3 Easy Accent Nail Ideas

F1D4AE8B-B101-42D4-9347-DCF7AA530A7A

Hello lovelies!

Hope everyone is having a fantastic start to their week & October! Can you believe it’s October already?! It is absolutely my favourite month of the year because HALLOWEEN! & my birthday as well, but still haven’t decided if I’m excited for my birthday this year or not.

Today though I have a fun nail art post to share with you featuring 3 different accent nail art looks that are both quick & easy! For these designs I used the same polishes for all 3 looks, & tried to do nail art that #1. wouldn’t take forever to dry, & #2. didn’t need a whole lot of complicated tools

BD3ED88F-1A43-4698-A6C6-51DA1194CF2A

For all three designs, I decided to use the same polishes:

  • Essie After School Boy Blazer
  • Essie White Page
  • Quo by ORLY Breathable Nail Superfood
  • Joe Fresh Gel Look Sparkling Glitz
  • Sally Hansen Miracle Gel Frosted Berries

As always, I used my base coat & top coat for a complete look. As well, I used a couple nail art tools in order to achieve my look–a dotting tool & a striping brush. Mine are both from NailStuff.ca, although there are a ton of different places you can purchase nail art tools.

Continue reading “3 Easy Accent Nail Ideas”