Hello beauties & happy Monday. I hope everyone had a lovely weekend.
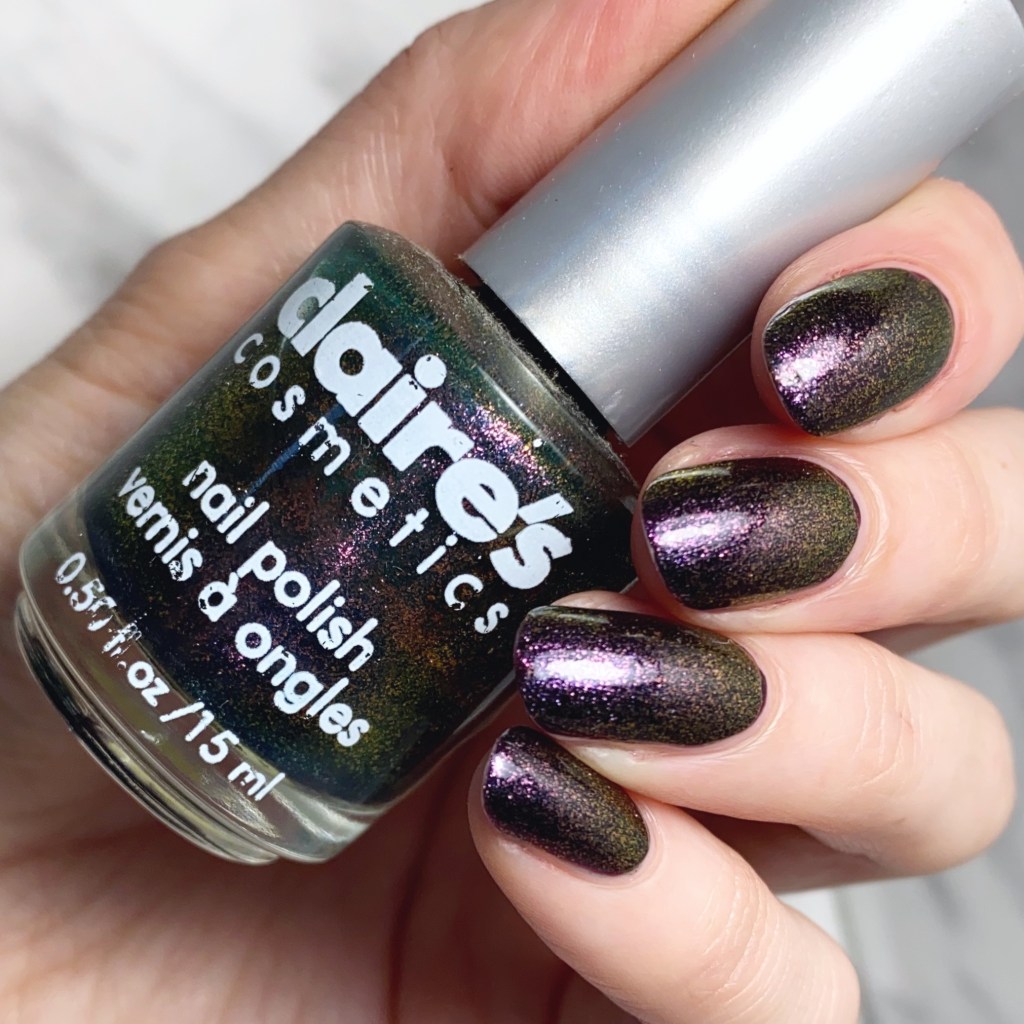
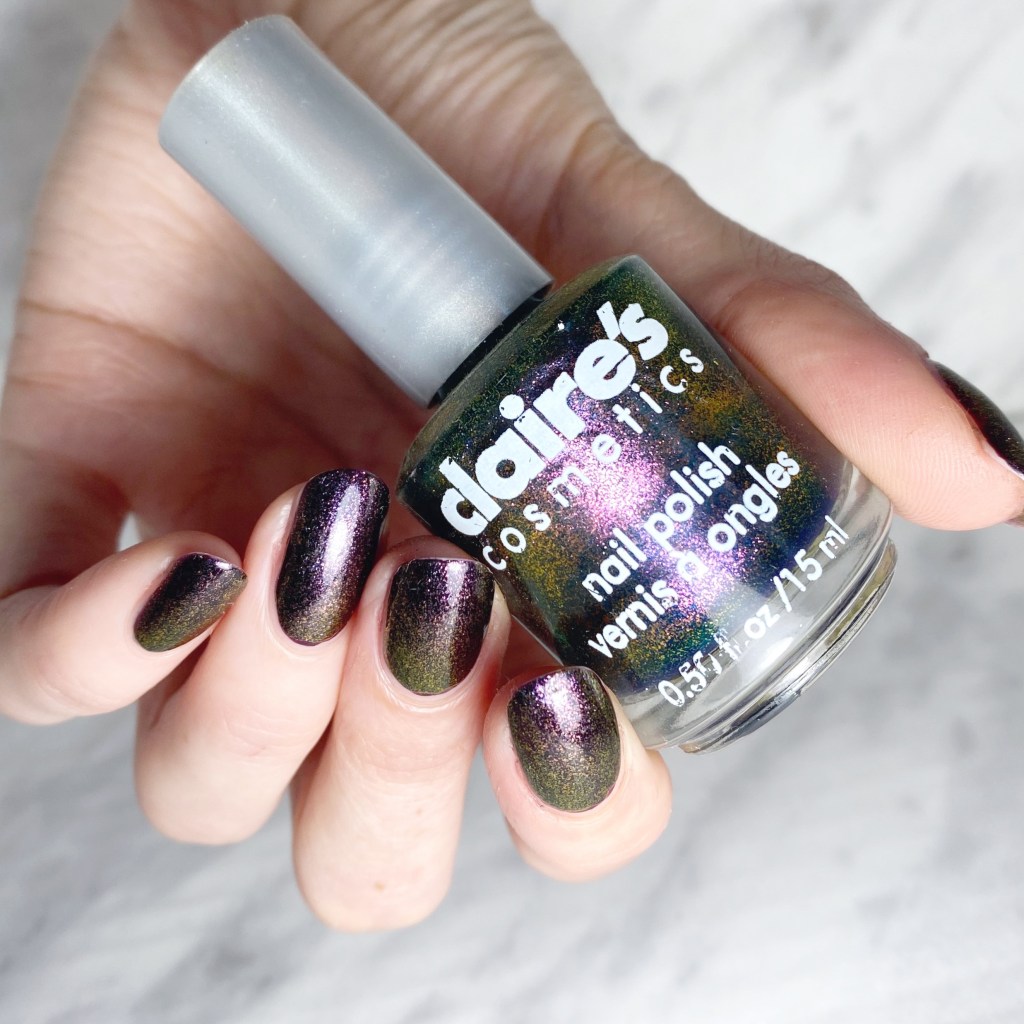
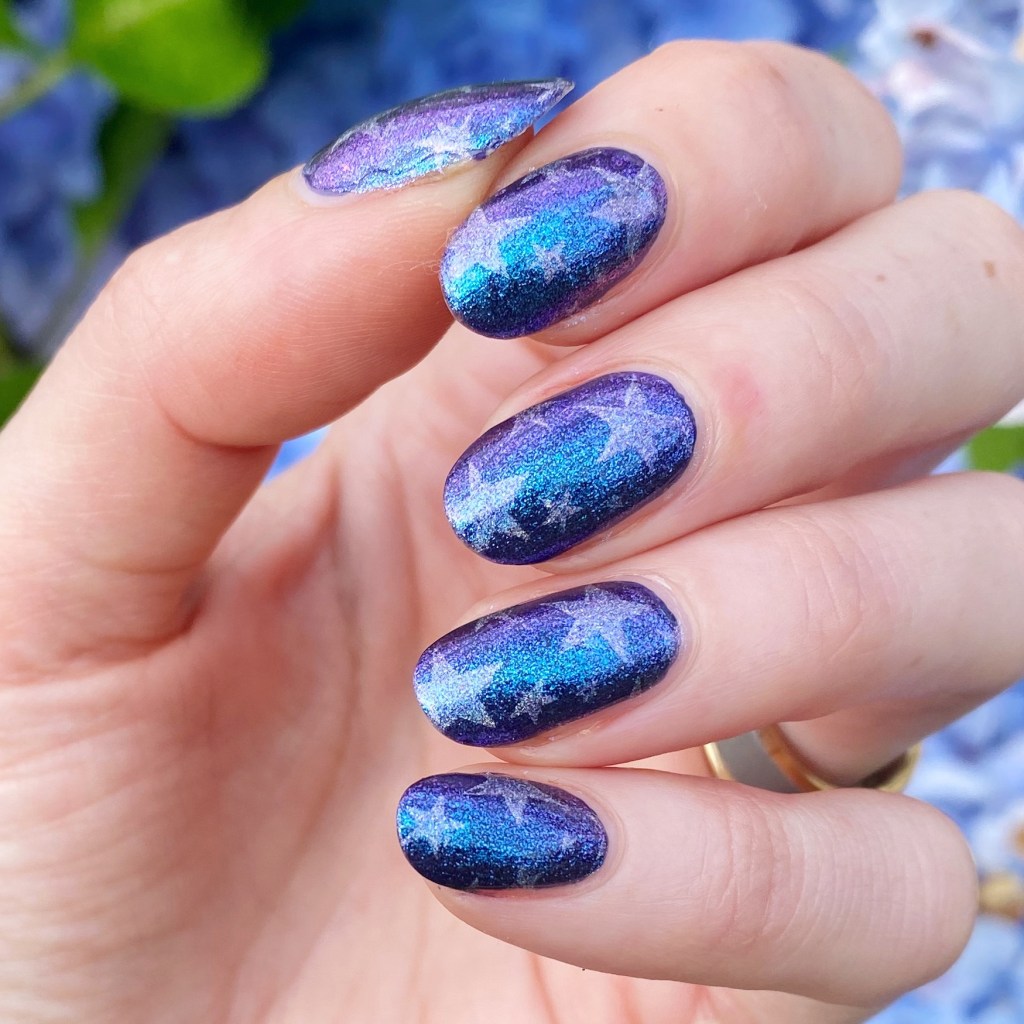
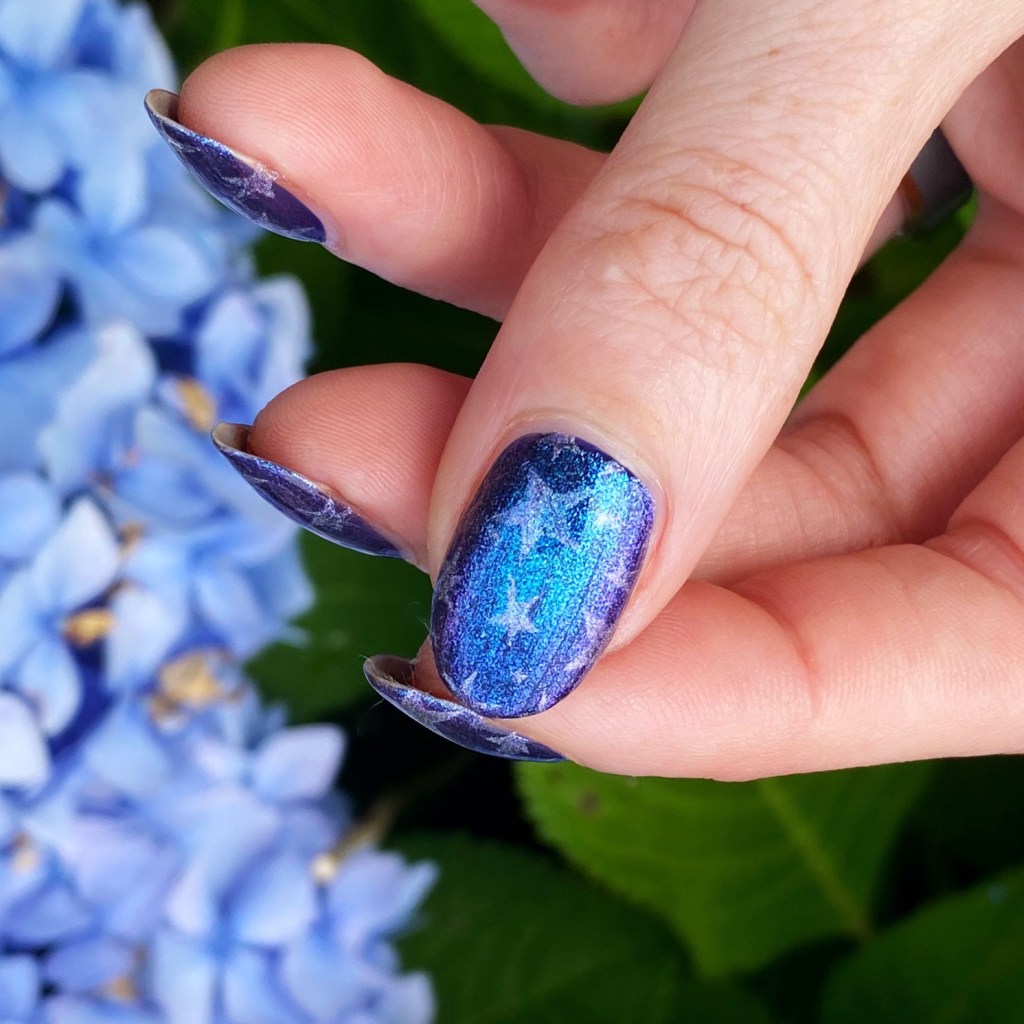
This month is speeding by quickly! We’re already on our third prompt of Glam Nails Challenge August, & the next prompt is Night Sky. For this look, I went with a dark base & some pretty stamped on holographic stars to complete it. & oh boy… am I in love!

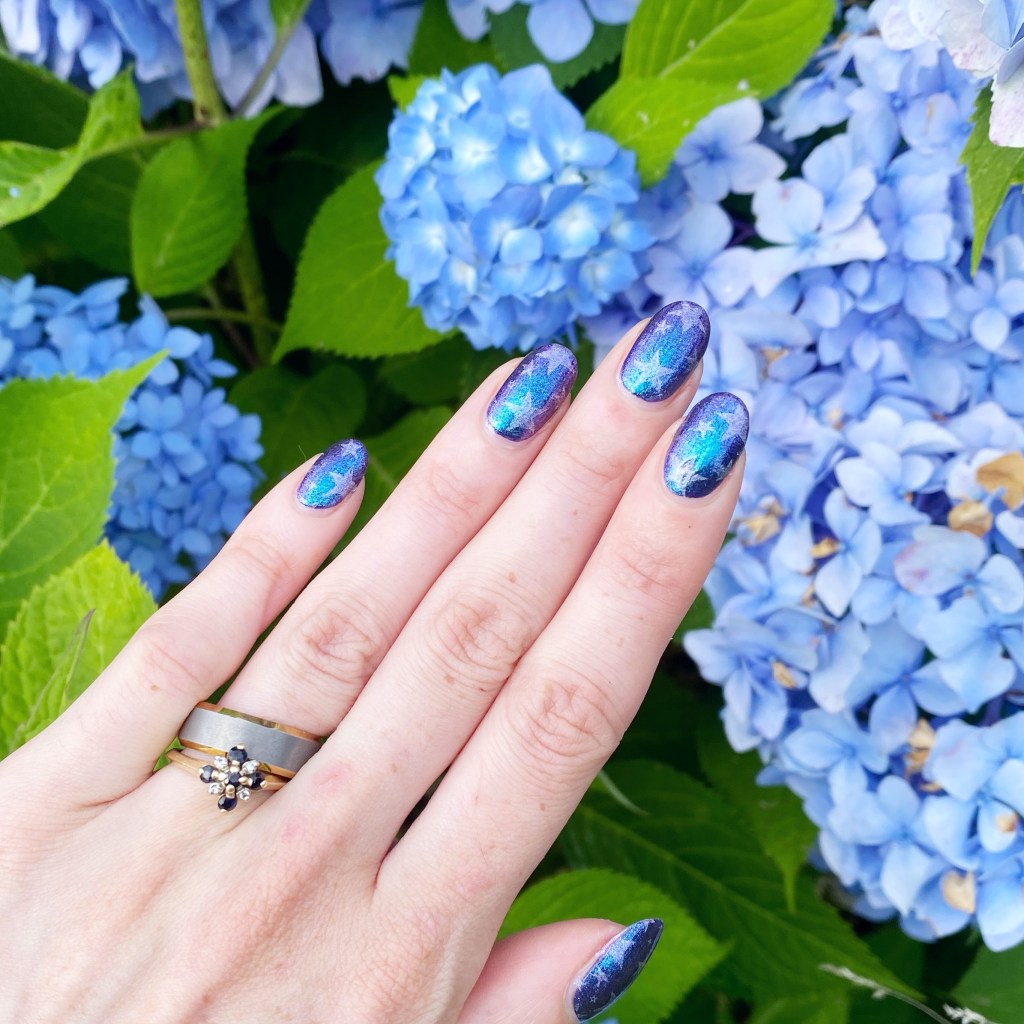
The polishes I used for this manicure are:
- Base Coat: LA Colors Mega Grow Treatment
- Top Coat: Essie Gel Setter
- Essie No More Film
- Claire’s Holographic
- Color Club Bewitched
- NailStuff.ca Clear Jelly Stamper Set
- Born Pretty Store Classic Patterns Stamping Plate BP-L006 (discontinued)
Hello gorgeous!
While usually I would go with a classic galaxy design for a prompt like this, I’m glad I went with the stamped stars because I just think this look turned out perfect! I love the shifty base, I love my secretly holographic stars (those Color Club holos really do stamp so well!); I love everything! This is exactly the reason why I knew I wanted to jump back into the Glam Nails Challenge game this month — I needed to get my nail art mojo back after a rough beginning to the year, & it feels like I finally am!
Just in time for my favourite nail art months of the year.

What do you think of my night sky inspired nails? Are you a fan of this design? Would you wear this nail art look? Let me know your thoughts down in the comments below!
& as always, you can follow along with the Glam Nails Challenge on Instagram with the hashtag #glamnailschallengeaug24 & see all the beautiful nails that have been created!
Happy Monday!
♥︎