SWATCH SUNDAY — Essie Revenge’s a Beach (Summer 2022)

Hello lovelies & happy Sunday.

I hope everyone is having a lovely weekend so far & that the weather, where you are, is not apocalyptic.

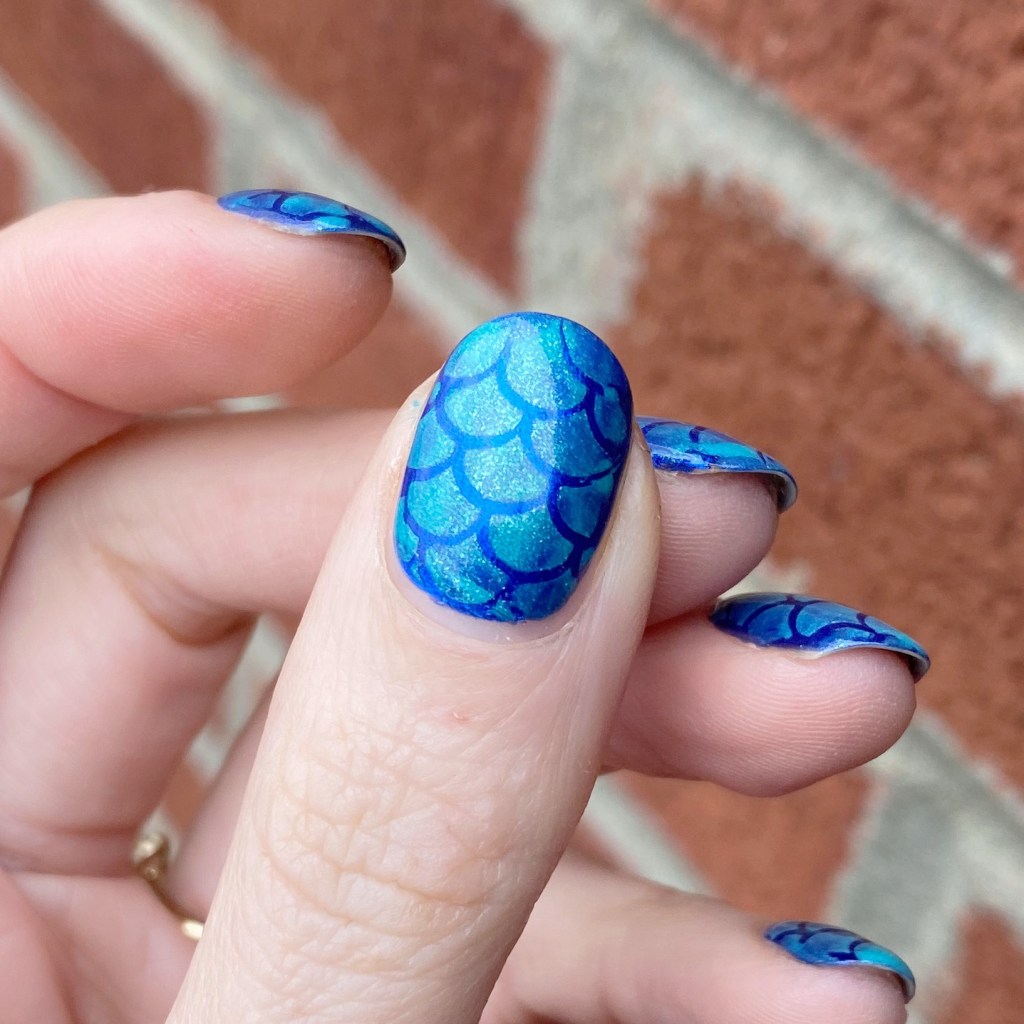
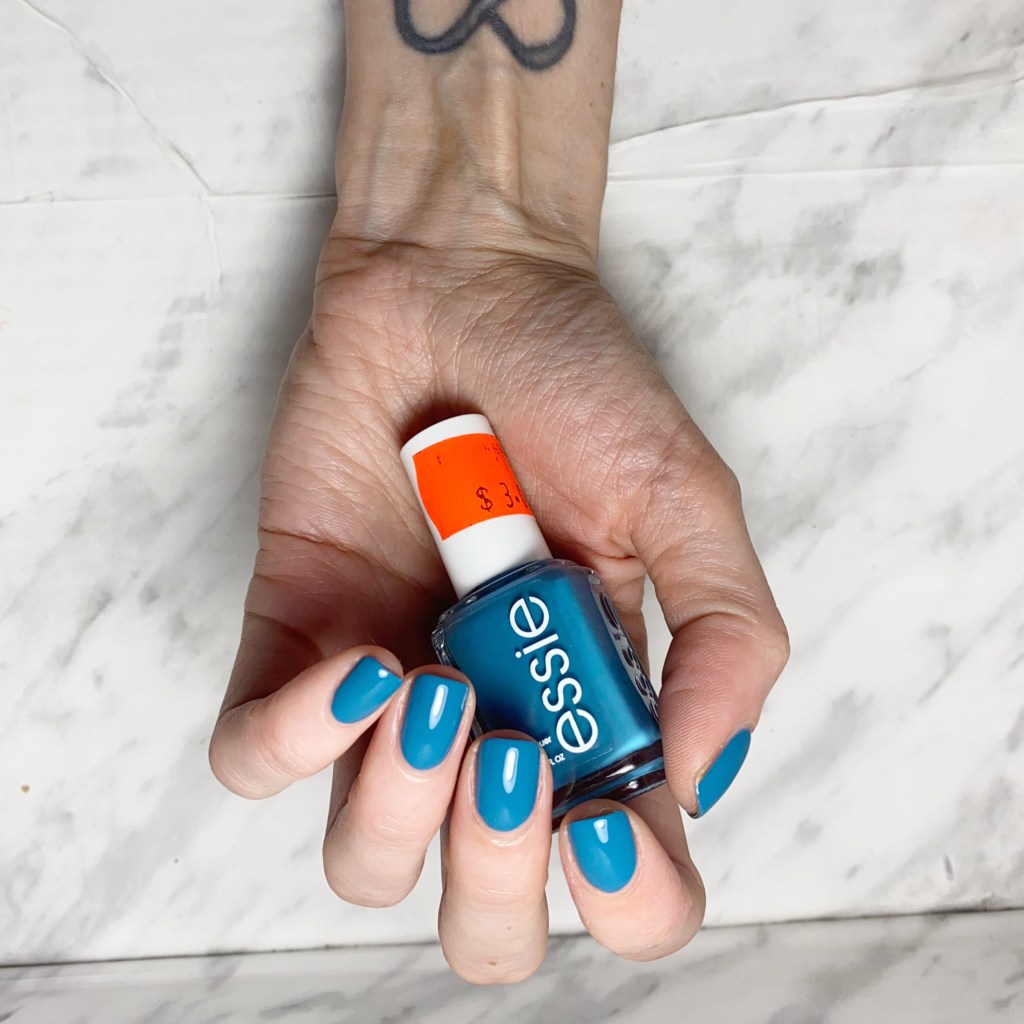
Today’s Swatch Sunday post is decidedly Summer appropriate. I posted last weekend about the other polish I picked up during my small Shoppers haul, & here she is: Essie Revenge’s A Beach from the Summer 2022 collection.

2 coats + top coat

I’ve been eyeing this shade in their clearance bin for a month or so, but I’ll be honest — the price wasn’t right. But when I saw it for $3 on my last visit, I knew it was coming home with me.

Formula is pretty good on this one — I could almost do one coat, but I applied a second for full coverage. It dried down a bit flat, but adding top coat gave it that glossy finish you see. The colour is a beautiful blue leaning teal that you just know needs careful removal because it’ll be a stainer. I’m still wearing this shade, so we’ll see how it goes when I attempt to remove it tonight!

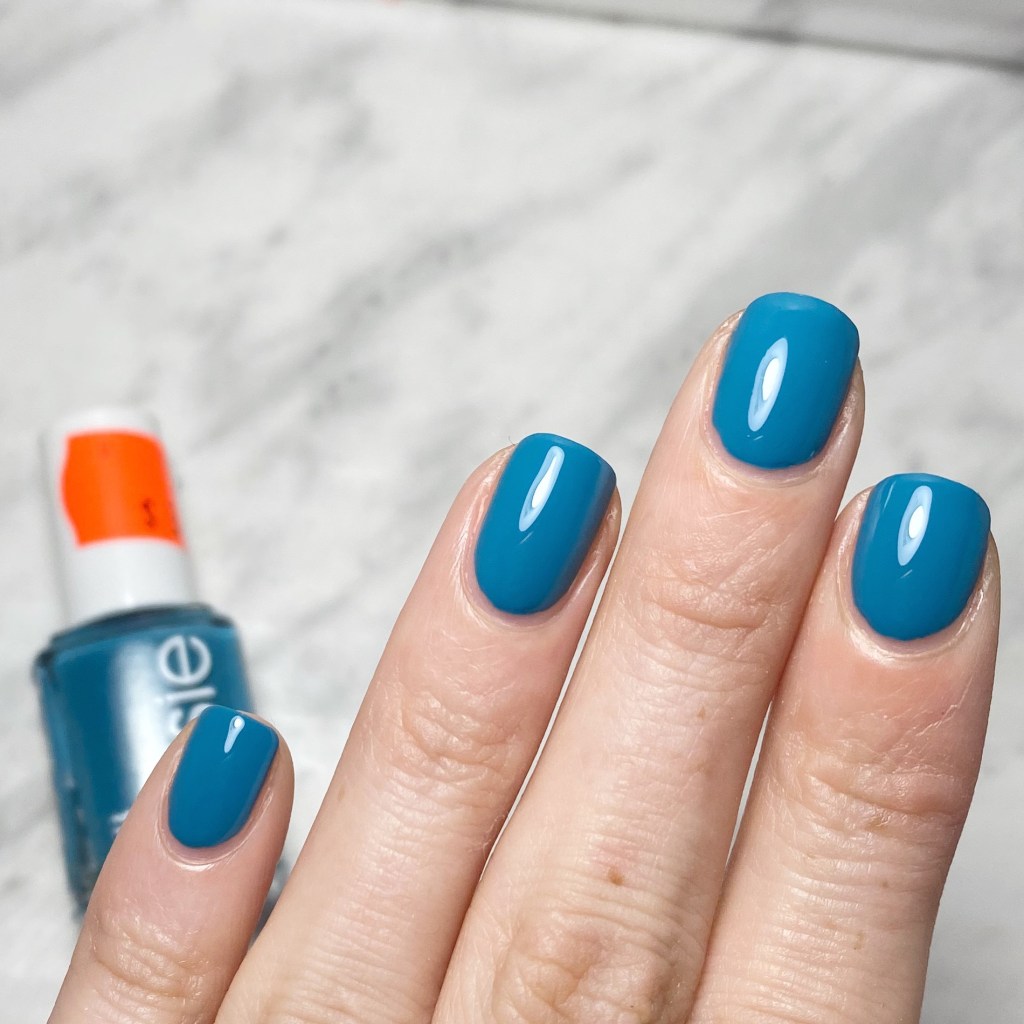
It really is a beautiful colour. Definitely a little bit bluer than Essie Garden Variety & a little more teal & darker than Essie Strut Your Stuff. It also definitely appears lighter in my light box versus natural lighting. Not necessarily a colour I immediately reach for in the Summer, but I very much get the beach vibes they were aiming for.

Obviously, as this was part of last years Summer collection, availability is limited. I did find it still available on NailPolishCanada.com, & I have no doubt if you Google around you can find more. My best advice is check the clearance section at your favourite place to buy nail Polish — that’s where I usually score finds like this. It’s also possible it will pop up at your local Winners/Marshal’s, as mine always seems to get in these previous collections.

What do you think of Essie Revenge’s A Beach from the Summer 2022 collection? Are you feeling the beach vibes? Let me know all your thoughts in the comments below!

Happy Sunday! 🖤

Throwback Floral (Using Just a Dotting Tool)

Hello lovelies & happy Friday! I hope it’s a beautiful day wherever you are. It’s supposed to be sunny, & slightly warm today, so I’ll take it.

Today I’m sharing a design which is a recreation of a design I did many moons ago—like… 2013 at the beginning of my nail art journey & before this blog. I just always love revisiting old designs, & when this one popped up on my Facebook memories, I knew I needed to do an updated version!

2013 version
2023 version

The polishes I used for this manicure are: 

  • Base Coat: Londontown KUR Nail Hardener & Base Coat 
  • Top Coat: Seche Vive Fast Dry Top
  • Essie Peach Side Babe
  • Essie Worth the Tassel
  • Essie Blanc
  • Essie Turquoise & Caicos
  • Small & Large Dotting Tool (NailStuff.ca Dotting Tool Trio)

I didn’t have a list of the original polishes I used for my design, so I tried to go with what looked the closest to the colours — which was hard because my original photo is pretty poor quality. I think, though, I did a pretty good job on recreating the original look!

I know that was my first jump into “real” nail art after getting my first dotting tool. It was an Essence brand one that I found at Shoppers Drug Mart, & I got very excited to find something to do legit nail art.

What do you think of this floral nail art recreation? Do you remember what nail designs first got you into nail art? Let me know down in the comments below!

Have a fantastic Friday!

Instagram Summer Treats Nail Art Collab 🍦

Hello lovelies — happy Friday. We have a weekend of rain in the forecast, which I’m so happy for because my entire province has basically been on fire this week, & we’re in desperate need of a reprieve from the heat. So everyone send rain vibes. 🌧️

Today, though, I’m sharing a look I did a week or so back for a nail art collab I joined! You might remember I did another one last month, & it was so much fun I thought I’d do it again! This time the theme was Summer Treats. & my favourite treat of the Summer: ICE CREAM!

The polishes I used for this manicure are: 

  • Base Coat: Londontown KUR Nail Hardener & Base Coat 
  • Top Coat: Seche Vive Fast Dry Top
  • Sally Hansen Good. Kind. Pure. Almond Tan
  • Sally Hansen G.K.P. Rock Steady
  • Sally Hansen Miracle Gel Neons Peach Please
  • Sally Hansen MG Neons Electri-Lime
  • Sally Hansen MG Neons Violet Voltage
  • Sally Hansen MG Neons Lemon Chillo
  • Sally Hansen MG Sugar Fix
  • Claire’s Melon Mania
  • NailStuff.ca 16mm Striper Brush
  • Large Dotting Tool (NailStuff.ca Dotting Tool Trio)

This is actually a recreation of a design I did all the way back in June 2016. I loved it so much the first time, I thought it would be perfect for this nail art collar — with some updates! I love the neon ice cream, I love my glitter “sprinkles”. I just think this whole look turned out too, too cute!

Don’t forget to check out all the beautiful designs on Instagram by checking out the hashtag #summertreatsnailartmanicollab2023 & see all the other beautiful designs that my fellow nail artist created! There are so many cute one!

Have a fantastic Friday! ♥︎

Floral Shorties

Hello loves & happy Wednesday!

& Happy last day of May!

I swear, you’re in the right place. I just decided to switch things up a bit. I’ve been humming & hawing on Instagram for a while about going to square nails, & I finally decided to take the plunge–just in time for a new month! I know, crazy. But it’s been about 2 years since the last time I rocked some squares, so I thought why not try them out again for a while.

They’re pretty short right now, but that’s okay. I’m excited to grow them out to a nice square shape. & in the meantime, we’ll rock some fun shortie nail art. Naturally, the first manicure I did on my new short squares is floral! I mean, were you expecting anything else.

The polishes I used for this manicure are: 

  • Base Coat: Londontown KUR Nail Hardener & Base Coat 
  • Top Coat: Seche Vive Fast Dry Top
  • Franken white shade (I mixed a few whites I own with a little black to grey it)
  • OPI Is That A Spear in Your Pocket
  • OPI Living On The Bula-vard 
  • OPI Two Timing The Zones 
  • OPI Do You Have This Color in Stock-holm? 
  • OPI Getting Nadi on My Honeymoon 
  • OPI Koala Berry
  • OPI Who You CallinBossy?
  • OPI Gelato On My Mind
  • OPI Check Out The Old Geysirs
  • NailStuff.ca Dotting Tool Trio
  • NailStuff.ca 4mm Micro Detail Brush

Obviously, I had to use my garden for a backdrop as it’s been thriving with these Summer-y temperatures. This floral is pretty simple — although it used a ton of different polishes — but I think it turned out beautiful & I’m really in love with the final look. I went with a white base, even though I’ve been iffy on wearing white lately thanks to the VPR drama & Scandoval, but I think this white base looks so pretty with the floral over top.

What do you think about this floral look & my return to square nails? This was the nail shape I had when I first started my blog, so I always return to it, even though I do love round nails as well. Sometimes, you just need a change, you know?

Let me know what you think & what nail art you’d like to see next! I have one manicure coming on Friday that I did earlier in the month for a nail art collab, but I’m excited to start Summer off with these new square shorties.


Happy Wednesday ♥︎

Shimmery Mermaid Vibes 🧜‍♀️

Hello loves! It’s Monday again.

It’s also 3 days away from June, which just blows my mind. I mean, I’m happy for Summer weather — although, we could use some rain here so send rain vibes! — but also this year is speeding by & it’s kind of unbelievable. How is it even possible that we’re almost half way through this year?

But I digress; you’re here for nails, so let’s talk nails! Today’s look was what I promised in yesterdays swatch post. I knew that OPI Blue My Mind would be a beautiful base from some nail art, & I knew I was feeling mermaid nails. So naturally, I knew what I had to do.

The polishes I used for this manicure are: 

  • Base Coat: Londontown KUR Nail Hardener & Base Coat 
  • Top Coat: Seche Vive Fast Dry Top
  • OPI Blue My Mind
  • Essie Viva Antigua!
  • Beyond the Nail Mermaid Scale Vinyls

My little girl is absolutely obsessed with all things mermaids right now, so this was the perfect manicure to impress her! This was also super easy to do. I only applied one coat of Viva Antigua! over my base, so it’s kind of spotty in some spots, but I like it because it gives a more watery scale look (if that makes sense). You can kind of see the base showing through, & I like that. Over all, it’s a very pretty look.

In fact, I’ve been wearing this manicure since Thursday, & it’s still holding up very well. I usually wear a manicure maybe 3 days max (& that’s if I’m really busy) but I’ve just loved this look so much, & it’s barely even showing tip wear, it felt like a shame to remove it. Of course, I will probably change my nails today, but it’s been fun to wear. I almost wish I had gone to see the Little Mermaid this weekend, as it would have been the perfect manicure for it. But I’ll have to redo one when I take my little girl in a few weeks.

What do you think of my mermaid nails? Are you feeling all the mermaid vibes? Let me know all your thoughts on this look down in the comments below!