Lush Green Dotticure 🌿💚

•PR/Gifted•

Hello loves & happy Tuesday! I know, a post on a Tuesday…. not my usual posting schedule. But the rain & grey has me all out of sorts, so I ended up skipping posting yesterday. I just was not feeling it.

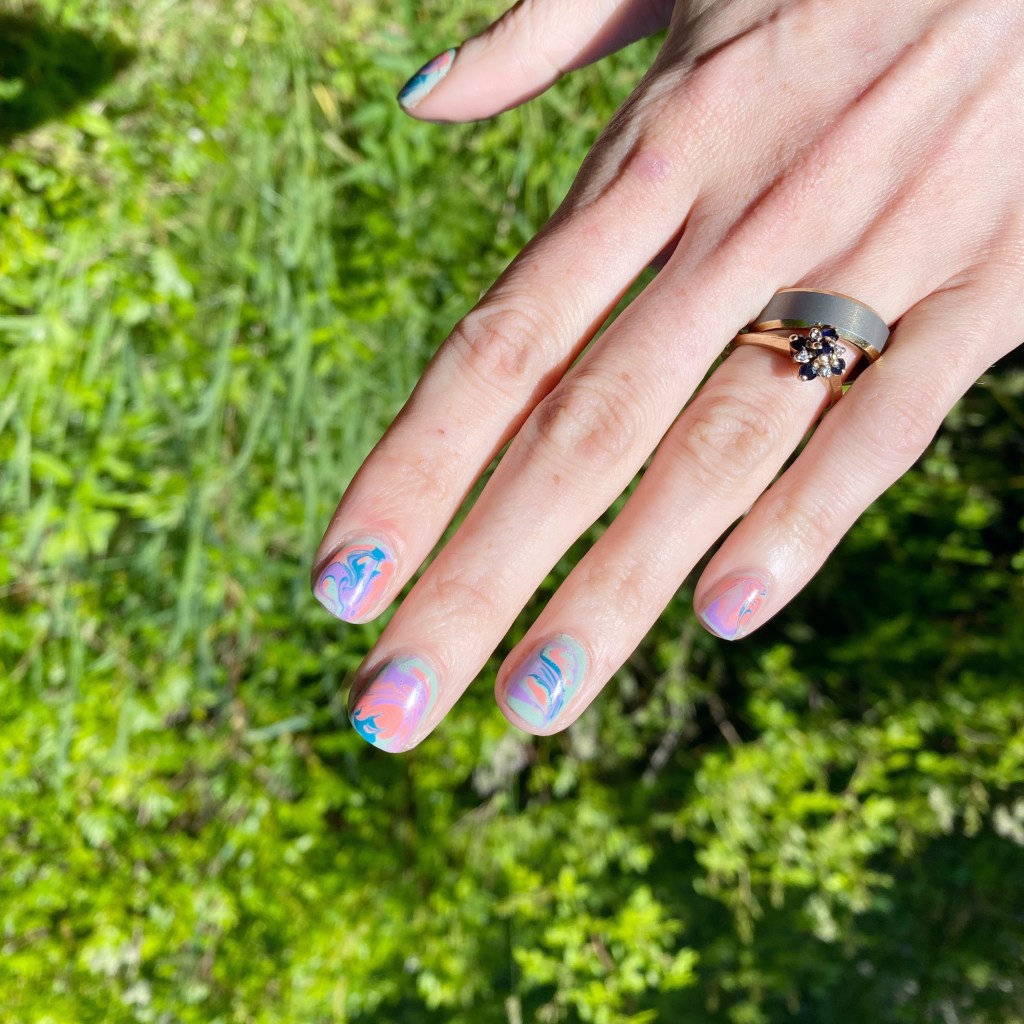
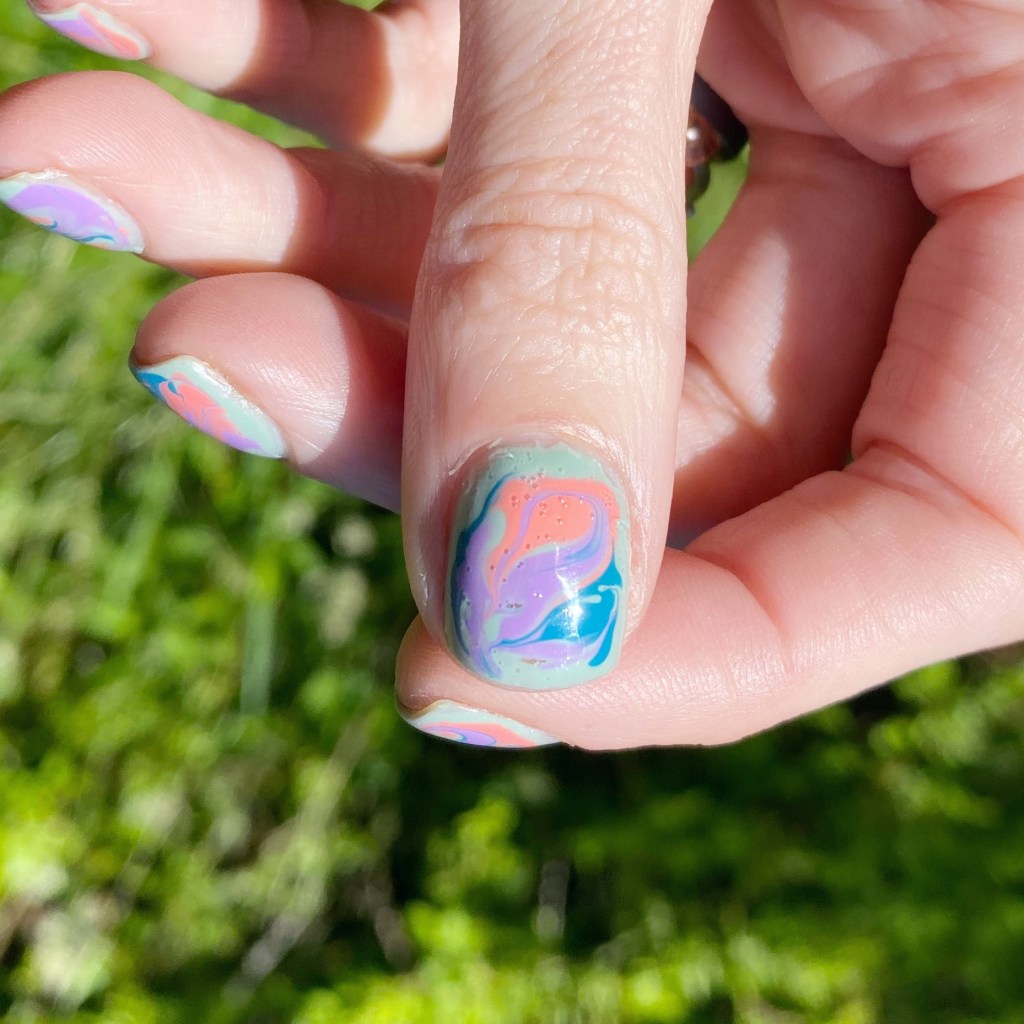
I’m back today though, & I have a cute & easy dotticure to share with you featuring on of the new Essie shades I received recently. I’m still obsessing over this beautiful green Willow in the Wind & I decided to use it as the base for a luscious green dotticure. \

The polishes I used for this manicure are: 

  • Base Coat: Londontown KUR Nail Hardener & Base Coat 
  • Top Coat: Seche Vive Fast Dry
  • Essie Willow in the Wind
  • Essie Off Tropic
  • Essie Blanc
  • NailStuff.ca small dotting tool (NailStuff.ca Dotting Tool Trio)

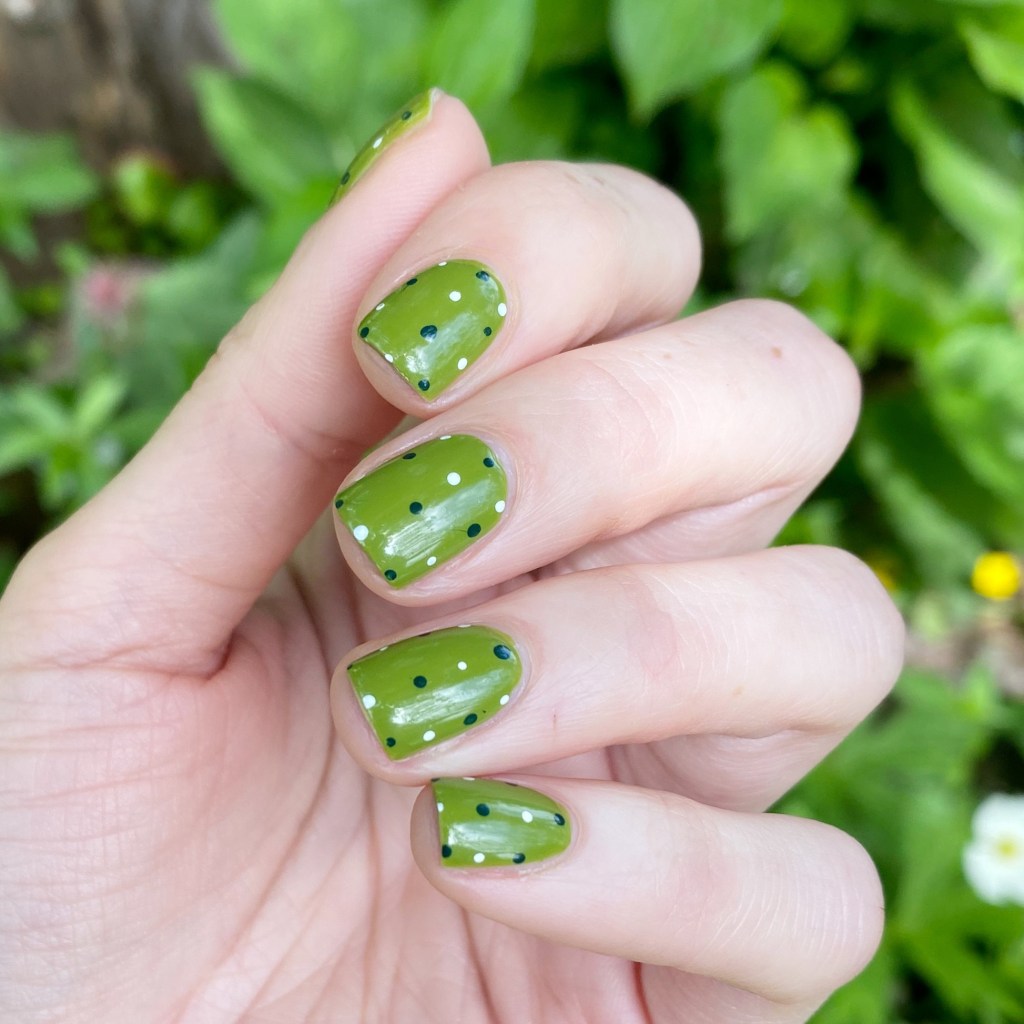
Yes, I’m still obsessed with this green. I don’t know what it is about it — it’s just a very Summer-y green & I really love it. I haven’t yet had a chance to use it in a floral/cactus look yet — which I very much want to — but I thought it worked so well for this simple dotticure.

What do you think of this green dotticure? Are you a fan of Essie Willow in the Wind as much as I am? Let me know all your thoughts in the comments below, & what you think about a simple dotticure!

Enjoy your Tuesday!

Products featured in this post were provided in exchanged for content.  All thoughts are honest & my own.

SWATCH SUNDAY — Icing Stores Starlight

Hello lovelies & happy Sunday. It’s a rainy, grey, & extremely blah day here on the East Coast — & it’s starting to feel like we’ll never see the sun.

I needed some cheering up after this blah, blah week so I started digging through my Claire’s/Icing drawer & found this old school beauty! & I just knew that I had to pick it for this week’s Swatch Sunday.

This is Icing Starlight.

3 coats + top coat

The formula on this beautiful jelly glitter is thin thin thin, but it builds to nice coverage. & because the formula is so thin, each coats dries down quickly before you apply the next one. It also means you can see each & every silver & holo glitter suspended in the base, which I love.

Truthfully, I could have applied a forth coat for a bit more opacity, but with the exception of my tips (where it shows of a bit of my natural yellowing from my nail polish obsession) I really love how this looks. & that could easily be corrected with a colour correcting base coat. Or, by using it as a topper over another blue polish.

In the bottle it reminds me a bit of China Glaze Dorothy Who? but the base is much thinner leaving the colour on the nail much, much lighter. However, it has those beautiful holographic glitters that really show up, so I can’t be mad about it. It’s a beautiful shade all on its own.

Sadly, this colour is long long out of circulation. If I had to hazard a guess, based just on the bottle shape, I would say I purchased this bottle somewhere between 2009-2011. The brand has gone through quite a few bottle changes since then, but I’m happy to see even a decade later, this shade applies & wears beautifully.

& sometimes it’s just fun to take a walk down nail polish memory lane with a shade you haven’t seen in a while.

What do you think about Icing Starlight? Do you have any oldies in your stash you haven’t pulled out in a while? This Sunday is a great day to find a shade you haven’t worn in a while, & pull it out!

Have a lovely day! 🖤

Happy Canada Day Nails 🇨🇦

Good morning lovelies & happy Friday!

It’s almost the weekend. & here in Canada, it’s almost our nation’s birthday. So obviously, I needed some cute Canada Day nails to celebrate the occasion (& the day off work!) I still have a good haul of my Canada Day vinyl stencils from a few years ago, so I decided I should put them to good use.

The polishes I used for this manicure are: 

  • Base Coat: Londontown KUR Nail Hardener & Base Coat 
  • Top Coat: Seche Vive Fast Dry
  • Sally Hansen Miracle Gel x Friends He’s Her Lobster
  • Sally Hansen MG x Friends A Moo Point
  • Sally Hansen MG Red It Twice
  • What’s Up Beauty Canada Flag Stencils (c/o: NailPolishCanada circa 2018)

Please excuse the raindrops on my nails — I took these between bouts of torrential rain. But even the damp conditions couldn’t take away from how cute these turned out! & they were so easy to do with my nail stencils! I definitely couldn’t think about freehanding these maple leaves.

& I got so many compliments when I wore them to work! Which always makes me feel good.

What do you think of my cute Canada Day nails? Let me know in the comments below. & to my fellow Canadians — enjoy your holiday tomorrow!

Funky & Bright Drag Marble Nails

Hello lovelies & happy Wednesday! I hope your week has been going well so far. It’s a very wet, & grey, week here so far — & it’s supposed to last all the way into next week, so that’s less than ideal.

So let’s go back a few days when it was sunny, & warm, & I matched the weather with these colourful drag marble nails! These Essie shades were sitting on my nail desk, & I just had to combine them together. & I’m so glad I did because they look so good together.

The polishes I used for this manicure are: 

  • Base Coat: Londontown KUR Nail Hardener & Base Coat 
  • Top Coat: Seche Vive Fast Dry
  • Essie Turquoise & Caicos
  • Essie Worth the Tassel
  • Essie Revenge’s A Beach
  • Essie Peach Side Babe
  • Extra tiny dotting tool (NailStuff.ca Dotting Tool Trio)

Please excuse the bubbles on my thumb — I added top coat a little too soon to this one. But I really love the swirling on this one!

Drag marbles are definitely time consuming to do — you have to go one finger at a time. But the end result is always awesome! This colour combination, especially, just looks so cool.

What do you think about this bright drag marble? Have you ever done a drag marble design before? I love the look of actual water-marble, but I’ve never been able to be successful at it, so this is my go-to alternative. Not quite the same idea, but just as fun!

Holo Mermaid Vibes 🧜🏼‍♀️

Hello lovelies & happy Monday!

I hope you had a fantastic weekend — the last full weekend of June. This means we are almost officially half way through this year, & I just need to slow down a smidge. But I thought we could, & should, start this week off on a sparkly vibe with the nails I wore this past weekend to celebrate my daughter’s 4th birthday. She decided on a Mermaid Princess party, & naturally that means I needed my nails to match.

The polishes I used for this manicure are: 

  • Base Coat: Londontown KUR Nail Hardener & Base Coat 
  • Top Coat: Seche Vive Fast Dry
  • Essie Gel Couture Princess Charming
  • Essie Expressie FX Iced Out
  • Color Club Bewitched
  • Color Club Crystal Baller
  • Color Club Eternal Beauty
  • Color Club Trick of the Trade
  • Beyond the Nail Mermaid Vinyls

I think these turned out absolutely magical & they were perfect for the theme of the party & the whole day. It was a beautiful sunny day, so the sparkle really came out — which I was hoping for! Originally I was thinking you couldn’t really see the scale pattern, but they got noticed for sure. & my little girl was excited about them!

I don’t have pictures, but she rocked a fun combo of Essie Bikini So Teeny & Birthday Girl for her birthday manicure, with a few nautical themed stickers as accents. The perfect look for my birthday princess.

\

& a quick pic of my with my birthday princess. My nails almost matched her new special bathing suit!

What do you think of my special mermaid nails? Do you like to match your nails to special occasions? Let me know all your thoughts down in the comments below!

Have a fantastic Monday loves. ♥︎