Hello lovelies & happy Thursday. Yesterday the temperatures were above freezing & it felt a bit like, dare I say it… Spring. Oh, & it was perfect since I was wearing this pretty Spring-y floral.
Originally I did this floral because I had bought this pretty new Sinful Colors shade at Walmart, & I thought it would be a great base for floral nail art. I also wanted something that was kind of, sort of Valentine’s Day-

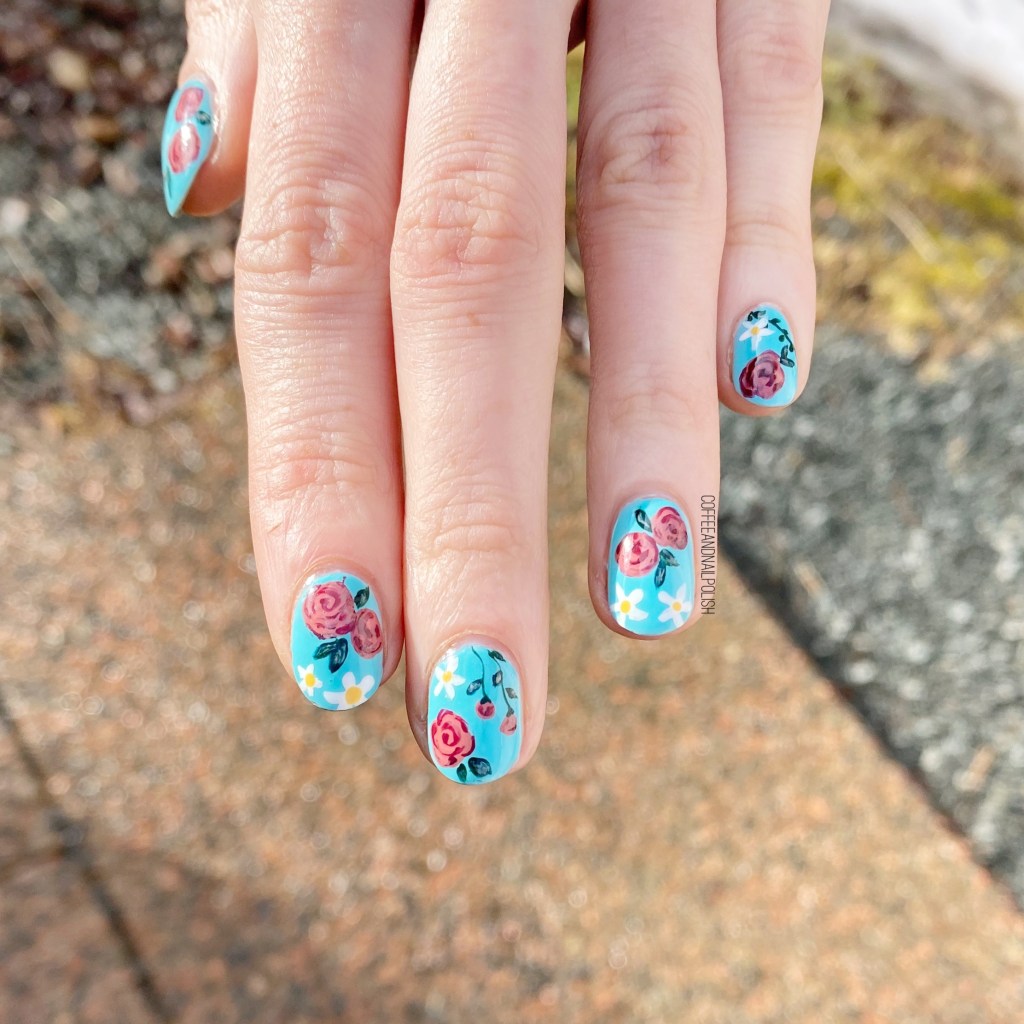
The polishes I used for this manicure are:
- Base Coat: Essie Millionails
- Top Coat: Seche Vive
- Sinful Colors Wonder Mint
- Sally Hansen Complete Salon Manicure One in a Melon
- Sally Hansen CSM So Much Fawn
- Sally Hansen CSM Berry Fancy
- Essie Blanc
- Essie Check My Baggage
- Essie Off Tropic
- Essie Cacti on the Prize
- NailStuff.ca 7mm detail brush
- NailStuff.ca Dotting Tool Trio

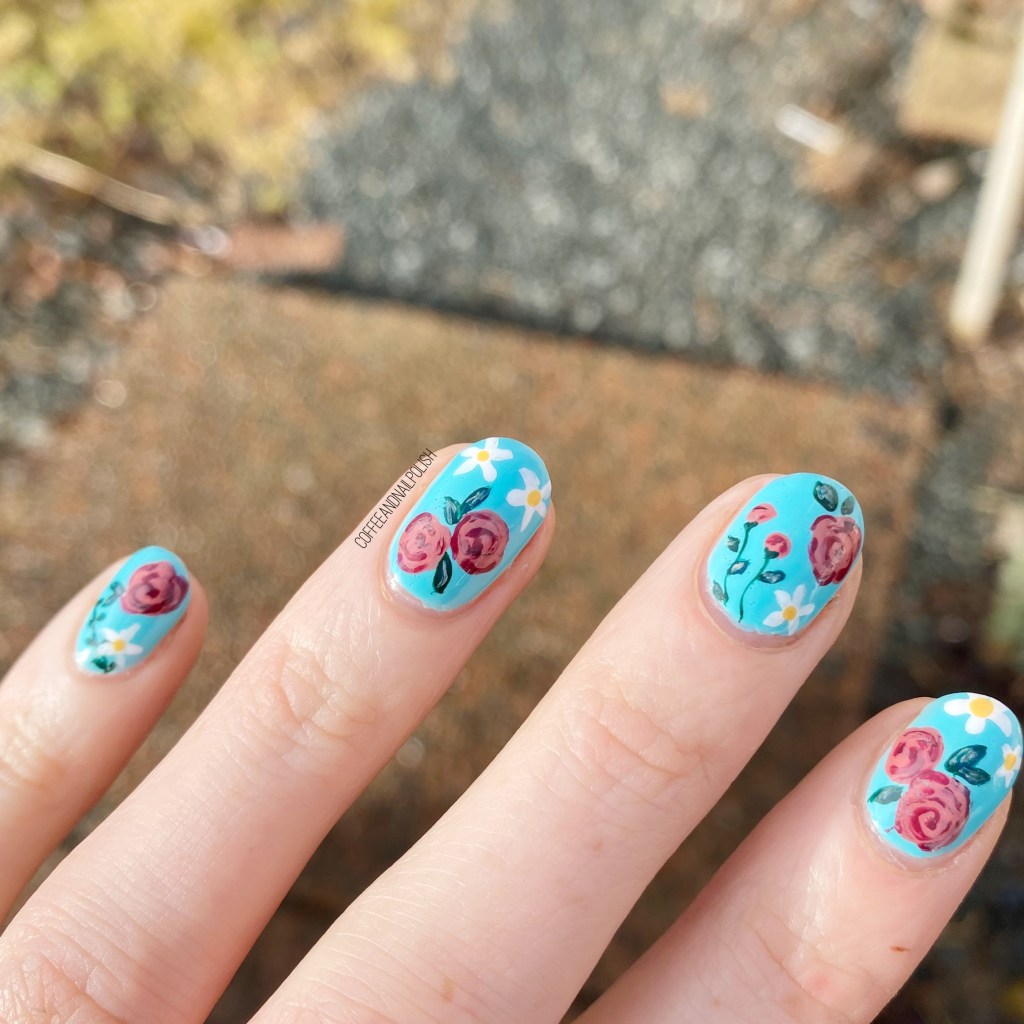
So I know everytime I do a new floral look, I gush endlessly about how it’s my favourite, so I’ll save you that — but I am really proud proud of how these turned out, especially the rose buds. The feel delicate & romantic, & I literally didn’t want to take these off! Plus the bright blue base is vibrant & makes me forget it’s only February.
It gives me thoughts about Spring days, & sunshine & pretty dresses. & I’m so ready for all of those things.
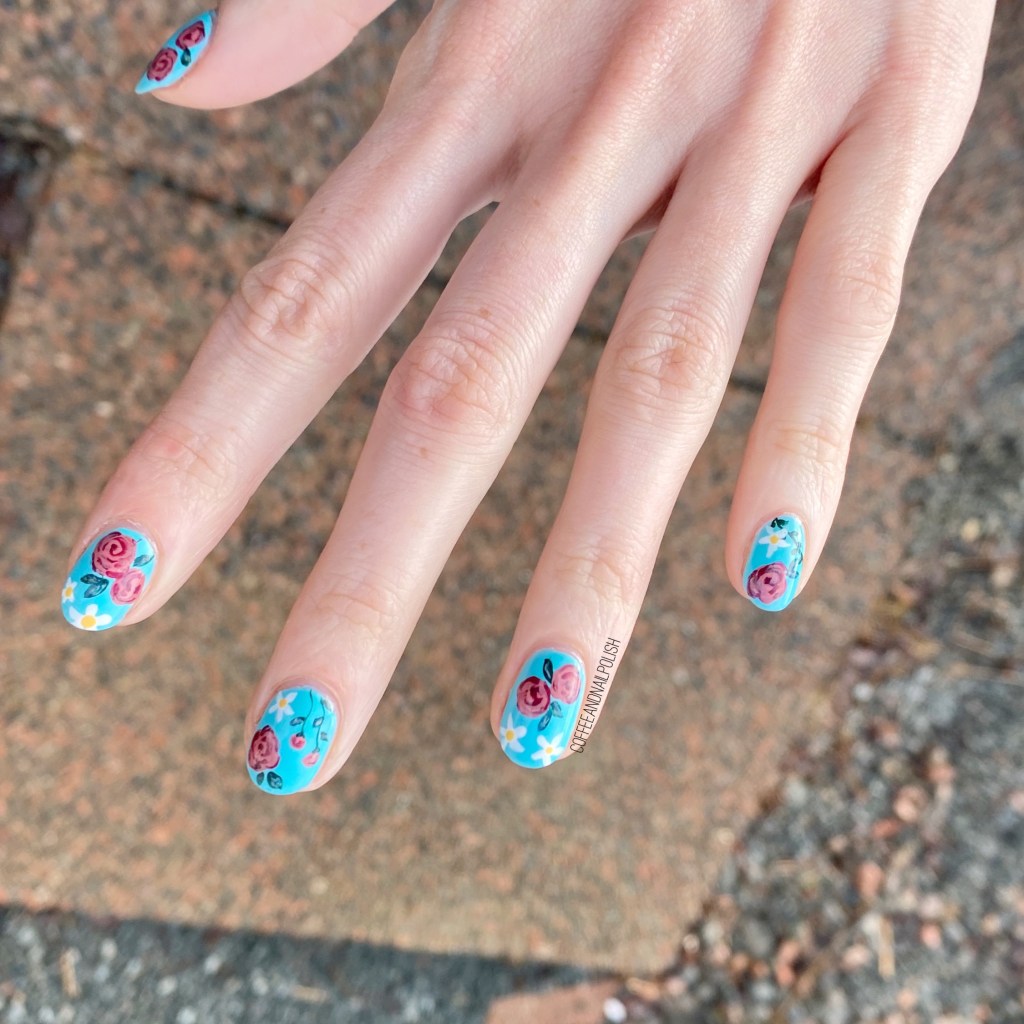
What do you think about this pretty Spring floral? Do you like the roses paired against this vibrant blue base? Let me know all your thoughts down in the comments below!