Half Moons on Ultra Shorties

Hello lovelies & happy Friday. I hope everyone is having a feel good Friday so far. We’re currently awaiting another storm — this time rain. Is it Summer yet?

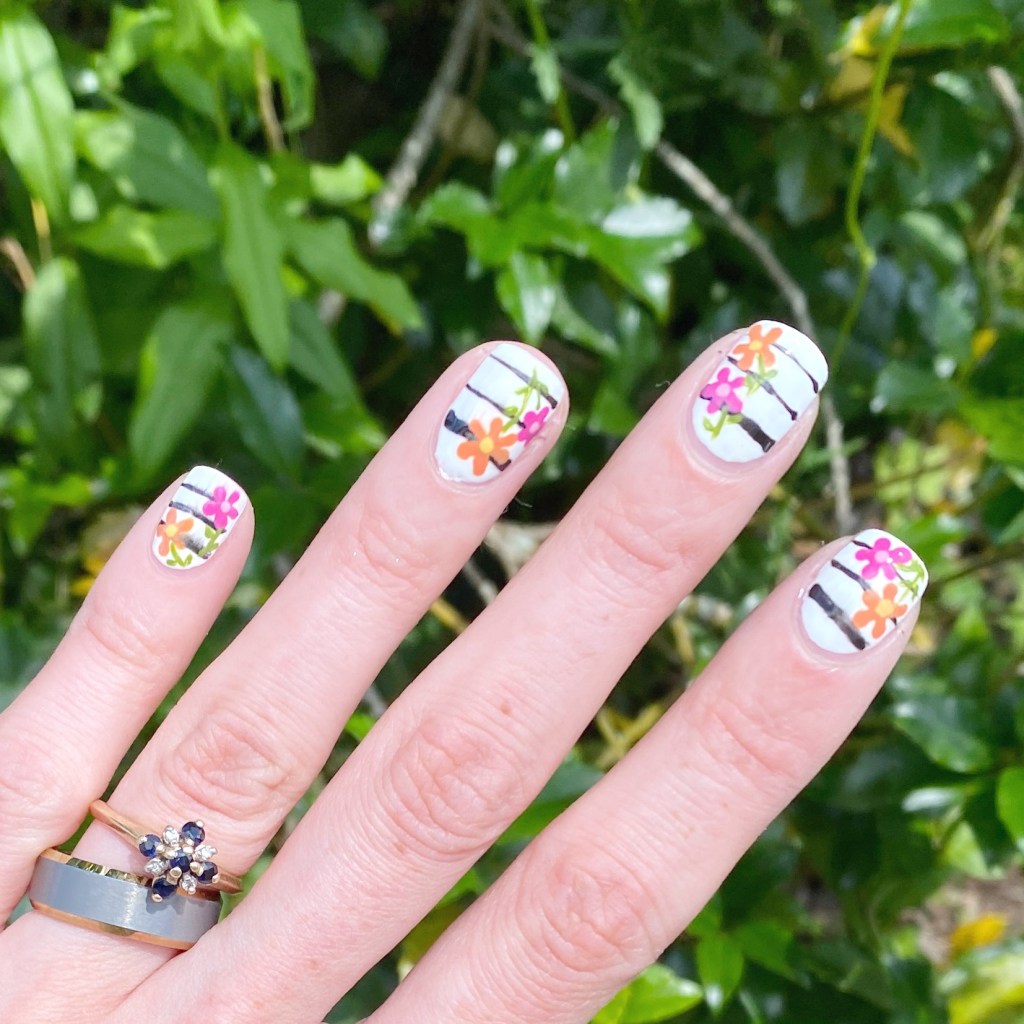
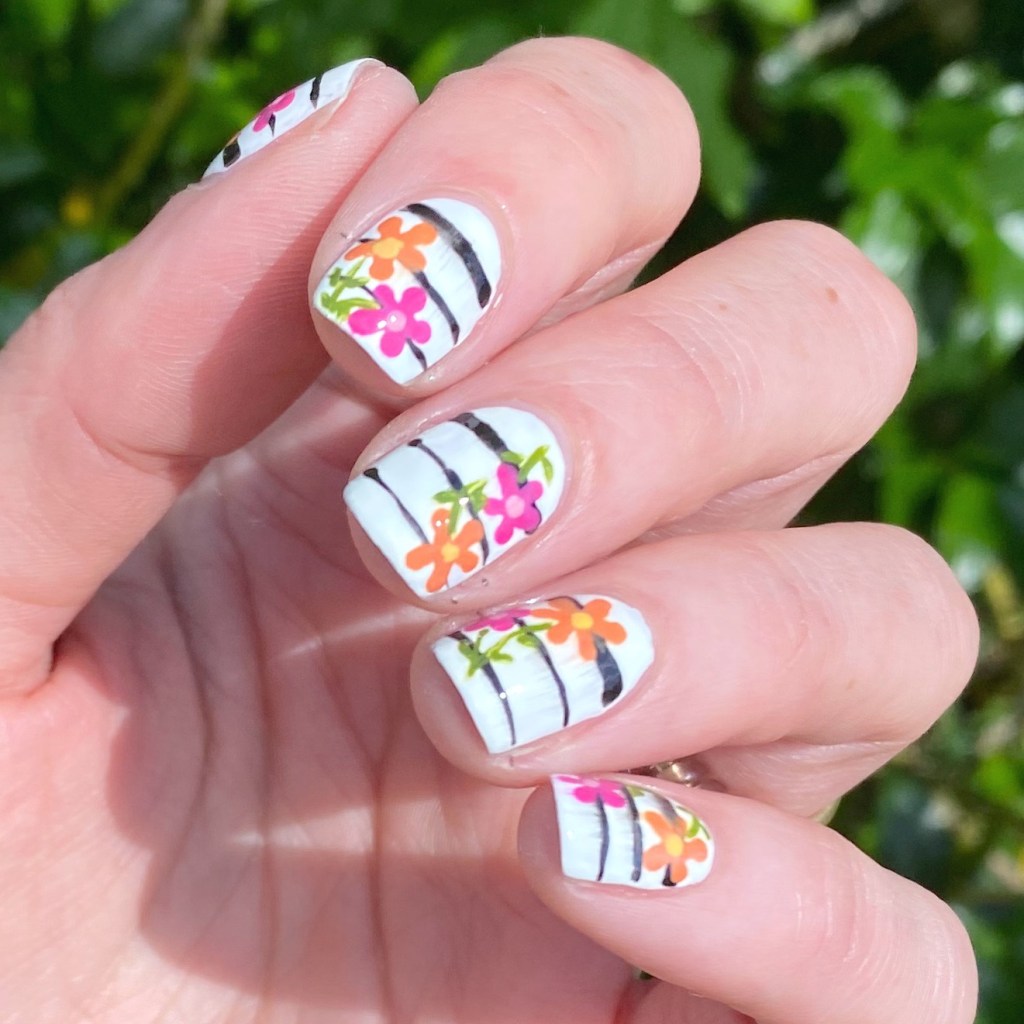
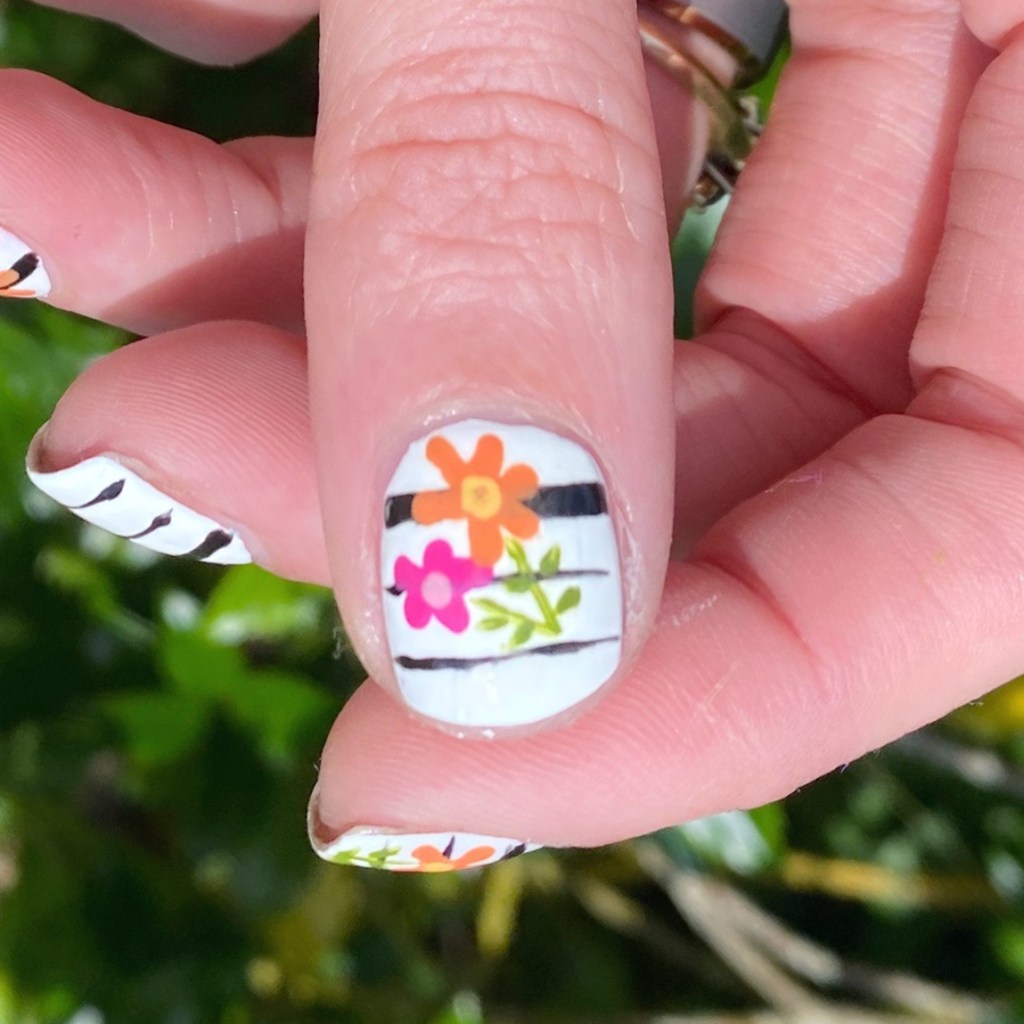
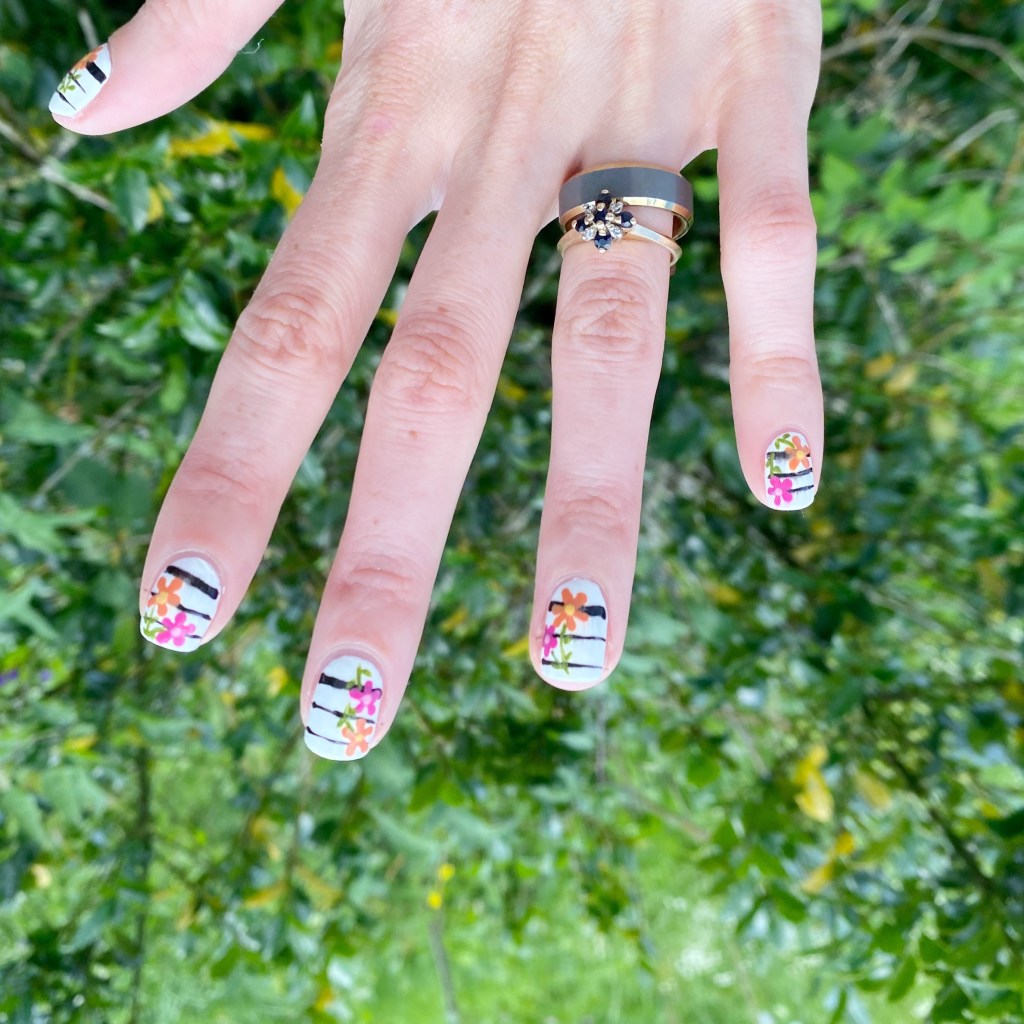
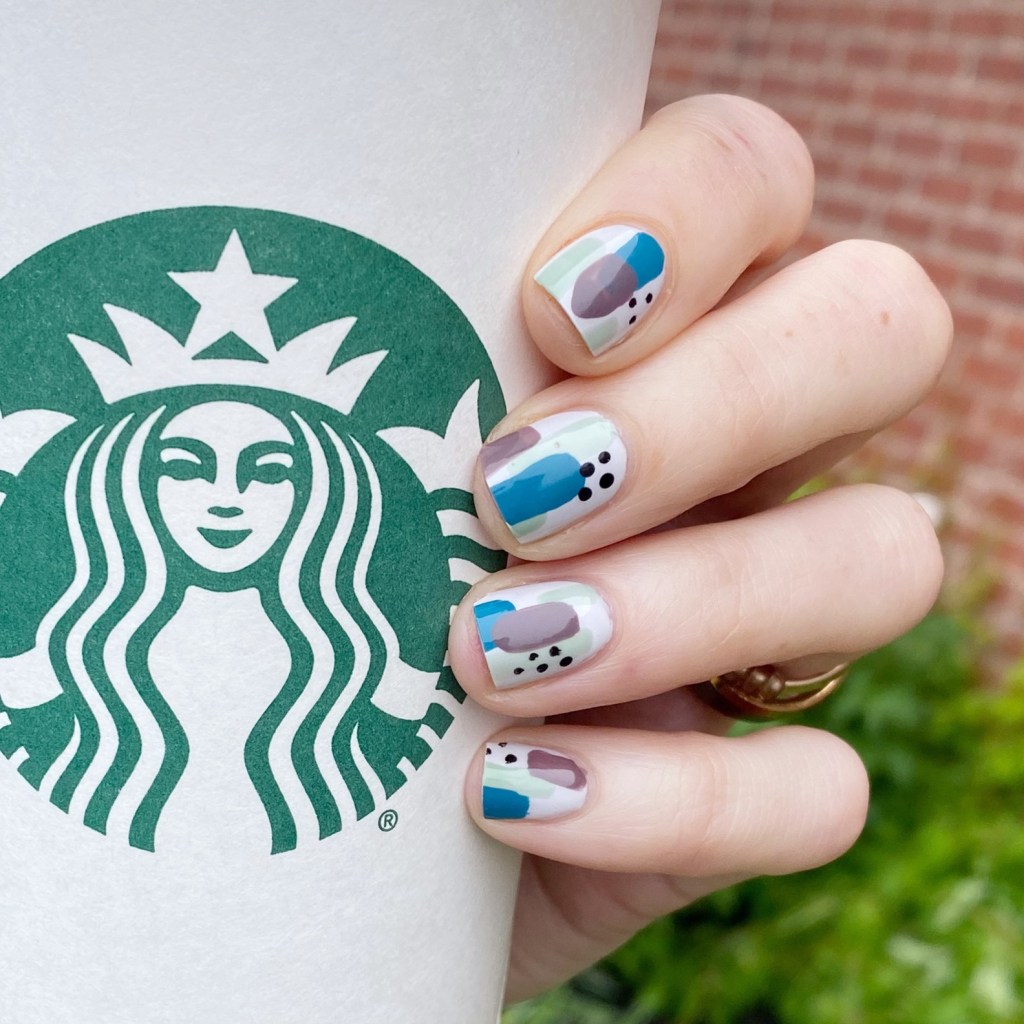
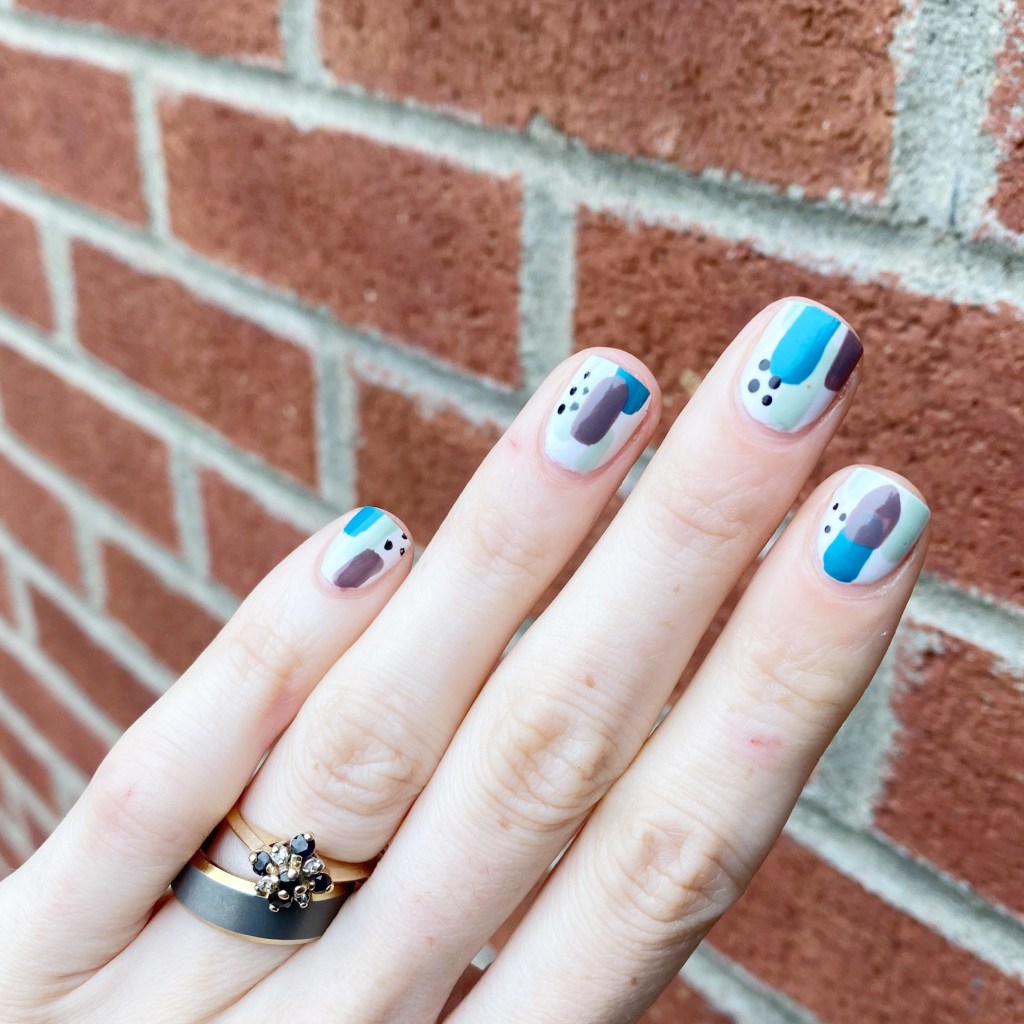
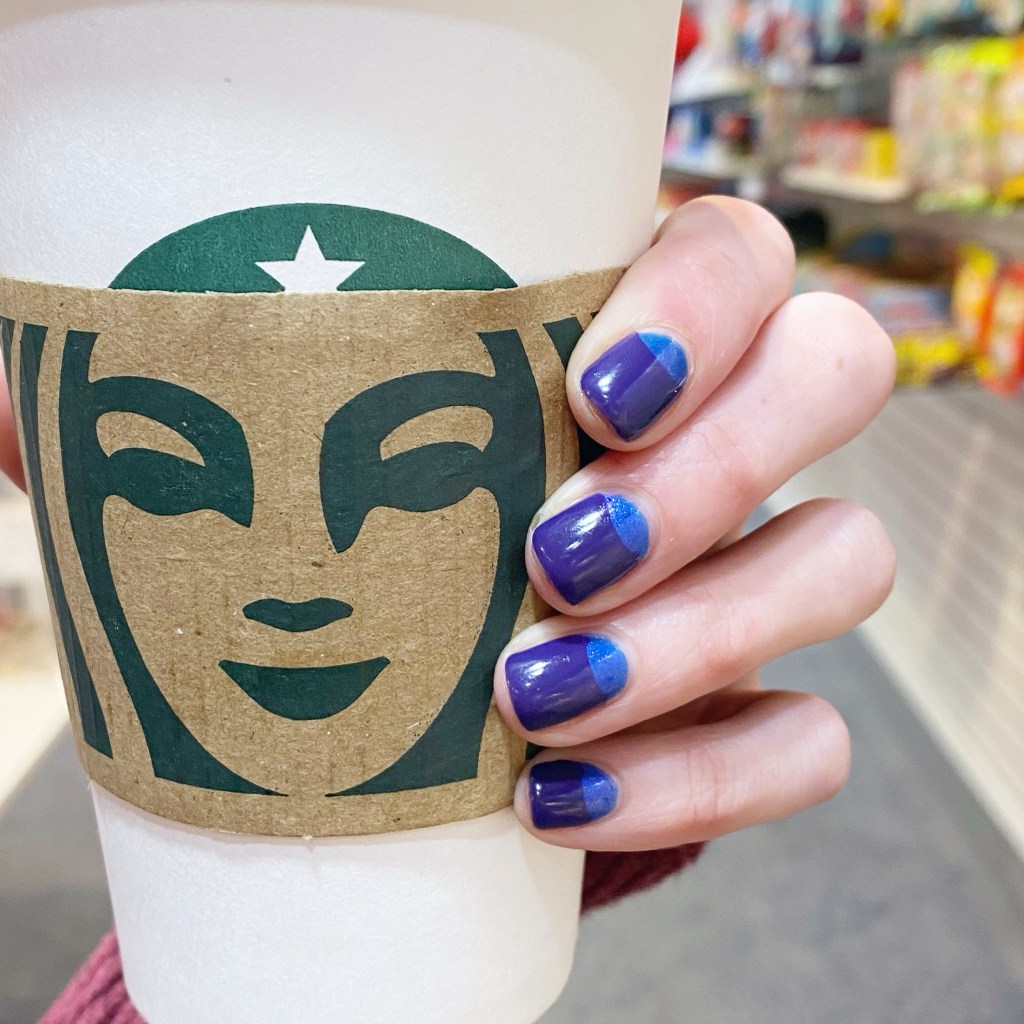
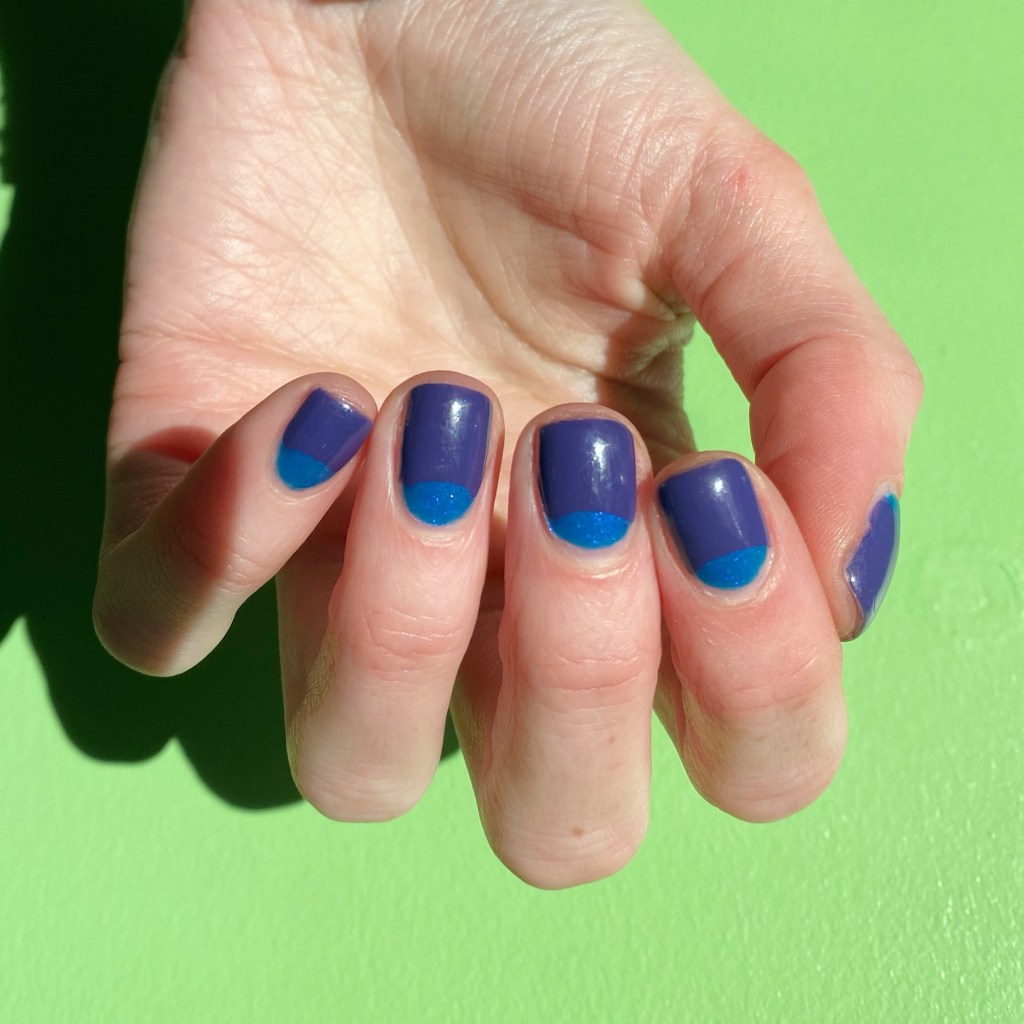
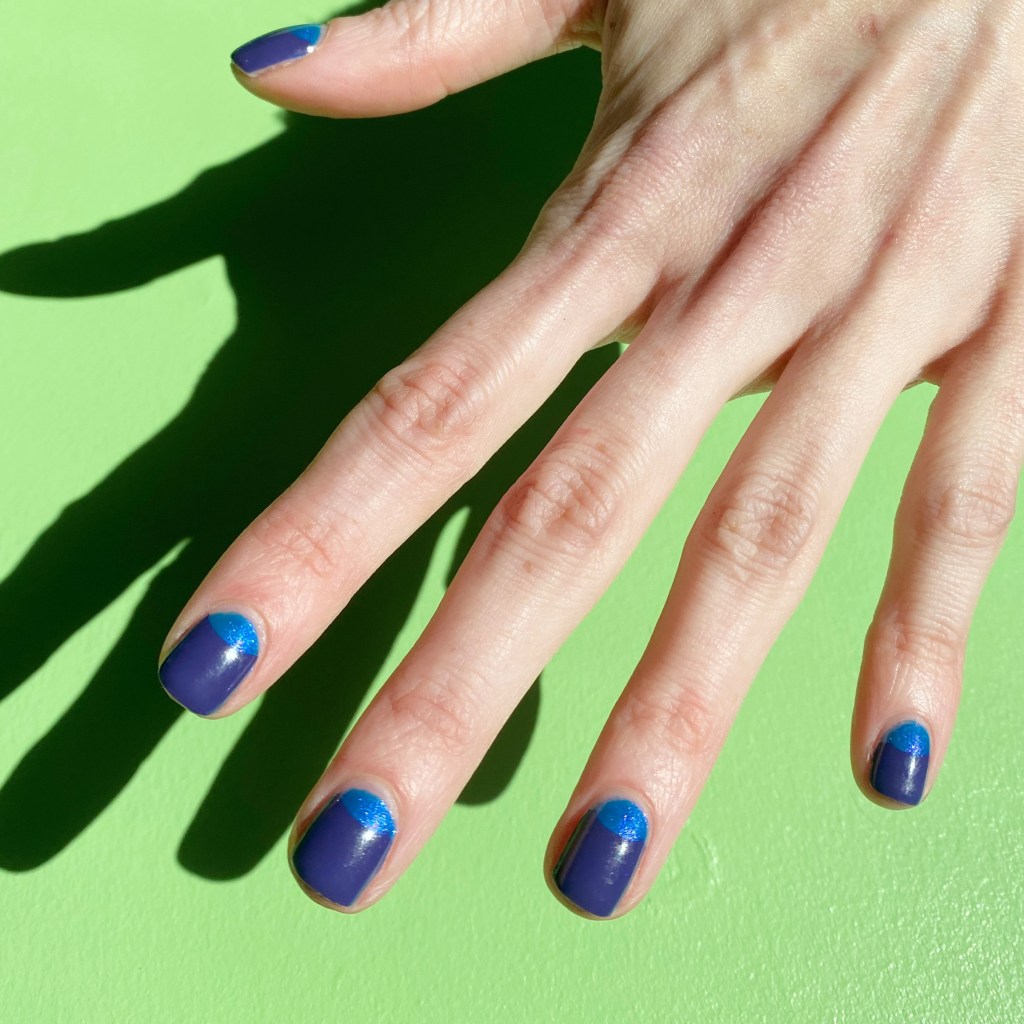
Today I have a classic nail art look on my new ultra shorties. I had a couple terrible breaks recently, which hasn’t helped with inspiring me to paint my nails, but I decided to go with a favourite design — half moons — to cheer me up.

The polishes I used for this manicure are: 

  • Base Coat: China Glaze Calcium Gel Fortifer
  • Top Coat: China Glaze Fast Forward Top 
  • Ardene La Luna
  • OPI Infinite Shine Mariachi Makes My Day
  • Paper Hole Reinforcements

I’ve been really feeling the blue nails lately, if you haven’t noticed. They’re just the colours I’ve been reaching for most often. But I love this light & dark colour combination. Plus, I found the best natural lighting at work against this green wall so I had to take my pictures there!

What do you think about these half moons on my ultra short nails? What kind of nail art would you like to see me attempt on these shorties? Let me know down in the comments below, & I’ll try my best to make it happen!

Enjoy your Friday loves. 🖤

Christmas Ribbon Candy Swirls

Hello beauties & happy Friday! It’s almost the weekend, & not just any weekend, but Christmas weekend! That’s insane but exciting. I had to keep my holiday inspired nail art going with some more abstract nail art.

The first thing this design made me think of after I did it was the Ribbon Hard Candy you get around Christmas. I’m sure you know the stuff, but if not it’s this stuff.

The polishes I used for this manicure are: 

  • Base Coat: China Glaze Calcium Gel Fortifer
  • Top Coat: Essie Speed Setter
  • OPI I Cannoli Wear OPI
  • OPI Unfrost My Heart
  • Sally Hansen Miracle Gel 5 Golden Blings
  • Red & Green Acrylic Paint
  • 16mm Striper Brush from Nailstuff.ca

I decided to use a combination of acrylic paint & nail polish for this design to make it a bit easier for me. Sometimes, I find when I’m doing bigger stripes, my polish starts drying a bit too quickly, but you don’t have the same issue with acrylic paint.

I really, really like how these stripes turned out. I know, I know — I say this every time. But I don’t think there is anything wrong with being proud about your nail art! For a long time, I was extra critical of my work, so I’m glad to enjoy what I do. & it is a little bit different from typical Christmas nail art.

What do you think about these ribbon candy inspired abstract swirls? Do you like the holiday vibes they are giving off? Would you wear these for any Christmas celebrations you’re partaking in this weekend? Let me know all your thoughts down in the comments below!

Happy Friday 🎄

SWATCH SUNDAY — China Glaze Blue Iguana (& some bonus sparkle ✨)

Hello lovelies & happy Sunday! The first Sunday of November, if you can believe it! Sadly, I’m starting off November with some extra short nails thanks to a bad, bad break at work on Friday.

So I wanted to make my nails feel extra pretty, so I dug through my stash & landed on this sparkly old school China Glaze shade. This is China Glaze Blue Iguana.

2 coats + top coat

Blue Iguana was originally released as part of the 2011 Summer Island Escape collection. It has an electric blue foil finish with a great micro shimmer. The formula was fairly thin, but I had adequate coverage in 2 coats. It also appears lighter on the nail than in the bottle, which was kind of a bummer — but maybe an extra coat or two would have fixed that. I also wish you could see more of the purple duochrome flash on the nail, as much as you can see it in the bottle. But it’s still beautiful regardless.

I was feeling like my short, stubby nails needed a bit more sparkle, so I pulled another oldie (released around the same time) from Icing to add a little pizazz: Icing Radio Super Star.

1 coat over Blue Iguana + top coat

I was actually really impressed with how closely the blue glitters in Radio Super Star matched Blue Iguana. It has a clear base with blue micro glitter, fuschia hex glitters & these fun silver star glitter. What you see above is just one coat over my base — & I had great luck with getting the star glitters onto the nail with minimal fishing.

It gave me exactly the sparkle I was craving to cheer myself up!

How are you feeling up these two fun polishes both together & apart? I feel like it’s just a smidge too early for holiday polishes (although I’m keeping my eyes open!) but I may see what glitter shades I can pull out for this month.

Have a happy Sunday!

Summer Dress Inspired Floral 🌸

Hello lovelies & happy Wednesday! I hope everyone is enjoying their week so far. What is the weather doing where you are? We’ve been hot & balmy on the East Coast, a big difference from the torrential rainstorm we had on the weekend. I’m definitely happy for brighter weather.

I’m also super excited to show off today’s nail art look. You know the saying “nail art inspiration can come from anywhere”? Well I definitely took that to heart with this nail art look. Recently, I took my daughter thrifting & found the sweetest Summer dress for her, & the second I saw it, I knew I was going to need to do some nail art inspired by it. I’m a sucker for anything floral, & the simple sweet pattern was too cute not to do on my nails!

The polishes I used for this manicure are: 

  • Base Coat: Sally Hansen Miracle Gel Colour Grip Primer Base Coat 
  • Top Coat: Sally Hansen Miracle Gel Glossy Top Coat
  • Essie White Page
  • Sally Hansen Instadri Ghouls Night Out
  • Essie Frilly Lillies
  • Essie Check Your Baggage
  • Essie Willow in the Wind
  • Sally Hansen Good Kind Pure Peony Origins
  • Sally Hansen GKP Love You Lotus
  • NailStuff.ca Mermaid Tail Brush Trio (11mm liner brush)
  • Dotting Tool (NailStuff.ca Dotting Tool Trio)

How cute is this look! I’ll be honest, this wasn’t a super complicated design to paint, but it was a little time consuming… especially trying to make sure my horizontal stripes were straight. &, as you can see from my pointer, I wasn’t completely successful in that regard. But I think this design turned out just like my inspiration, so that’s a win in my books! Such a sweet, pretty design to match my sweet little girl.

What do you think about this floral design? Do you like this line & floral design? Where do you find inspiration for your own nail art looks? Let me know down in the comments, & enjoy your Wednesday!

Abstract Shorties

Hello lovelies & happy first day of Summer to those in the northern hemisphere! & it actually feels very Summer like today, which is very exciting. I’m definitely here for it, & all things Summer related.

Todays look is a quick abstract design I applied over my base of OPI I Cannoli Wear OPI from my Swatch Sunday post for this week. I wanted to extend my wear another day or so, & decided an abstract look was the perfect way to do that!

The polishes I used for this manicure are: 

  • Base Coat: Londontown KUR Nail Hardener & Base Coat 
  • Top Coat: Seche Vive Fast Dry
  • OPI I Cannoli Wear OPI
  • Essie Revenge’s A Beach
  • Essie Turquoise & Caicos
  • Essie Merino Cool
  • OPI Who You Callin’ Bossy?!
  • Small dotting tool — NailStuff.ca Dotting Tool

As you can see, I’m rocking extra shorties right now thanks to a break on my ring finger at work on Saturday.

Normally I would be upset about it, but I’m kind of enjoying shorter nails right now. I find when my nails are square, I prefer a shorter length to them. Plus I love showing off that you can rock fun nail art no matter the length of your nails!

What do you think of these abstract shorties? Are you a fan of looks like these? Let me know all your thoughts down in the comments below, & what colour scheme you would choose.

Have a lovely Wednesday ☀️