Simple Vintage Roses

Happy Wednesday lovelies! I hope everyone is having an excellent week so far. Today marks the second post of my all floral week! & yes, I’m still obsessed. I went shopping yesterday for new work clothes (because I start training at my new job next week) & I kept having to tell myself to not buy all the florals, since I already have a closet full of floral patterned shirts. However, you can never have enough floral on your nails.

Today’s design is you classic vintage floral design. When I got my first ever dotting tool, I was obsessed with these simple kind of designs & nothing has changed in the last 6 years. They’re still one of my favourites, especially because they’re just so easy to do! Plus they always look so pretty & girlie on the nail.

For this manicure, the polishes I used were:

  • Base Coat: Quo by ORLY Kiss Me, I’m Kind
  • Top Coat: Seche Vive
  • Essence Nude Glam Iced Strawberry Cream
  • Essie Bachelorette Bash
  • Sally Hansen Xtreme Wear Tickled Pink
  • OPI Two Timing the Zones
  • Sally Hansen I ♥ Nail Art Pen in Green
  • Essie Off Tropic
  • Dotting Tool from Bundle Monster
  • Small Detail Brush from Bundle Monster

Who else remembers my very first ever floral posted on here? Almost 4 years & I’m never bored with these designs. I don’t think I could ever be bored by a floral design. According to the “floral nails” tag, I’ve done 46 designs so far. That’s a lot of flowers! Haha, you’d think that after 46 different floral designs I would be tired, but going through that tag just makes me want to do more. I think I’m addicted. But honestly, is there ever such a thing as too much floral? I just want Spring so badly.

img_9205

What do you think of this simple vintage floral? Have you ever/would you ever try this design yourself? Share you thoughts in the comments below, & let me know what you think!

Day Planner Inspired Floral Nails

Hello Lovelies! Hope everyone had a wonderful weekend & is all ready for the week ahead. This week, I’ve decided for a fun mani theme: all floral! It’s no secret how much I love floral nail art, so I thought I would share a few of the floral designs I’ve been doing lately. Honestly, if it wouldn’t bore everyone else I’m pretty sure I could wear flowers on my nails non-stop. They’re just so perfect any time of the year.

Today’s design is actually inspired by my day planner! As soon as I bought it, I knew that I was going to need to do nail art inspired by it.  The combination of colours was just screaming to be painted on my nails!

The polishes I used for this manicure were:

  • Base Coat: Quo by ORLY Breathable Kiss Me, I’m Kind
  • Top Coat: Seche Vive
  • OPI Race Red
  • Essie Play Date
  • China Glaze Sun Upon my Skin
  • Sally Hansen Xtreme Wear Mellow Yellow
  • China Glaze Plur-ple
  • Sally Hansen Miracle Gel Pretty Piggy
  • Sally Hansen Xtreme Wear Lacey Lilac
  • Sally Hansen I ♥ Nail Art pen in Green
  • Essie Off Tropic
  • Sally Hansen Hard as Nails Black Heart
  • Small Detail Brush (Bundle Monster)
  • Dotting Tools (Bundle Monster)

At first I wasn’t sure if this colour combination was going to work for me, but once I had it on it looked so perfect. Obviously my flowers aren’t as abstract as my planner, but I feel like they match close enough for me to be happy. The colour combination also reminds me of a Hawaiian shirt, so I feel like this manicure would be perfect for a beach luau! Or, in my case, hanging out on the couch pinteresting Summer fashion looks because that’s about as close as I’m getting to the beach right now. Seriously, what I wouldn’t give to wear a summer dress & flats–I’m so over boots & jeans, so so so over them. & it snowed yesterday, so now Spring feels even farther away.

Floral always takes so many polishes to do, but honestly the end result is always worth it. I don’t think I’ve ever painted floral on my nails & regretted it. There are so many ways to do them, it just never gets old. & look how well this design twins with the day planner that inspired it! Like I said, mine isn’t as abstract as my planner but the colours are spot on so I’m very happy with how they turned out!

What do you think of this floral design? Are you excited for a whole week dedicated to nothing but floral nails? Let me know your thoughts below!

Pretty Pink Gradient & Stamping

Happy Tuesday everyone!

We’re quickly speeding through February, can you believe we’re already half way through? Kind of crazy! Today I have a super fun gradient design to share. I’ve been kind of obsessed with gradients lately–I go through fazes, & now that I’m all stocked up on my Edge Perfection I’ve been a little gradient crazy.

For today’s design, I was feeling pink. I wanted something a little Valentine’s Day-esque without being too over the top. I started out with the gradient, then added some holo glitter. & then I thought–why not some stamping too? I was a bit scared it was all going to be too much, but I think because I didn’t use contrasting colours, the whole design really works together.

For this manicure, the polishes I used were:

  • Base Coat: Quo by Orly Breathable Kiss Me, I’m Kind
  • Top Coat: Seche Vive
  • Joe Fresh Cotton Candy
  • Sally Hansen Xtreme Wear Mauve Over
  • China Glaze Life is Rosy
  • Quo by Orly Falling Star
  • Essie No Place like Chrome
  • Born Pretty Store Image Plate BP-L006 (item #17924)
  • Edge Perfection Cuticle Barrier

I’m really loving this gradient!

& obviously I took some macro shots! You see the holo glitters much better this way, since my desk lamp doesn’t show them off as well as I would like. Also it shows off the blend on this gradient, which I have to admit, I’m pretty proud of. Especially since my early gradients looked something like this.


I’m so happy with this whole design! I know it’s not oh my god Valentine’s Day, but it’s pretty & pink & what is more lovely than that?

What do you think of this design? Do you like all the layers, or do you think it’s too busy? Let me know your thoughts in the comments below!

5 Cute Valentine’s Day Designs (inspired by Pinterest)

img_8523

Are we getting excited for Valentine’s Day? T-minus one week until the big day! & even if you’re not a fan of the holiday itself, it’s always fun to have an excuse for cute nails. I decided it would be fun to browse my nail art inspiration folder on Pinterest for some fun Valentine’s Day nails. I decided to pick 5 relatively easy nail art designs & recreate them for you, just in case you need a little last minute inspiration.

DOTTICURE HEART — original design (by @majikbeenz) pinned here

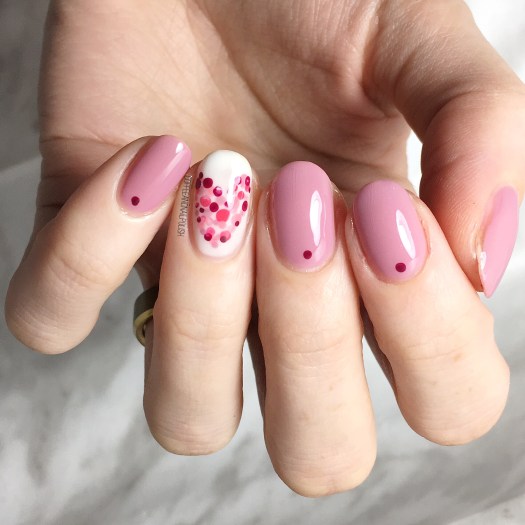
First design I picked to recreate is this adorable dotticure heart design that was originally done by @magikbeenz. I’ve actually recreate this design before (pre-this blog & instagram) but I loved it so much I wanted to give it another attempt. All you need for this design is a couple of polishes (pink, white, red, coral) & a dotting tool. It looks super complicated, but it really isn’t. If you weren’t sure if you can get the heart shape right, you could always use a heart stencil & fill the dots inside.

My main pink is Essence Perfect Match.

TIC TAC TOE HEART ACCENT NAIL — original design (by @nailstorming) pinned here

The next design I attempted was this tic tac toe heart design originally done by @nailstorming. I thought this design was super cute & a little bit more challenging. Your best bet for you accent nail is to use acrylic paint, so that if you make a mistake you can wash it away easily. For this design you’ll want a striper brush, detail brush & small dotting tool. I have this set from Bundle Monster, which was actually a Valentine’s Day gift from my hubby a few years ago.

Main pink is L’Oreal Jardin Des Roses & main red is L’Oreal Carmin Parisien.

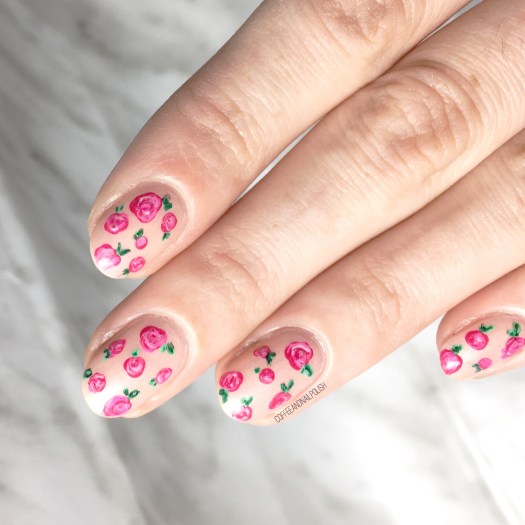
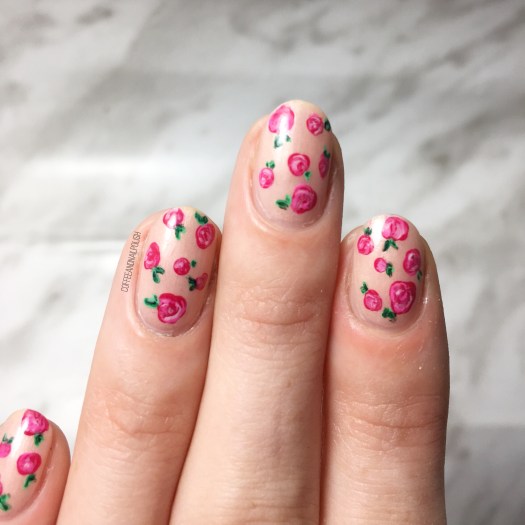
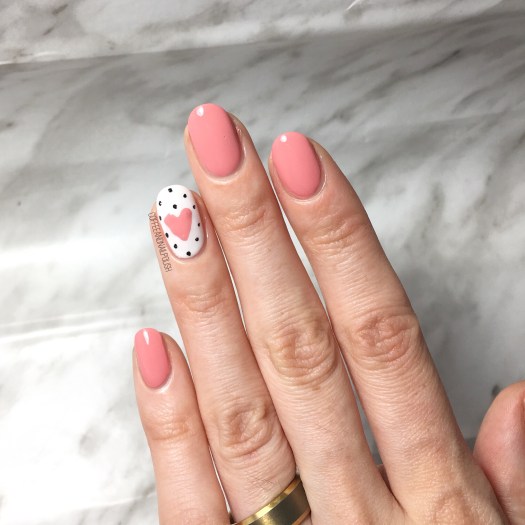
PINK HEART & POLKA DOT ACCENT NAIL — original design pinned here

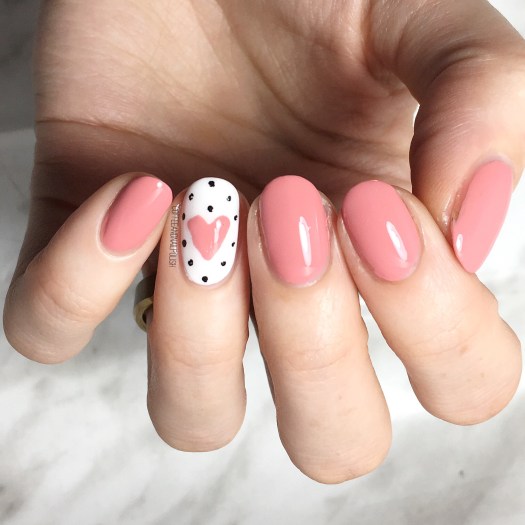
I found this cute simple heart nail design on Pinterest & loved how girlie it was. I wish there was a proper Instagram account to link to, but sadly I couldn’t find one. (I guess my Veronica Mars sleuthing skills aren’t as up to par as I thought). This is a great design for a nail art beginner to wear on their nails! I created my heart using a larger dotting tool & a small detail brush (you can see how I create hearts by checking out my tutorial here) but again if you’re not comfortable with freehanding, a nail stencil also works!

Main pink is L’Oreal Jardin Des Roses.

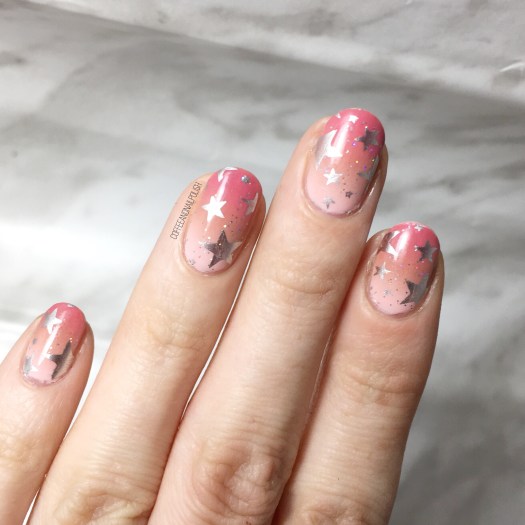
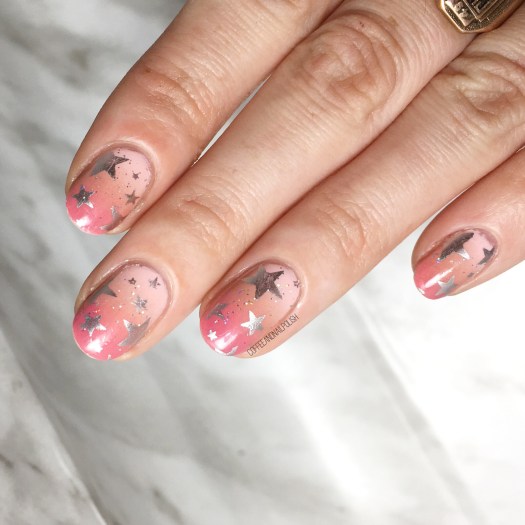
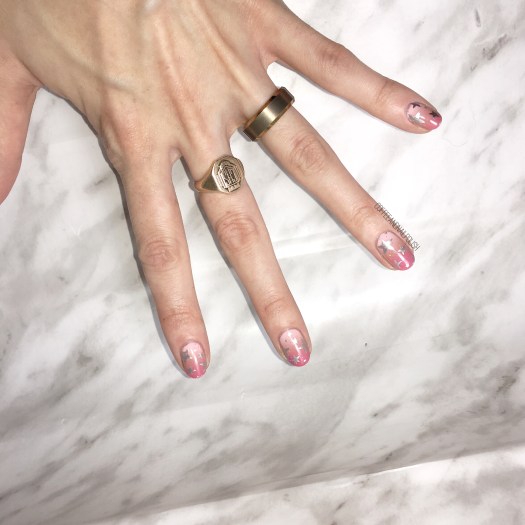
VALENTINE’S DAY LEOPARD PRINT — original design (by @mayasnailart) pinned here

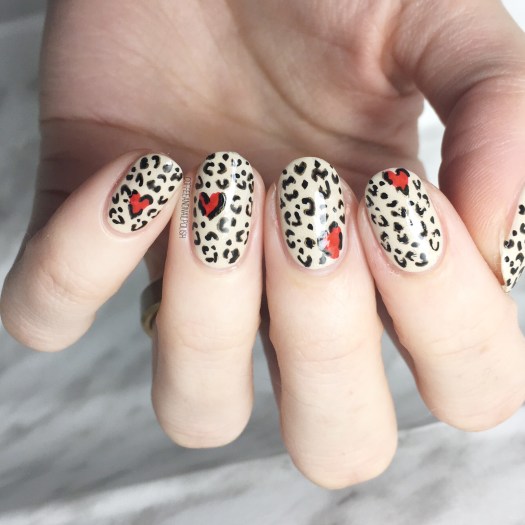
If you’re not in the mood for a super obvious Valentine’s Day design, but still want to feel festive, this design originally done by @mayasnailart is a super cute option! Again this is a design that is not super complicated to do, even though it looks super complicated! I like the contrast of the leopard hearts against the neutral base colour. All I used for my leopard print was a red & black nail art pen (Sally Hansen I ♥ Nail Art)  & it was just as easy as drawing on paper. You just have to make sure your base is dry.

My main beige is OPI You’re So Vanilla.

BLUE VALENTINE NAILS –originaldesign (by @karrisabianco) pinned here

Not everyone is a fan of pink or red, so this is a great Valentine’s Day nail art option. This design was originally done by @karissabianco & what drew me to it was the fact it wasn’t your typical colour scheme. For this design, I also used a Sally Hansen Nail Art pen (this time in Silver) but for your heart you could use a stamping plate or nail stencil, & create your polka dots using a dotting tool.

Main Blue colour is Sally Hansen Miracle Gel in Beatnik

So that’s 5 cute Valentine’s Day designs inspired by Pinterest! I hope I’m not the only one who can spend hours on pinterest saving nail art design (& style idea, & home ideas & food ideas). Do you have any fun nail art designs you’re planning on creating for Valentine’s Day? Share your favourite designs in the comments below!

If you’re interested in checking out my favourite saved manicure designs on Pinterest, my username is xcoffeeandnails.

Bestie Twin Baby Boy Birthday Nails with @hjs_nails

Happy Tuesday lovelies! Today I have a very special nail collab to share with you. One of the most amazing things about the nail community is the way it brings people together. Last August I did a mani swap with Hannah from @hjs_nails & we bonded over the fact we both had baby boys in February. Since our beautiful little guys share a birthday month we decided to team up & do some Bestie Twin Baby Boy Birthday Nails in their honour.

How handsome do our little guys look hanging out beside their special birthday manicures! For our designs, Hannah & I created a fun celebratory design featuring a gradient dotticure (to represent confetti), some balloons & the number one. Hannah had painted her nail design first, so I followed her polish picks to match the best I could.

For this manicure, the polishes I used were:

  • Base Coat: Quo by ORLY Breathable Kiss Me, I’m Kind
  • Top Coat: Seche Vive
  • ORLY Decades of Dysfunction
  • Essie Strut Your Stuff
  • Essie Too Too Hot
  • L’Oreal Feeling Kilty
  • Sally Hansen Hard As Nails Black Heart
  • Small detail brush from Bundle Monster
  • Small dotting tool from Bundle Monster

How cute did this design turn out?! The colour combination reminds me of a race car, which is perfection when celebrating baby boys. My little guys birthday isn’t until Thursday, but it still works because on this day last year I was on day 2 of my 54 hour labour! It’s kind of crazy to believe that I am almost the Mom of a one year old. This year has certainly been a whirl wind, & it definitely hasn’t been easy to balance Mom-life with non-Mom life (like blogging & doing my nails) but I wouldn’t trade it. It’s been a very interesting adventure.

My nails & my 9 pound baby boy.

Hope you liked this design! & don’t forget to pop over to Hannah’s instagram (@hjs_nails) & give her mani some love too!

Have a happy Tuesday! 🎈🎉🎁