Hello lovelies & happy Wednesday! Today marks Day one of GlamNailsChallengeFebruary, which I’ve been planning for since the prompts were released last month! I’m really excited, because there is a good mix of prompts that can be for Valentine’s Day (which I love doing nail art for!) & some non-holiday prompts as well.
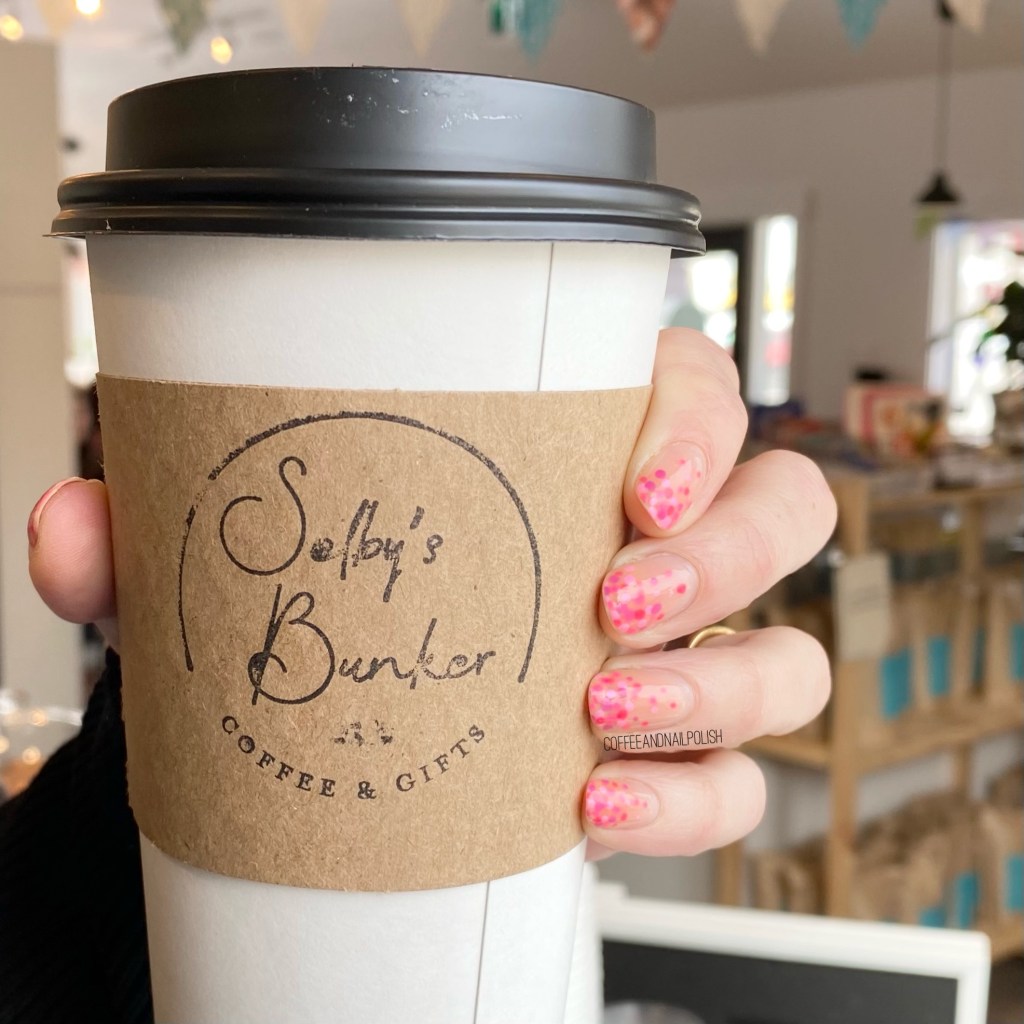
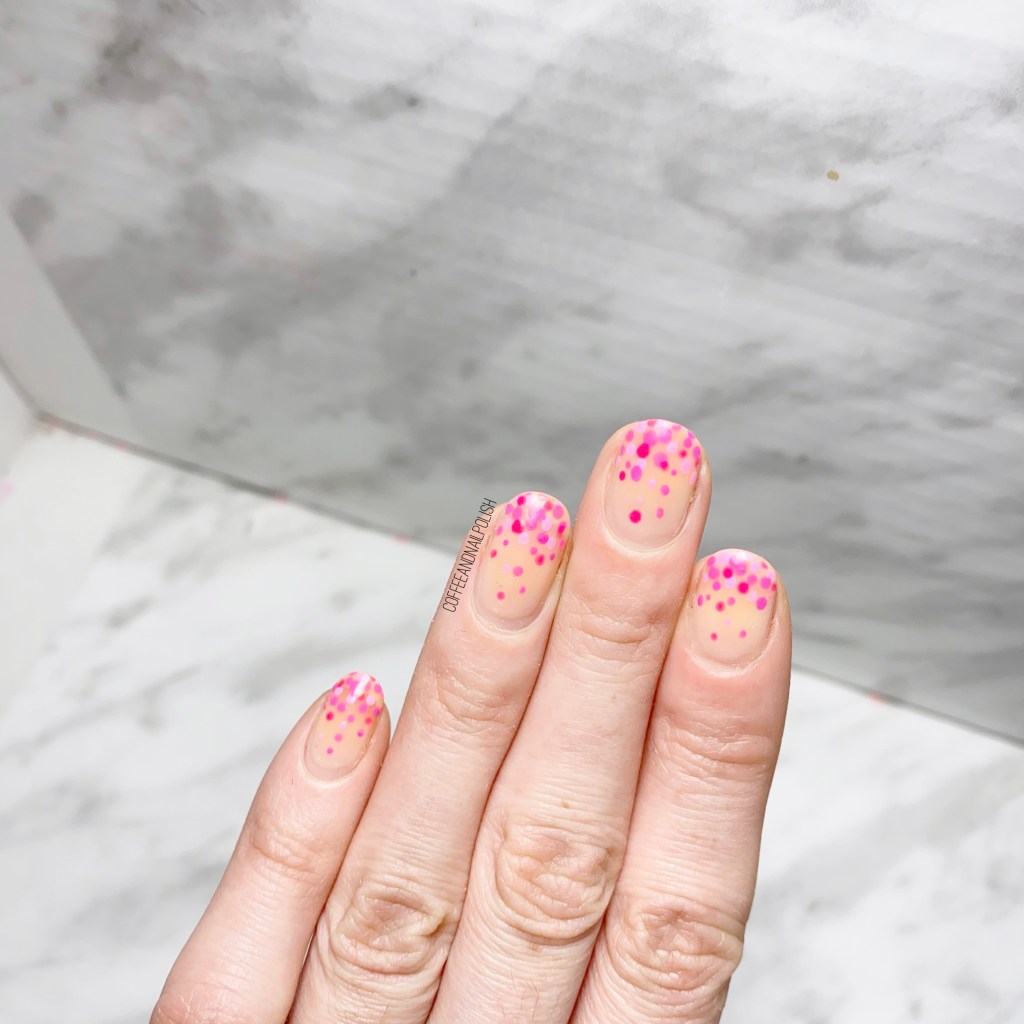
First up, we have Polka Dots — & naturally I was feeling a pink inspired Valentine’s Day dotticure. You can always use more pink in your life. Plus I had this Quo by ORLY set that had been sitting around for absolutely ever that I bought & never used, so I figured why not pull it out & use it a pretty gradient dotticure!
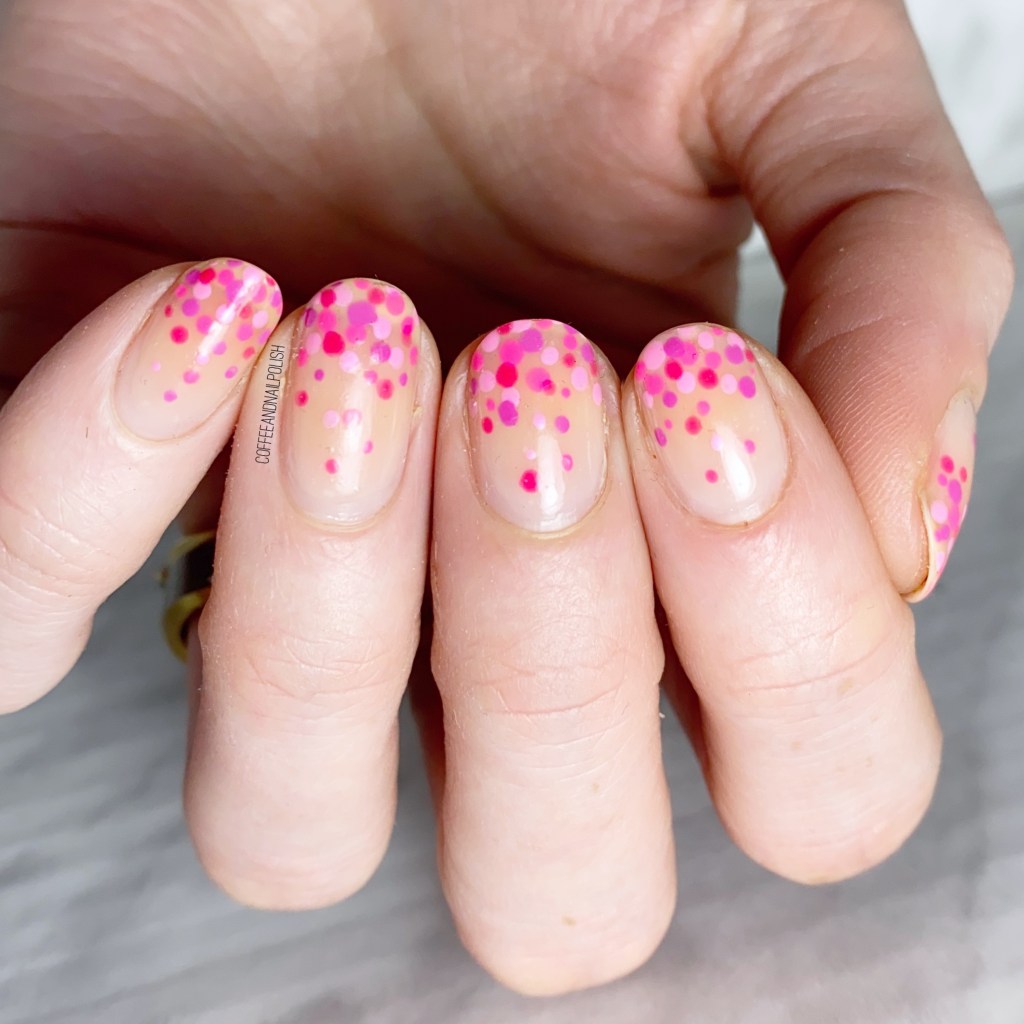
For this manicure, the polishes I used were:
- Base Coat: Essie Strong Start
- Top Coat: Sally Hansen Miracle Gel Top Coat
- Sally Hansen CSM Nail Primer
- Quo by ORLY Holiday 2014 collection — “the Pinks” (none of these mini bottles have names associated, so I can’t give you specifics sadly.)
- NailStuff.ca Dotting Tool Trio (COFFEE10 saves you 10%!)
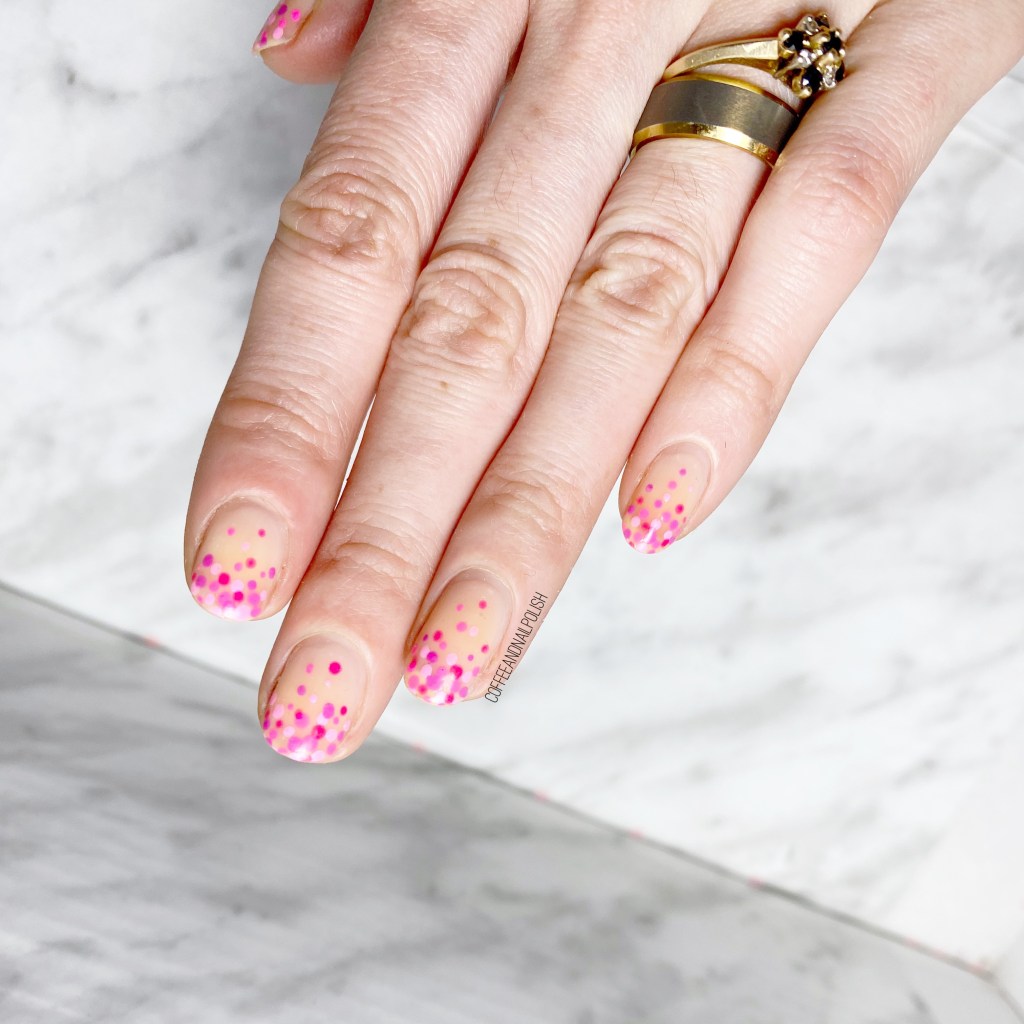

Oh man, I love a good gradient dotticure, especially one that is as vibrant & pretty as this! I’ve done a few versions of this look over the years, especially for Valentine’s Day, which makes it a classic in my books! Especially great if you’re short on time, but want some pretty & standout nails! & you don’t even need tools to do it — a hair pin works just as easily as a dotting tool.

What do you think of my gradient dotticure for the first prompt of #glamnailschallengeFeb? I’m so exciting to be participating again this month, & can’t wait to play around with all the prompts to come!
It’s going to be a really good month for nail art so stay tuned!