GLAM NAILS CHALLENGE APRIL – Easter Bunny 🐰

Hello lovelies & happy Monday! I’m excited because it’s April, & I haven’t participated in a Glam Nails Challenge in a while so I thought it would be fun to participate this month since it’s a Spring-y themed challenge so I thought it would be fun to participate.

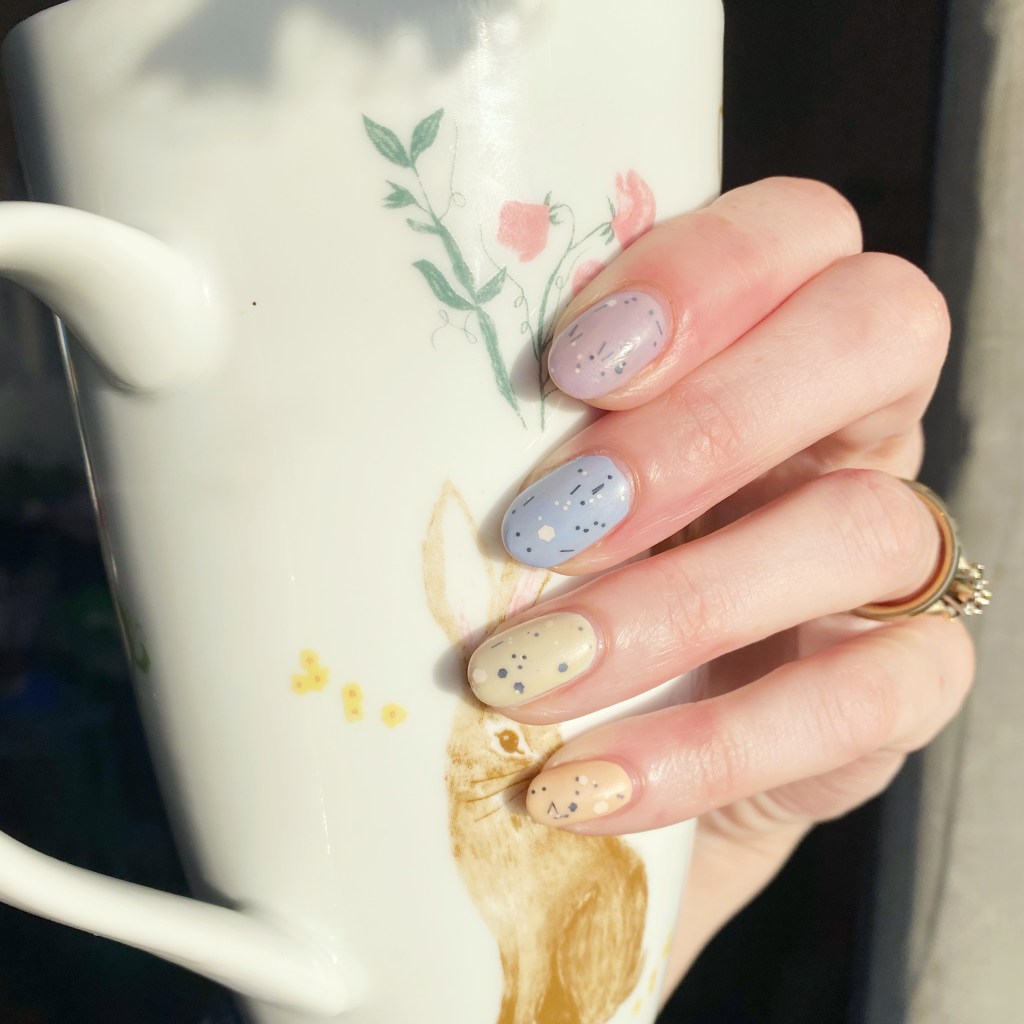
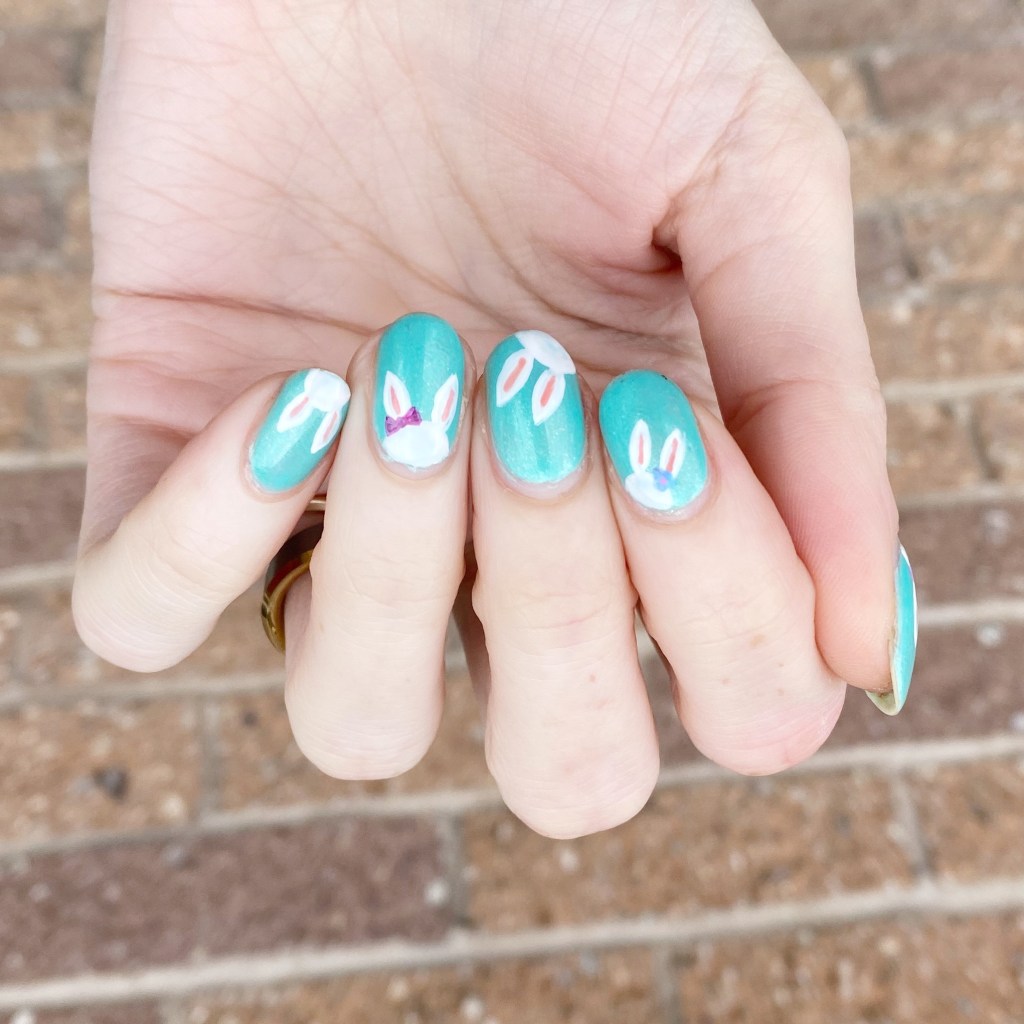
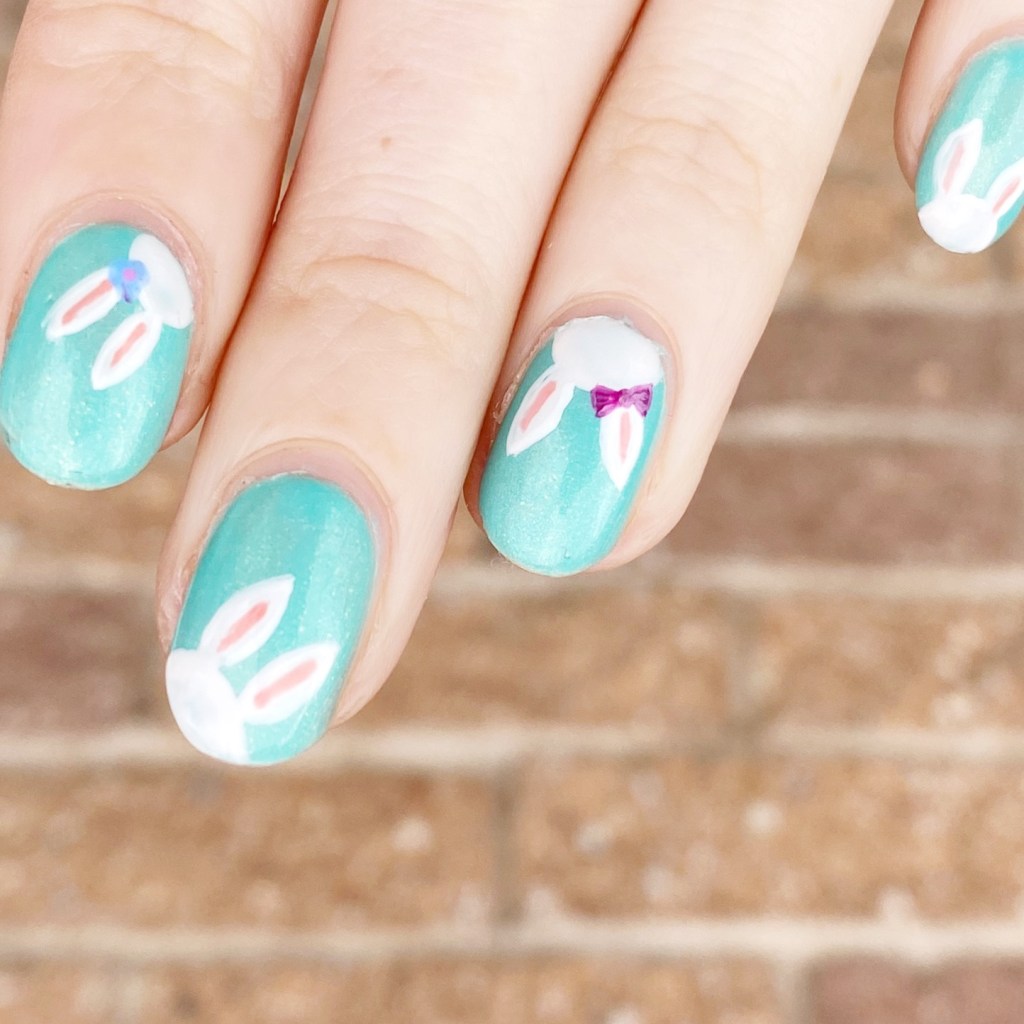
The first prompt for this month? Easter bunny. Which is awesome because I love any excuse for some holiday themed nails. I browsed through my Pinterest, & settled on a cute peek-a-boo bunny look.

The polishes I used for this manicure are: 

  • Base Coat: Essie Hard To Resist Glow & Shine 
  • Top Coat: Seche Vite Fast Dry Top Coat
  • LA Colors Mermaid Magic Sea Life
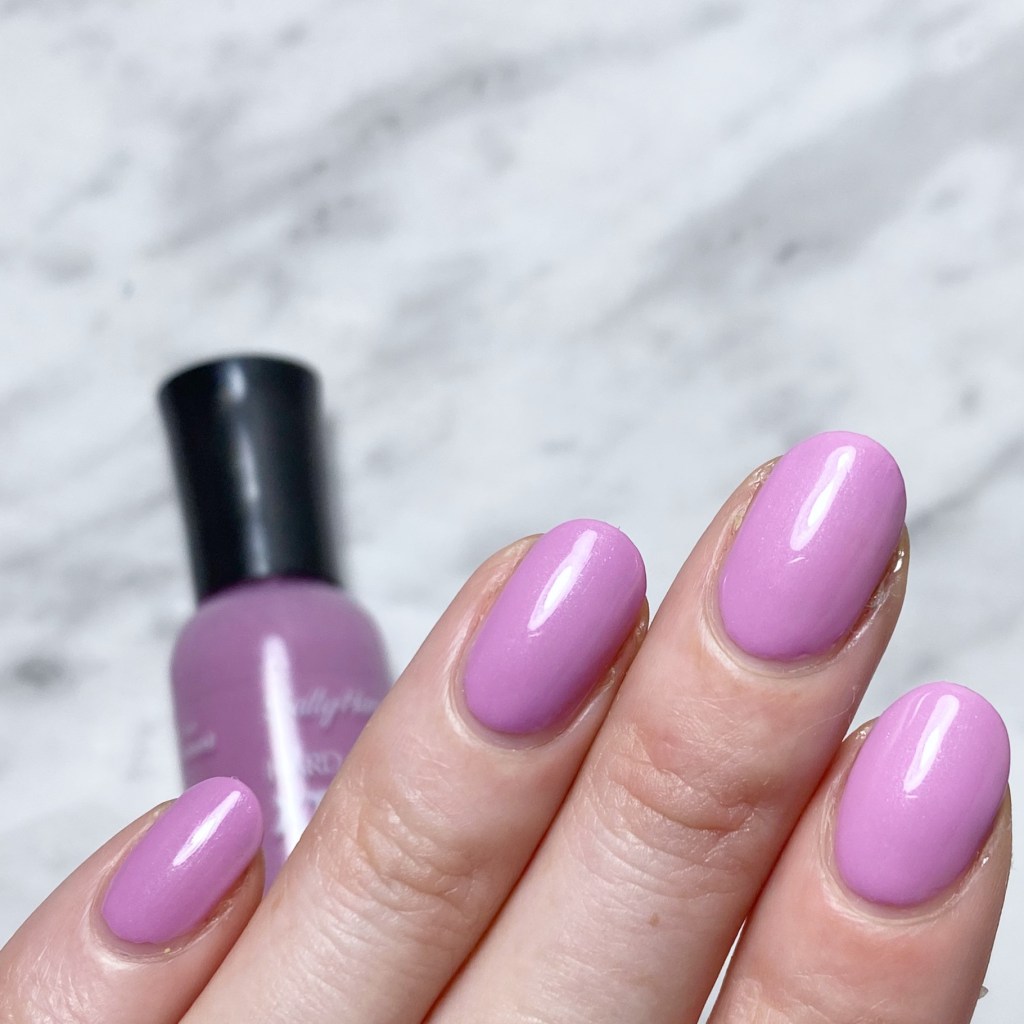
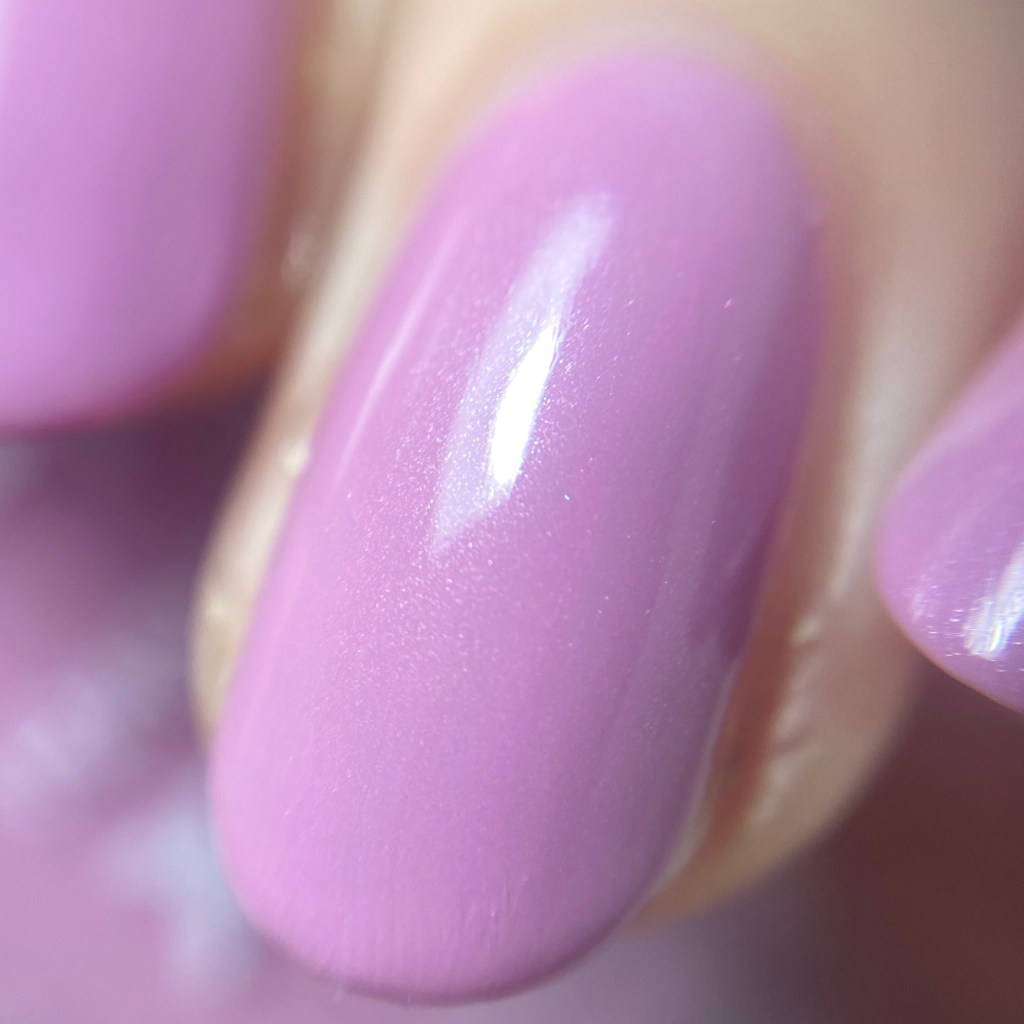
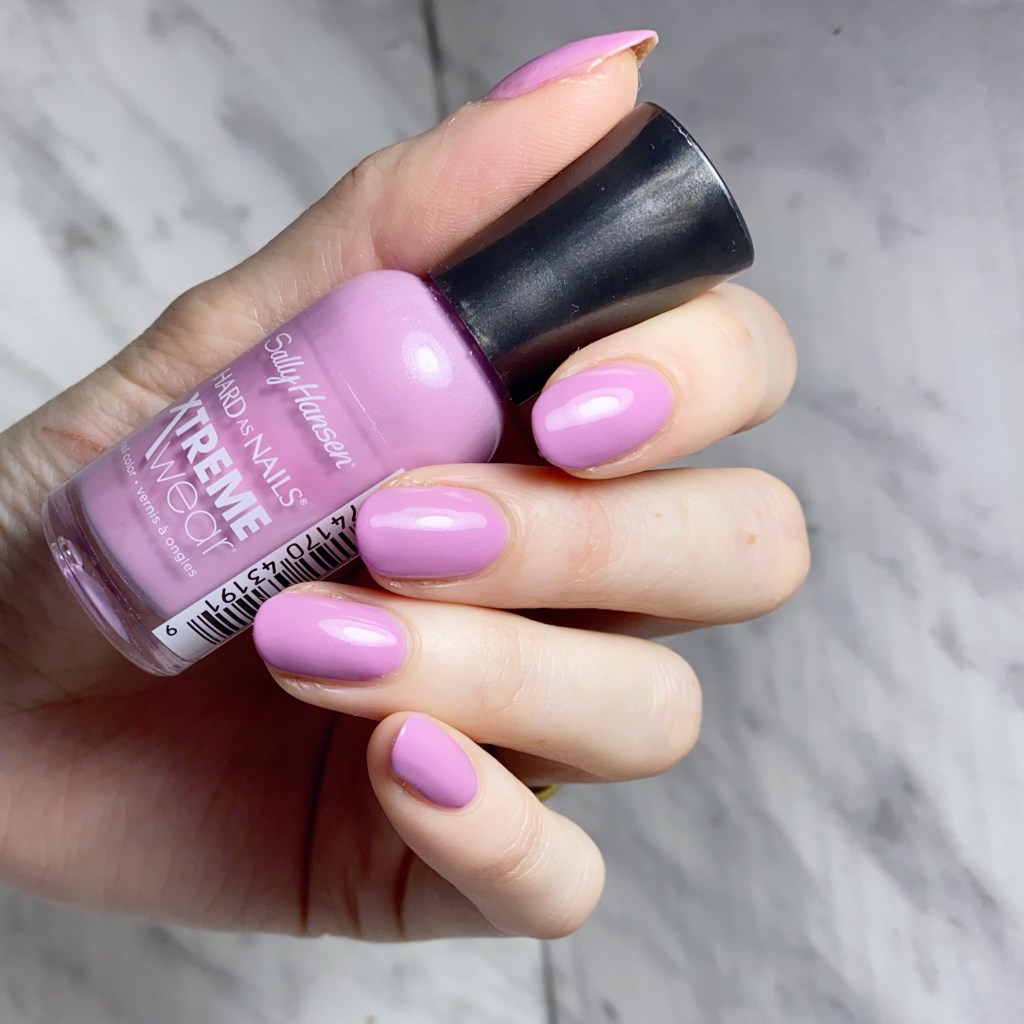
  • Sally Hansen Miracle Gel Ski Bunny
  • Sally Hansen MG Get Mod
  • Sally Hansen MG Pretty Piggy
  • Sally Hansen MG Sugar Fix
  • Sally Hansen MG Orchid-ing Aside
  • Sally Hansen MG Montley Hue
  • NailStuff.ca 4mm Micro Detail Brush
  • Small Dotting tool (NailStuff.ca — Dotting Tool Trio)

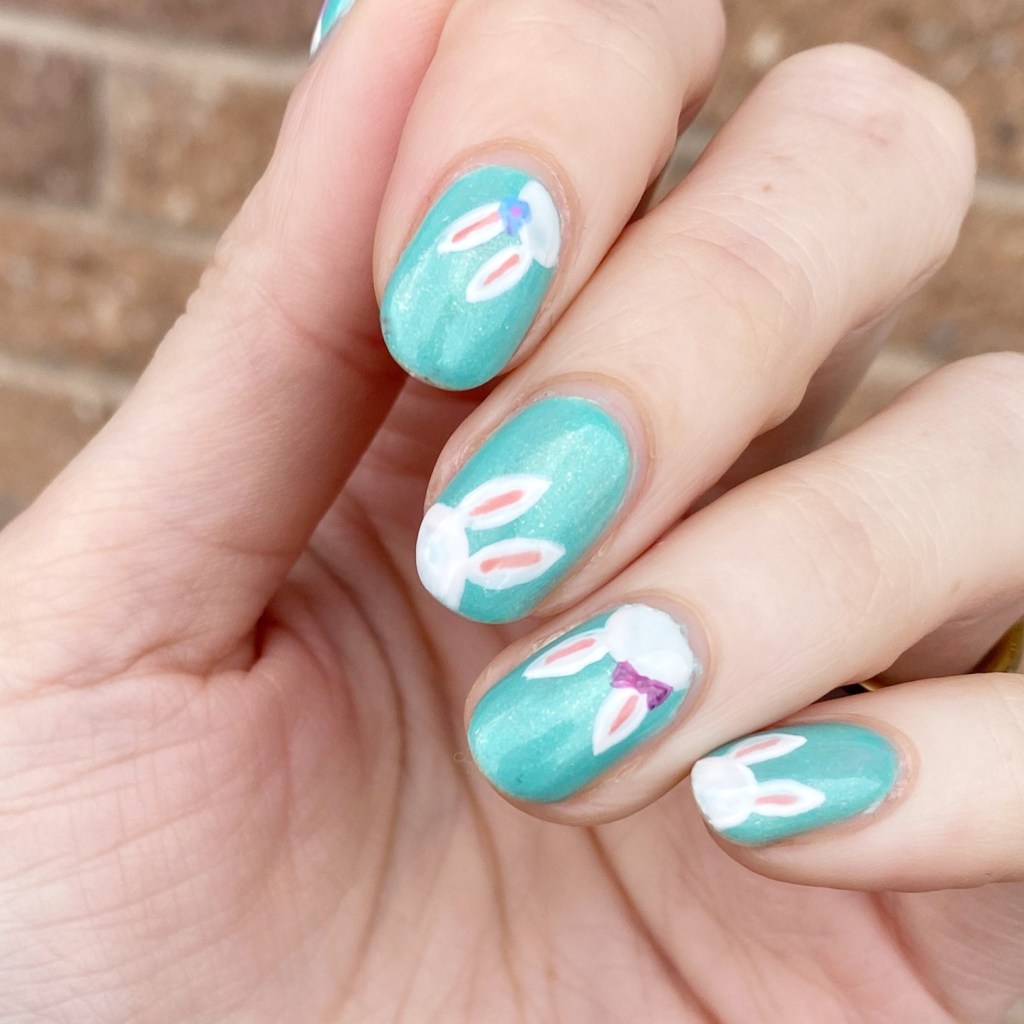
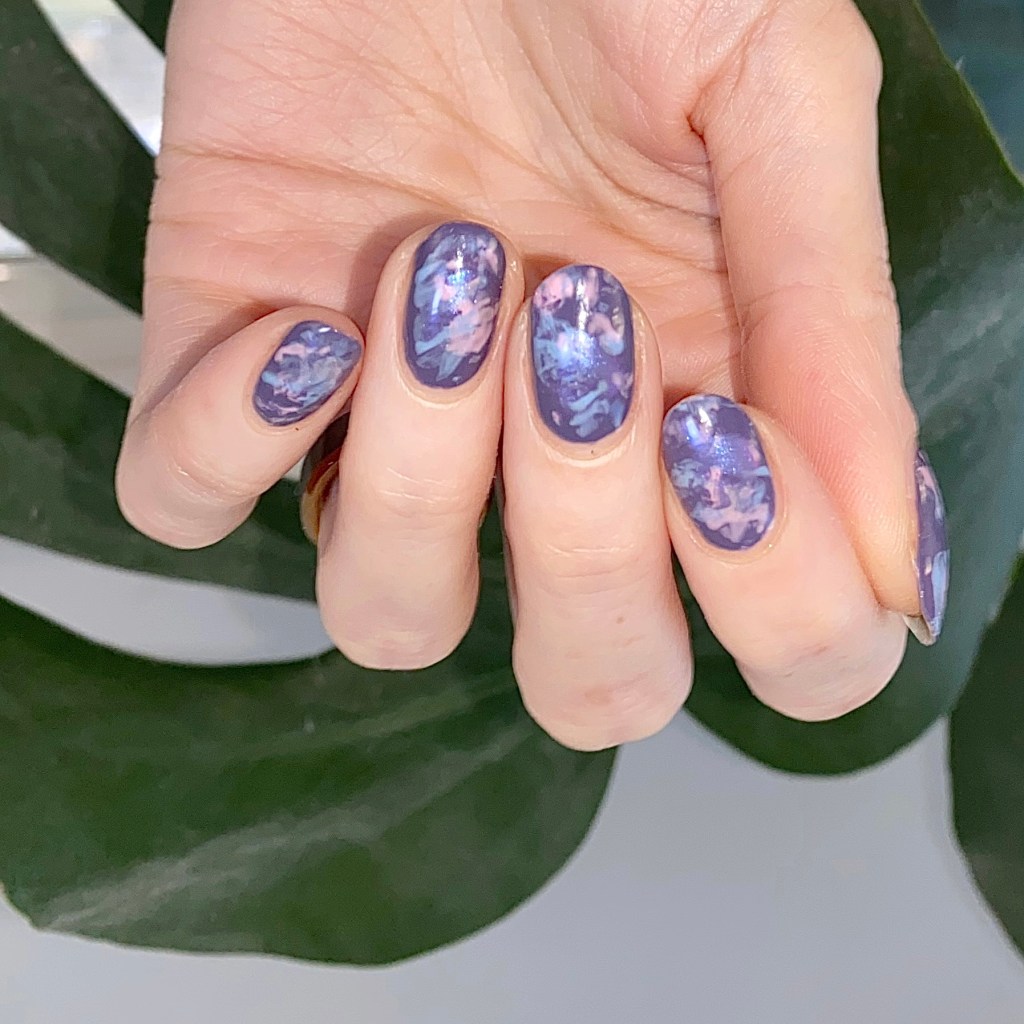
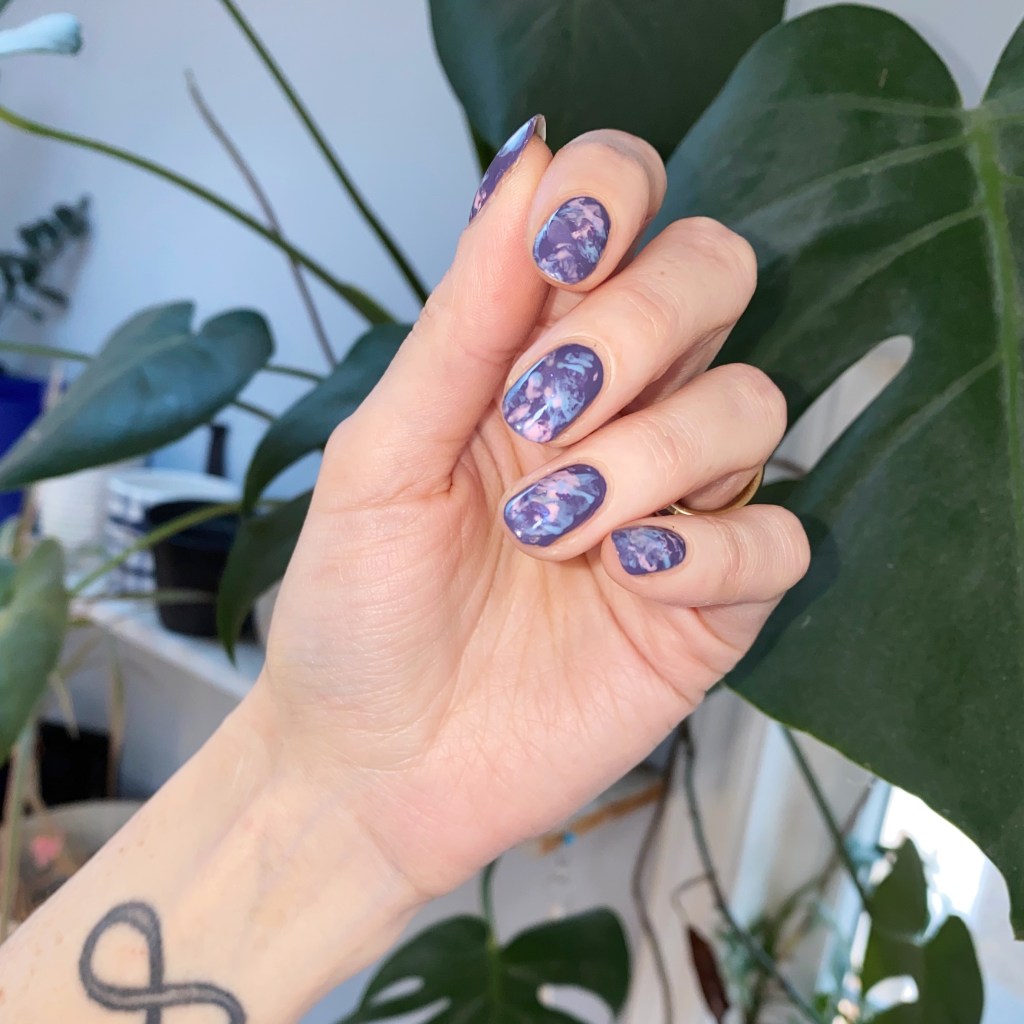
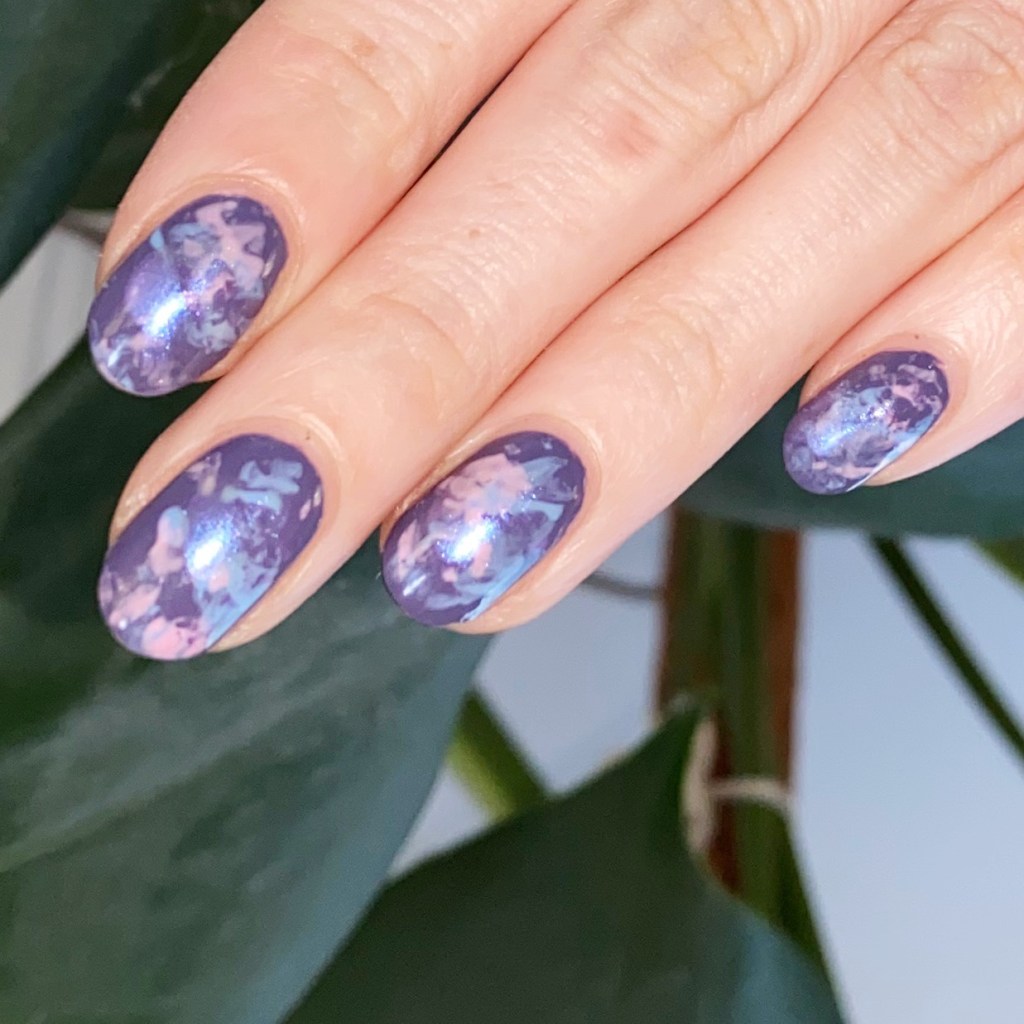
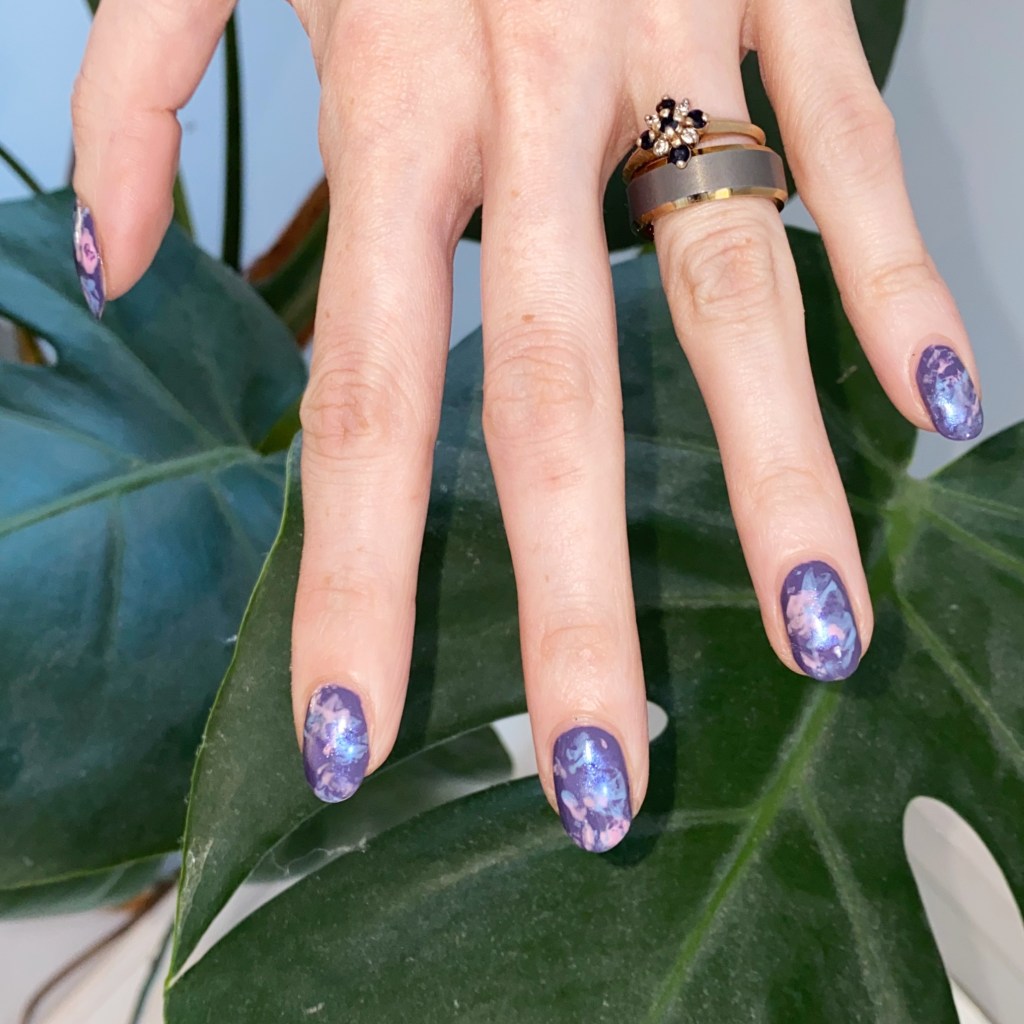
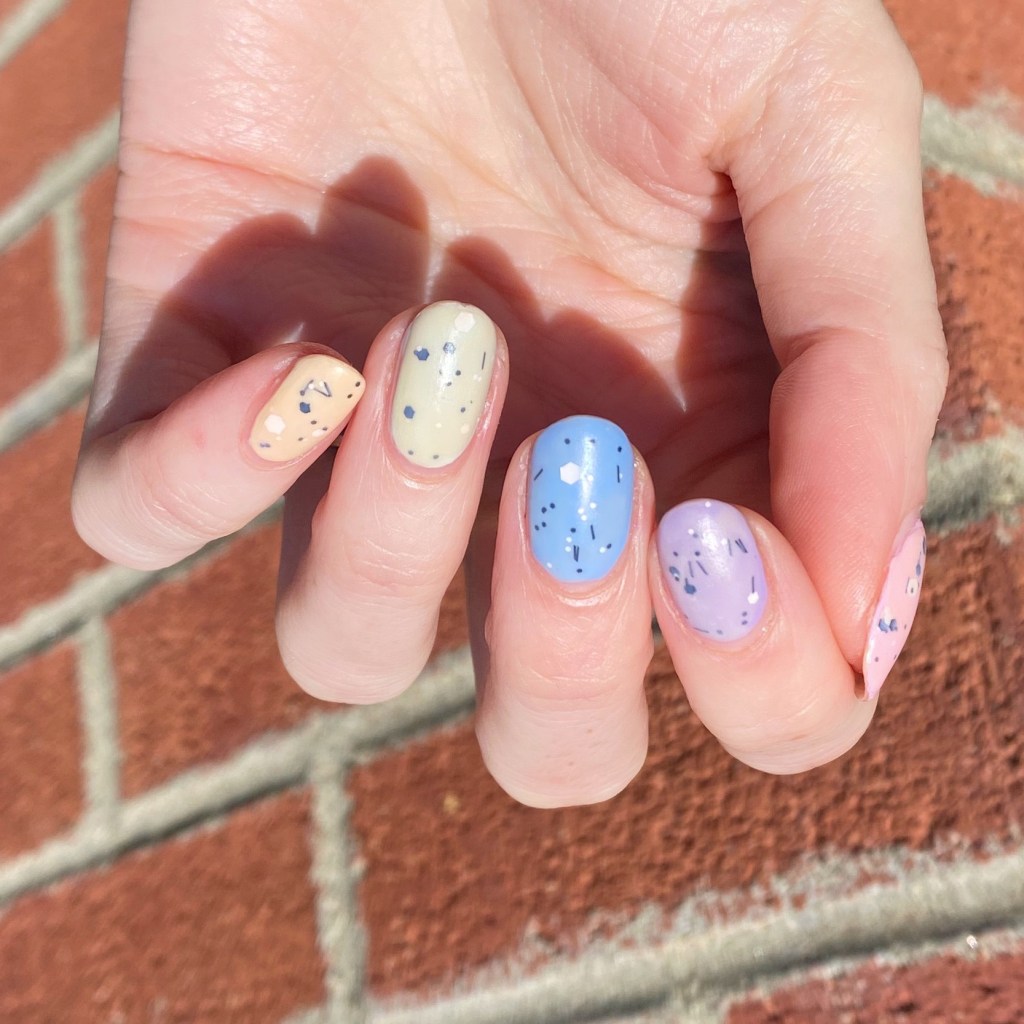
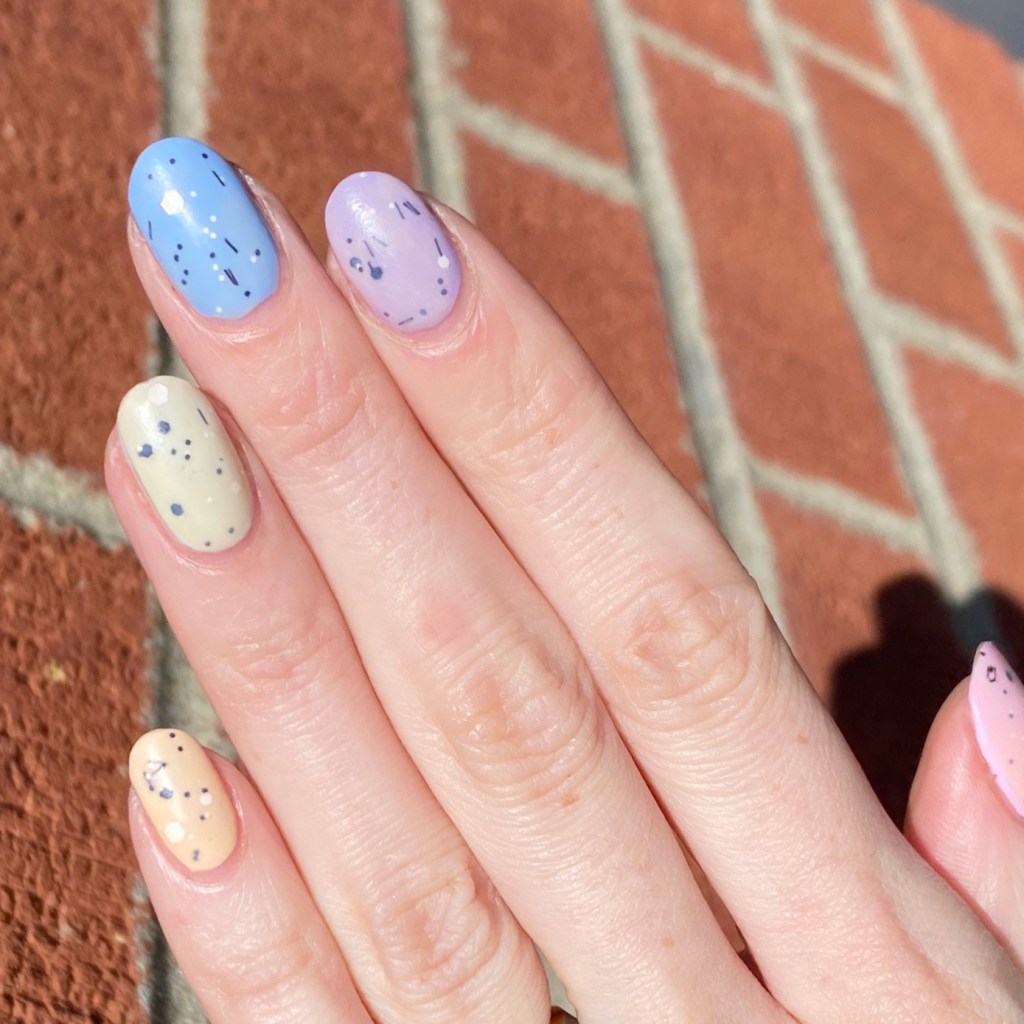
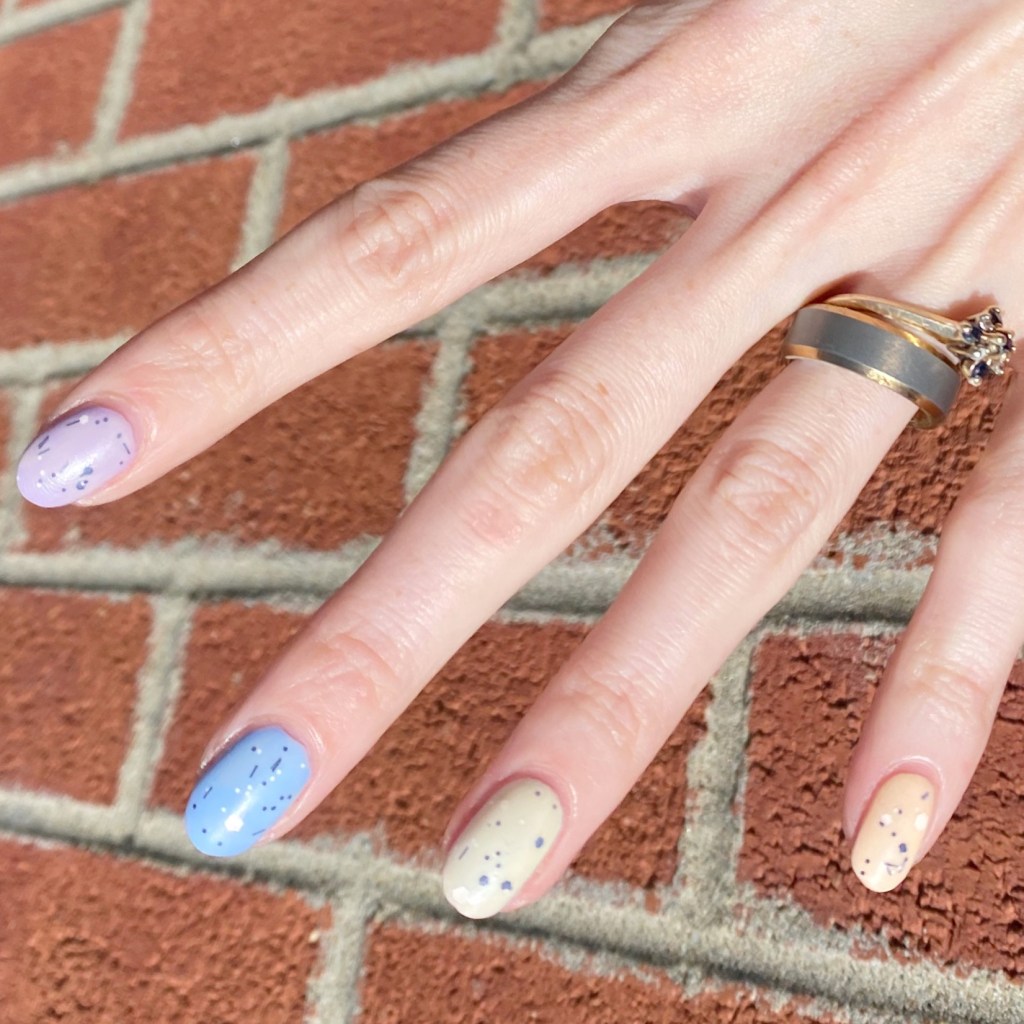
How cute did these bunnies turn out? I was a little bit nervous about free-handing these bunnies, but I was really happy with how they turned out. They look so cute! I added the little details like the bows & flowers, but I didn’t want to add little faces because I felt like they would end up way too cartoon-y.

But they turned out perfect! Super Easter-y, & a fun look to wear. Obviously if you wanted to go a little more subtle you could just do one bunny accent, but I was in the mood to go wild!

What do you think about this Easter Bunny nail art look? Can you believe that it’s less than a week to the big day? What is your favourite Easter treat? Let me know all your thoughts down in the comments below!

Cotton Candy Saran Wrap Splatter

Good morning lovelies & happy Tuesday! It’s a chilly Tuesday morning here & not very Spring like unfortunately. I’m so over these cold, grey days.

But I do have a cute nail art look to share today. I recently added a few new polishes to my stash—which I acquired on some good deals—so I decided to combine a few in a Saran Wrap splatter look. It’s been a hot minute since I did one of these, so I was excited. & the fact it turned out looking a bit like cotton candy was even cooler!

The polishes I used for this manicure are:

  • Base Coat: Essie Hard To Resist Glow & Shine 
  • Top Coat: Seche Vite Fast Dry Top Coat
  • Essie No Ex-pectations
  • Sally Hansen Miracle Gel Sugar Rush
  • L.A. Colors Gossip
  • Essie Expressie FX Iced Out
  • Crinkled up plastic wrap

I’m super in love with how this turned out. Essie No Ex-pectations turned out to be a bit more grey than I had expected, but it made for an excellent base for my splatters of colour to pop! Plus I really do think it gives off the effect of cotton candy. I also like the subtle shimmer from the bit of Expressie FX Iced Out. It gives off just enough sparkle.

What do you think of this Saran wrap splatter design? Do you like easy nail art like this? I really need to do a tutorial to show off just how easy this look is to do! Maybe when things slow down a bit, I can get that reel made!

Have a happy Tuesday. 🖤

Spring Speckled Egg Skittle Nails

It’s the time of year again lovelies, where I recreate one of my favourite Spring/Easter designs: mini egg/speckled egg skittle nails. I’ve been doing some version of this manicure since the early days of my blog, & it never gets old to me. There is something about a speckled egg design that just screams Easter & Spring. Plus it’s so easy to do!

Today’s look was especially on the easy side, as I chose a glitter top coat for my specks.

The polishes I used for this manicure are: 

  • Base Coat: Essie Hard To Resist Glow & Shine 
  • Top Coat: Seche Vite Fast Dry Top Coat
  • Matte Top Coat: Sally Hansen Miracle Gel Matte Top Coat
  • Sally Hansen MG Sun-Shower
  • Sally Hansen MG Sweet Pea
  • Sally Hansen MG Sugar Fix
  • Sally Hansen MG Lavendoor
  • Sally Hansen MG Orchid-ing Aside
  • ACO by Ardene Meteorite
  • Wet N Wild 2% Milk

When I saw this look was super simple, I mean it was super simple. I painted each finger a different colour, applied the glitter top coat, applied Wet N Wild 2% Milk for that faded look, then finished it off with my Seche Vite (because there was a lot of layers of polish) & then added my matte top coat after about 15 minutes. Everything did take a while to dry, but it was totally worth it! I just love a good speckled nail design.

What do you think about this speckled egg design? Do you like a look like this for Easter & Spring? Are you already feeling the Spring temps where you are? It’s just starting to warm up around us, so I’m excited. I’ll be wearing my Spring dresses in no time!

SWATCH SUNDAY — Sally Hansen Xtreme Wear Orchid Around

Good morning lovelies & happy Sunday!

& a bright, sunny, warm Sunday at that. Finally, it’s starting to feel like Spring. So naturally, I needed to pick out some kind of Spring-esque shade for this week’s Swatch Sunday polish pick.

After perusing my polish stash for a while, I decided on this pastel beauty from Sally Hansen: Orchid Around from the Xtreme Wear line.

2 coats + Seche Vite Fast Dry Top Coat

How pretty is this beautiful pastel is somewhere between pink & pale purple, with a very pretty shimmer which — sadly — is hard to actually see on the nail unless you’re really looking for it.

The formula was a good consistency & easily applied in 2 coats. I did need to apply top coat to smooth things out, as I found it had some streakiness, but since I always add top coat when I’m wearing nail polish anyways, it’s not a big deal — & definitely not a deal breaker.

You can see that pretty shimmer in my macro shot! I just wish it was more visible.

The colour is so perfect for Spring! & I’m always here for a pretty pastel shade to inspire warmed days. This would be the perfect base for some Easter nail art (which, is less than a month away!) I’ve always had good luck with the Sally Hansen Xtreme Wear line in terms of wearability, which is awesome because it’s a great affordable option.

What do you think of Sally Hansen Xtreme Wear Orchid Around? Would you wear this shade for Spring? Let me know all your thoughts down in the comments below!

Have a lovely Sunday! 🌸

Teal & Blue Colour Block French Manicure

Good morning loves & happy Thursday. It’s almost the weekend!

I hope everyone’s week is not too crazy. I’ve just been wistfully sitting here, wishing for Spring. Every time I look at the dresses in my closet, I can’t help but wonder… how much longer? So I decided another bright & colourful manicure was in order. But… I’ll be honest. I’ve been very wrapped up in all the Vanderpump Rules drama going on, so I also needed something not too involved.

So naturally I decided a bright & colourful colour block French design would be perfect. Quick, easy, & gorgeous!

The polishes I used for this manicure are: 

  • Base Coat: Essie Hard To Resist Glow & Shine 
  • Top Coat: Seche Vite Fast Dry Top Coat
  • Sally Hansen Miracle Gel X FRIENDS The One With The Teal (PR/gifted)
  • Sally Hansen Miracle Gel Beatnik

Okay, so I did this look completely 100% freehand, & even I can’t believe how clean & straight I managed these lines. Also, I really like the kind of asymmetrical look of this design, as opposed to my usual (similar) colour block looks. But the colours — the colours are definitely my favourite part. This pop of colour is exactly what I needed, & I didn’t even realize it. I’m obsessed.

It’s just a really fun, easy look with an endless possibility of colour combinations. I’m so happy with how they turned out.

What do you think about this colour block French manicure look? Do you think this is a great design & pop of colour for Spring? I’d love to know what colour combination you would choose for this look, so let me know down in the comments below!

Have a lovely Thursday! ♥︎