Rainbow Paint Splatter (Using Acrylic Paint 🎨)

Good morning lovelies & happy Thursday! How is everyone’s week going so far? I hope it’s been filled with beautiful days.

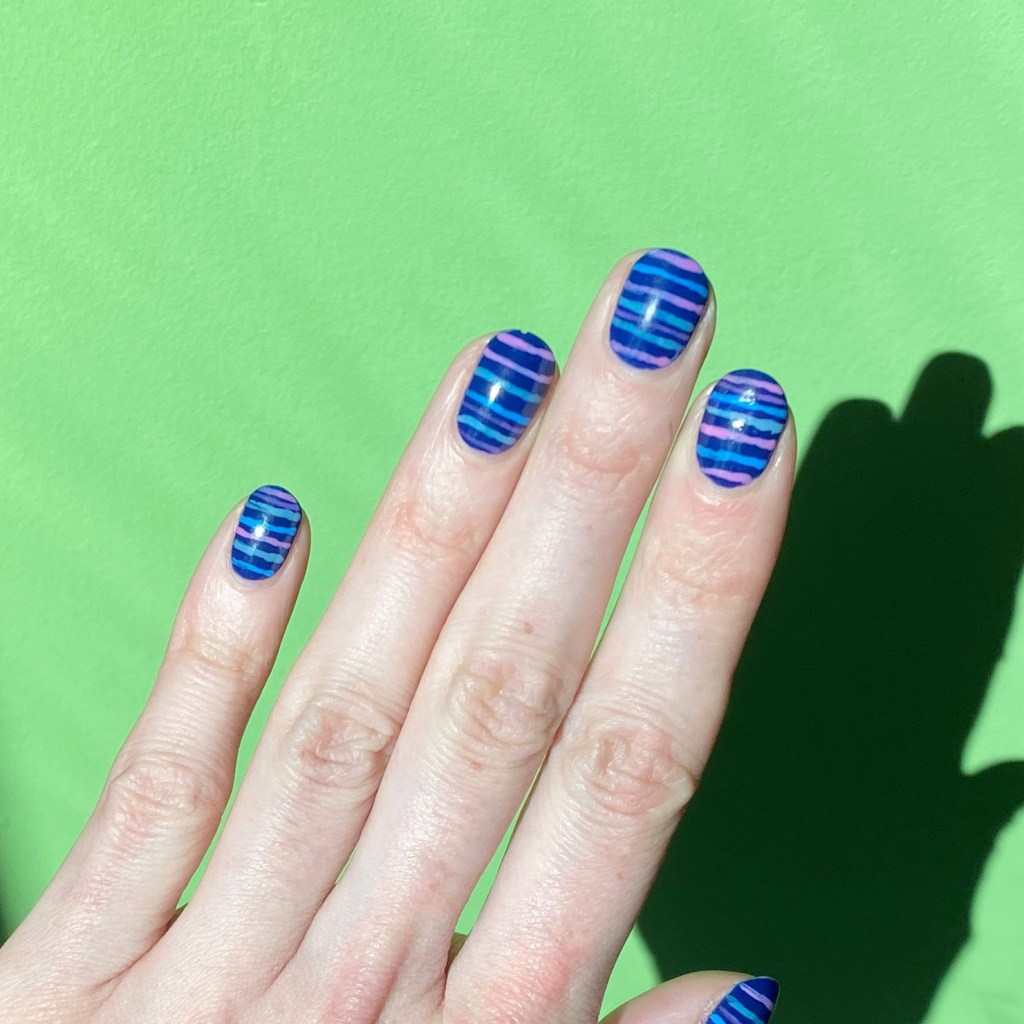
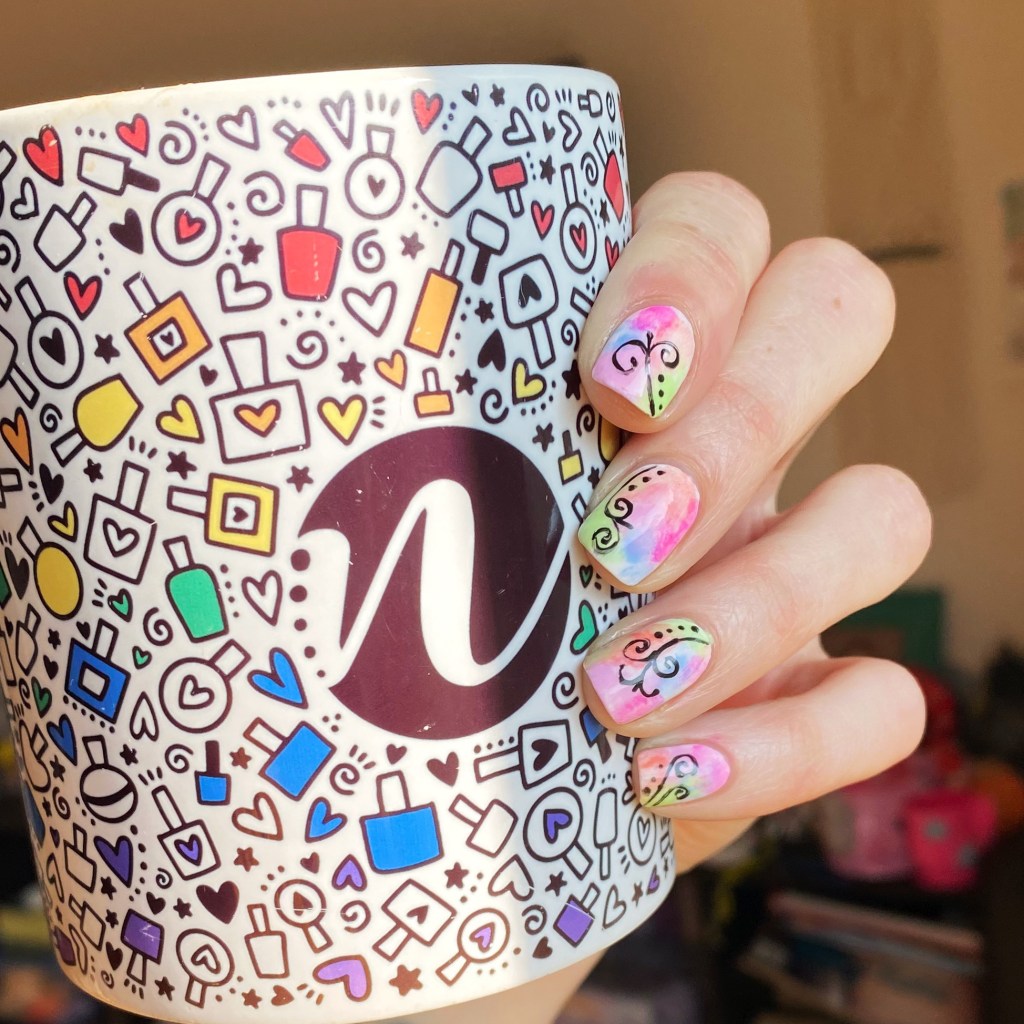
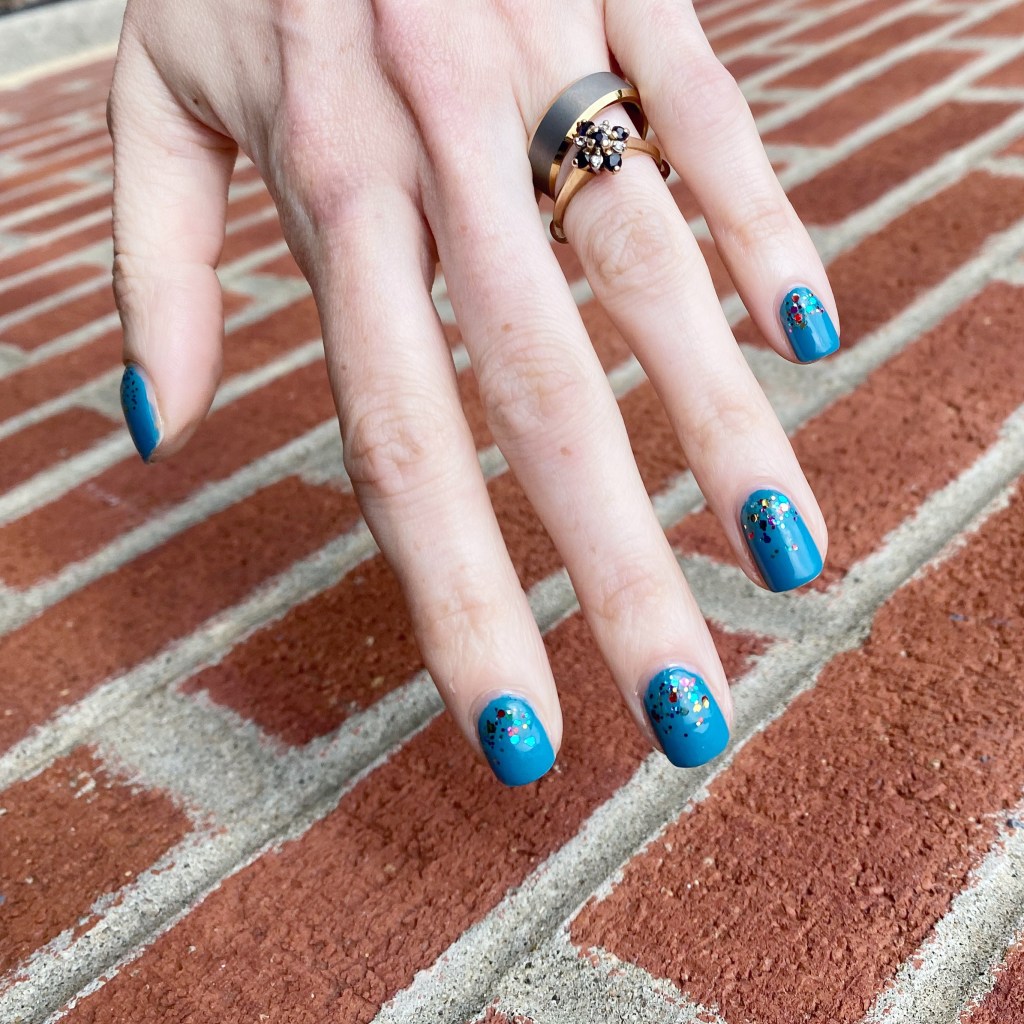
Today I’m sharing a super easy design that was totally inspired by my daughter. I asked her how I should paint my nails, & she told me rainbow 🌈. I haven’t played with my acrylic paints in a while so I decided to use them for a splatter-y effect, & I think it turned out pretty cool!

The polishes I used for this manicure are: 

  • Base Coat: China Glaze Calcium Gel Fortifer
  • Top Coat: Seche Vive
  • OPI I Cannoli Wear OPI
  • Acrylic Paint
  • Paint brush
  • Water

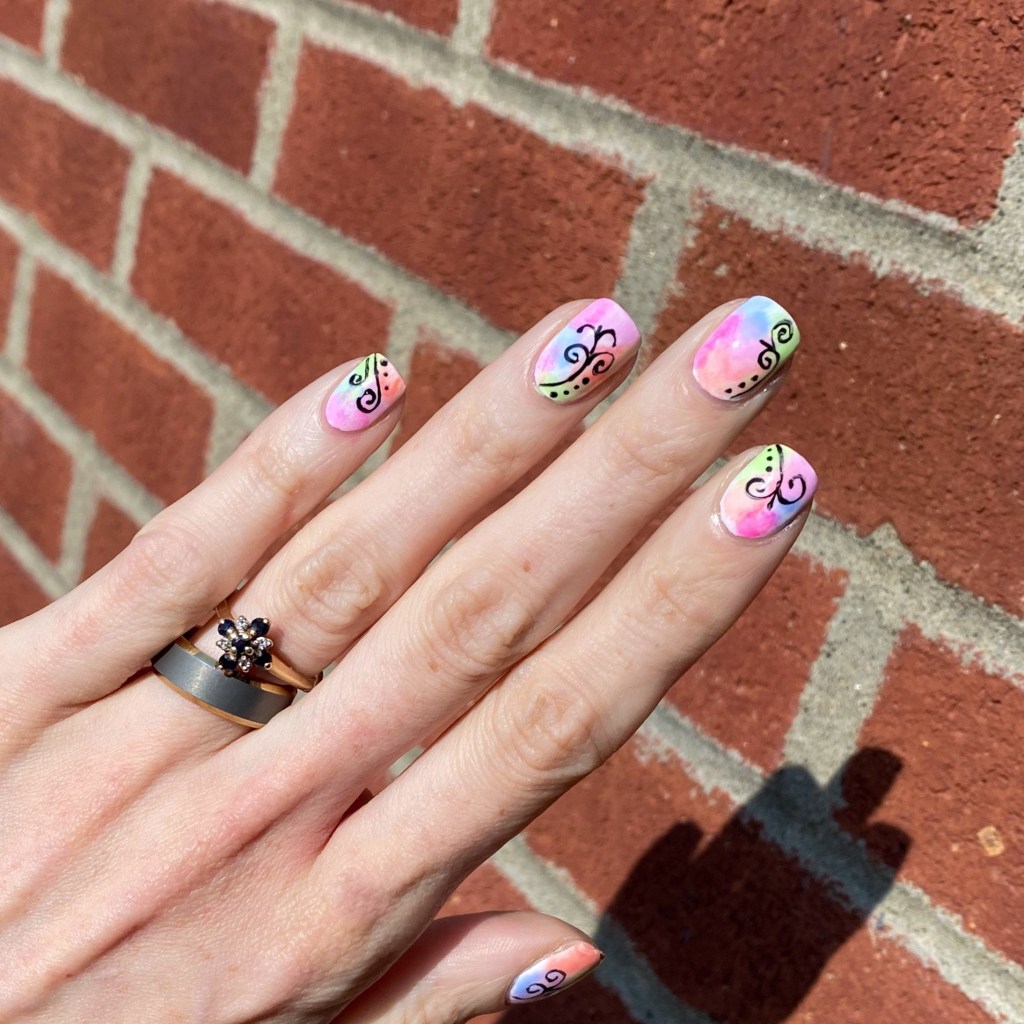
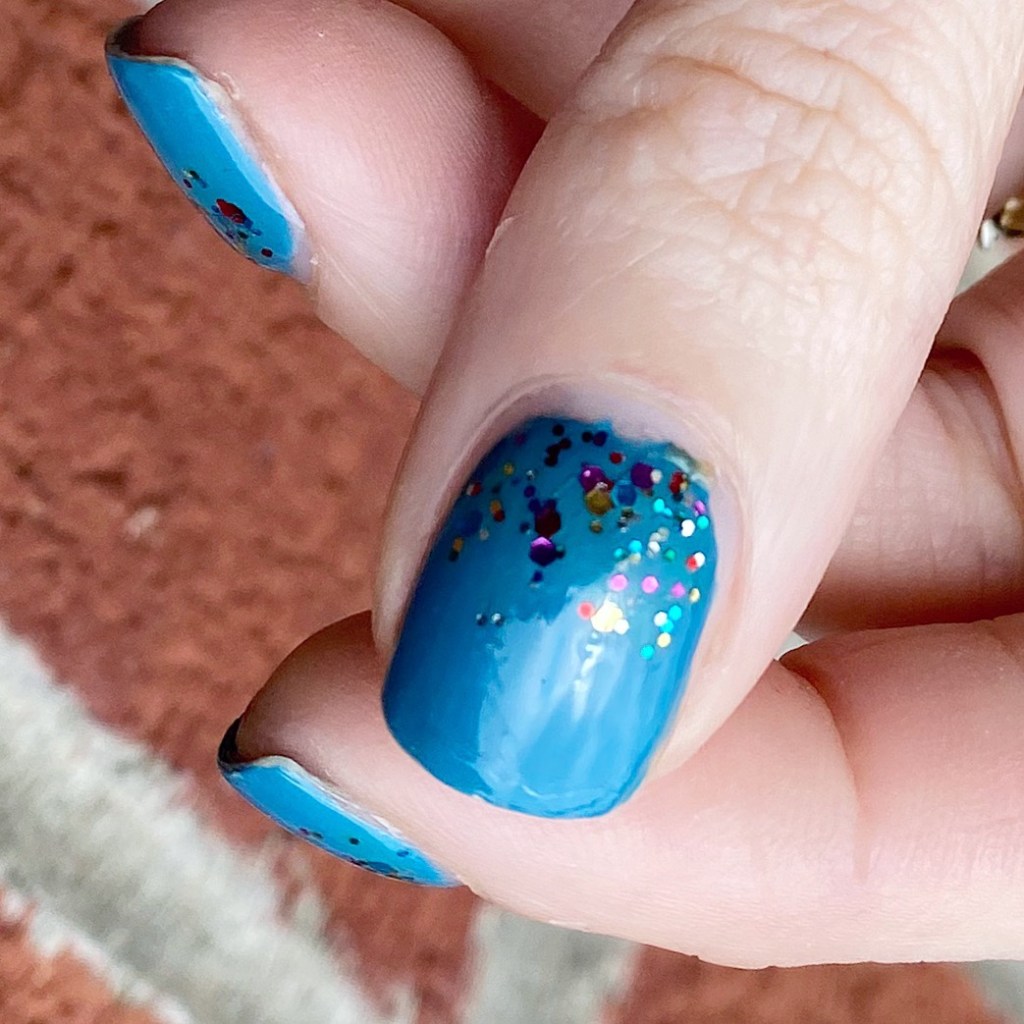
These nails were kind of an experiment because I wasn’t sure initially what I was going to create. I ended up applying drops of acrylic paint on my nails, then using the water to make it spread out a bit. My ring & pinky finger probably turned out my favourite of the 5 on this hand, but I definitely know what I’ll do next time to get the look I want.

These were super easy though, & because I was using acrylic paint vs nail polish I could easy erase any mistakes & start over. My only tip is make sure the acrylic paint is dry before applying top coat, otherwise you’ll end up with some smearing & transferring which kind of mucks up the final look a bit (like on my middle finger). Over all though, such a fun quick look to do.

What do you think of this rainbow paint splatter design? Do you love this quick & easy look? Let me know all your thoughts down in the comments below.

Blue Spring-y Stripes

Good morning lovelies & happy Tuesday!

I’m trying really hard to get back into the swing of posting again, & I’m hoping I can get back into a regular posting schedule. Today, I have a fun easy stripe design to share with you that was surprisingly easy to do!

The polishes I used for this manicure are: 

  • Base Coat: China Glaze Calcium Gel Fortifer
  • Top Coat: China Glaze Fast Forward Top 
  • Quo Beauty Stormy Night
  • Quo Beauty Bluebell
  • OPI Nature Strong Emflowered
  • BKIND Sauble Beach
  • Color Club Art Club Striper Passion Flower
  • Nailstuff.ca Mermaid Tail 7mm liner brush

I tried my hardest to make my lines straight, which I definitely find hardest when I’m doing horizontal lines verse vertical lines! But I think this look turned out really perfect. & I absolutely love the combination of colours. The base (Quo Beauty Stormy Night) may be quite dark, but the lighter colours really pop against it! &

I got so many compliments when I wore these at work — which is always what I base my designs on. If people start complimenting them, I know it’s a good design.

What do you think about this colourful stripe design? Do you like my freehand stripes? Let me know all your thoughts down in the comments below!

Have a happy Tuesday ♥️

GLAM NAILS CHALLENGE MARCH — Pastel

Good morning lovelies & happy Monday. I hope everyone had a fantastic weekend. This weekend was the beginning of March Break, which meant that work was pretty busy. It also means my kids are home all week during the day, which should make trying to get any nail art done a moot point haha.

But today we’re diving into the 3rd prompt for Glam Nails Challenge March, & this one was an easy one — pastel. Obviously, I had to do a pastel skittle look using a few Spring-y shades.

The polishes I used for this manicure are: 

  • Base Coat: China Glaze Calcium Gel Fortifer
  • Top Coat: China Glaze Fast Forward Top 
  • Sally Hansen Miracle Gel Crying Out Cloud
  • Londontown USA Bell Flower
  • Essie Mint Candy Apple
  • Essie Chillato
  • Sally Hansen Miracle Gel Sun Shower
  • Essie Expressie FX Iced Out

Oh I love a good skittle, & I’ve really been loving the pastels lately as well. This look is an easy way to do some “nail art” that isn’t really nail art but totally passed for it. Quick, easy, super cute; all the things I look for in a manicure, to be honest. & the addition of Essie Expressie FX Iced Out gives all the nails a nice cohesive look that pulls everything together. I know the glazed nail look is kind of on its way out, but I’m kind of obsessed with it.

I’ve never been one for following trends anyway.

What do you think of my pastel skittle look for Glam Nails Challenge March? Is it beginning to feel a bit like Spring where you are? We’ve had nothing but rain upon rain the last couple days… so yeah, definitely feeling like Spring haha.

Have a great Monday.

♥︎

Neon Squiggles ➰

Hello lovelies & happy Friday! I know, I skipped a day of posting this week — sometimes you just need a day to take a break & relax. But I’m back today & I have a manicure I’m really obsessed with. It has all the Summer vibes that I’ve been looking for.

I really loved a sponged neon base, & I just found my make up sponges the other day, so I knew it was time for another version of one of my favourite looks! & I couldn’t be happier with how it turned out.

The polishes I used for this manicure are: 

  • Base Coat: Londontown KUR Nail Hardener & Base Coat 
  • Top Coat: Seche Vive Fast Dry
  • Essie Blanc
  • Sally Hansen Miracle Gel Peach Please
  • Sally Hansen MG Sugar Crush
  • Sally Hansen MG Violet Voltage
  • Sally Hansen MG Electri-Lime
  • Sally Hansen MG Fuchsia Fever
  • OPI Who You Callin’ Bossy?!
  • NailStuff.ca 4mm Micro Detail Brush

Love this vibrant base, but obviously I needed to draw some kind of pattern overtop. It’s been a while since I tried one of these swirly looks, but I think it turned out really fun. I have no set plan going into it, I just tried to create something that looked unique… & I think I was successful! My ring finger is probably my least favourite of all my nails, but over all I love love love how it looks. I’m very happy with it!

What do you think about this neon swirl look? Are you busting out the neon now that the days are getting warmer? Let me know all your thoughts down in the comments below, & share what your favourite neon nail polish is down in the comments below!

Sparkly Glitter Gradient ✨

Good morning lovelies & happy Monday! A beautiful, sunny & warm Monday. It’s feeling like Summer today, & I’m loving every moment of it.

Today I gave a super simple, easy nail art look that anyone can do! I love a good glitter gradient, & it is such an easy way to spruce up a relatively plain manicure.

The polishes I used for this manicure are: 

  • Base Coat: Londontown KUR Nail Hardener & Base Coat 
  • Top Coat: Seche Vive Fast Dry
  • Essie Revenge’s A Beach
  • Sinful Colors Pride

What I love most about a glitter gradient is you don’t really need any tools. Obviously, you can sponge on the glitter, but I usually just apply it using the brush as I find it easiest (& least messy).

These are definitely the look you need to do if you have a special occasion you want fancy nails for, but aren’t too comfortable with nail art. I swear, anyone can rock this look easily! In fact, I’m already planning another one in my head featuring a few glitters I don’t use too often — stay tuned!

What do you think about this fun glitter gradient? Also yes — that is the same polish from yesterday’s Swatch Sunday post. Crazy how different lighting can make it look different! Natural light vs Light Box.

Have a fantastic beginning to your week loves! 🖤