Easy Galaxy Nails ( With Magnetic Polish)

Hello beauties & happy Thursday! We’re almost one full week into 2023 & its kind go crazy to think about. & it actually looks like Winter today, which I think is the first real snowfall we’ve had so far that wasn’t more than a dusting. Now if only it could have come like 2 weeks ago before Christmas, haha.

Today we’ve got our second nail art look of the year.

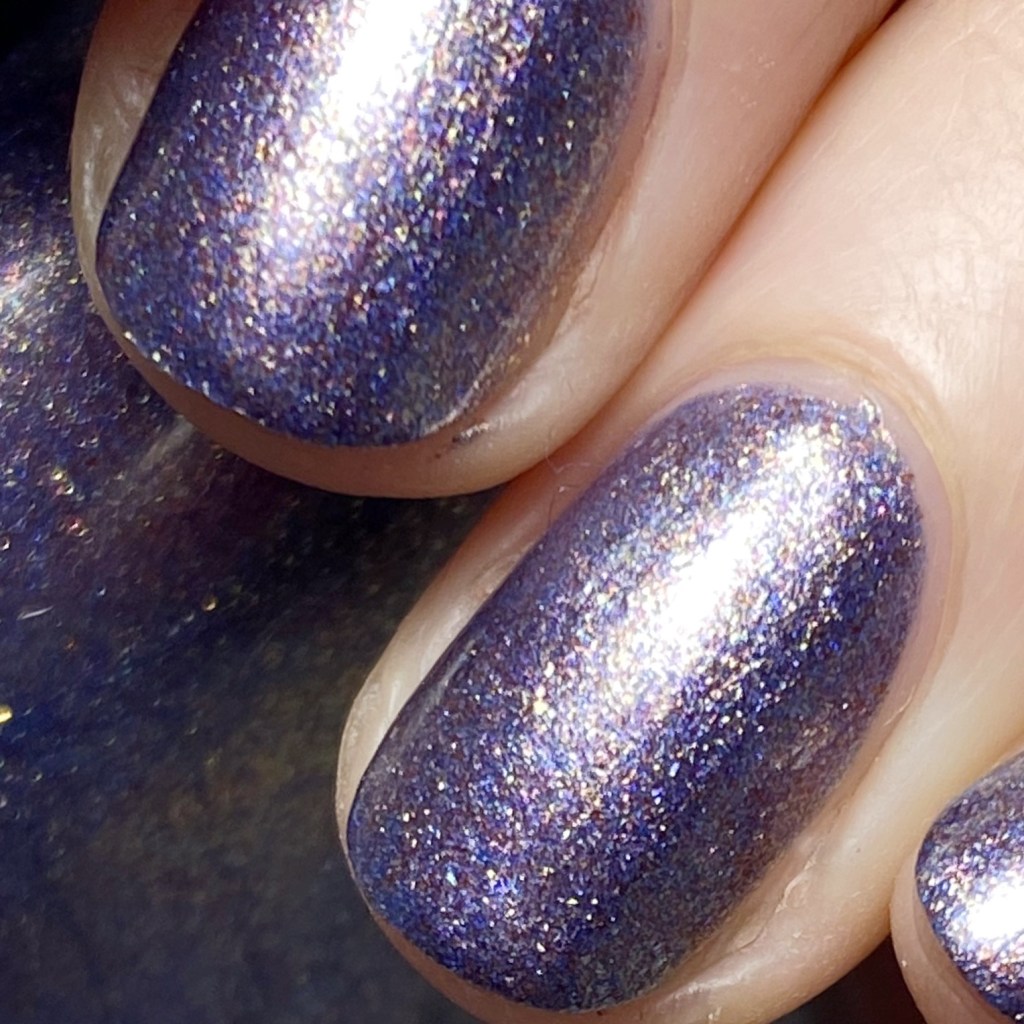
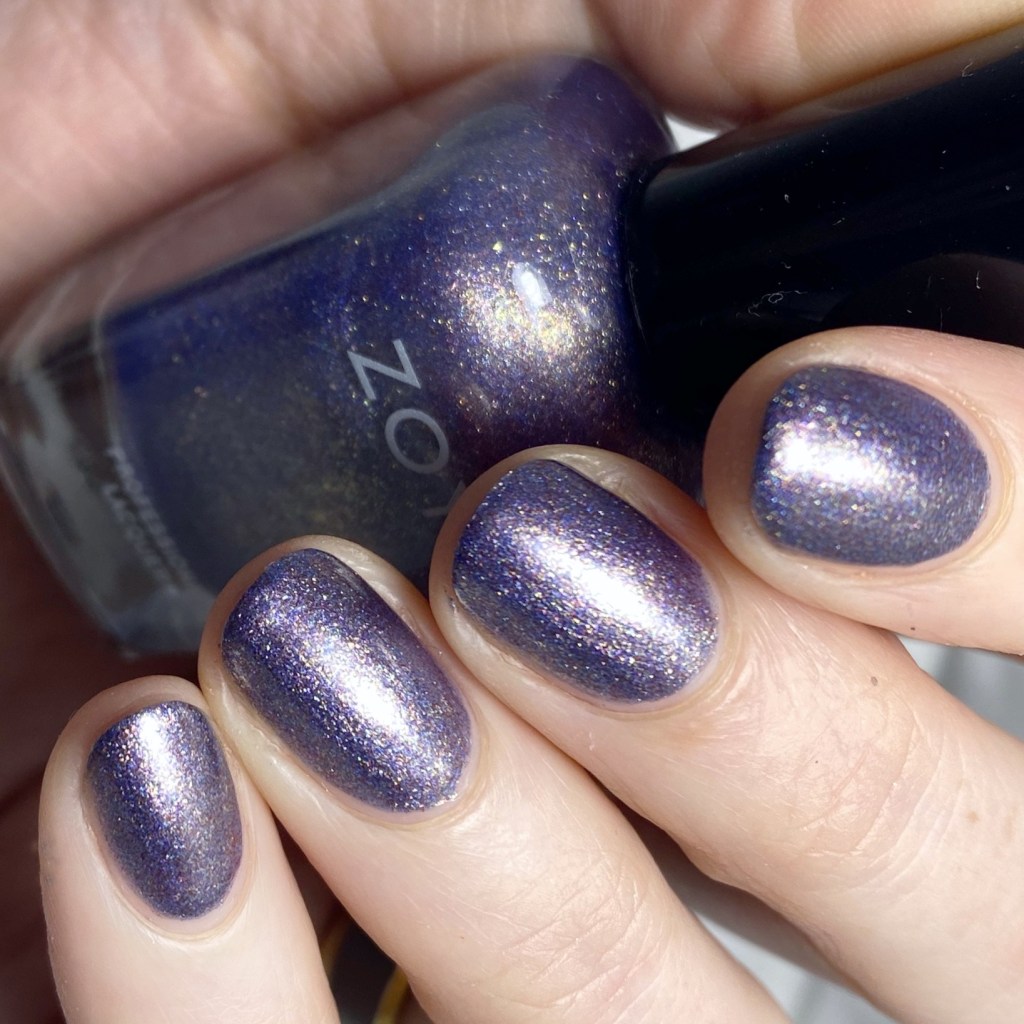
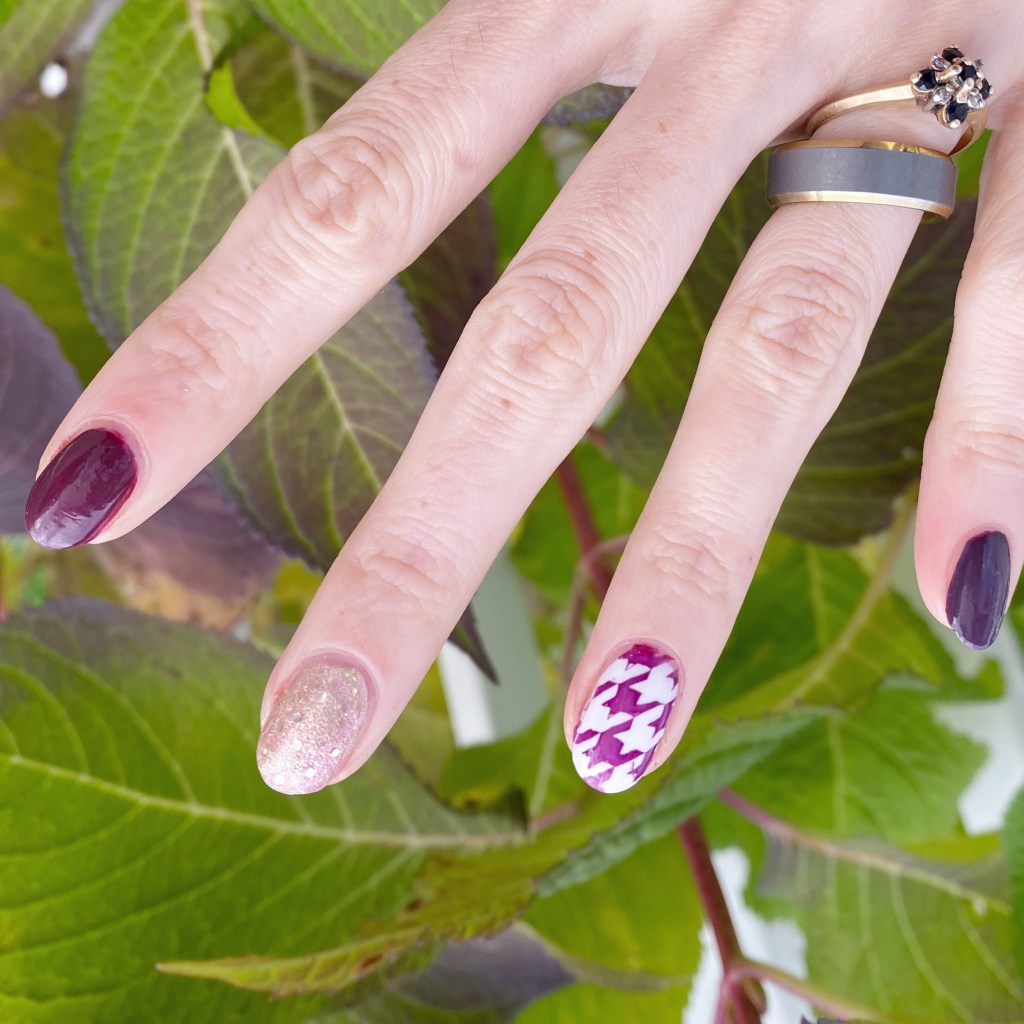
I’ve recently been going through my stash, looking at old shades I haven’t touched in a while. We all know magnetic polishes are having a serious moment right now on Instagram, so I decided to pull out one of my old school magnetic shades from China Glaze to test it out with the Starrily magnetic I got from NailStuff.ca & see what kind of effect it would have on it. & from that, I realized how perfectly it would be as a base for a galaxy design! So here are my super easy magnetic galaxy nails!

The polishes I used for this manicure are: 

  • Base Coat: Essie Hard To Resist Glow & Shine 
  • Top Coat: Seche Vite Fast Dry Top Coat
  • China Glaze Magnetix Instant Chemsitry
  • China Glaze Fairy Dust
  • China Glaze Public Relations
  • Starrily Magnet (C/o: Nailstuff.ca)
  • NailStuff.ca Mermaid Tail Nail Brush Trio (11mm Liner Brush)

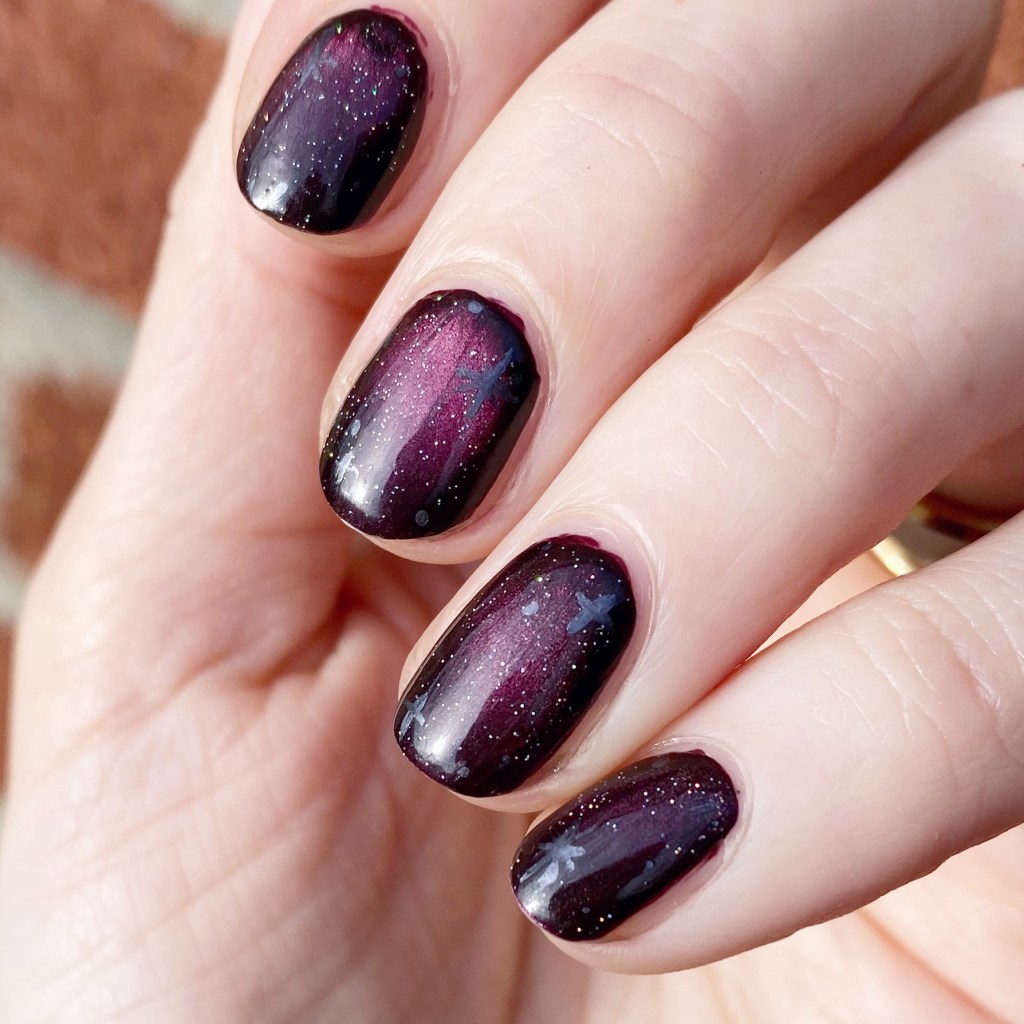
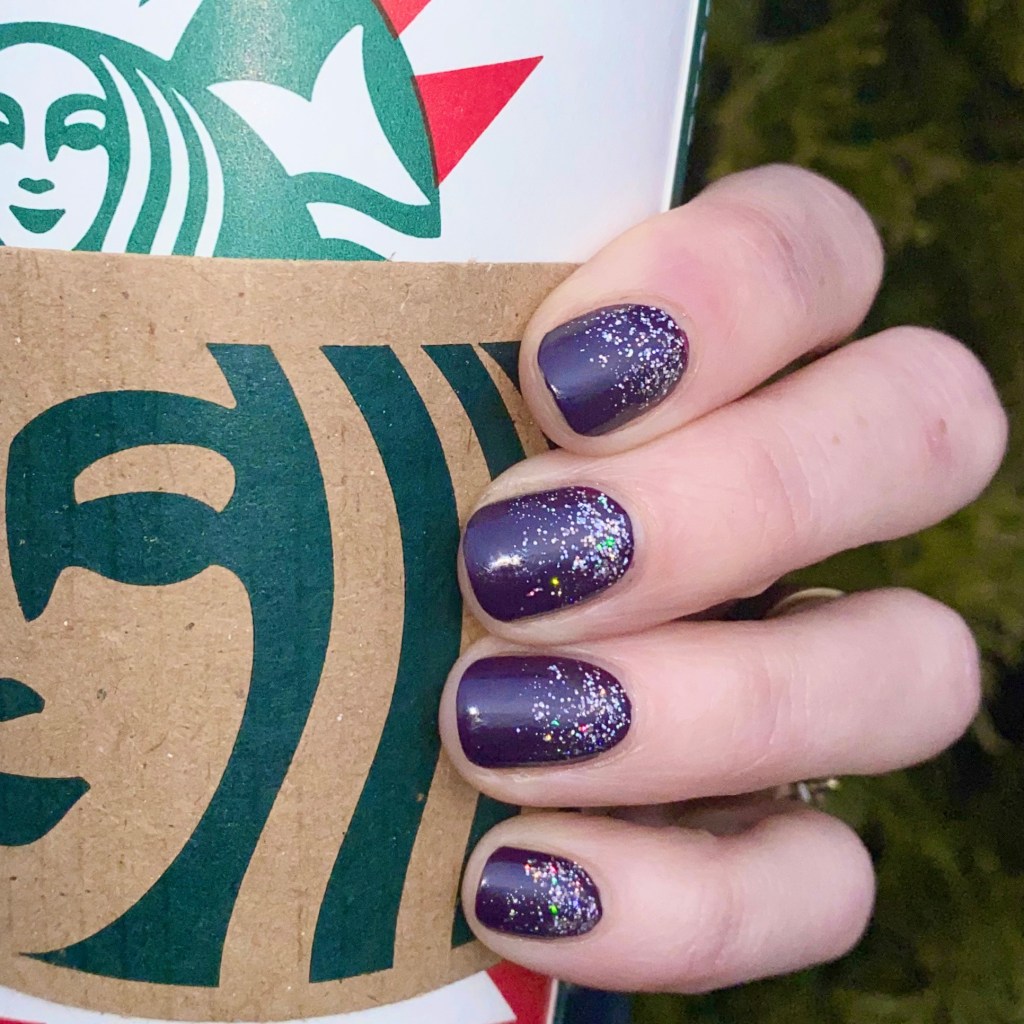
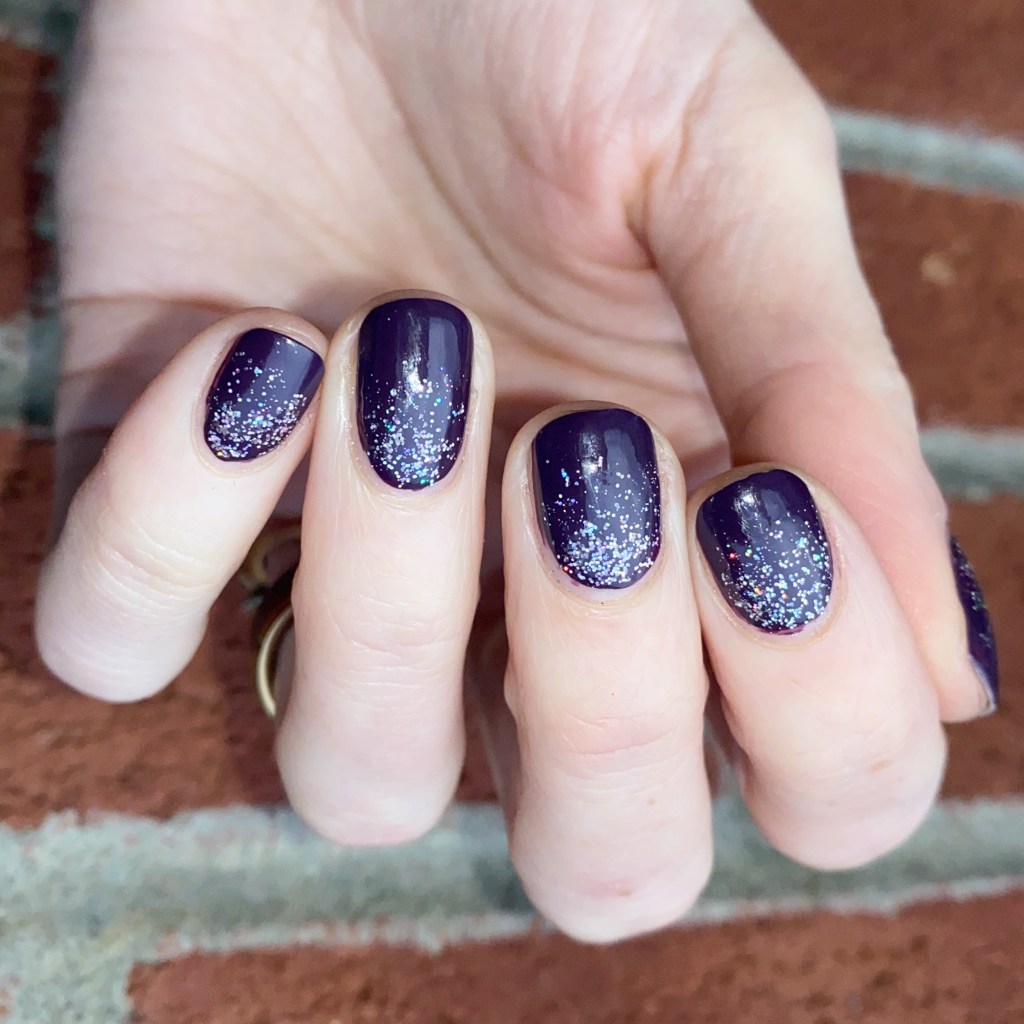
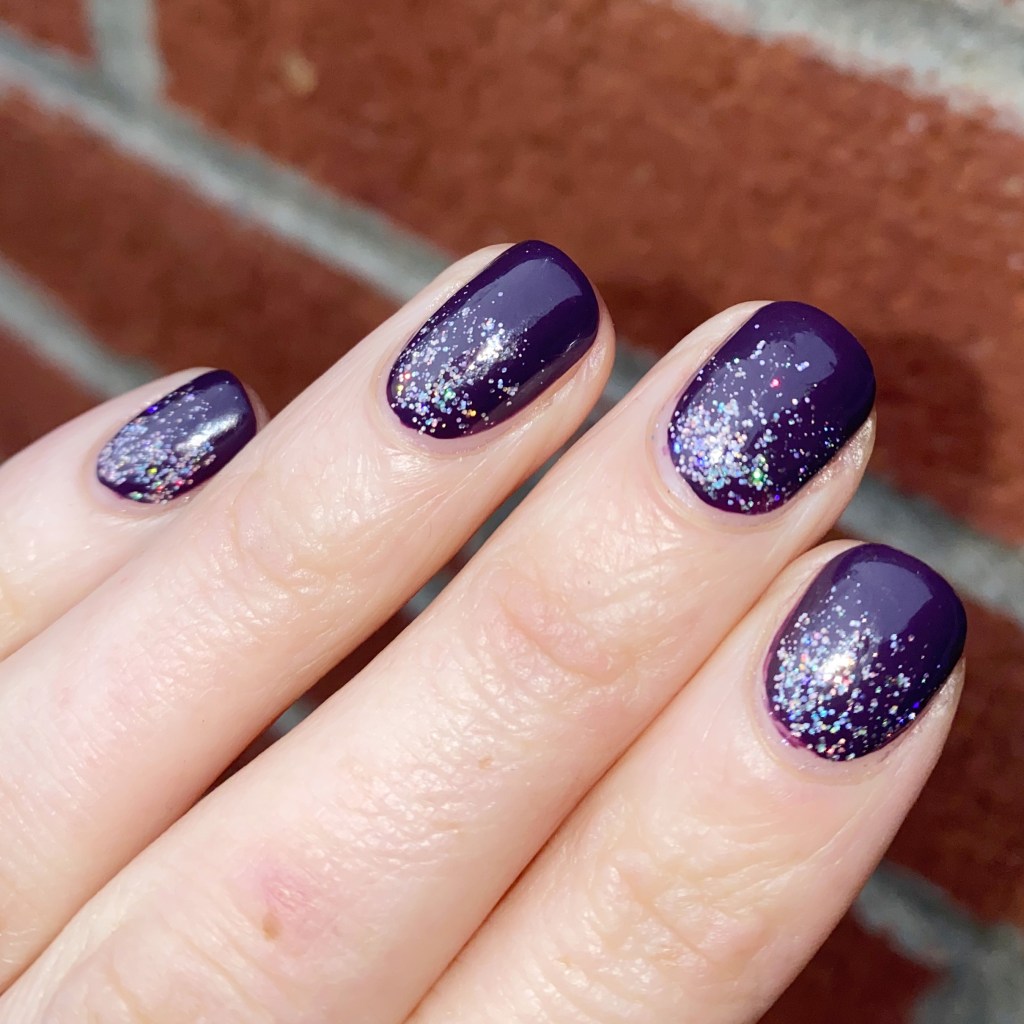
Originally my plan was just to wear the shade on its own, as I loved the effect the magnet had on it. But then I was like “I wonder what Fairy Dust would look over this?” From there I realized how much it looked like a galaxy, so I added a few dark silver stars.
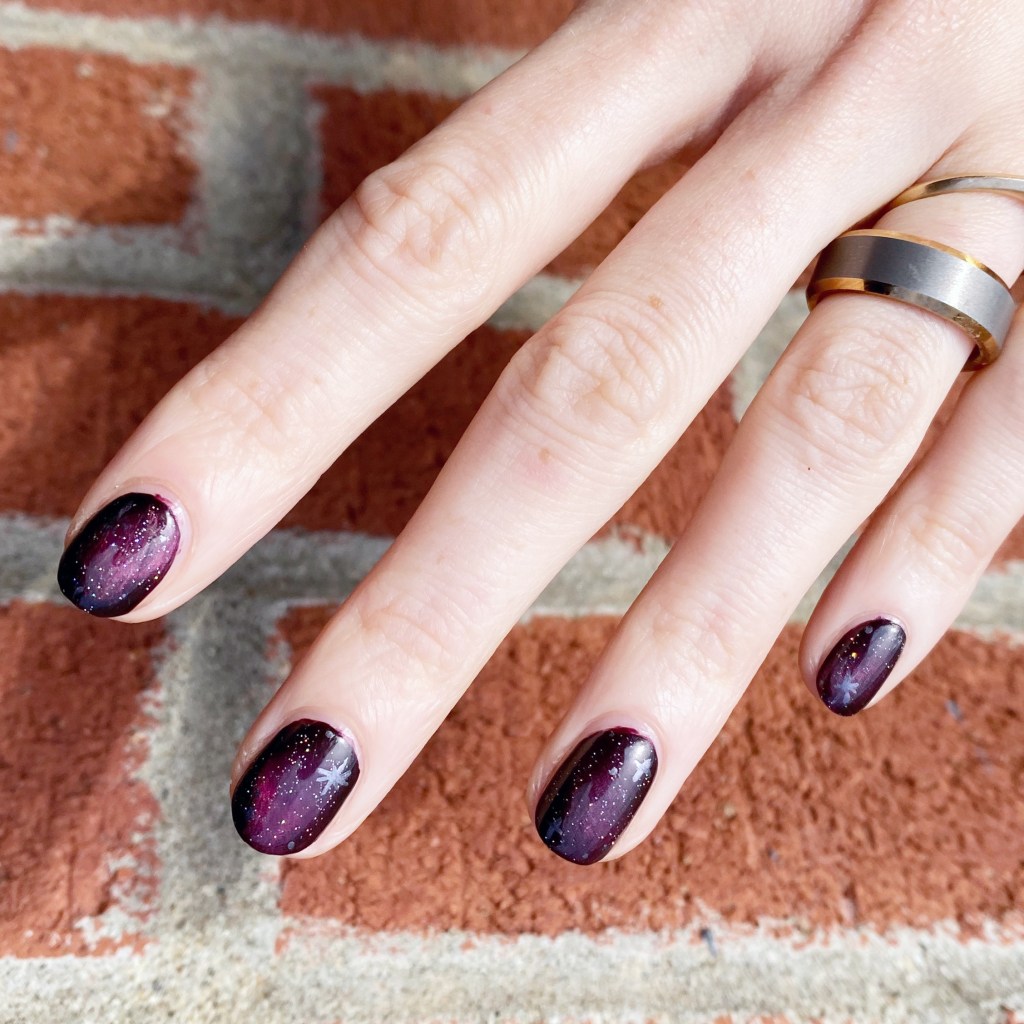
Instant galaxy.

These are definitely the easiest galaxy nails I’ve ever created, & definitely the least time consuming. This is definitely making me want to go through all the magnetic polishes I’ve collected over the years & test them out with the Starrily magnet to see what it creates. The old magnets that came with these shades usually created patterns, but I’m much more fond of this like way.

What do you think about this easy galaxy design? Is this a look you could see yourself recreating? Let me know if this look is one making you want to dig out your own magnetic polishes, or any other thoughts you have down in the comments below!

SWATCH SUNDAY — Zoya Devin

Hello lovelies & happy 2023!

I hope everyone had a lovely New Years Eve whether you spent it partying it up, cuddled up on the couch, or sleeping through it. I personally got to spend my New Years with one of my best friends — who I haven’t seen in over3 years! We spent like 2 hours laughing on the couch, & it was the best way to end the year.

Now we’re starting off a fresh year with Swatch Sunday. I decided to pull out a beautiful Zoya shade that has been sitting in my stash for a while. This is Zoya Devin, originally released for Fall 2018.

3 coats, no top coat.

Zoya Devin is a stunning metallic frosty steel blue with this intense. Without top coat, it dries to a smooth finish. It’s not matte, but it’s also not shiny. The polish itself is really interesting, but as you look closely you see it has hints of bronze & silver glitters. The shade itself is giving me Y2k vibes, which is very trendy right now, & as a millennial, gives me so much nostalgia! I feel like if this shade had existed when I was a young teen, I would have obsessively worn it a lot.

Up close, you can really see all the different metallic shades & it gives it a very cool finish. Definitely the kind of shade which doesn’t catch your eye as much from a far — you need to see it up close to really appreciate its beauty. I also think, even though it was originally released as a Fall shade, it’s very appropriate for the winter months as well! It has that iciness to it that is great for Winter.

Application was interesting — it was definitely very thin on first coat, & even a second coat seemed to be a bit thin & sparse. With the third coat though, the colour came across as beautiful as in the bottle, & I was very happy. It looks so pretty!

I picked up this bottle of Zoya Devin on sale on NailPolishCanada.com last Fall (I do believe) but from the looks of things it’s no longer available on there. I did however find it listed on the Zoya website, so if you want this beauty in your life, that would be the place to get it!

What do you think of this metallic beauty? Are you a fan of Zoya polishes? Let me know all your thoughts down in the comments below, & once again Happy 2023! I am very excited for all the things that this year has in store.

♥︎

New Years Eve Glitter Gradient

Hello lovelies & happy New Years Eve… Eve. Only 2 more days of this year left, & I can barely believe it. It really feels like the last few months, & especially the last few weeks, have absolutely flown by. With less than 48 hours left of this year, I figured why not sneak in one or two more manicures.

& naturally, with New Years Eve so close, I have to be all about the glitter. What better excuse than wearing all the glitter than counting down to a new year? I’m not much for getting dressed up, & going out on NYE… but you know I’m always going to have my nails ready for a night of snacks on the couch & sparkling kombucha.

The polishes I used for this manicure are: 

  • Base Coat: Essie Hard To Resist Glow & Shine 
  • Top Coat: Seche Vite Fast Dry Top Coat
  • Essie Kimono Over
  • Color Club On the List
  • Color Club Take Me to VIP
  • China Glaze Fairy Dust

Ooooooh look at the sparkle. I made sure to take pictures with my flash on, because I really wanted to be able to properly capture the sparkle. Like how much fun is this to wear for New Years Eve? I did this look completely without any tools, just layering of glitter, & it turned out so perfectly, & glittery. It almost makes me wish I had something exciting planned for New Years Eve.

This is super simple to do though! You just need to gently apply the glitter at the base of your nails, & brush up gently. It gives you a thicker glitter near your cuticle, & gives a lighter effect as you go up. I ended up using 3 different glitters because layering also gives it a beautiful effect. I just love glitter so much.

Do you have you plans for New Years Eve solidified yet? I think we’re going to do some sparklers & snacks with our kids, & neighbours, & then some snacks on the couch leading up to the end of the night.

I’m also going to see if I can sneak in one more New Years Eve manicure before the end of the year, so I will see you tomorrow for one more look.

♥︎

Fall Houndstooth Skittlette

Hello beauties — long time no see! I know, it’s been quiet on the blog front, again. It was an interesting weekend, that saw me get that lovely stomach sickness my kids had. Not fun. Have I mentioned I hate Winter & sickness season?

But I’m back, I feel better, & I even managed to paint my nails! I was feeling some Fall inspired skittlette nails, inspired by fellow Canadian nail blogger GrapeFizzNails & here stunning colour combinations — only I wanted to throw a little extra accent nail action into the mix. Mostly because I’ve been itching to use the old Born Pretty stamping plate featuring this houndstooth pattern.

The polishes I used for this manicure are: 

  • Base Coat: Essie Hard To Resist Glow & Shine 
  • Top Coat: Sally Hansen Insta-Dri Anti-chip Top Coat
  • Sally Hansen Complete Salon Manicure Pat on the Black
  • Sally Hansen CSM Berry Fancy
  • Sally Hansen CSM Clean Slate
  • Sally Hansen CSM Let It Snow
  • Sally Hansen Miracle Gel Goldie Rocks
  • Sally Hansen Insta-Dri Shooting Star
  • Born Pretty Store Classic Patterns Stamping Plate BP-L006 
  • Nailstuff.ca clear stamper & scraper set

Okay, please ignore the weird stamped hair on that accent finger. Haha. Second how Autumn-esque is this colour combination. I love how these turned out with the darker plum/purple shades & then the sparkle from the golds on my middle finger. It turned out really pretty, & I really like the whole combination. Who needs to wear just one colour on their nails when you can wear all the colours on your nails!

What do you think of my houndstooth skittlette design? Do you like these colour combining manicures? What colours are you feeling right now? Have you gone full on holiday-manicure mode yet? Let me know all your thoughts down in the comments below!

SWATCH SUNDAY — OPI Vampsterdam

Good morning lovelies & happy Sunday. The last Sunday of October — because this month is just going by at a crazy rate! I thought for this weeks Swatch Sunday I would come up with something kind of Halloween-y to share, & this latest Winners find definitely fits the bill!

This is OPI Vampsterdam— originally released as part of the Spring/Summer 2012 Holland Collection. But I totally feel like between the name & the shade, it could be a Fall shade.

2 coats, no top coat

The shade itself is a very warm plum, with stunning frosty shimmer. I needed 2 coats for full coverage, but I did find I needed to wait a bit between coats because if not it would pull a bit (see my pinky finger). The formula was also quite thin, but it was also a brand new bottle, so maybe that was why? Either way, not big issues that take away from the polish.

The shade itself is absolutely stunning, & very perfect for late October. It’s beautiful & definitely vampy. It also has a lovely jewel tone to it that I feel like translates into holiday party season. Definitely another winner & shade that I will find myself reaching for again & again.

Over all, I love this shade.

I’m not 100% sure on availability in store — this is obviously OPI’s newer label — but it is available to “try on” via the OPI website in both regular & Infinite Shine, but I couldn’t find an option to buy. However, I did find a link to it on Amazon.ca & Tradesecrets.ca — both in the Infinite Shine formula. So if you need this shade, that’s probably your best options!

What do you think of OPI Vampsterdam? Would you wear this shade? Let me know all your thoughts down in the comments below!