Valentine’s Day Chevron Accent Nails

Another day, another fun Valentine’s Day appropriate design to share with you! The day is quickly approaching, so I’ve been trying to get creative while I have time. Last year with having a newborn (& spending extra days in the hospital) I wasn’t able to do anything Valentine’s Day related on my nails, so I’m definitely making up for it this year!

For this design, I decided to grab a few of the colours I picked from my “6 Polishes I’m Loving for Valentine’s Day” post on Sunday. To pair all these shades together, I decided on son stacked chevrons to show off all these pretty shades! This is definitely a design that is all about Valentine’s Day–it might be too flashy of a design to wear, for example, to the office (depending on where you work) but would be awesome for date night, or a Valentine’s Day themed party!

For this design, the polishes I used were:

  • Base Coat: Quo by ORLY Kiss Me, I’m Kind
  • Top Coat: Seche Vive
  • Christian Louboutin Beauty Rouge Louboutin
  • China Glaze Seduce Me
  • L’Oreal Jardin Des Roses
  • ACO by Ardene Ice Mist
  • Quo by ORLY Nail Art Striper in Gold
  • NailStuff.ca Heart Stud — Gold Mixed Decoration Nail wheel
  • UR SUGAR Stacked Chevron Nail Stencils item #AUB39877 — click to buy
  • Dotting Tool

I think these turned out so cute with the mix of colours together!  Next time I might use the stacked chevron vinyls upside down so it matches the V-shade of the heart. But I’m really happy with how these turned out, & the addition of the little heart stud just makes it even more perfect! ♥

Do you like these Valentine’s Day themed nails? Have you figured out what you’re doing on the day yet? My hubby & I usually stay in–because trying to make reservations is hell on Earth–& make heart shaped gluten free pizza or something else delicious. & of course, cupcakes! It’s become holiday tradition for me to make him cupcakes for special occasions.


Let me know your thoughts on this design in the comments below!

Chevron & Deer Stamped Design

Hello lovelies! Today I have a really fun design to share with you. Back in early December, I made an order through Born Pretty Store & just recently received my goodies which included 6 new stamping plates! Obviously, I couldn’t wait to play with my new plates, because I’ve been using the same ones I bought in 2014 for ages. Today’s design was semi inspired by all the fun stag head designs that have been popping up on my Instagram feed! Finally I can create my own cute deer designs!

For this design, the polishes I used were:

  • Base Coat: Nailtek 2
  • Top Coat: Seche Vive
  • Matte Top Coat: Butter London
  • Sally Hansen Complete Salon Manicure Trouble Maker
  • Quo by Orly Breathable Barely There
  • ACO by Ardene Daydreamer
  • L’Oreal Feeling Kilty
  • Sally Hansen Hard as Nails Black Heart
  • Born Pretty Store Clear Stamper
  • Born Pretty Store Image Plate BP-L006 (item #17924)
  • Born Pretty Store Image Plate BP-L03 (item #23268)
  • Small dotting tool
  • Edge Perfection Cuticle Barrier.

Seriously, just how cute is this manicure?! I’m a little disappointed that I didn’t order these in time to get them for Christmas, so I could do cute reindeer nails, but I’m very excited for all the upcoming designs I’ll be able to do. I’m also very happy to have a brand new jelly stamper because mine as certainly seen better days & will need to be retired very soon. Don’t get me wrong, I still love doing freehand/nail vinyl designs, but there is something a little more convenient about stamping–you don’t have to spend an hour trying to paint a design, or worry about having to wait for you base to dry to apply nail vinyls (even with quick dry top coat). It’s taken me a while to finally get the hang of stamping, & while I’m not a pro by any means, I definitely feel like I’m so much better than I used to be!

What do you think of this design? Are you a fan of stamping? Let me know all your thoughts (or tips & tricks!) in the comments below.

Holo Gradient & Hearts

Happy Thursday lovelies! & happy first day of February. Seriously, how is the first month of 2018 already over?! That’s kind of amazing in a way. It also means we’re 2 weeks away from Valentine’s Day, so it’s time to start getting my love-themed manicures started.

When it comes  to Valentine’s Day, I feel like hearts are kind of a necessity. For this design, I decided to skip the pink (there will be lots of pink to come, don’t worry) & used silver, purple & blue holo shades instead. You still get that Valentine’s Day feeling without going too overboard.

For this manicure, the polishes I used were:

  • Base Coat: Nailtek 2
  • Top Coat: Seche Vive
  • Layla Cosmetics Hologram Effect Mercury Twilight
  • Layla Cosmetics Hologram Effect Ultra Violet
  • Layla Cosmetics Hologram Effect Ocean Rush
  • Sally Hansen Hard As Nails Black Heart
  • KaylaRayLoves Nail Vinyls Tumbling Hearts Vinyls
  • Edge Perfection Cuticle Barrier
  • Latex Free Make Up Sponge

I really, really love how these turned out. The gradient + the hearts just looks so good together! You could definitely go with more pink shades if you wanted these nails to be extra girlie (which I could see myself doing for actual Valentine’s Day). Also I was really impressed with how well these holo polishes blended together to create a gradient! I feel like I haven’t been doing enough gradients lately, & that seriously needs to change. Yeah, they can be kind of messy, but that’s why they invented liquid latex.

Below, I have a couple of shots of the gradient before I added the hearts. I really need to do more holo gradients because the end result is just so pretty!

what do you think of this manicure? Would you wear it for Valentine’s Day? Let me know your thoughts in the comments below!

Negative Space Floral

We’re currently being bombarded with 25+ cm of snow here in Halifax, which is not so much fun. I’m really not a Winter person (well, once Christmas is over anyways.) So how about some floral nails to cheer us up? I wore this design this weekend, but with a raging Winter storm outside as we speak I kind of need something pretty & Spring-y to cheer me up. Did I mention I’m really, really over Winter?

Did you know it’s 49 days until Spring? Just a fun fact to get you through those long, chilly days ahead. Unless you’re in the Southern Hemisphere, in which case do you have a spare room because I’m coming to visit!

I took so many pictures of this design. I know every floral manicure is my new favourite, but this one just turned out so well I couldn’t help but take a million pictures of it.

For this manicure, the polishes I used were:

  • Base Coat: Nailtek 2
  • Top Coat: Seche Vive
  • Matte Top Coat: L’Oréal the Matte Velvet
  • Essie The Girls Are Out
  • OPI My Pointe Exactly
  • China Glaze Ever Glaze Don’t Grape About It
  • Sally Hansen Instadri Petal Pusher
  • Essie Bachelorette Bash
  • Sally Hansen I ♥️ Nail Art Pen in Green
  • Essence The Green & the Grunge
  • Essie Play Date
  • Sally Hansen Xtreme Wear Mellow Yellow
  • Small detail brush (Born Pretty Store)
  • Small & large dotting tools (Bundle Monster)

So many polishes were used for this design, but it was so worth it. & I think the matte top coat just makes the end result that much more beautiful. This is definitely not a quick to do design, but floral just makes me so happy I don’t even care! 💗 I hope you love floral, because I have a feeling there will be a lot of floral leading up to Spring. Also even though it’s snowing today, I’m totally pulling out my favourite floral romper, since I have no plans on leaving the house today… except to maybe go to Starbucks & get coffee but even then I won’t be leaving the car.

What are your thoughts on today’s floral design? Are you a fan of floral nails? Let me know your thoughts in the comments below!

Multicoloured Chevron Accent Nails

Good Morning! We’re half way through the week & in Halifax it’s actually snowing. I seriously thought we would never see actual Winter, so it’s pretty exciting! Although I’m sure it will lose its novelty in about a day & a half.

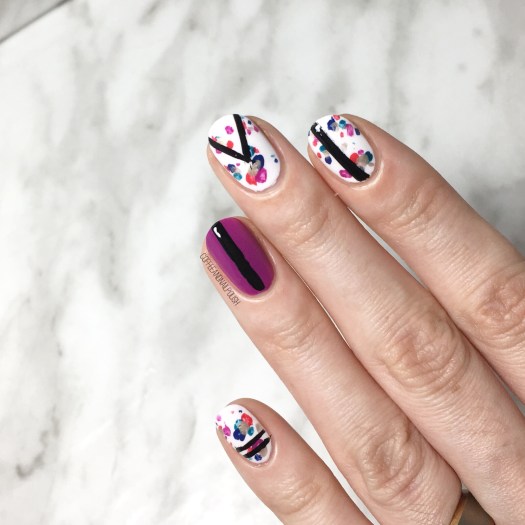
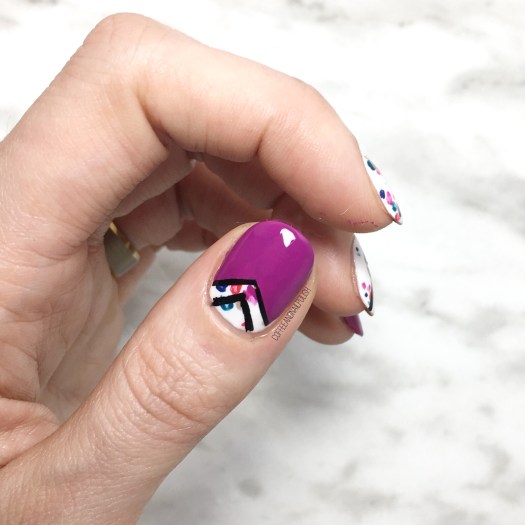
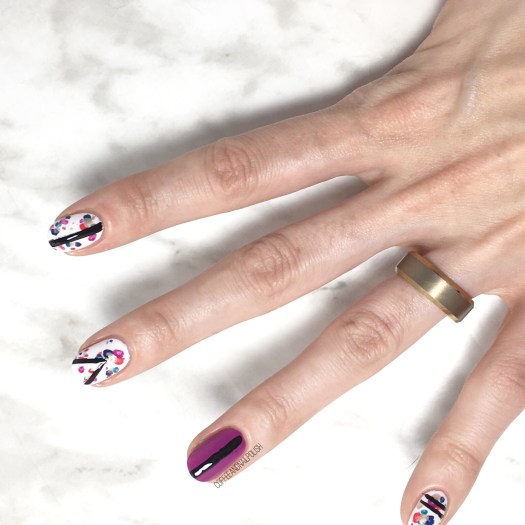
Today I’m sharing a chevron accent nail design with you. I’ve really been into darker shades right now (& grey, always) so I decided to combine a whole lot of shades together. & I even made you another tutorial to show you the technique I used.

Music: bensound.com

For this design, the polishes I used were:

  • Base Coat: Nailtek 2
  • Top Coat: Seche Vive
  • Sally Hansen Complete Salon Manicure Pat on the Black
  • Essie Merino Cool
  • Color Club Silver Lake
  • OPI Aurora Berry-alis
  • L’Oréal Feeling Kilty
  • Kiss Products Nail Art Chevron Vinyls
  • Small detail brush (from Born Pretty Store)

You can see in the video above, I was originally going to use Essie Merino Cool (such a good grey) as my main colour, but switched it to Sally Hansen CSM Pat on the Black because it just went better with the accent nails. Also next time I want to try filling in each chevron with a different colour for even more coloured stripes.

This is such a great design for a beginner because it looks complicated, but it’s really not. The hardest part honestly is just placing your vinyls (as you can see from the above video!) You could also use straight vinyls to make your stripes, but that would involve extra wait time for drying. Your stripes don’t have to be perfect because you’re covering them up anyways, so freehanding them usually is just easiest!

What do you think of this design? Would you try it out? Let me know your thoughts below! & if you do try it out, don’t forget to tag me on social media & use the tag #lookcoffeeandnailpolish! 💜 Happy Wednesday everyone!